Started with the first epigraphical efforts in Egypt, it has been a natural desire to capture this attribute when represented on a sheet of paper with only two aspects: length and breadth. In the next installment of this series, we'll put relief...
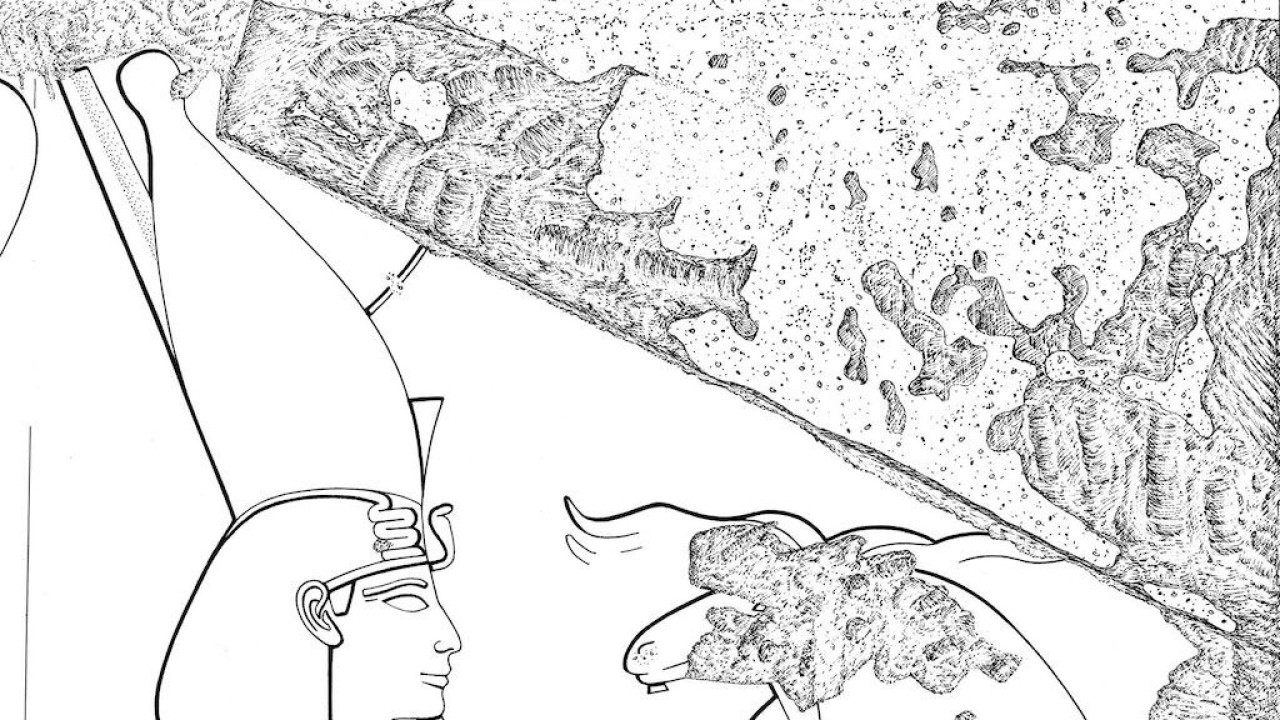
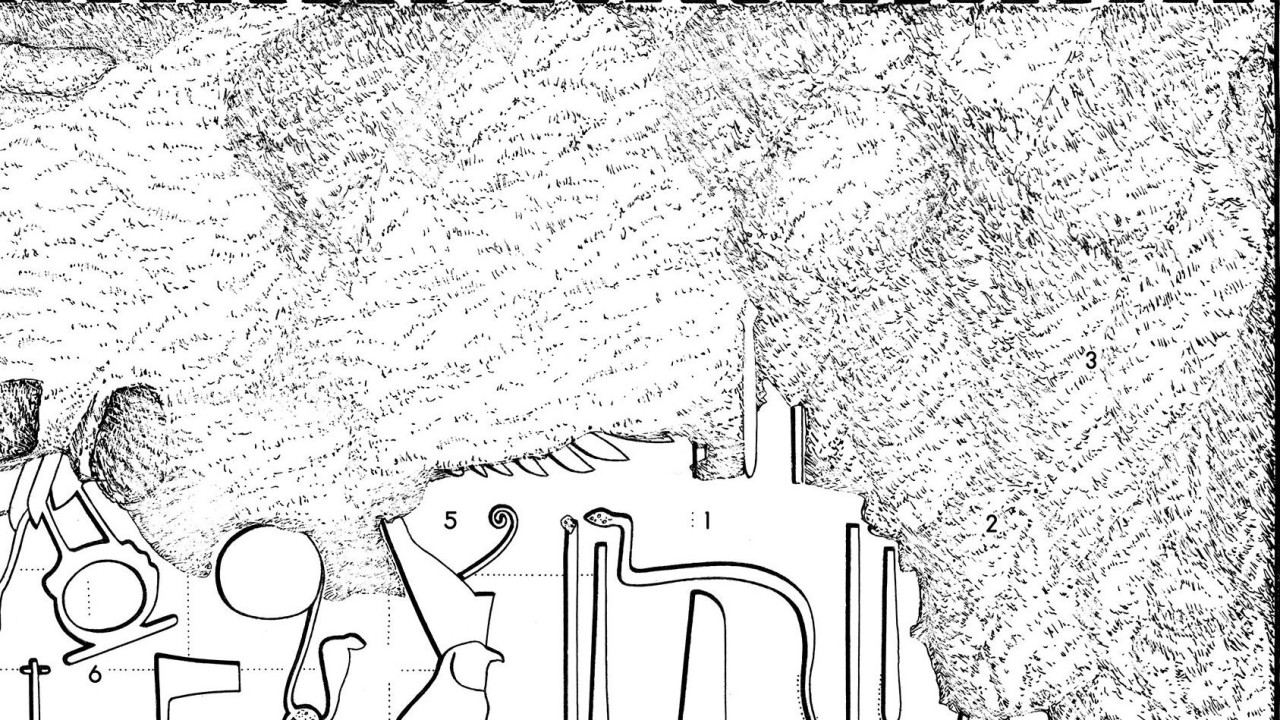
In this new tutorial of the Survey's "Tidbits…" series, digitalEPIGRAPHY would like to focus on one of the focal points in rendering raised and sunken relief, namely sun-shadow transitions.

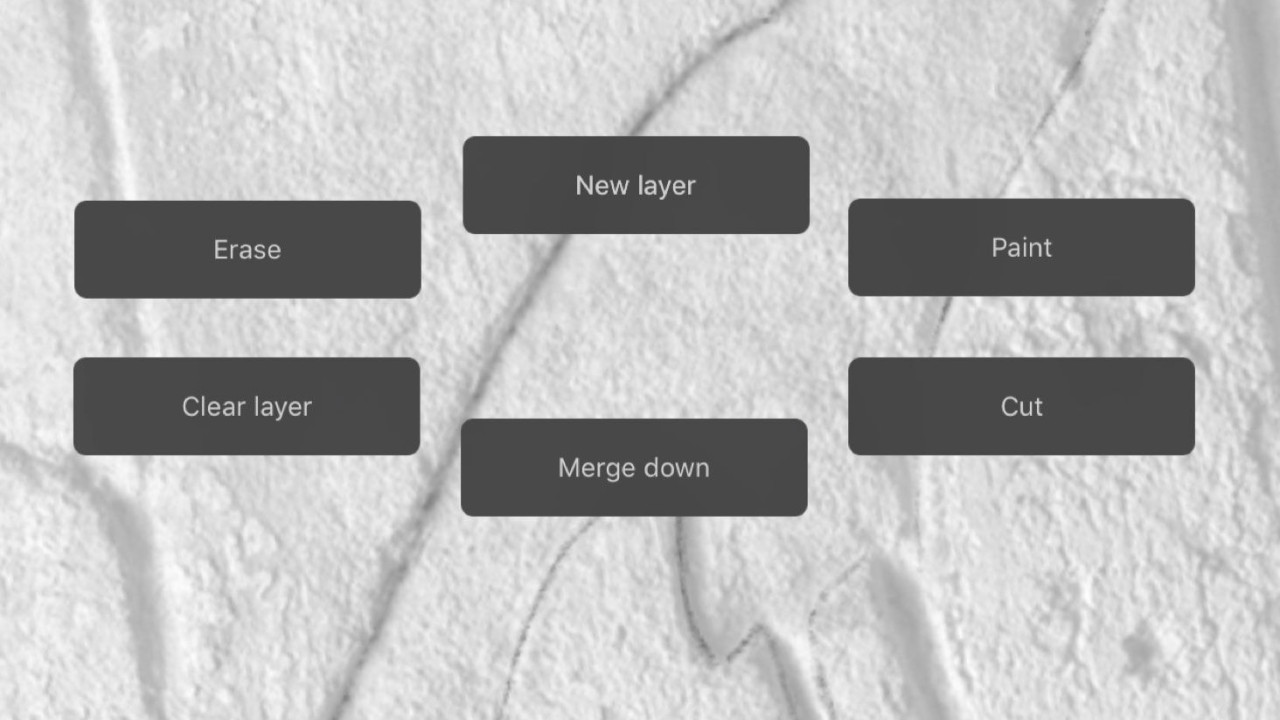
In the following tutorial, we'd like to show you the main differences between several options to disintegrate certain types of pixels, while explaining how to "detach" a scanned line drawing from its background.
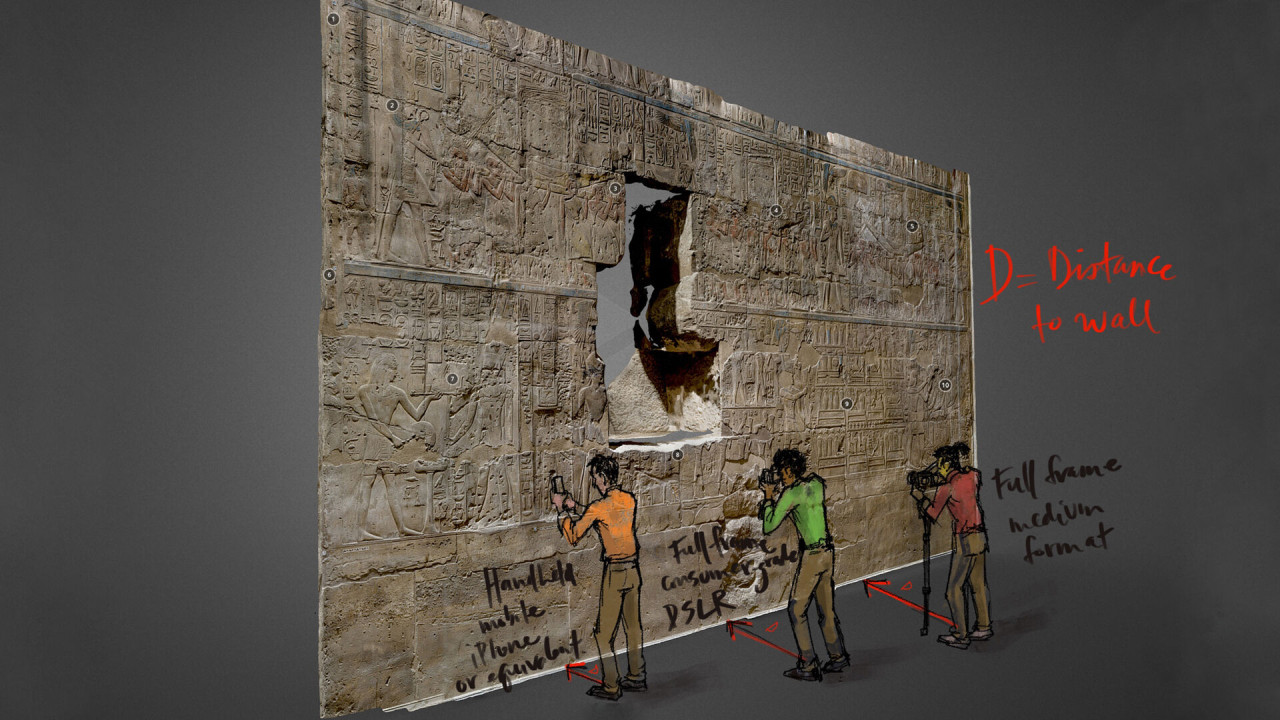
With the rise of photogrammetry in digital epigraphy, so has the ability to produce quality, to-scale photographs without expensive field equipment. Although lighting is, has been, and always will be, a major factor in the quality of said...
Last year digitalEPIGRAPHY presented our first digital collation project. Since that time, we have continued to develop and refine our system so that it is more functional for the artists and epigraphers and takes full advantage...
The Warp Transform Tool has been part of Photoshop for a long time, and it had remained mostly unchanged since its introduction until last year, when Adobe updated its Creative Cloud software suite for 2020.
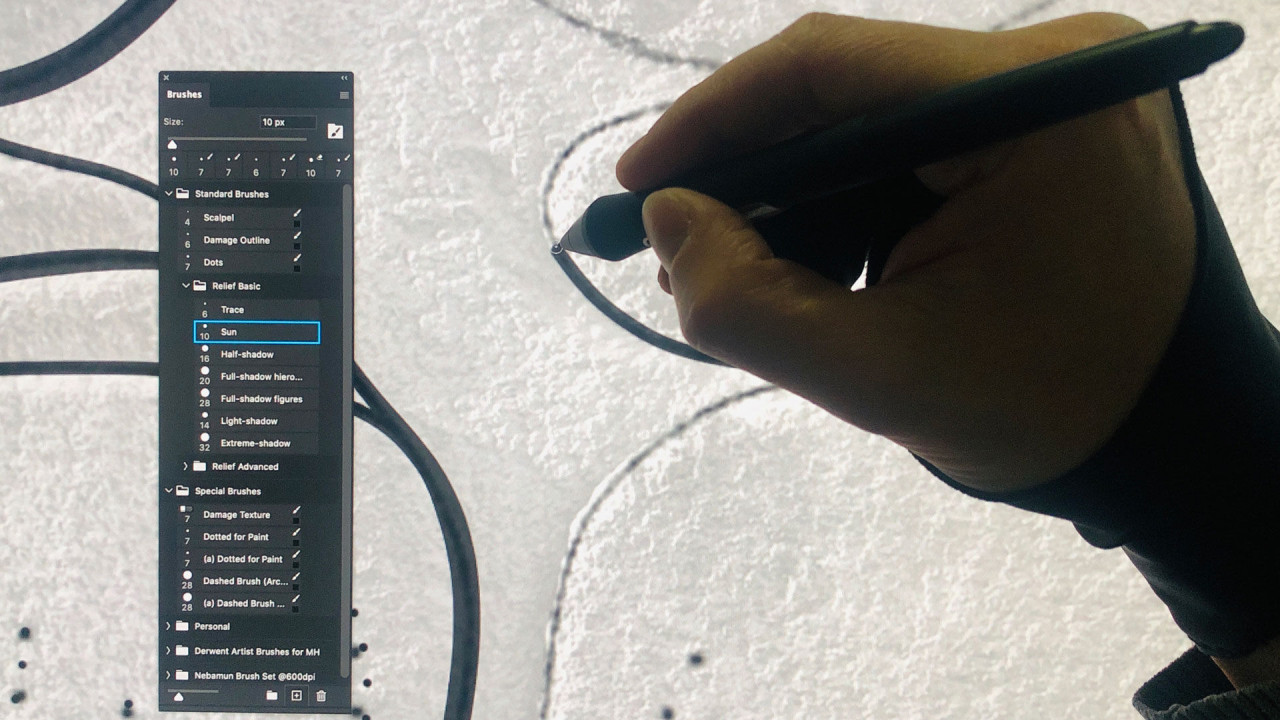
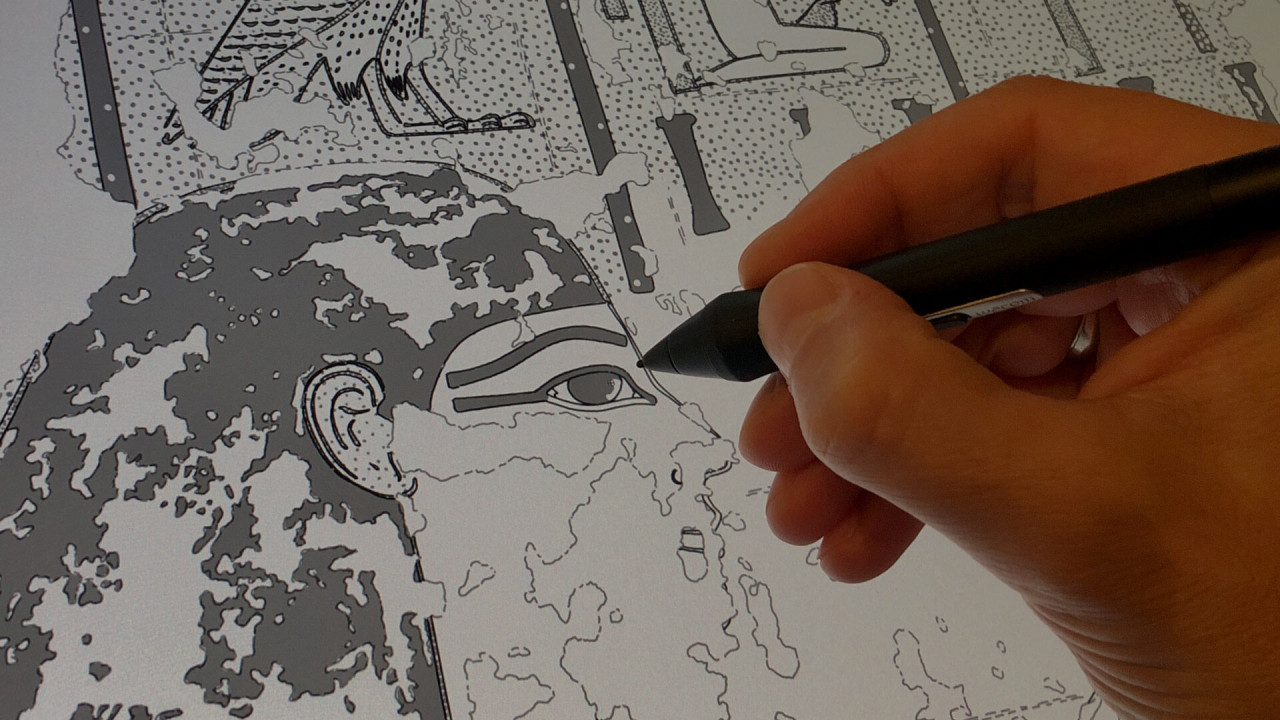
The Epigraphic Survey’s digital inking method involves a set of ink brushes, attributed with certain pixel brush widths. With many recent changes and additions altering brush behavior in Photoshop CC, digitalEPIGRAPHY takes a look at the prospect...
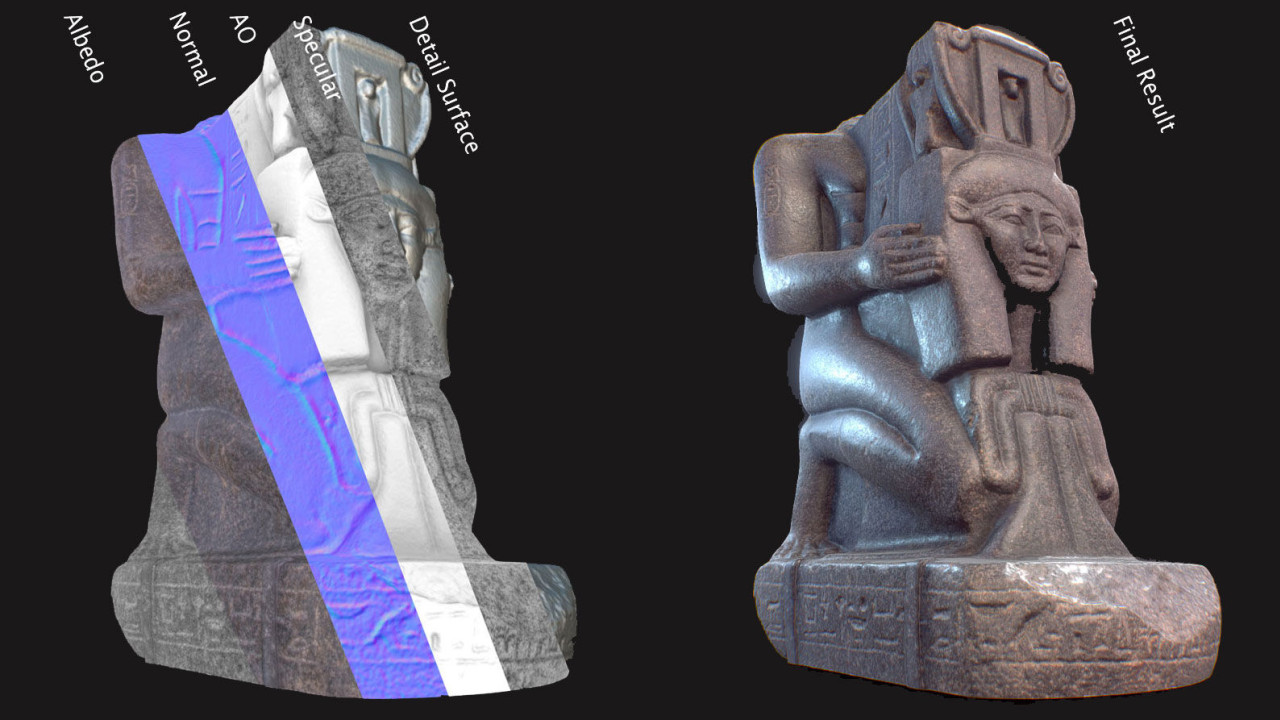
The article surveys a number of new methodologies and applications of photogrammetry in Egyptology and Virtual Heritage in general. First, it presents methods for photorealistic rendering of virtual objects...

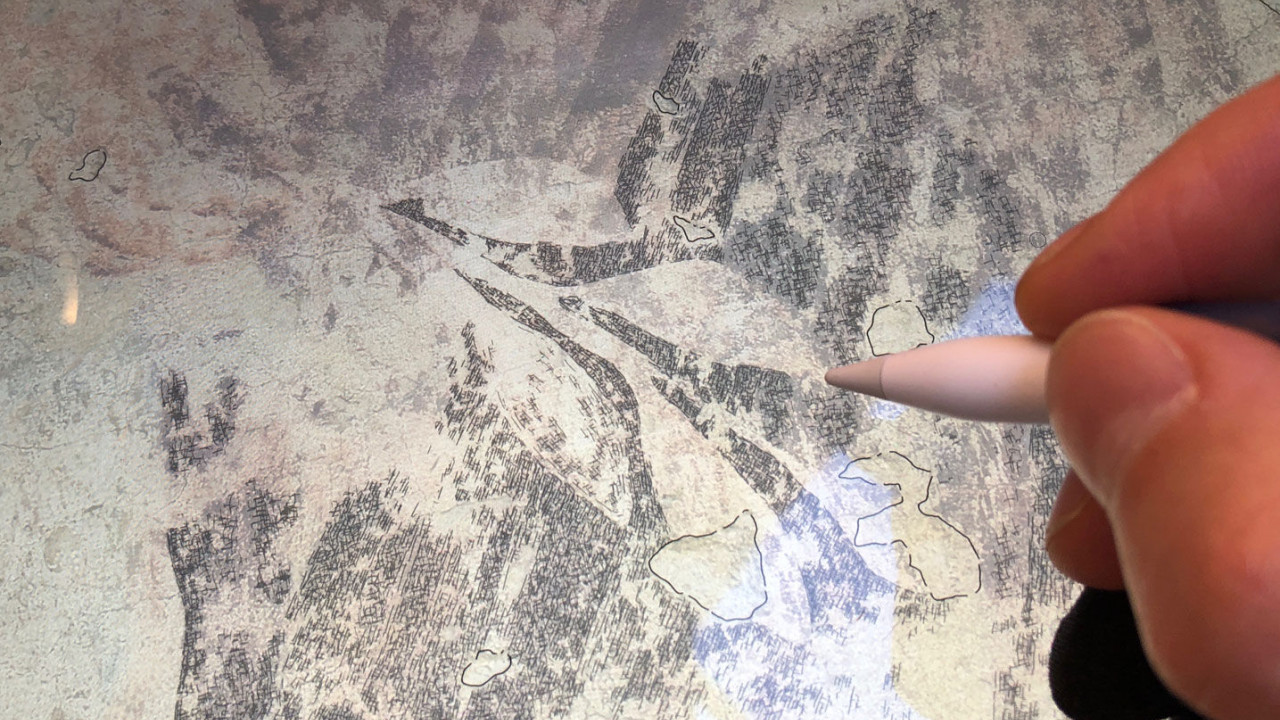
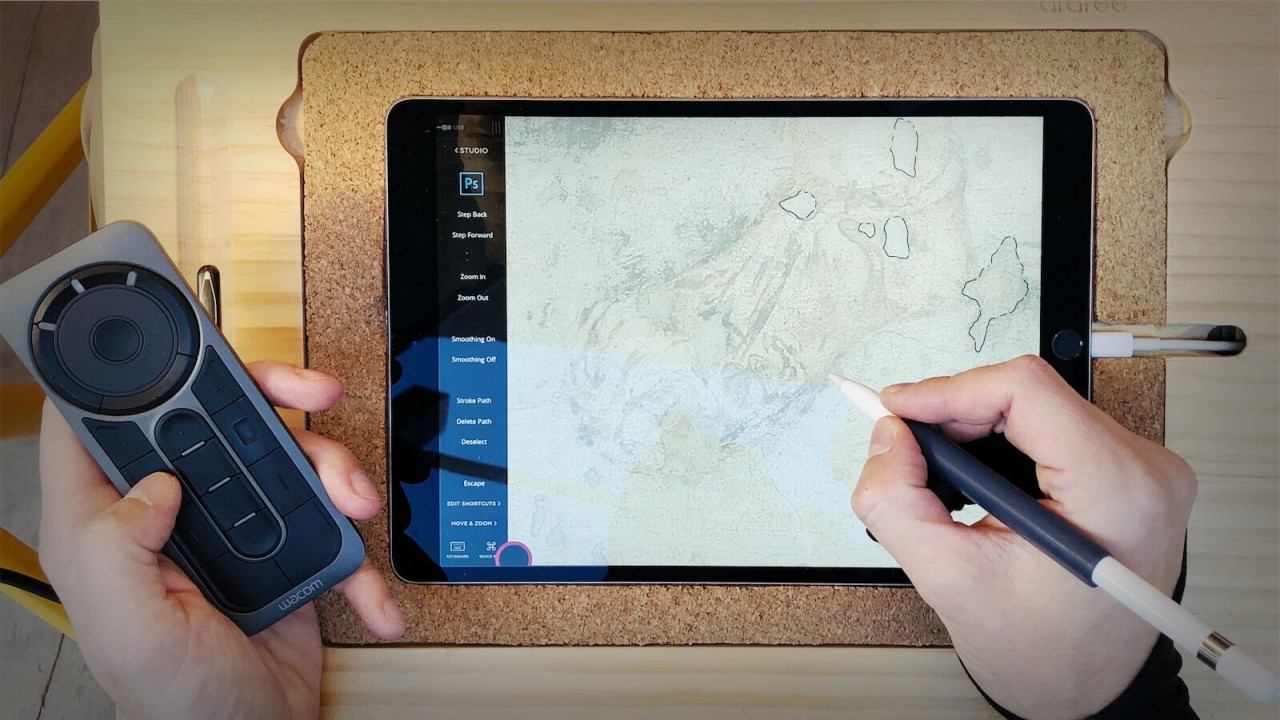
Being able to do quick editing at the wall can be rewarding at times. We’d like to show you how to make precise selections and interact with the selected elements in Procreate.
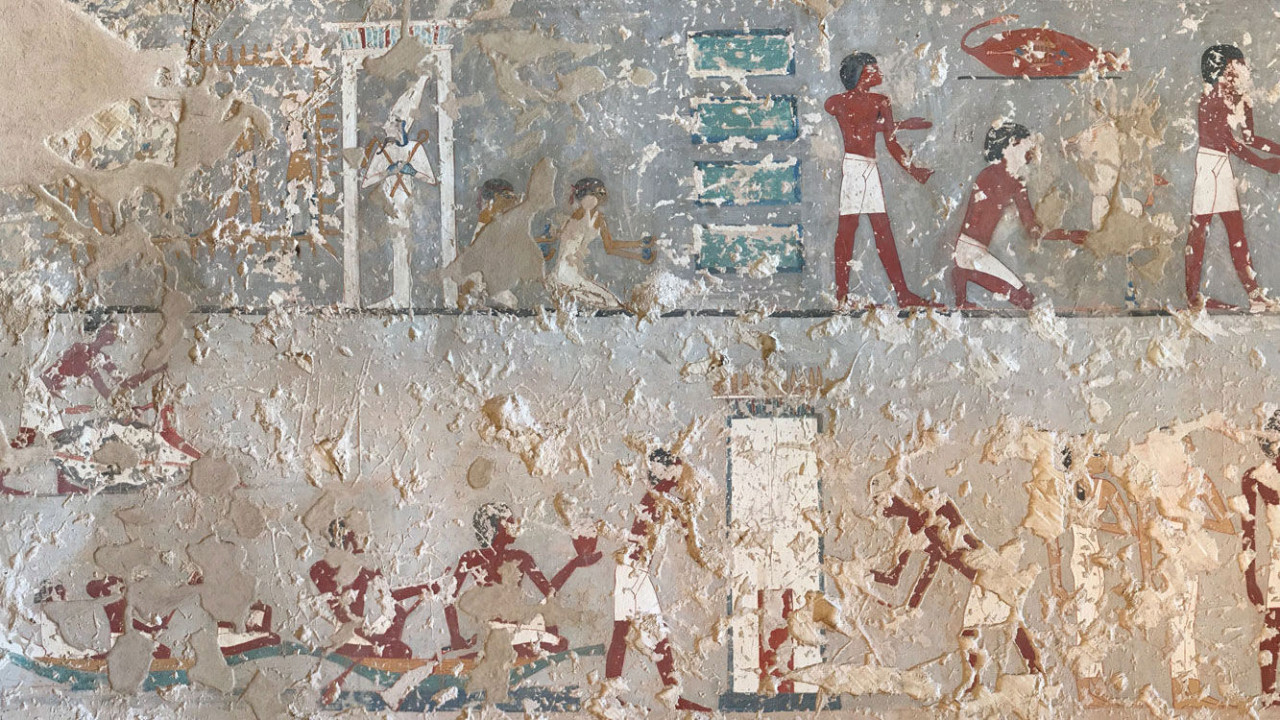
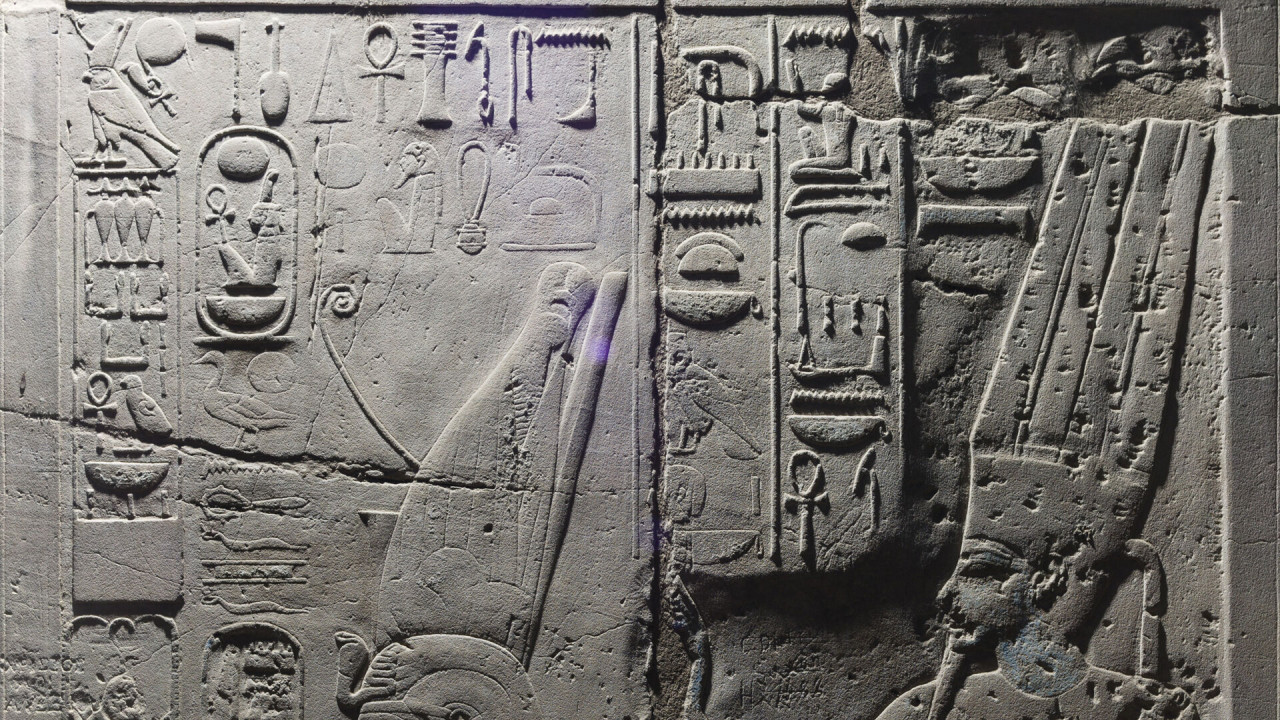
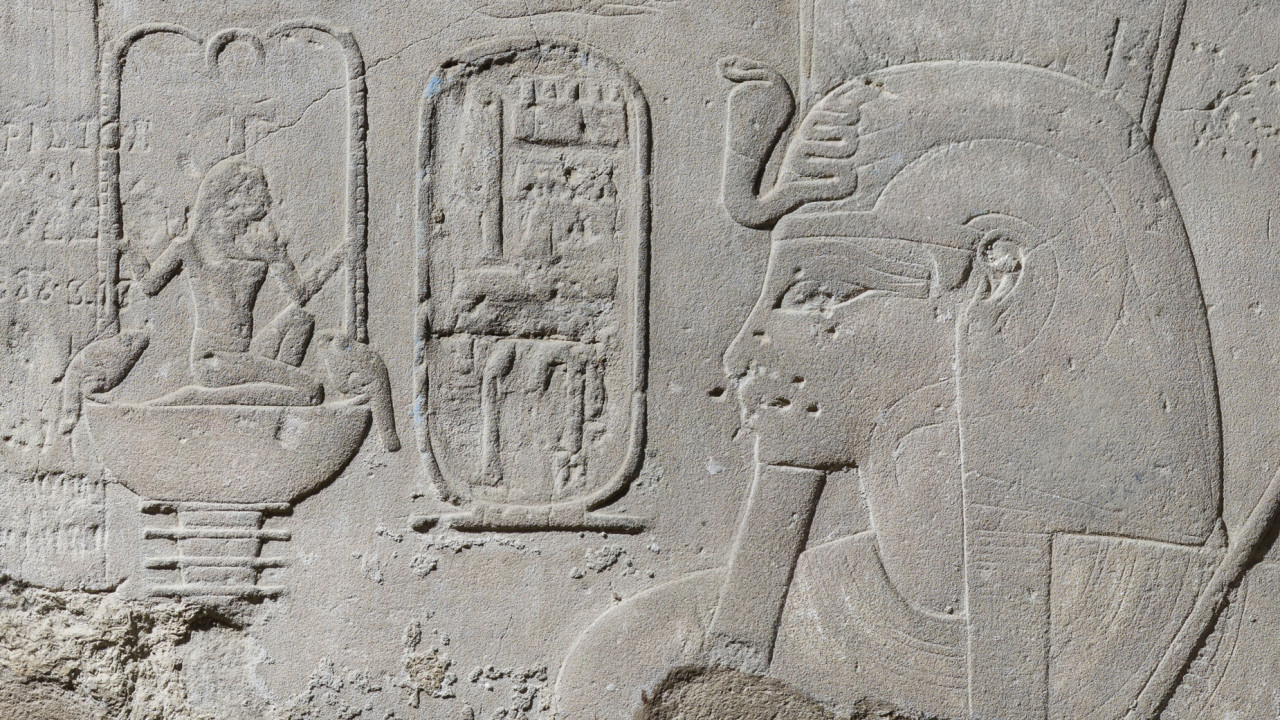
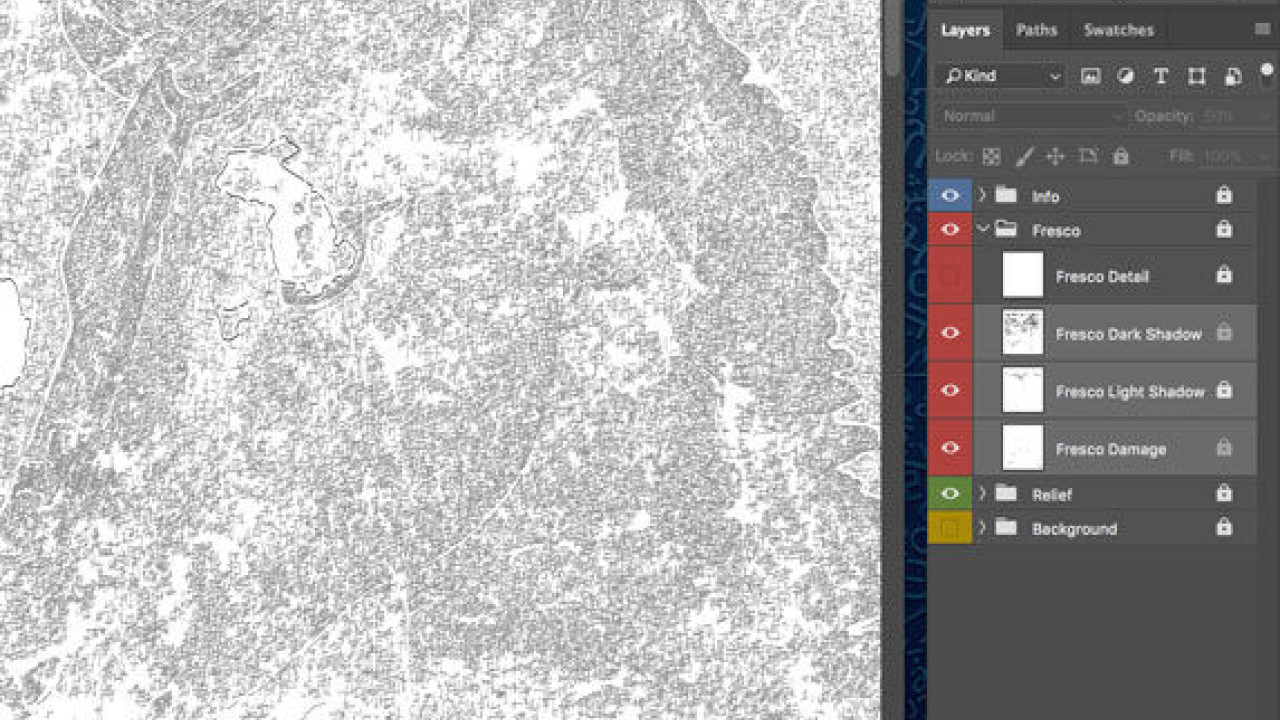
Due to centuries of decay and abuse of the monuments, there is one apparent feature that stands out immediately when we look at tomb or temple walls today: the tremendous amount of loss of the original surface.
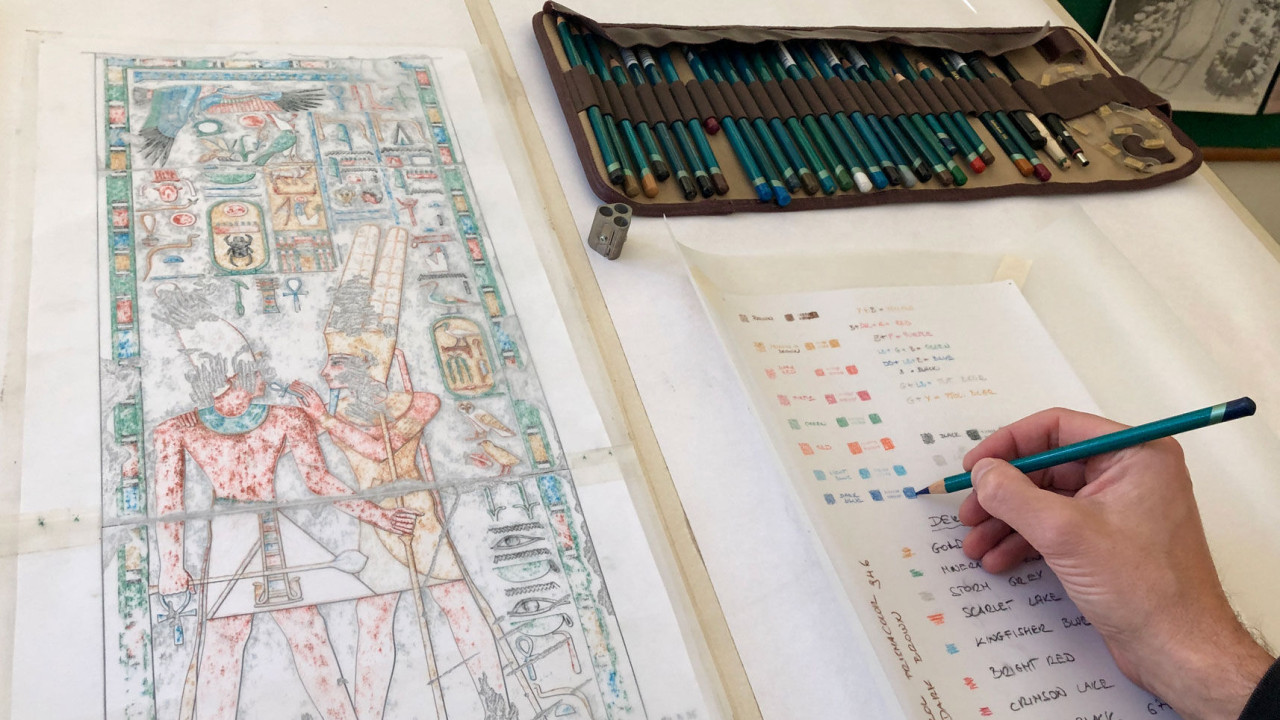
When we look at ancient Egyptian monuments, color is to be found everywhere. Documenting either tombs, temples or the smallest painted graffito, we must provide a reasonable solution for recording the painted remains of the surface.

In this new series of tutorials, digitalEPIGRAPHY would like to draw your attention to the importance of stylistic accuracy in epigraphic documentation by focusing on the representation of a common feature, the human ear.
One of the most understated requirements of digital inking is the ability to be in full control of line placement and line quality. Obviously, ink line quality can be altered by several aspects as is often dictated by the publisher’s requirements.
To be able to effectively use Photoshop in the studio, one needs to create a perfect personal workflow. While the same results can often be achieved by using different methods, the amount of time and effort it takes to accomplish your goals highly...
The following article is going to be a somewhat unusual tutorial as it is aimed to give the reader a sneak-peek into the process of developing a new documentation method.
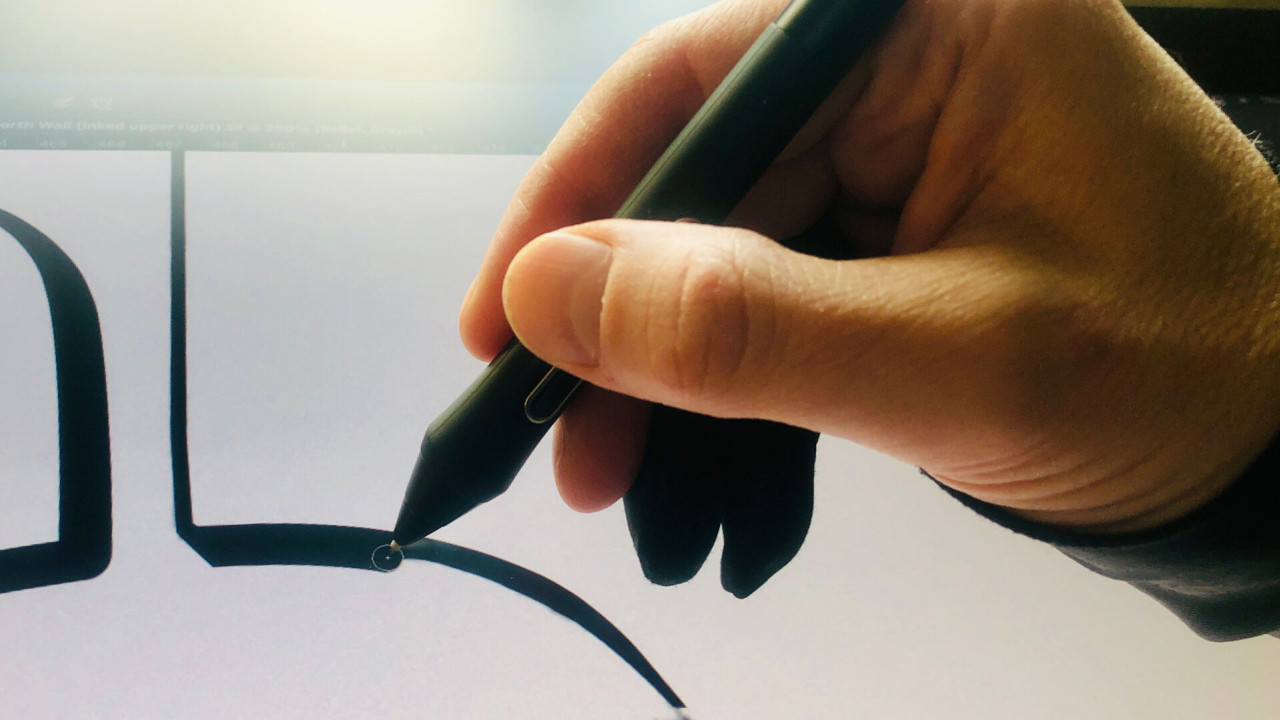
In the following entry we’d like to show you how to take advantage of your tablet’s camera during digital ”penciling”, as we all know that the best camera is the one that is with you.
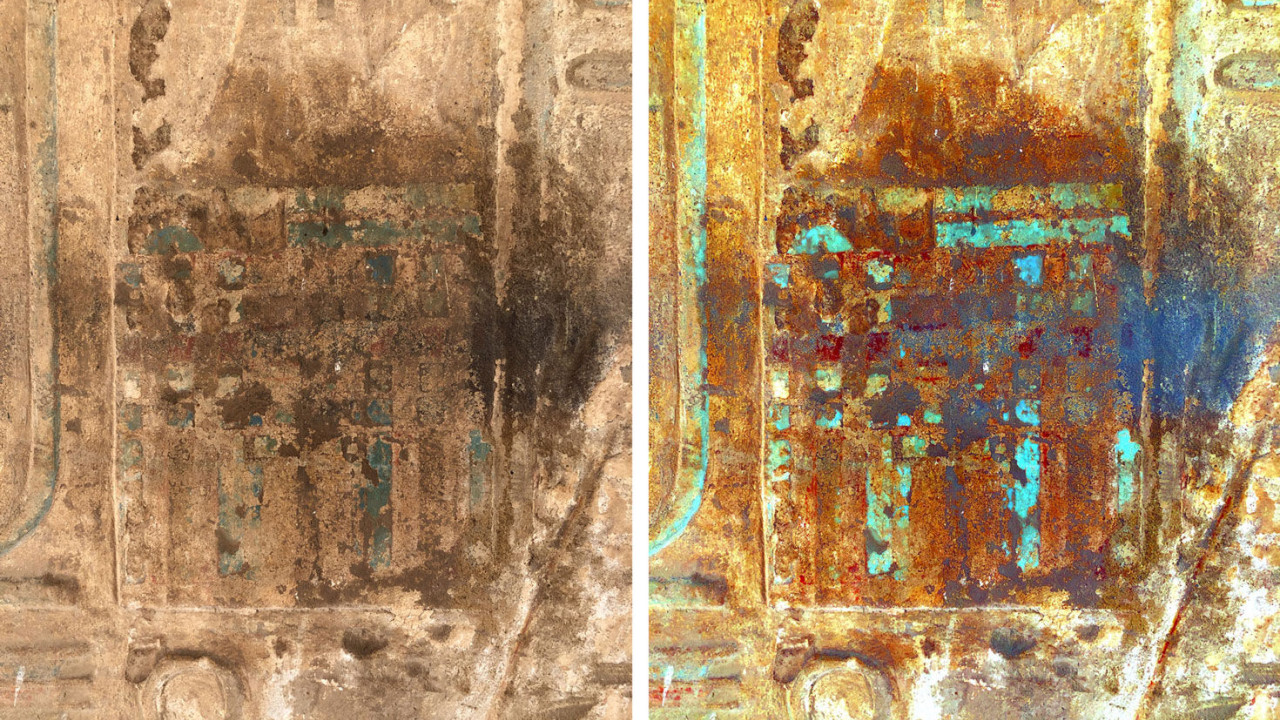
DStretch – a well-known and widely used piece of software – is an ImageJ plugin written by Jon Harman to enhance rock art images invisible to the naked eye. To be able to use DStretch on your computer...
Making a selection before interacting with certain elements of a drawing is one of the most vital tasks anybody who works with visual documentation must learn early on. In the first installment of our new tutorial series...
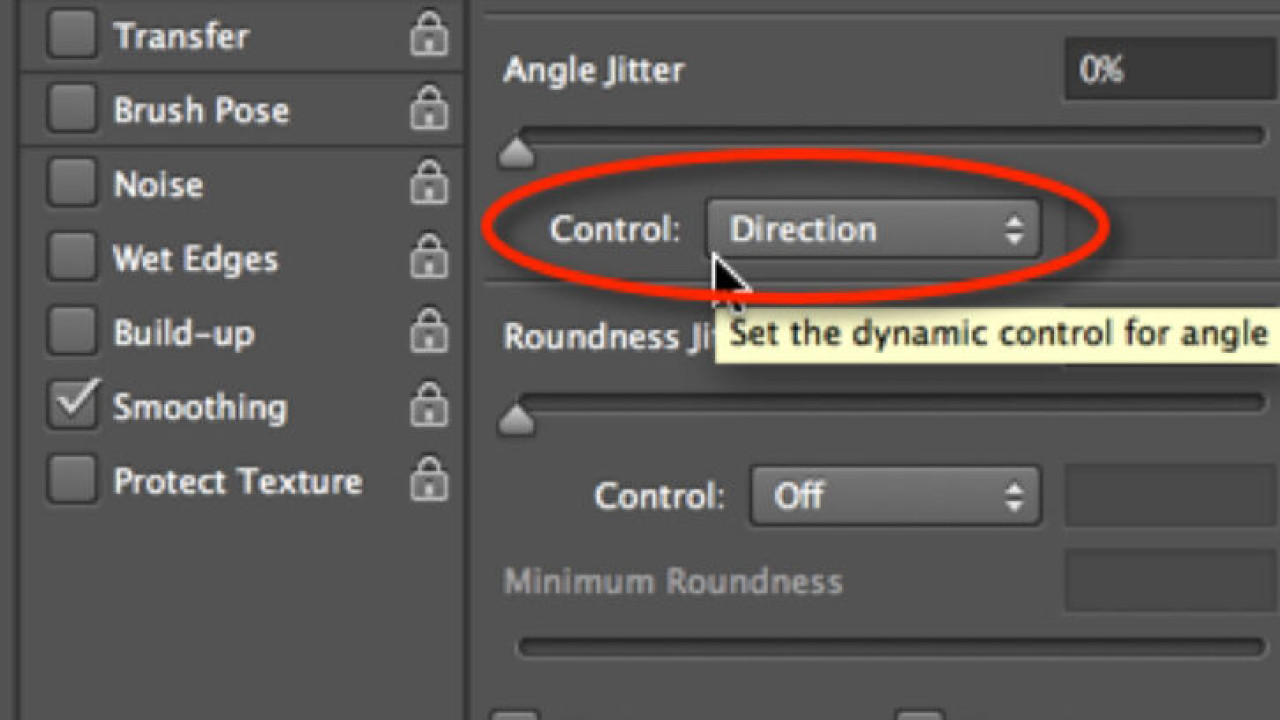
Dedicating an entire article for such a nuanced topic might seem like an overkill for some, however, knowing how certain Photoshop brush settings work and understanding how we can tweak these features...
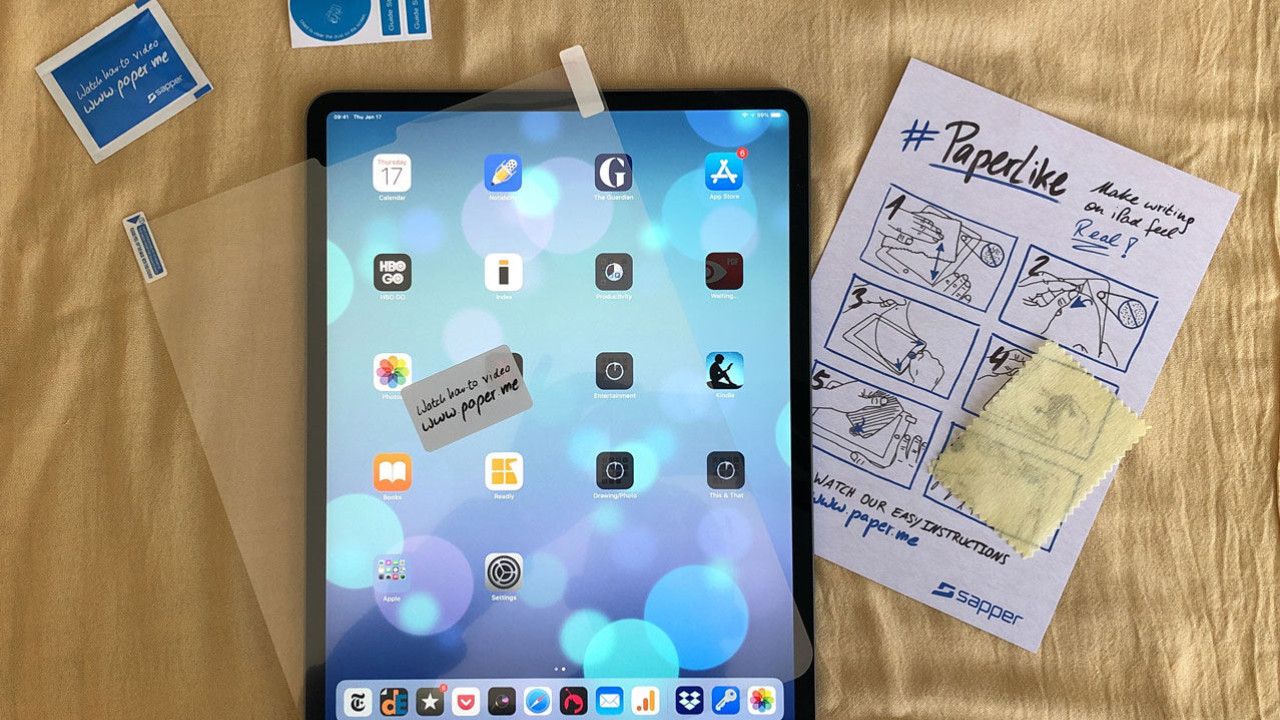
There is a peculiar product that we’ve already included in our Tools section called the PaperLike screen protector that proved to be tremendously useful when drawing on the iPad.
In this second tutorial discussing nuances that are specific to the digital iterations of the Chicago method, we’d like to debate over yet another peculiar surface treatment, the representation of areas obscured by plaster.
The background photo for LD 177 was created using the photogrammetric software Agisoft Photoscan and a Mamiya RZ67 Pro IID and 50mm Mamiya-Sekor Z f/4.5 lens, mounted with a Hasselblad CFV-50c digital back. The scene was lit using a Profoto studio...
There is a lot of debate, hesitance and argument pro and contra when it comes to studying, documenting and/or indicating damaged areas of ancient Egyptian wall surfaces. In our opinion, there could be a very convincing case...
In the second part of my introduction regarding using full-fledged desktop software in the field, I’d like to elaborate on the importance of creating the best possible workflow for our documentation needs.
Just a few years ago it wouldn’t have occurred to me to take my precious laptop to the temple, however in the last couple of years I grew accustomed to having the benefits of accessing desktop applications when working on certain field projects.
When inking large drawings with multiple layers, one can easily get lost in the details. This focus-oriented process often leads us to craft repetitive tasks manually, over and over, until our hands hurt.

Upon upgrading from Photoshop CC 2017 to CC 2018 there are a few differences to be noted regarding to the using of the standard brush tool. There are changes to the brush presets panel, allowing users to manage brush presets more quickly and...
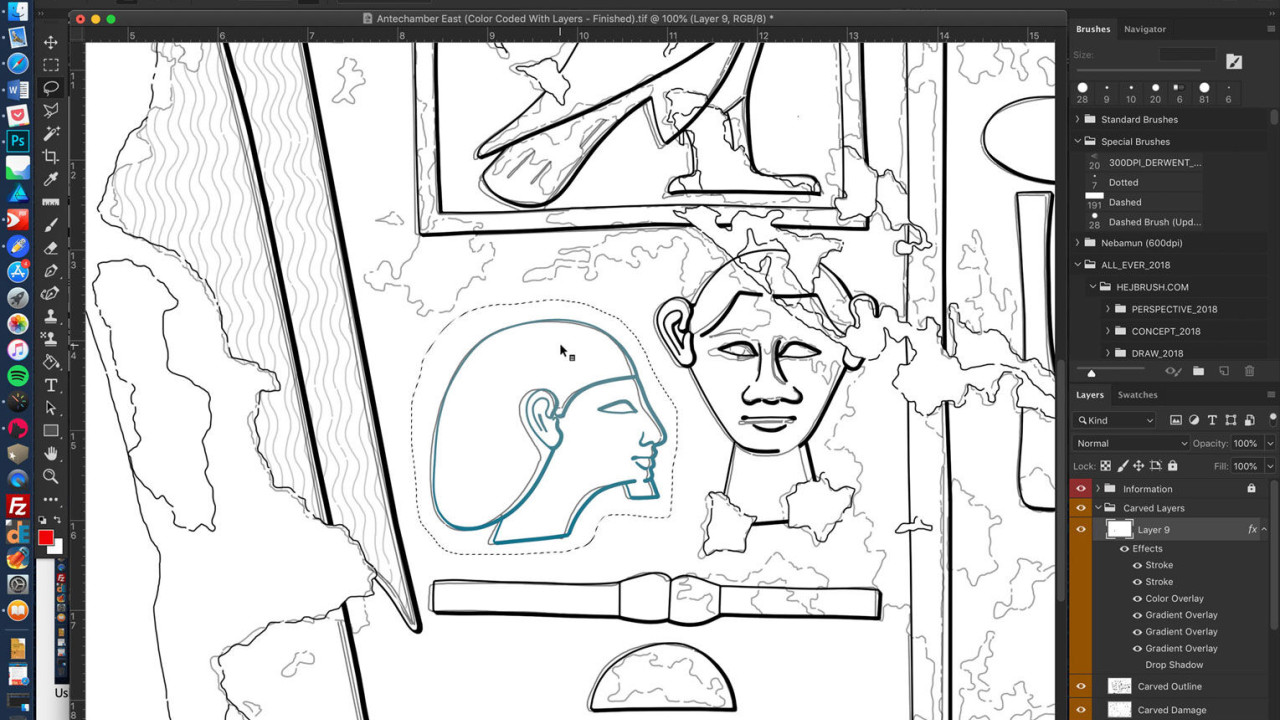
As it was already explained in the first edition of the Digital Epigraphy manual, Photoshop is our choice of quintessential tool when it comes to digital inking in the studio. We paint most of our brush strokes freehand using very little artificial...
There are two slightly different methods that can be introduced here: the artist can either delete from or add to the initial curves. They are both very effective and, once mastered, they can be useful complements to hand-drawn brush strokes.
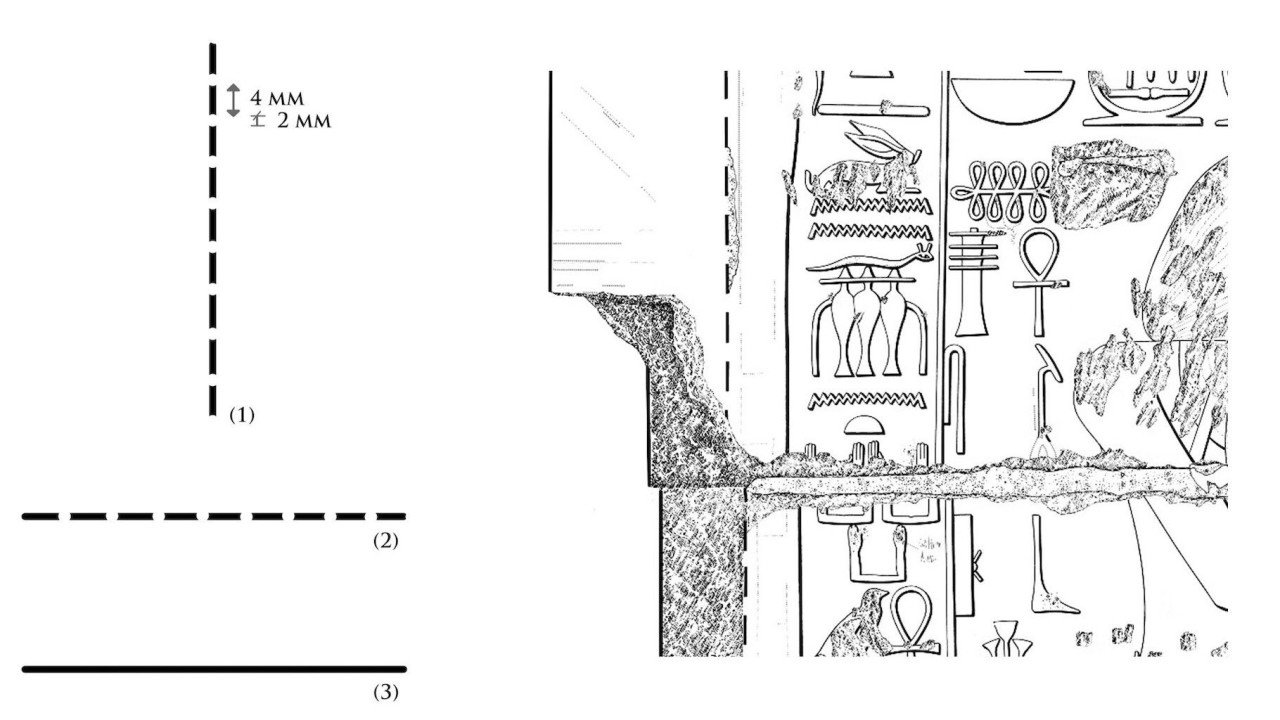
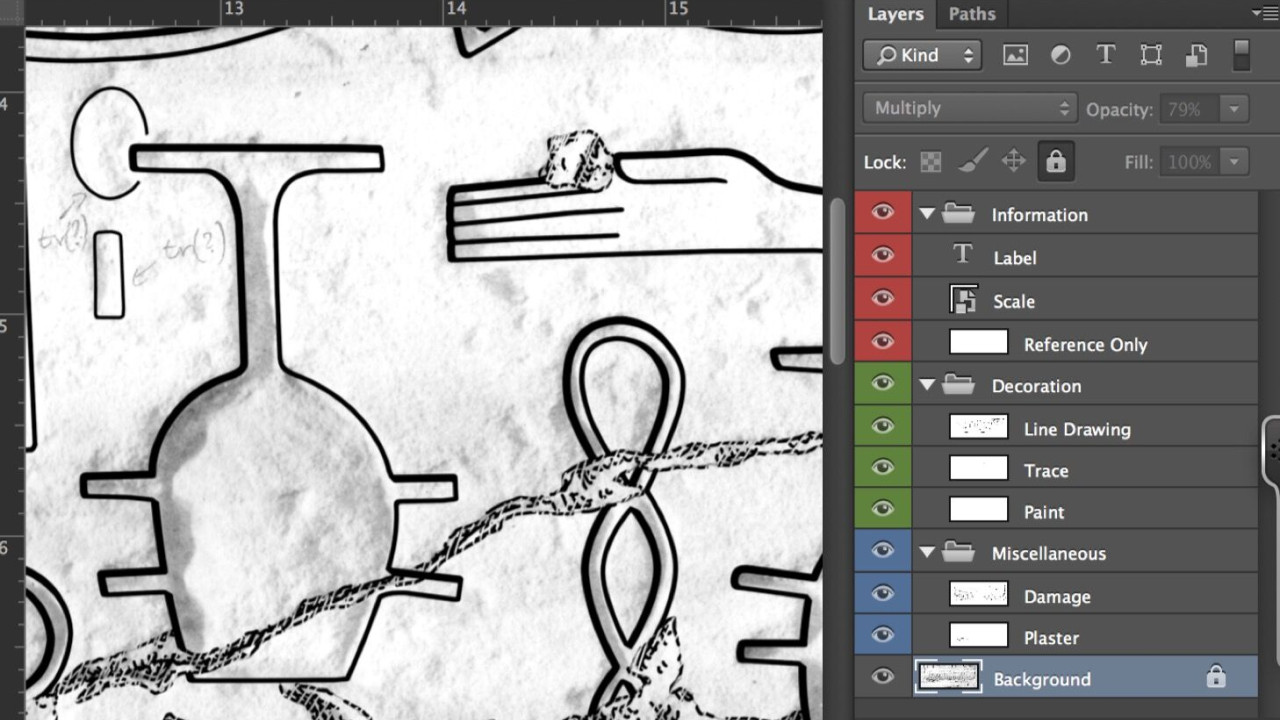
Restored decorative elements and architectural features, when part of an inked drawing, are represented by a series of dashed lines, as we’ve discussed in Chapter 2, Section 3. Again, just as with dotted lines, drawing dashed lines digitally can...
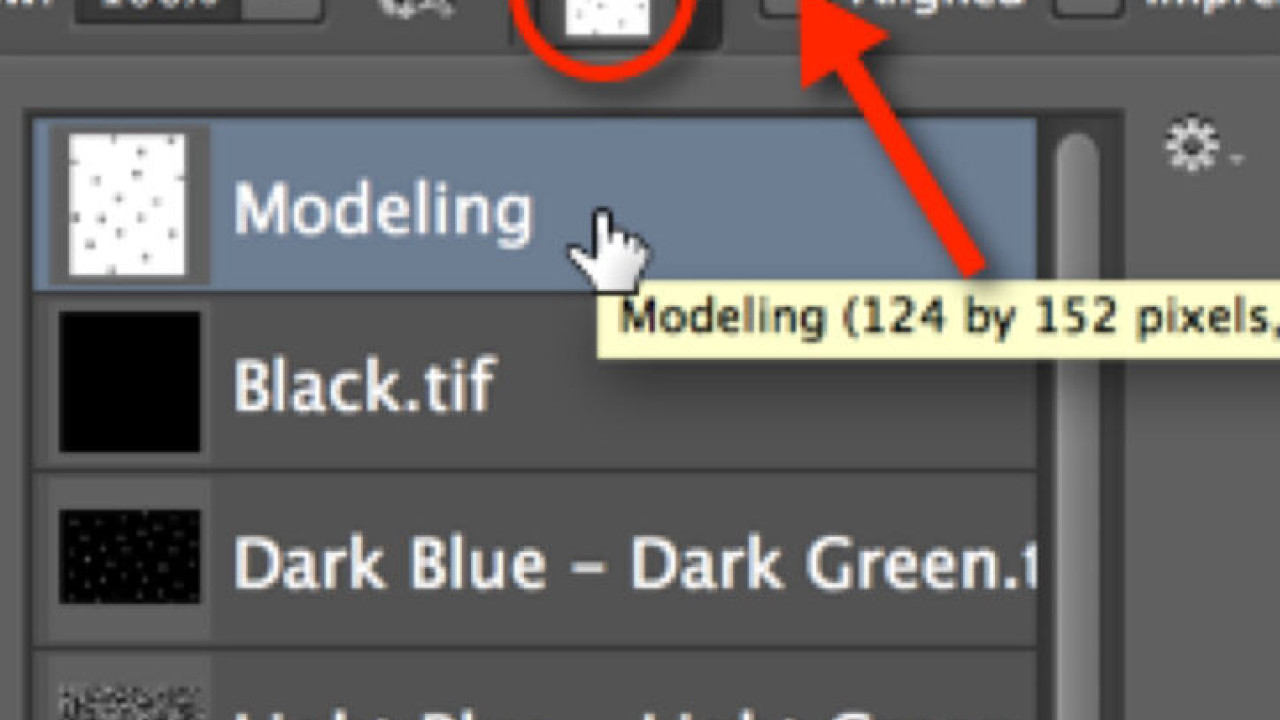
Modeling is indicated by a stippled area in which the variety in dot density adds a certain dimension to the texture. As with dotted paint lines and dashed architectural lines, the artist is free to add all the dots individually, and this is...

If further clarification of the pencil lines is needed for some reason, the artist has one more tool in his/her hands, but the process has to be carried out meticulously from the first manipulation of the enlargement.
There are two slightly different methods that can be introduced here: the artist can either delete from or add to the initial curves. They are both very effective and, once mastered, they can be useful complements to hand-drawn brush strokes.
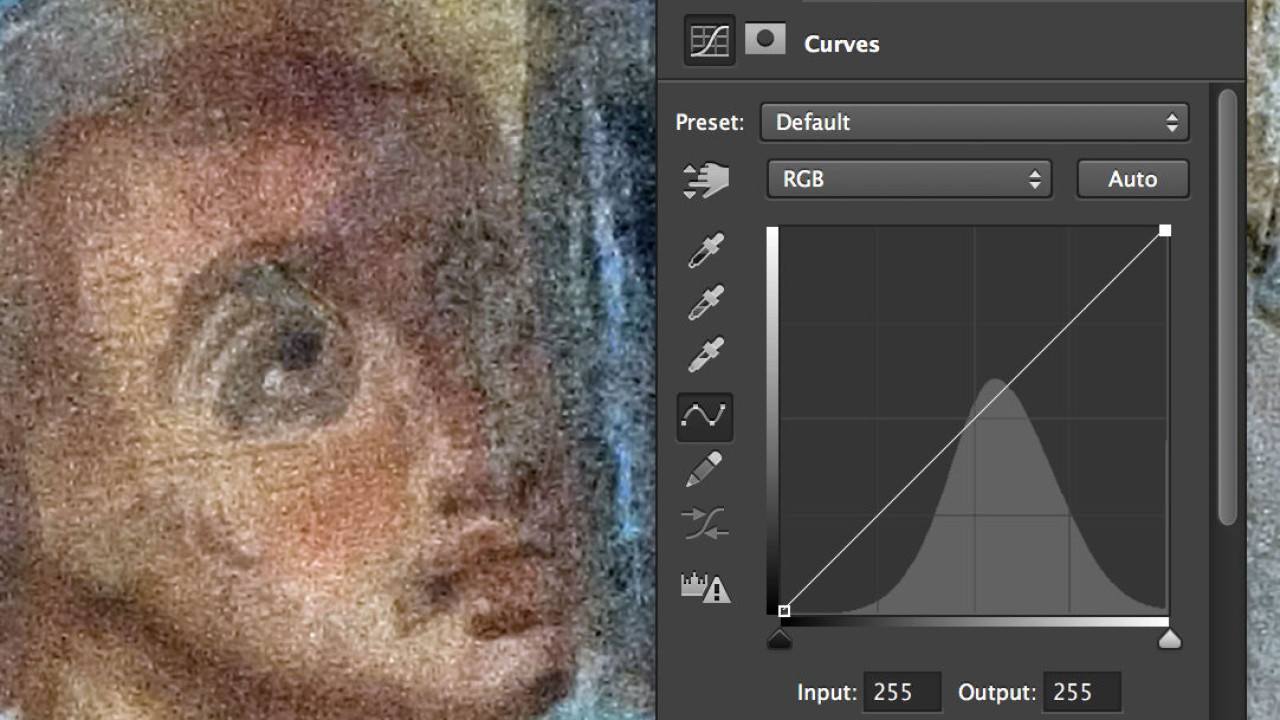
As an Epigraphic Survey artist who works almost exclusively with black-and-white images, one would think that learning about Photoshop’s color management is rather pointless.
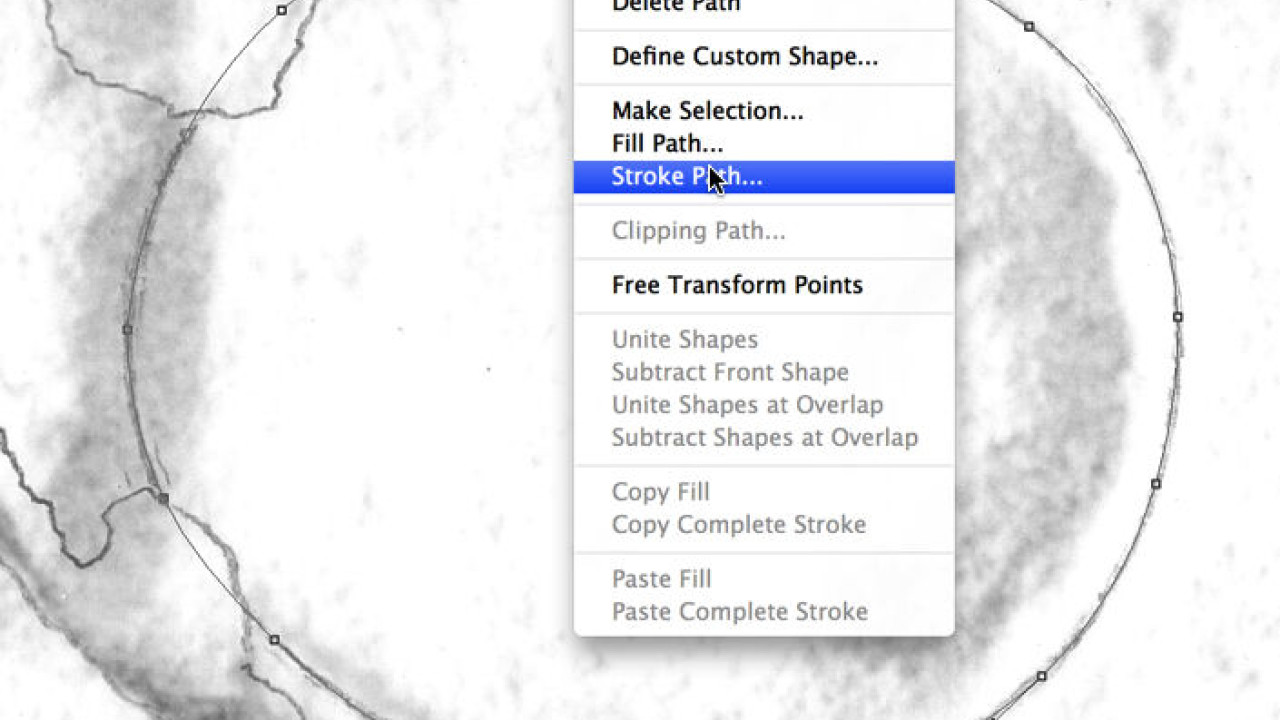
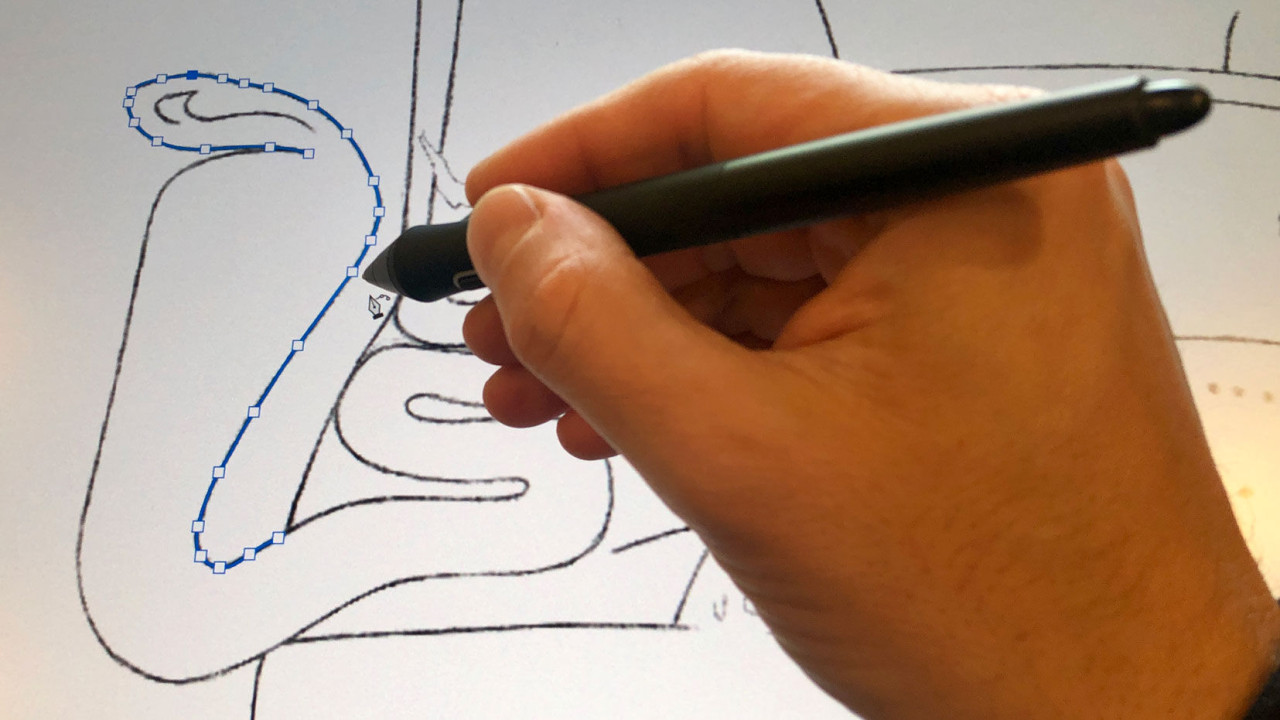
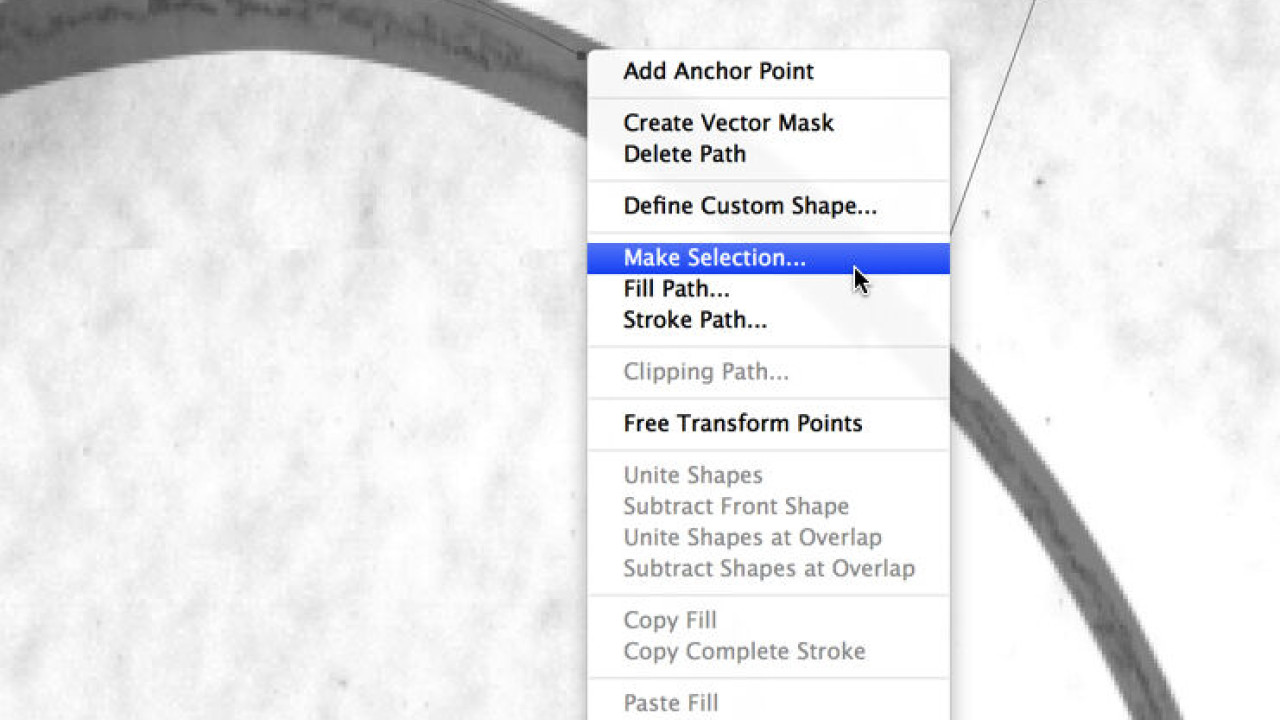
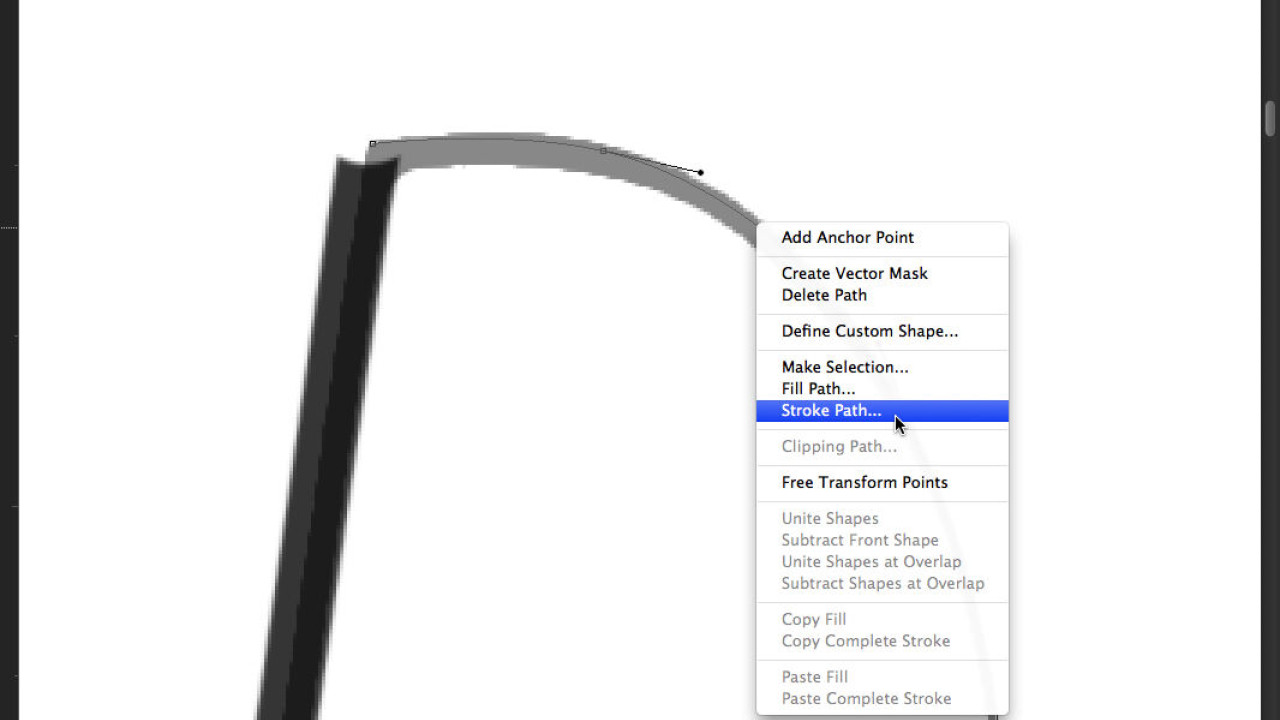
Using the Pen tool is the most precise and most controllable way of drawing curved paths for brush strokes. Its main advantage over the Freeform Pen tool is that the artist determines the number and position of the Anchor Points he/ she wants to use...
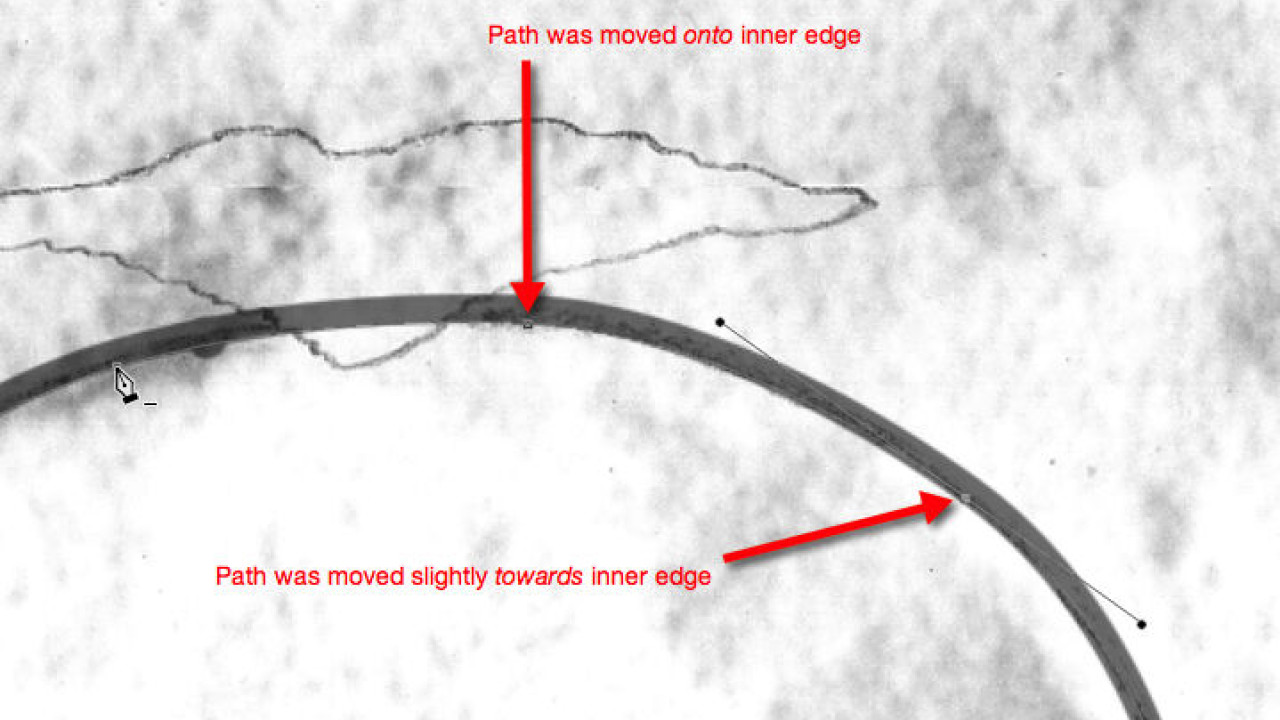
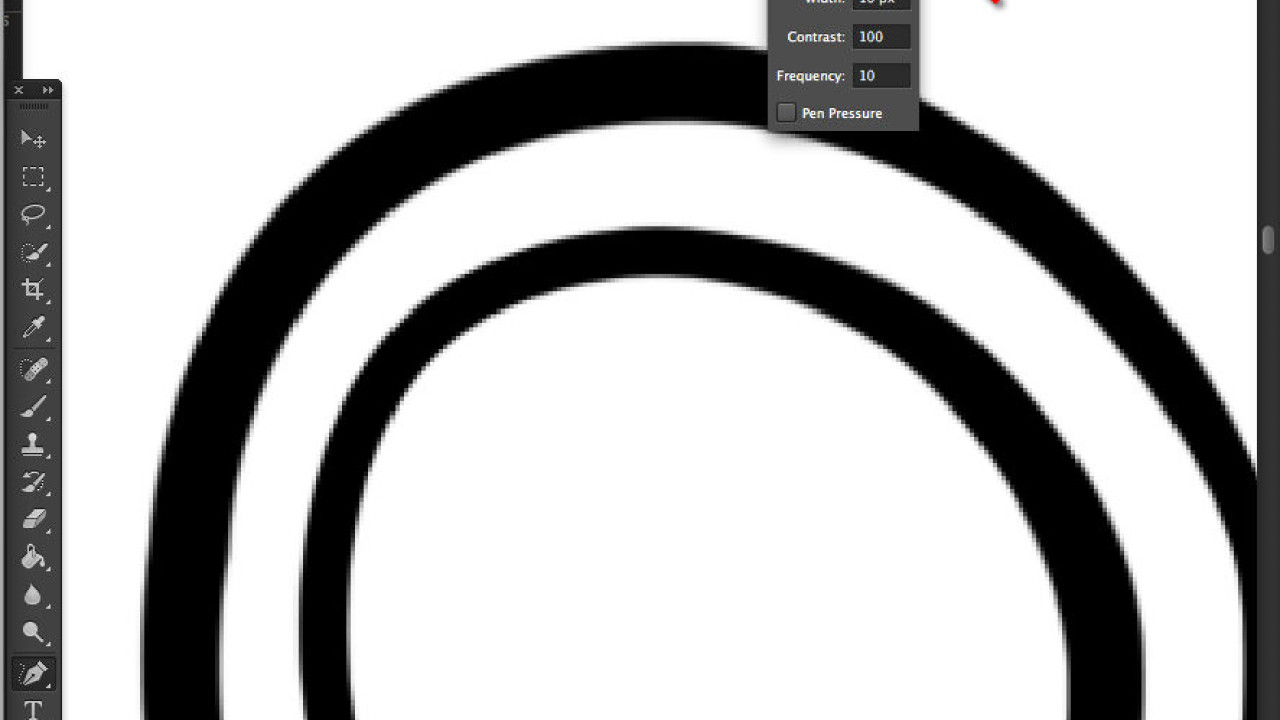
Changing the arc of a curved line is just as hard in Photoshop as it is on paper - assuming the artist is drawing freehand. The artist has to pay attention to keeping the smoothness, the thickness, and the sun-shadow transitions of the original line...
Astropad, like all Apps that create a bridge between computer and iPad, has a desktop version that provides the necessary connection. Upon initial opening of the Mac App, one has to decide what percentage of the computer screen should be allowed to...
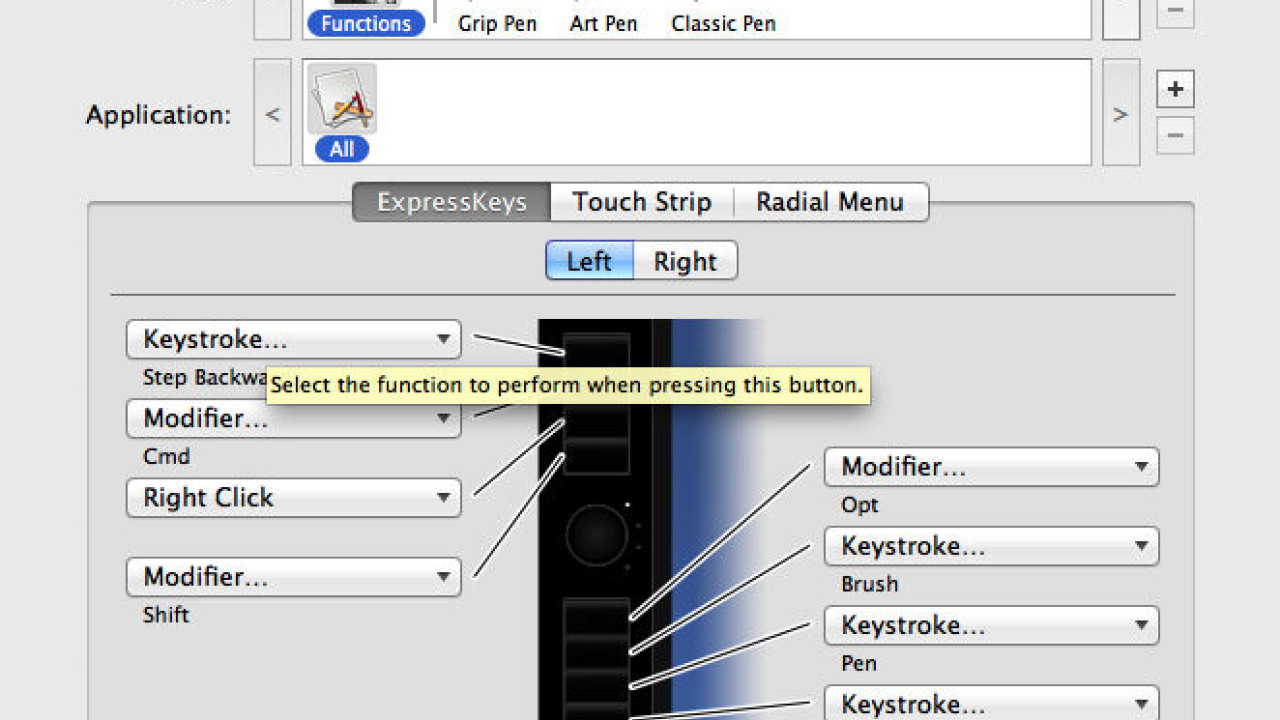
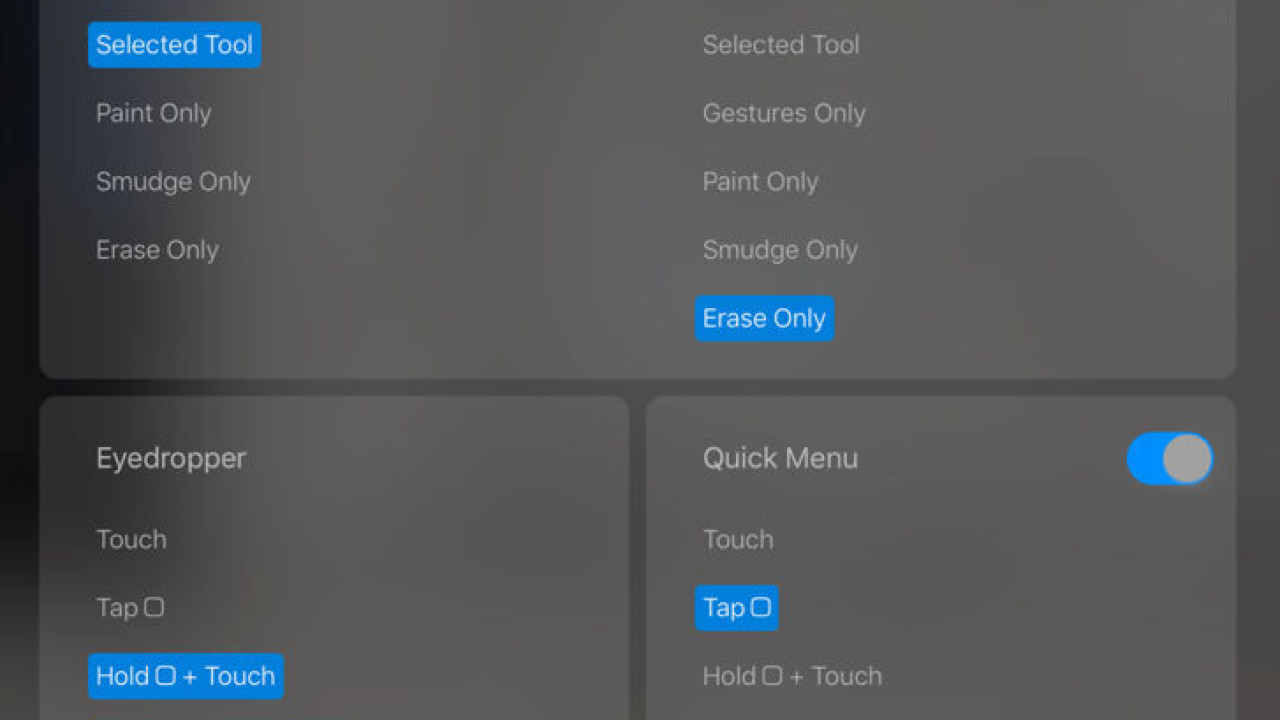
There should be some customization performed on the tablet’s button interface before putting it to work. When we click on the Functions tool, we see a picture of the left/right string of buttons with some commands already associated with them....
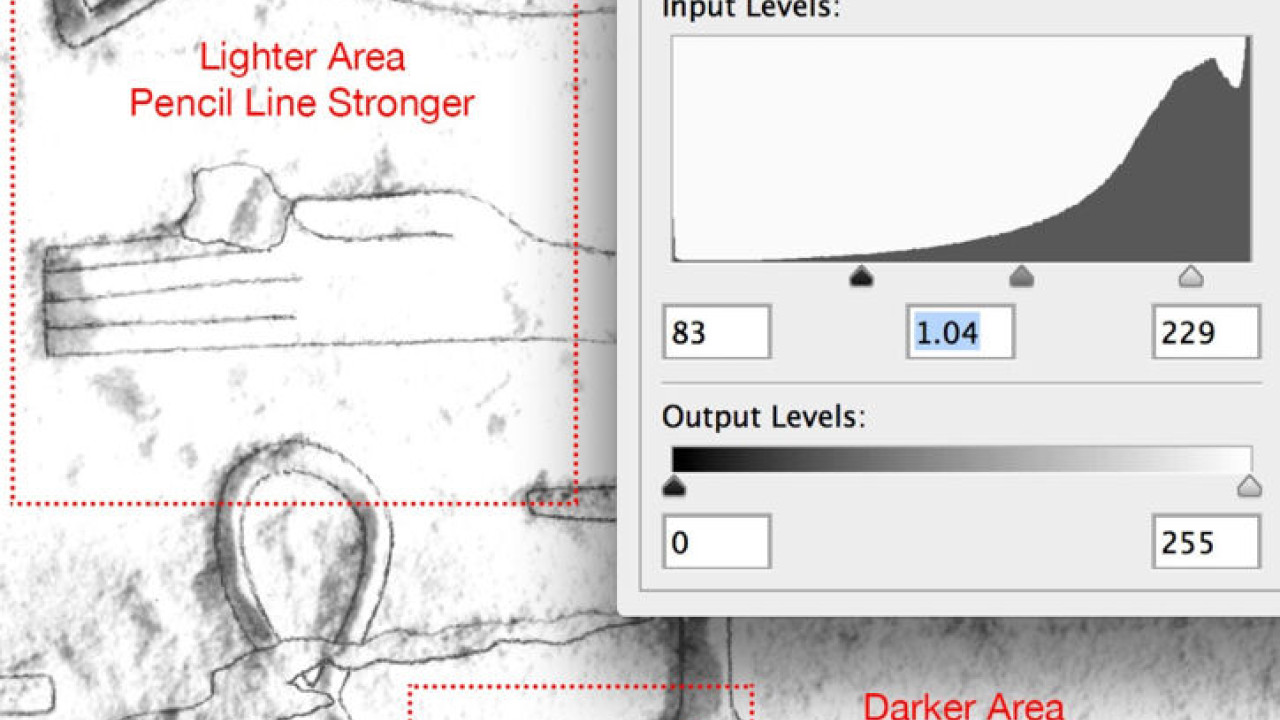
The best way to make local enhancements over smaller areas is by using the Burn and Dodge tools. The Burn tool can be used over light areas to make the pencil lines appear darker. When the artist uses the Burn tool, he/she has to be very careful
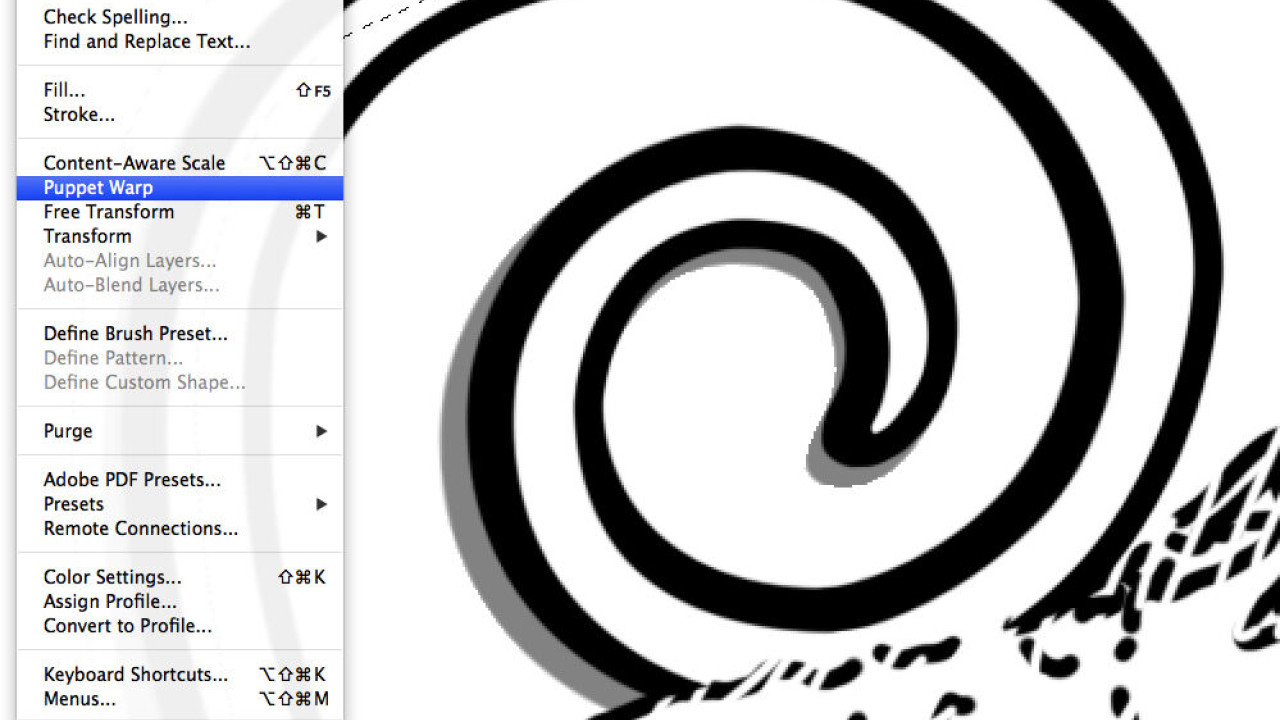
The Puppet Warp is a function that enables the artist to distort selected areas on a drawing via a mesh overlay and the placement of pins. Although we’ve already applied certain transformations on selected areas

Once again there is the obvious method of applying a “digital scalpel” over painted lines, using the Eraser, except that using the Eraser tool to get this lighter effect takes a very long time.
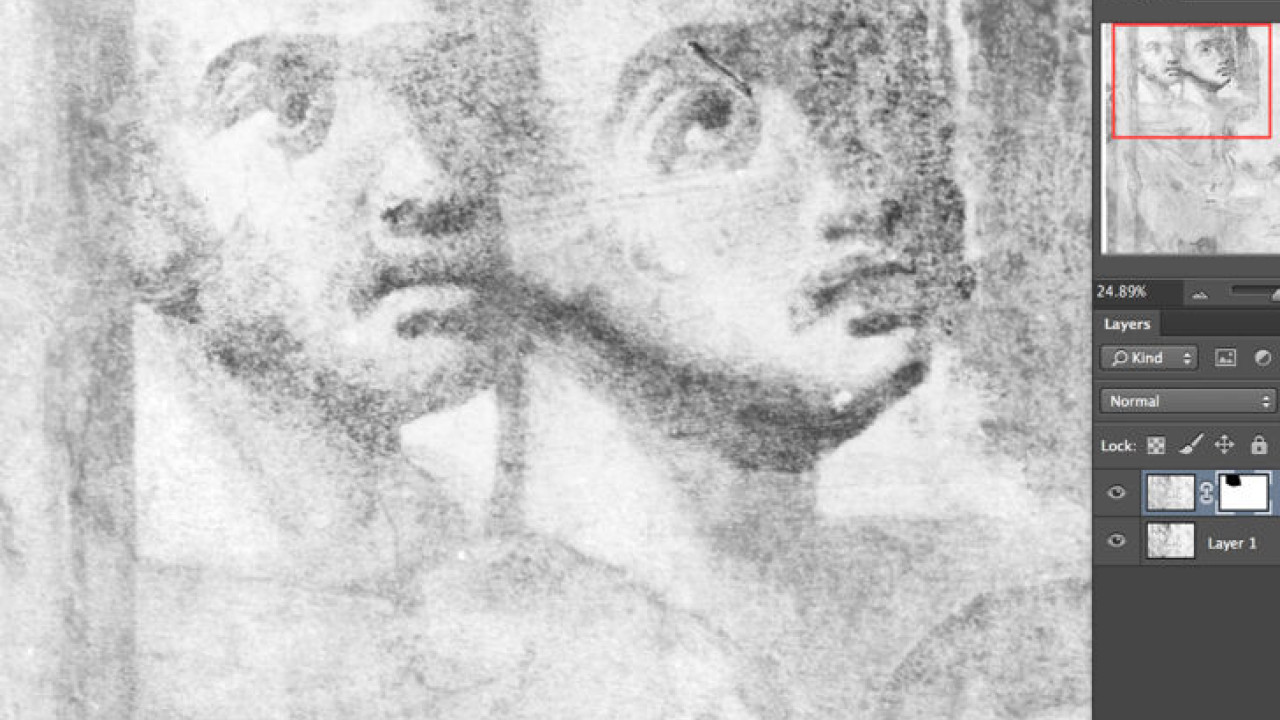
Layer Masks are one of those Photoshop features that beginners might find hard to work with, although the philosophy behind masks is very simple: masks enable the artist to hide or reveal parts of a layer.
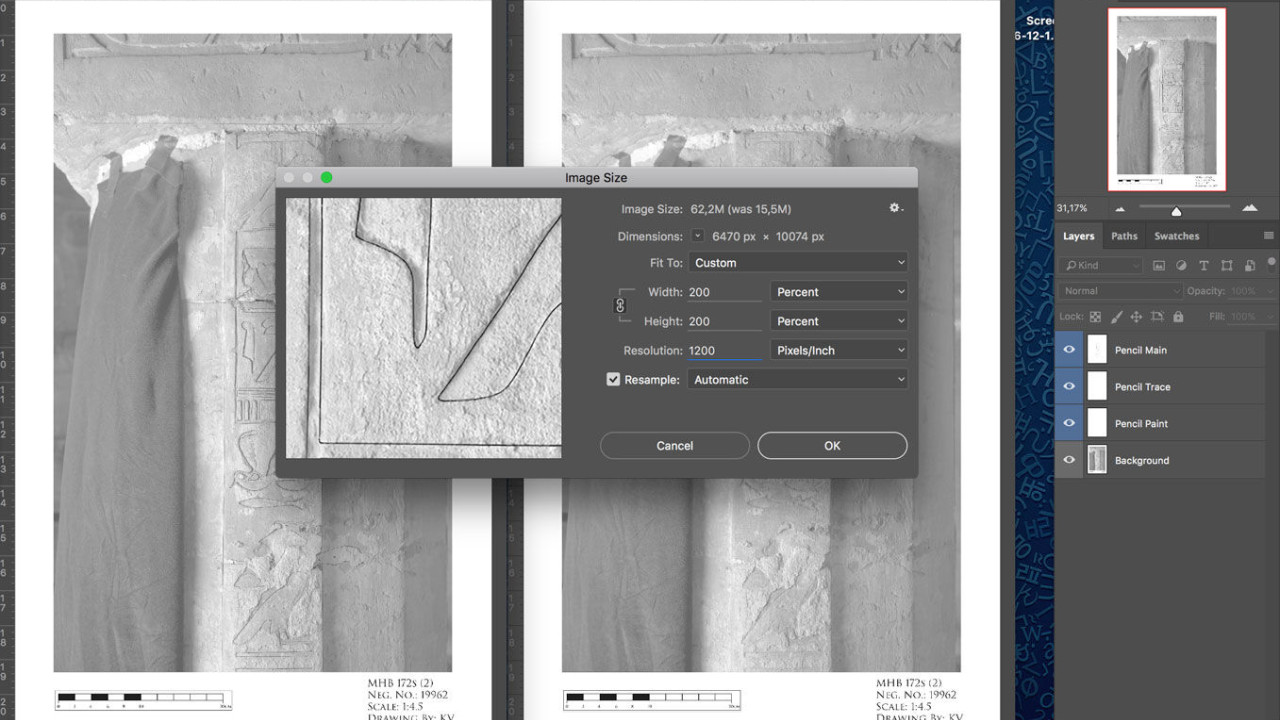
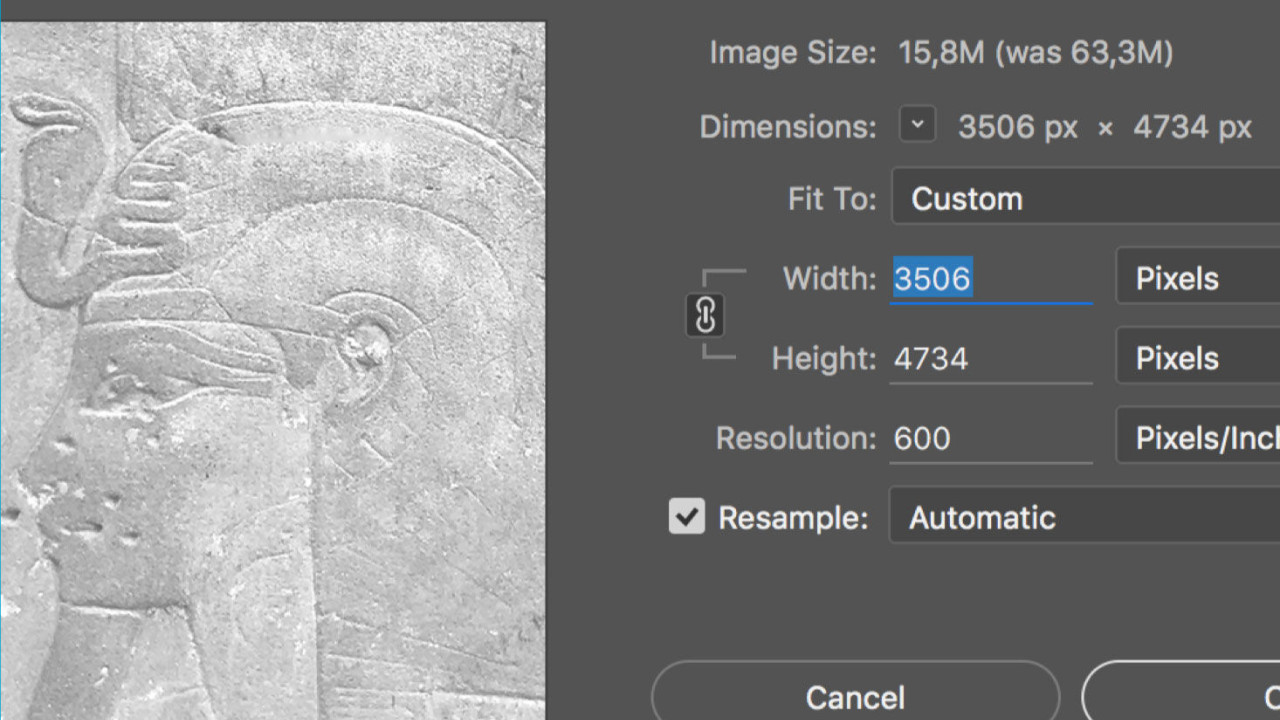
As a final preparatory step to ready the digitally penciled drawing for studio work, the artist needs to readjust the scale of the drawing to match its original dimensions. Since downscaling was a temporary necessity, required only to match the...
A time-consuming way of merging scans of oversized images involves a lot of manual manipulation by the artist, but it gives a lot more control over the entire process.
Once the artist creates the highest resolution background that is still usable in Procreate, all the layers can be merged and the file can be saved as a regular jpeg, keeping its quality at its maximum.
The artist needs to execute a few modifications to be able to work with a color version of his/her drawing. The drawing is created in a grayscale environment, so any color that would be applied on it would show as a shade of gray.
The Magnetic Pen Tool is an option of the Freeform Pen tool that lets the artist draw a path that snaps to the edges of defined areas on the drawing. We can set up the range and sensitivity of its behavior as well as the complexity of our path

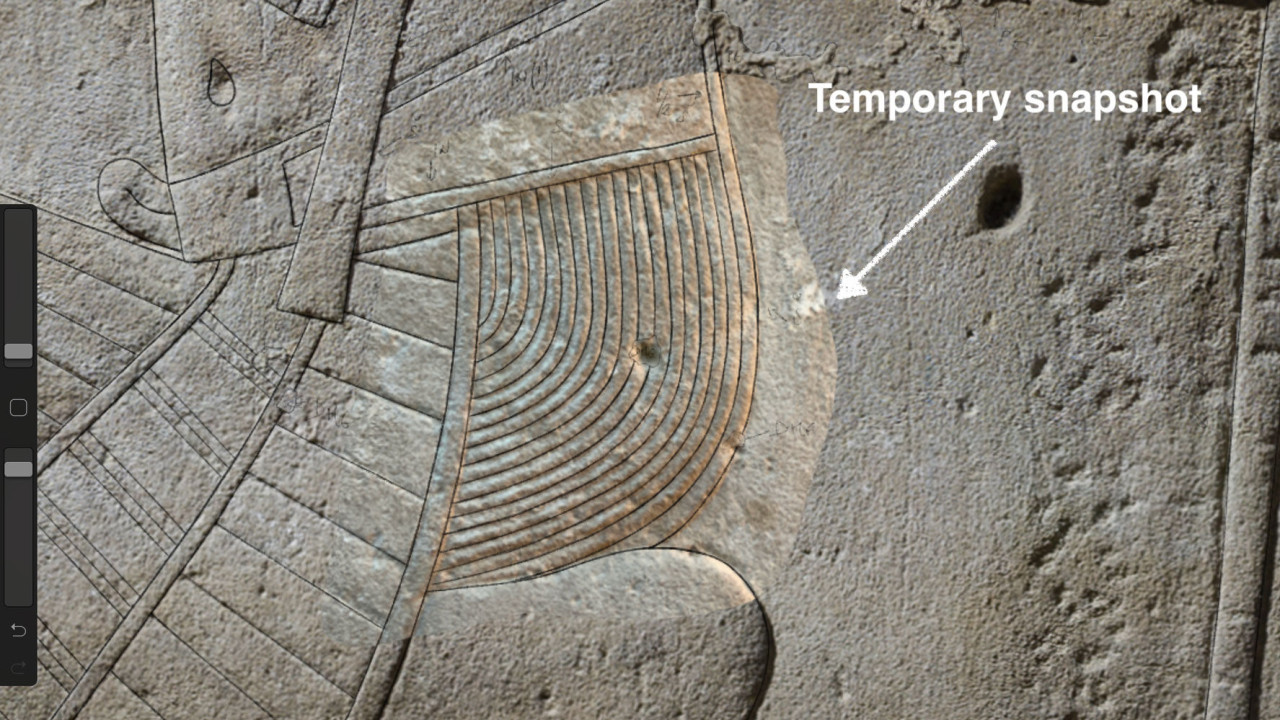
Before the artist starts adding the collation sheets to the digital drawing, he/she needs to set up the current stage as a layer for future reference. Later on, when we need a before and after collation comparison, this layer will be the one to...
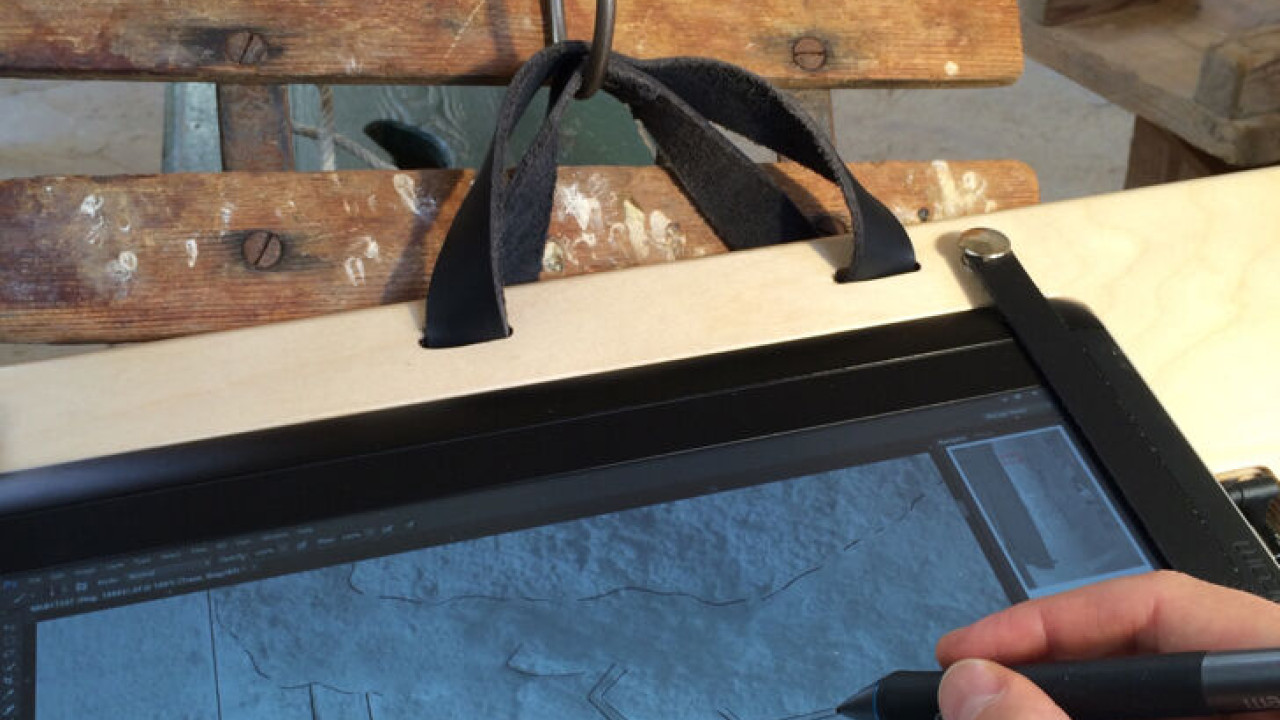
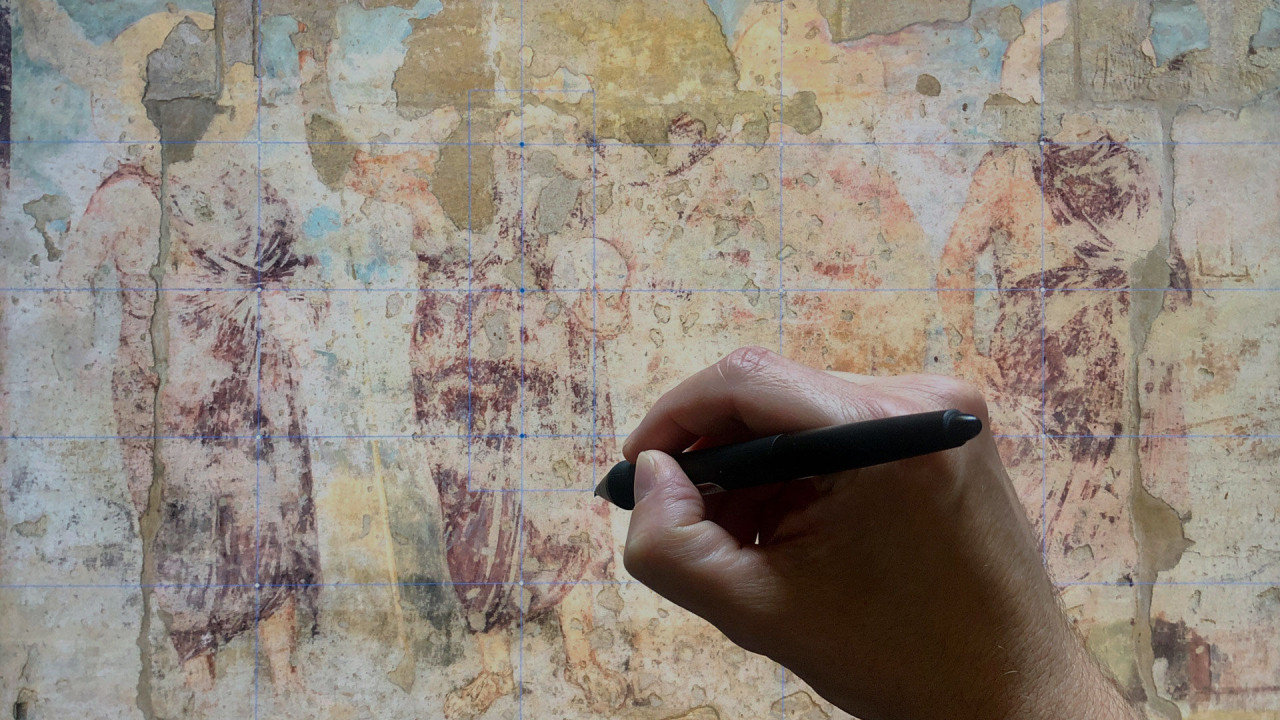
With Wacom’s Companion, it is possible to use a digital photograph instead of a printed enlargement for the drawing background, “penciling” directly onto the digital image in the presence of the inscribed wall surface.
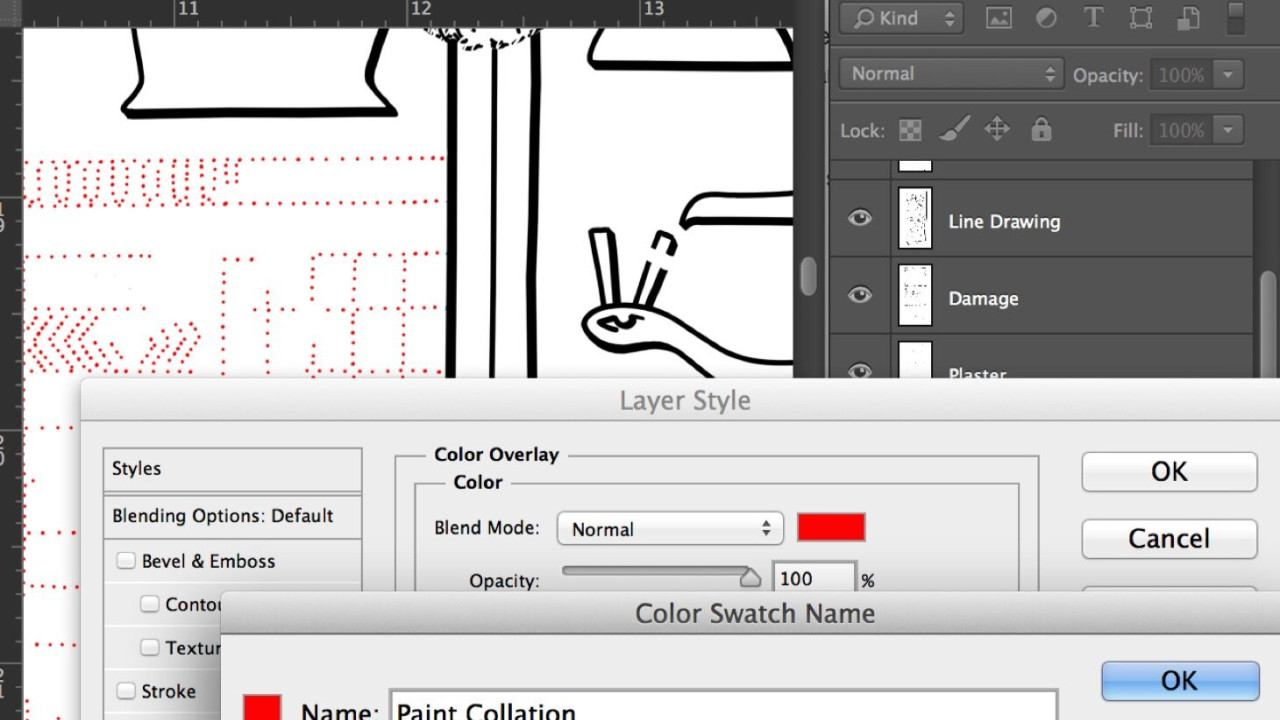
As part of the collation package, paint sheets are regular (i.e., black-and-white) printed copies of the inked drawing. They can thus be made fairly easily by flattening the digital drawing and hitting print.
Once the jpeg is imported and placed in the relevant project’s folder, we can move on to Procreate’s interface customization. There is not a lot to do here, but one should be aware of a few tweaks that could potentially help with work in the...

Along with refreshing our scanning skills, we also need to remember how to align layers properly. The Collation Sheet Layer needs to be matched exactly with the drawing, otherwise the changes end up being misaligned.
Procreate lets the artist paint in high resolution using customized brushes in a multilayered environment. It has a simple user interface, with most of the settings and options tucked away in hidden menus, keeping the canvas uncluttered. On initial...
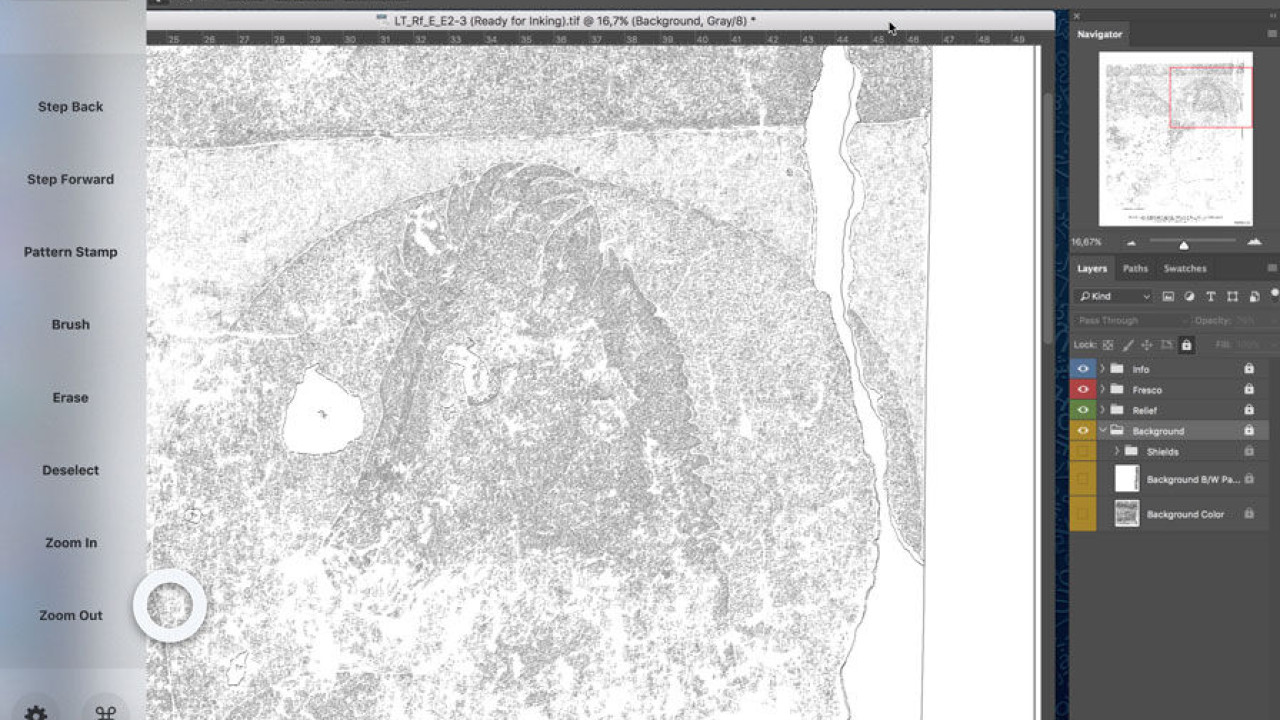
Although the digital inking method that was specifically developed for documenting the remains of some late Roman murals will be explained in another chapter, the multiple ways in which data is initially captured at Luxor Temple justify a brief...
