
How to create and apply a custom-made kheker frieze brush template
Kheker frieze reconstruction on a wall section in Theban Tomb 179.
When inking large drawings with multiple layers, one can easily get lost in the details. This focus-oriented process often leads us to craft repetitive tasks manually, over and over, until our hands hurt. Certainly there are situations where one must create every single line manually, either by painting freehand or using some of the many aids Photoshop has on board, such as the Curvature Pen Tool or brush-stroke smoothing. However, when one doesn’t have to deal with complicated sun-shadow transitions but rather can take a little “break” by working on simpler, repetitive elements, one can be a little more creative. Therefore, in this tutorial I’d like to show you how to create a single-weight kheker-frieze line drawing for reconstruction purposes.
Defining and using a Brush Preset for complex elements in Photoshop
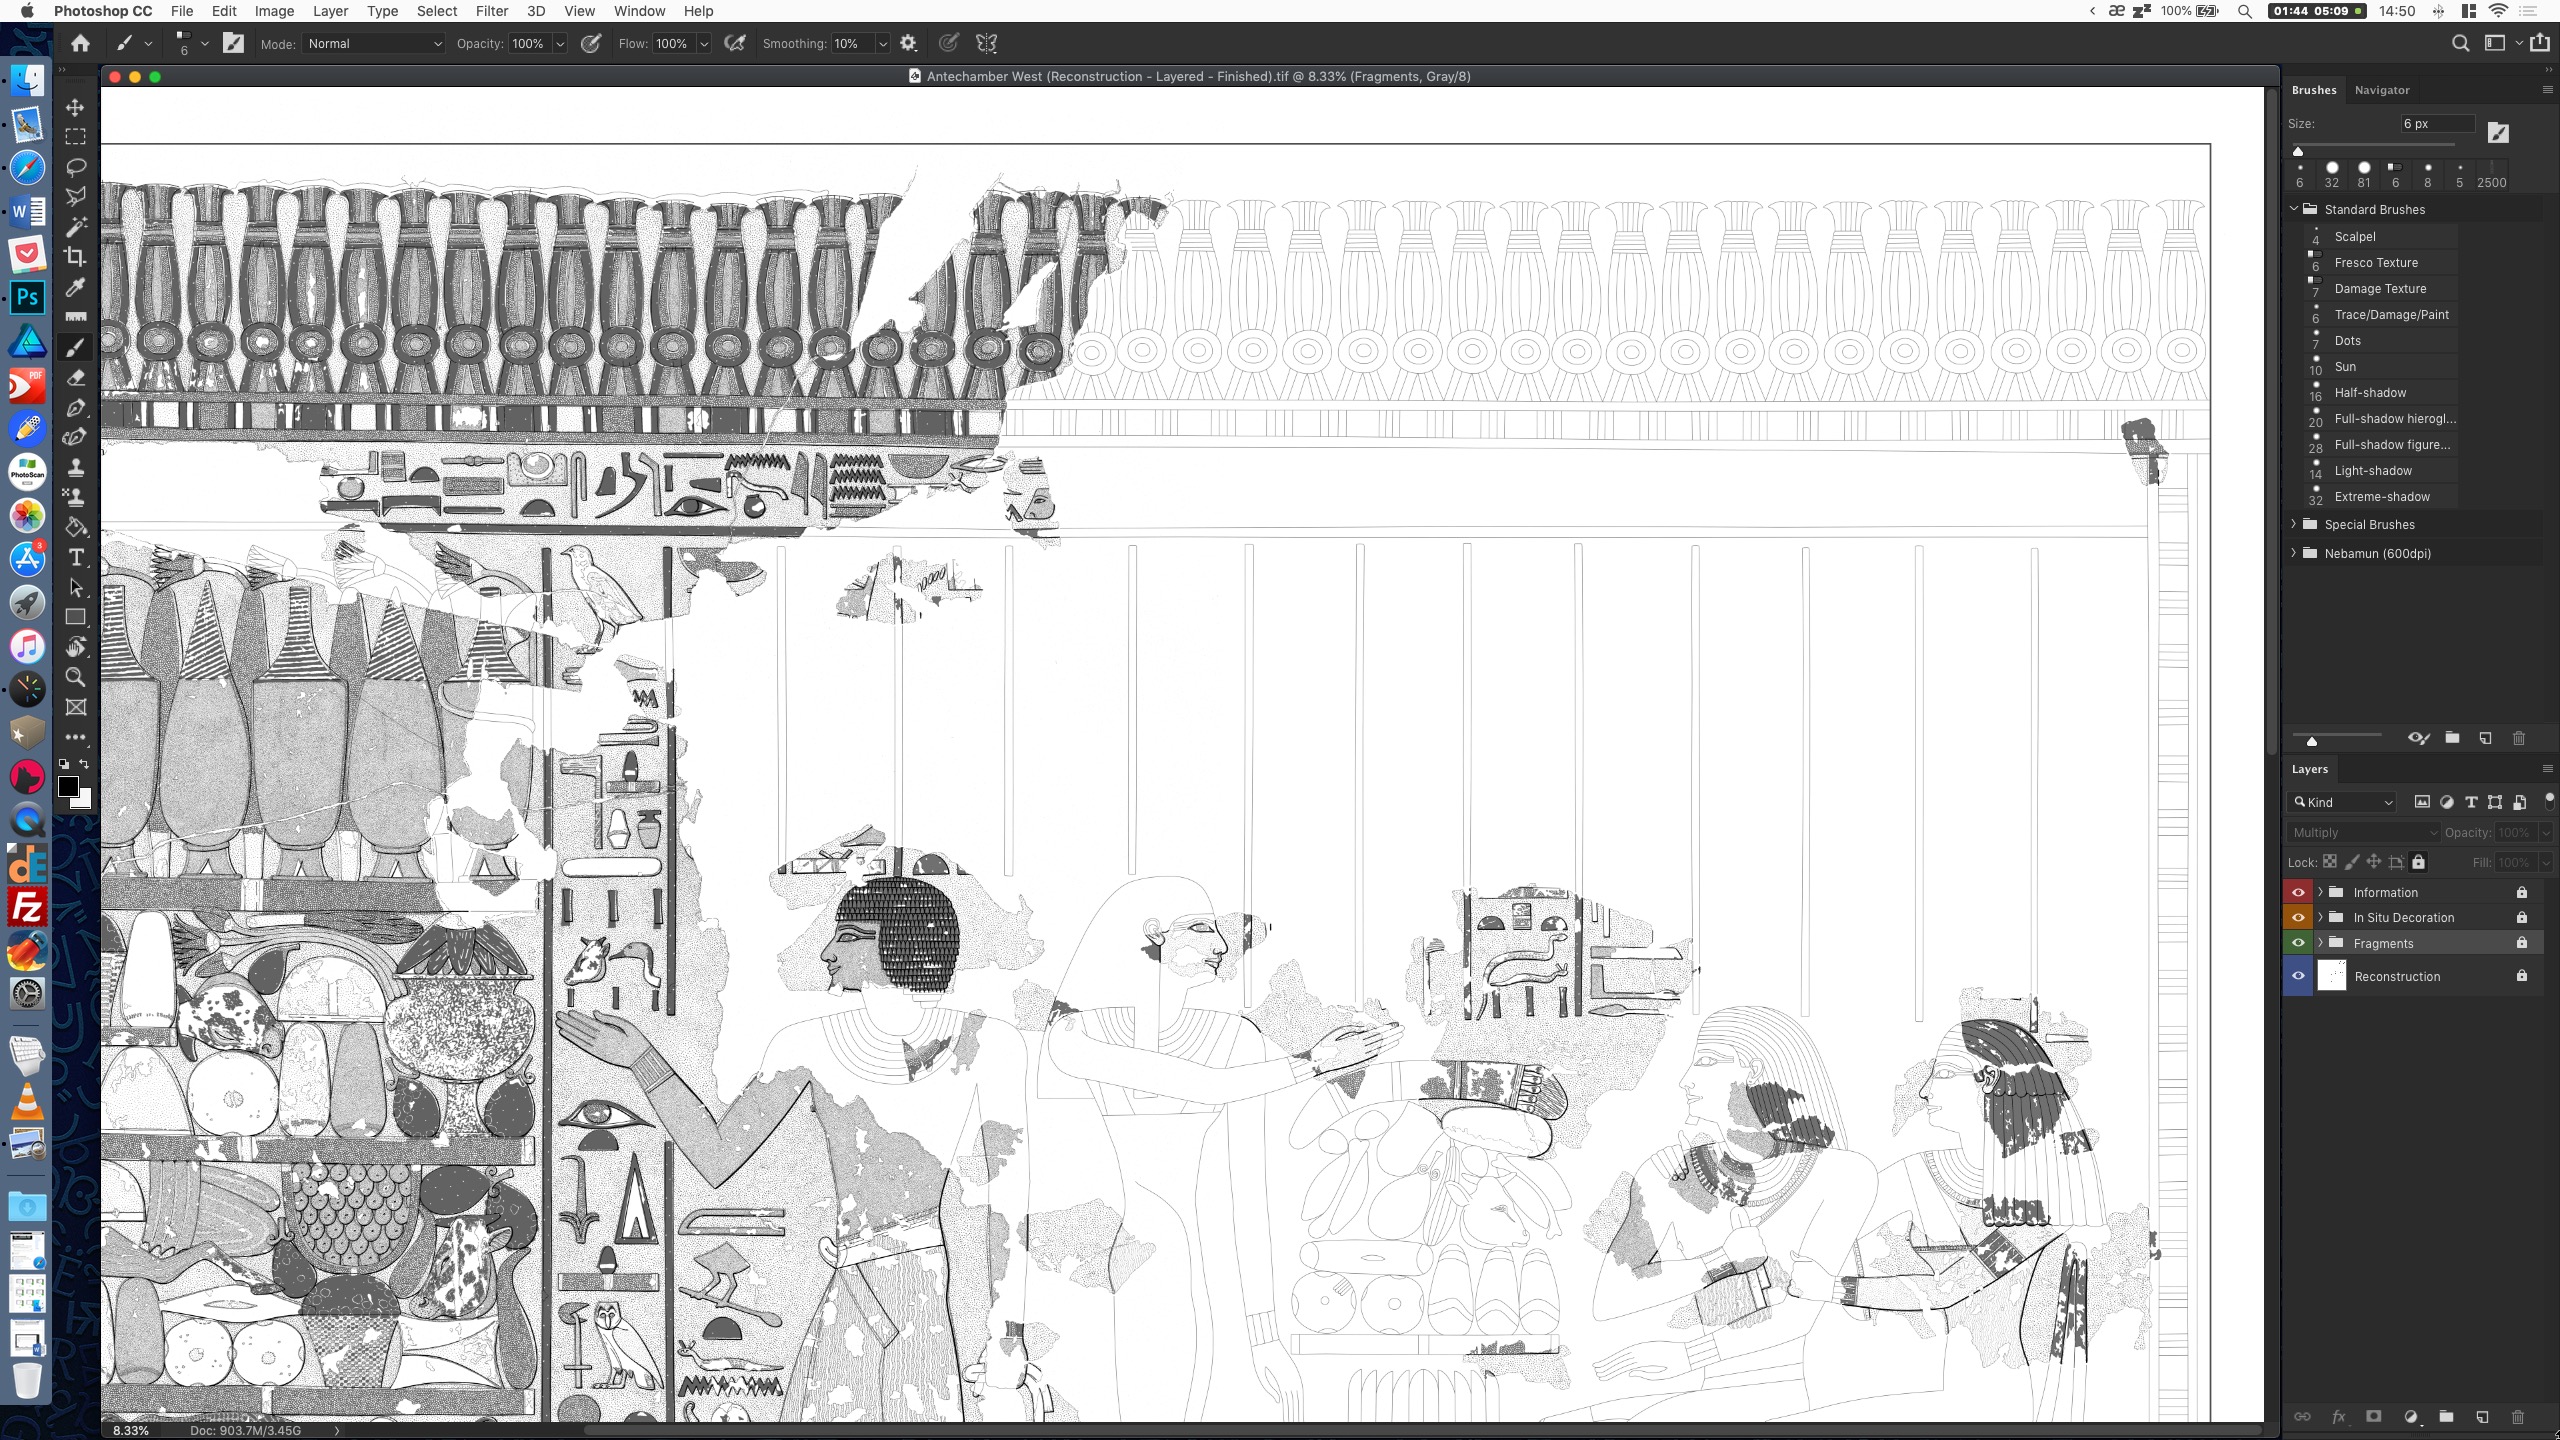
Digital inking in Photoshop literally means you must craft your line using a bitmap brush stroke, which can be cumbersome for some but is as close as you can get to inking by a Rapidograph on paper. Because Photoshop’s brush is our bread and butter we should learn early on how to create, modify, import, export brushes in a way that suits our specific needs. This is why digitalEPIGRAPHY dedicated a lengthy portion of its Manual for setting up the Epigraphic Survey’s basic digital brushes. This step-by-step instruction assumes you know how to create and use basic brushes in Photoshop. The tutorial is based on the reconstruction drawing created for the West Antechamber Wall in Theban Tomb 179.
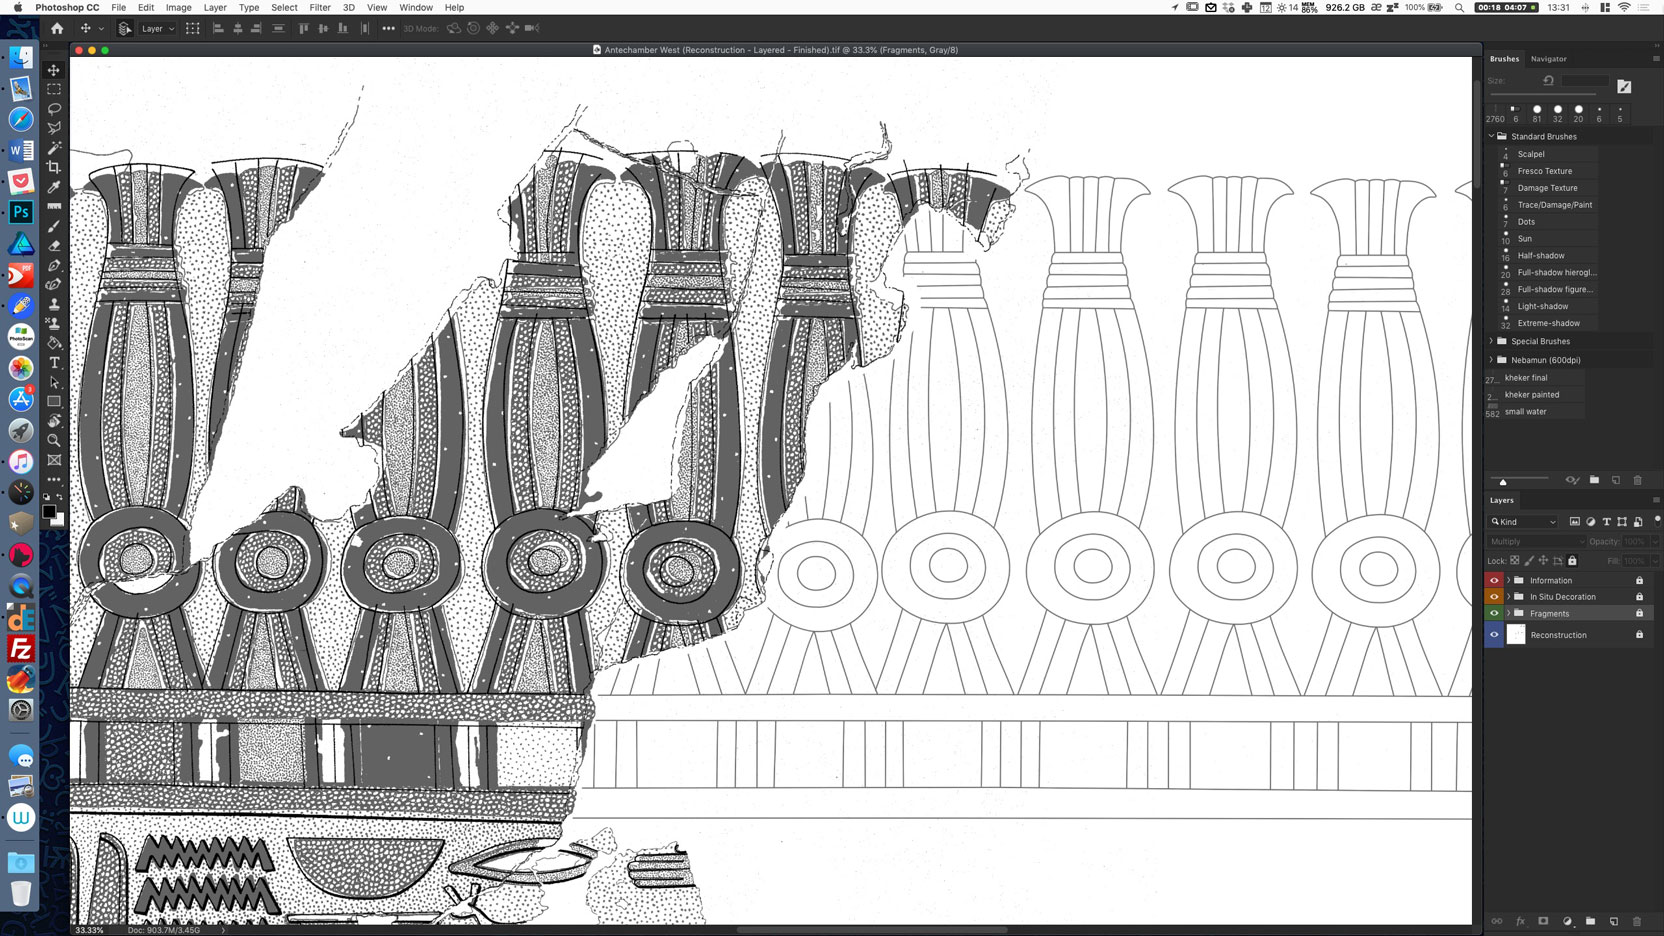
We start our process on a large, partially inked drawing that has most of the in situ decorative elements already indicated. In the first step, we need to create a kheker-template for our reconstruction drawing. I’ll use a 5 pixels wide brush stroke for my demonstration, that is the equivalent to the sun-line width in this particular artwork (created at 600 dpi). Now I need to paint one kheker that looks average, therefore, I try to avoid any irregularities in the kheker chosen as my template, even by overruling its outline if necessary.
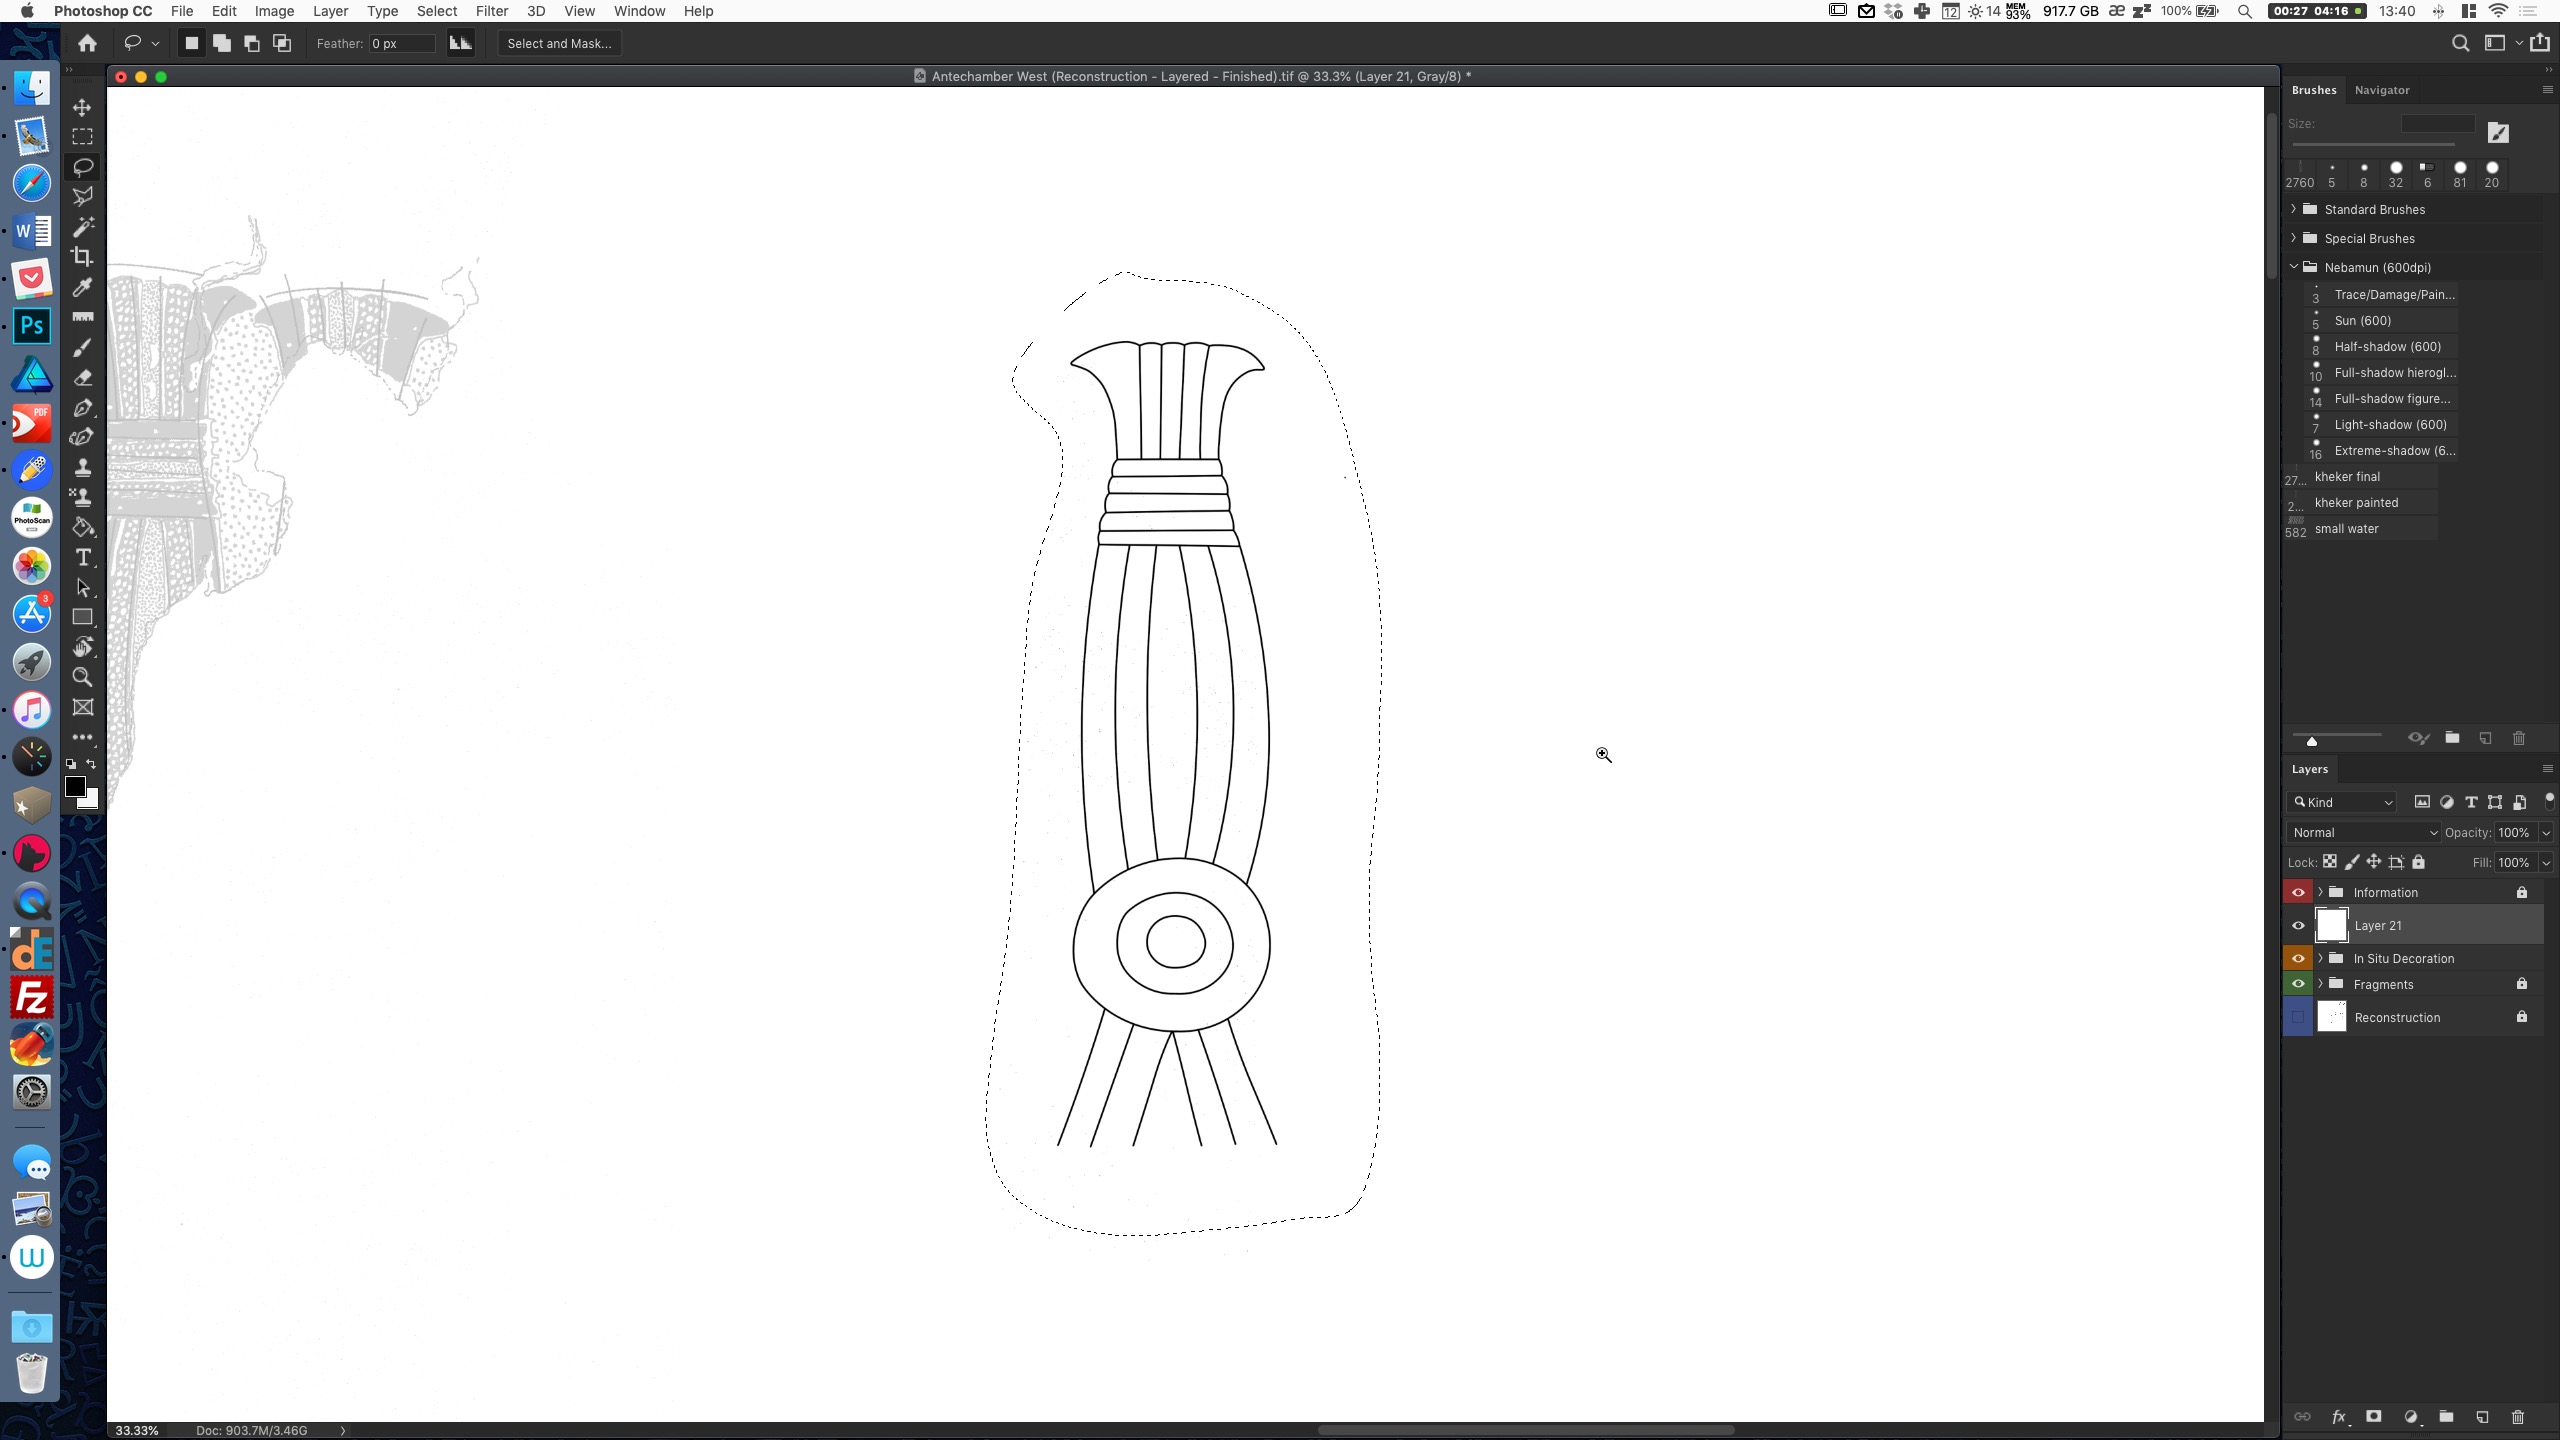
Once the kheker is drawn, I need to select and move it to an area where there are no background elements behind it, only white canvas. When creating a brush, Photoshop considers all the pixels in the selected area, therefore if your desired selection contains further elements they become part of your new brush. For the same reason, we must make sure that the brush stroke applied on the template is 100% black and the layer it is on is at 100% opacity, otherwise our new brush might end up rendered in a shade of gray.
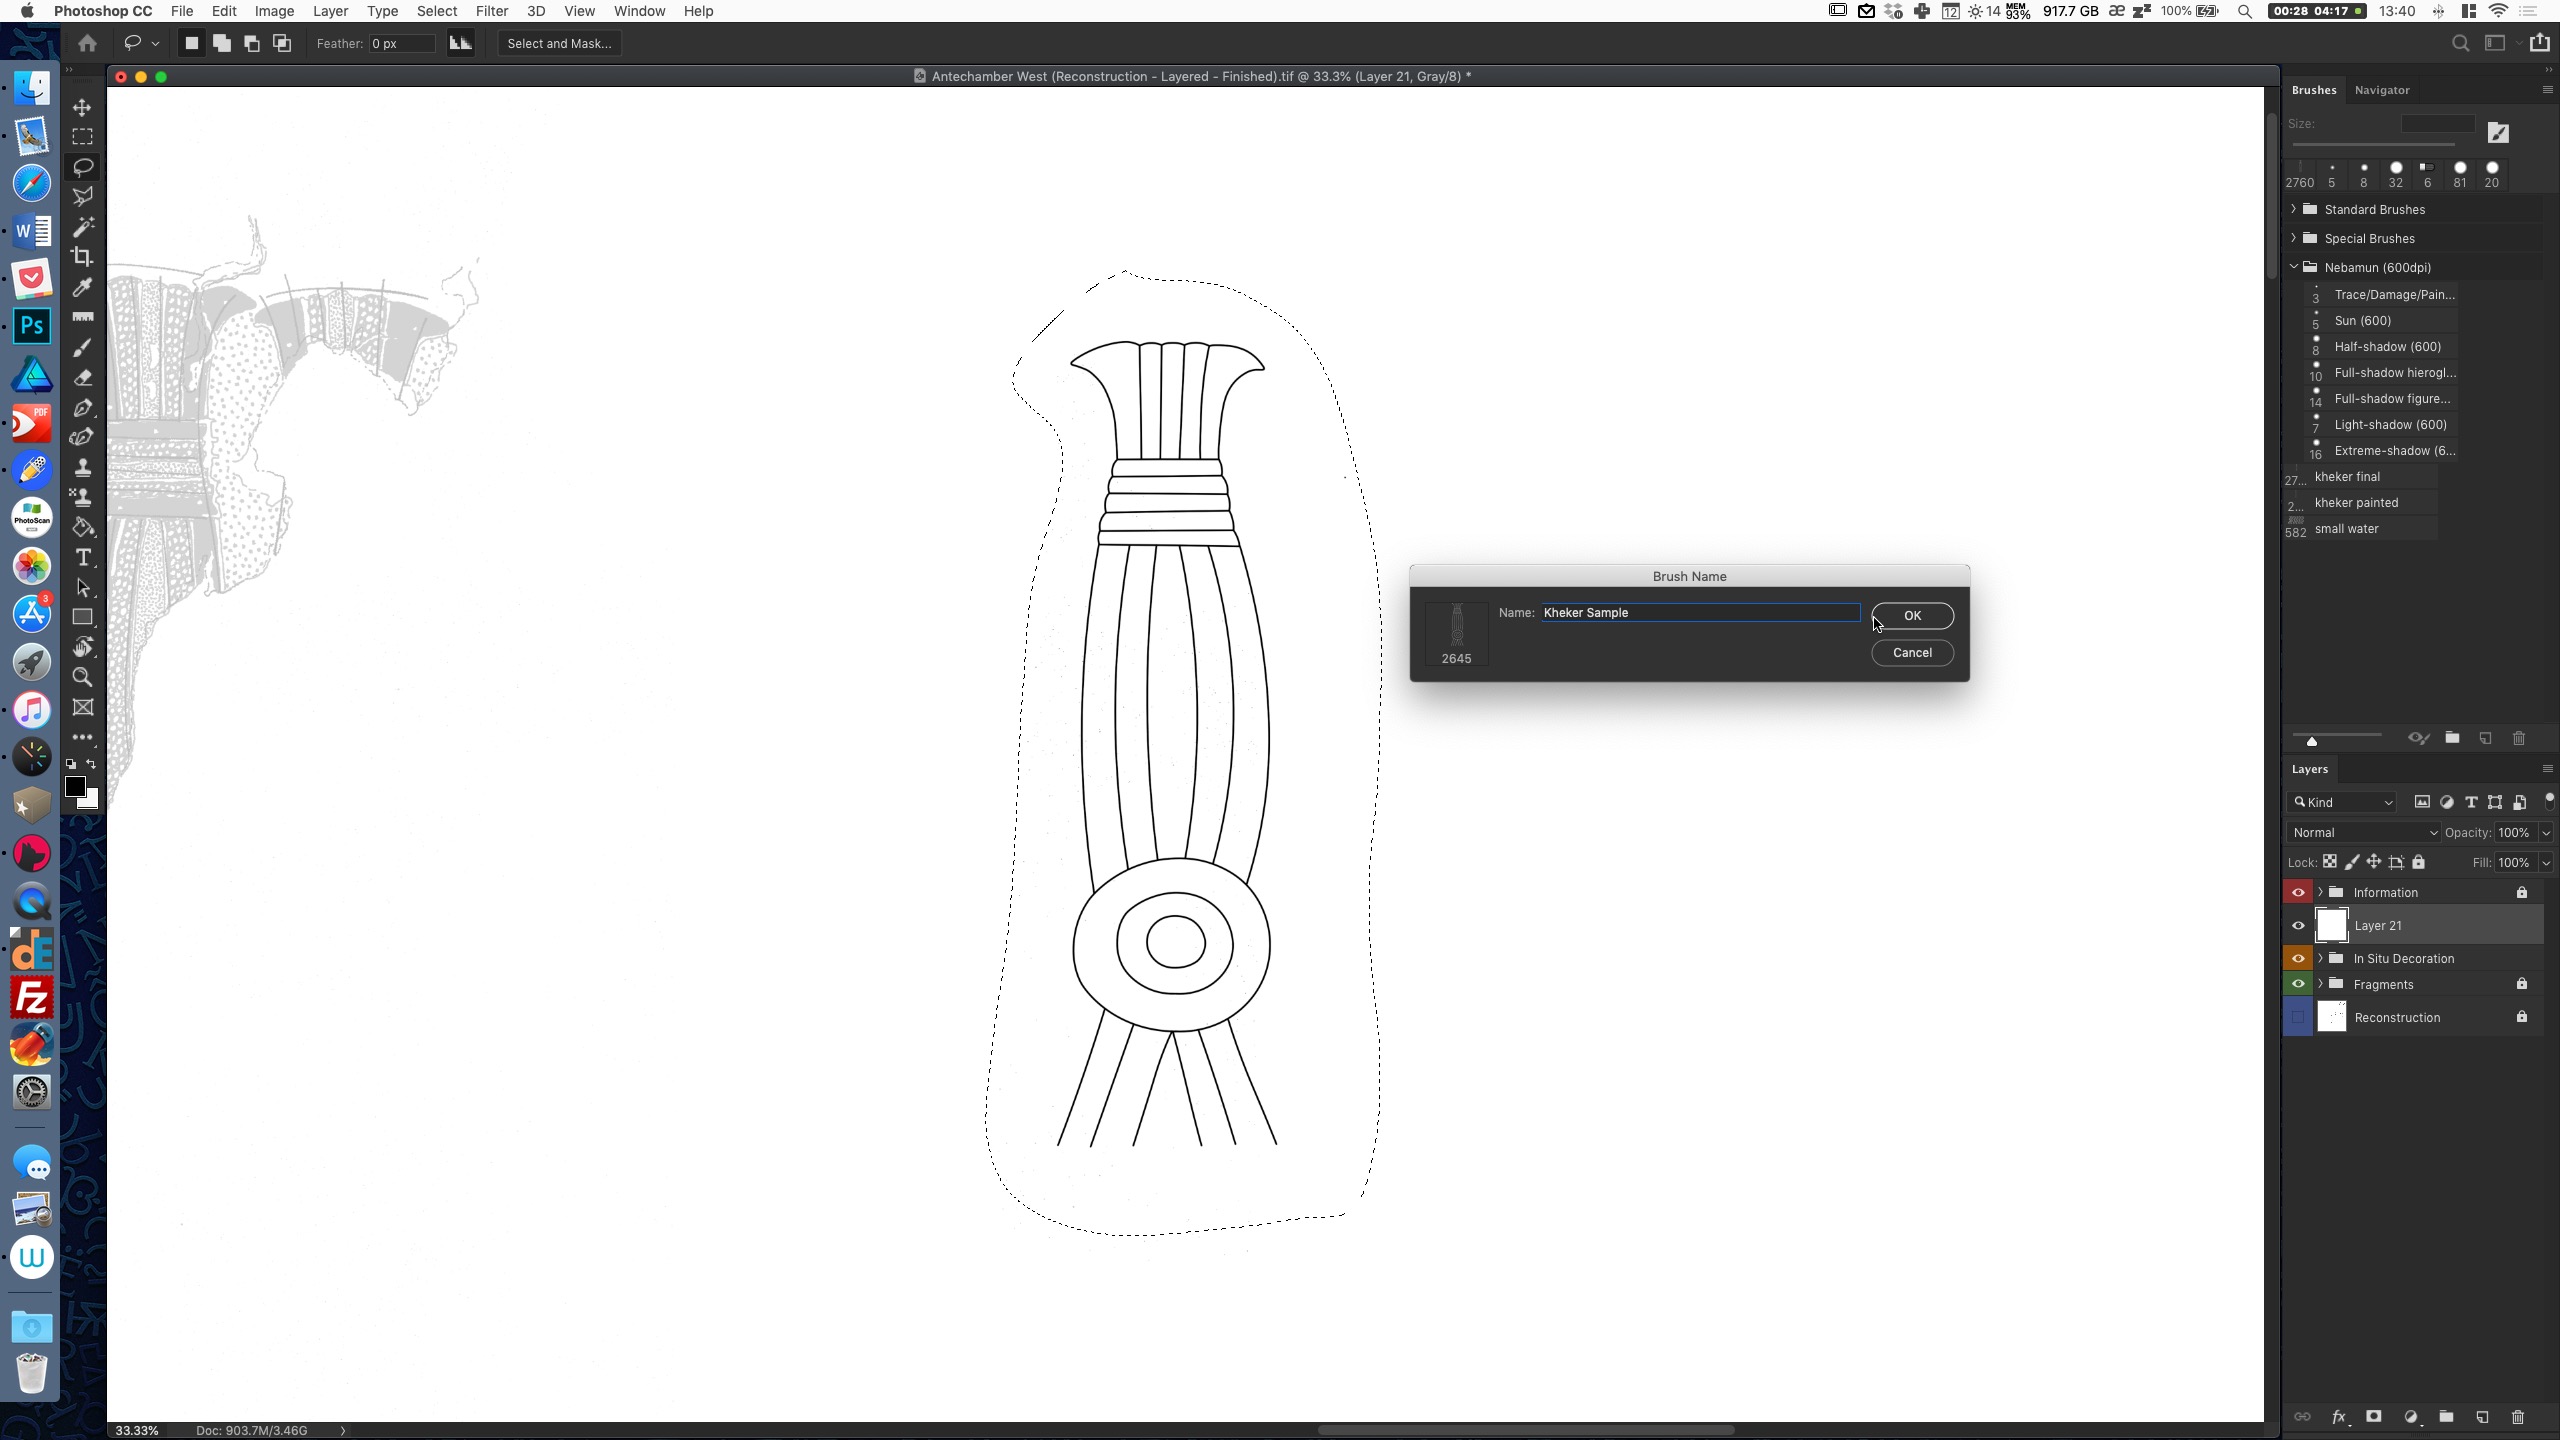
As soon as we are pleased with our kheker’s position, the kheker-brush is ready to be created. One can do so by clicking on Edit/Define Brush Preset. There is nothing else to do here except giving a name for our new brush. Once we hit OK it gets saved at the bottom of the list of our brushes. You need to take notice that you can’t create infinite size brushes in Photoshop, the brush shape needs to be defined within the 2500 by 2500 pixels size boundaries, otherwise you won’t be able to save it.
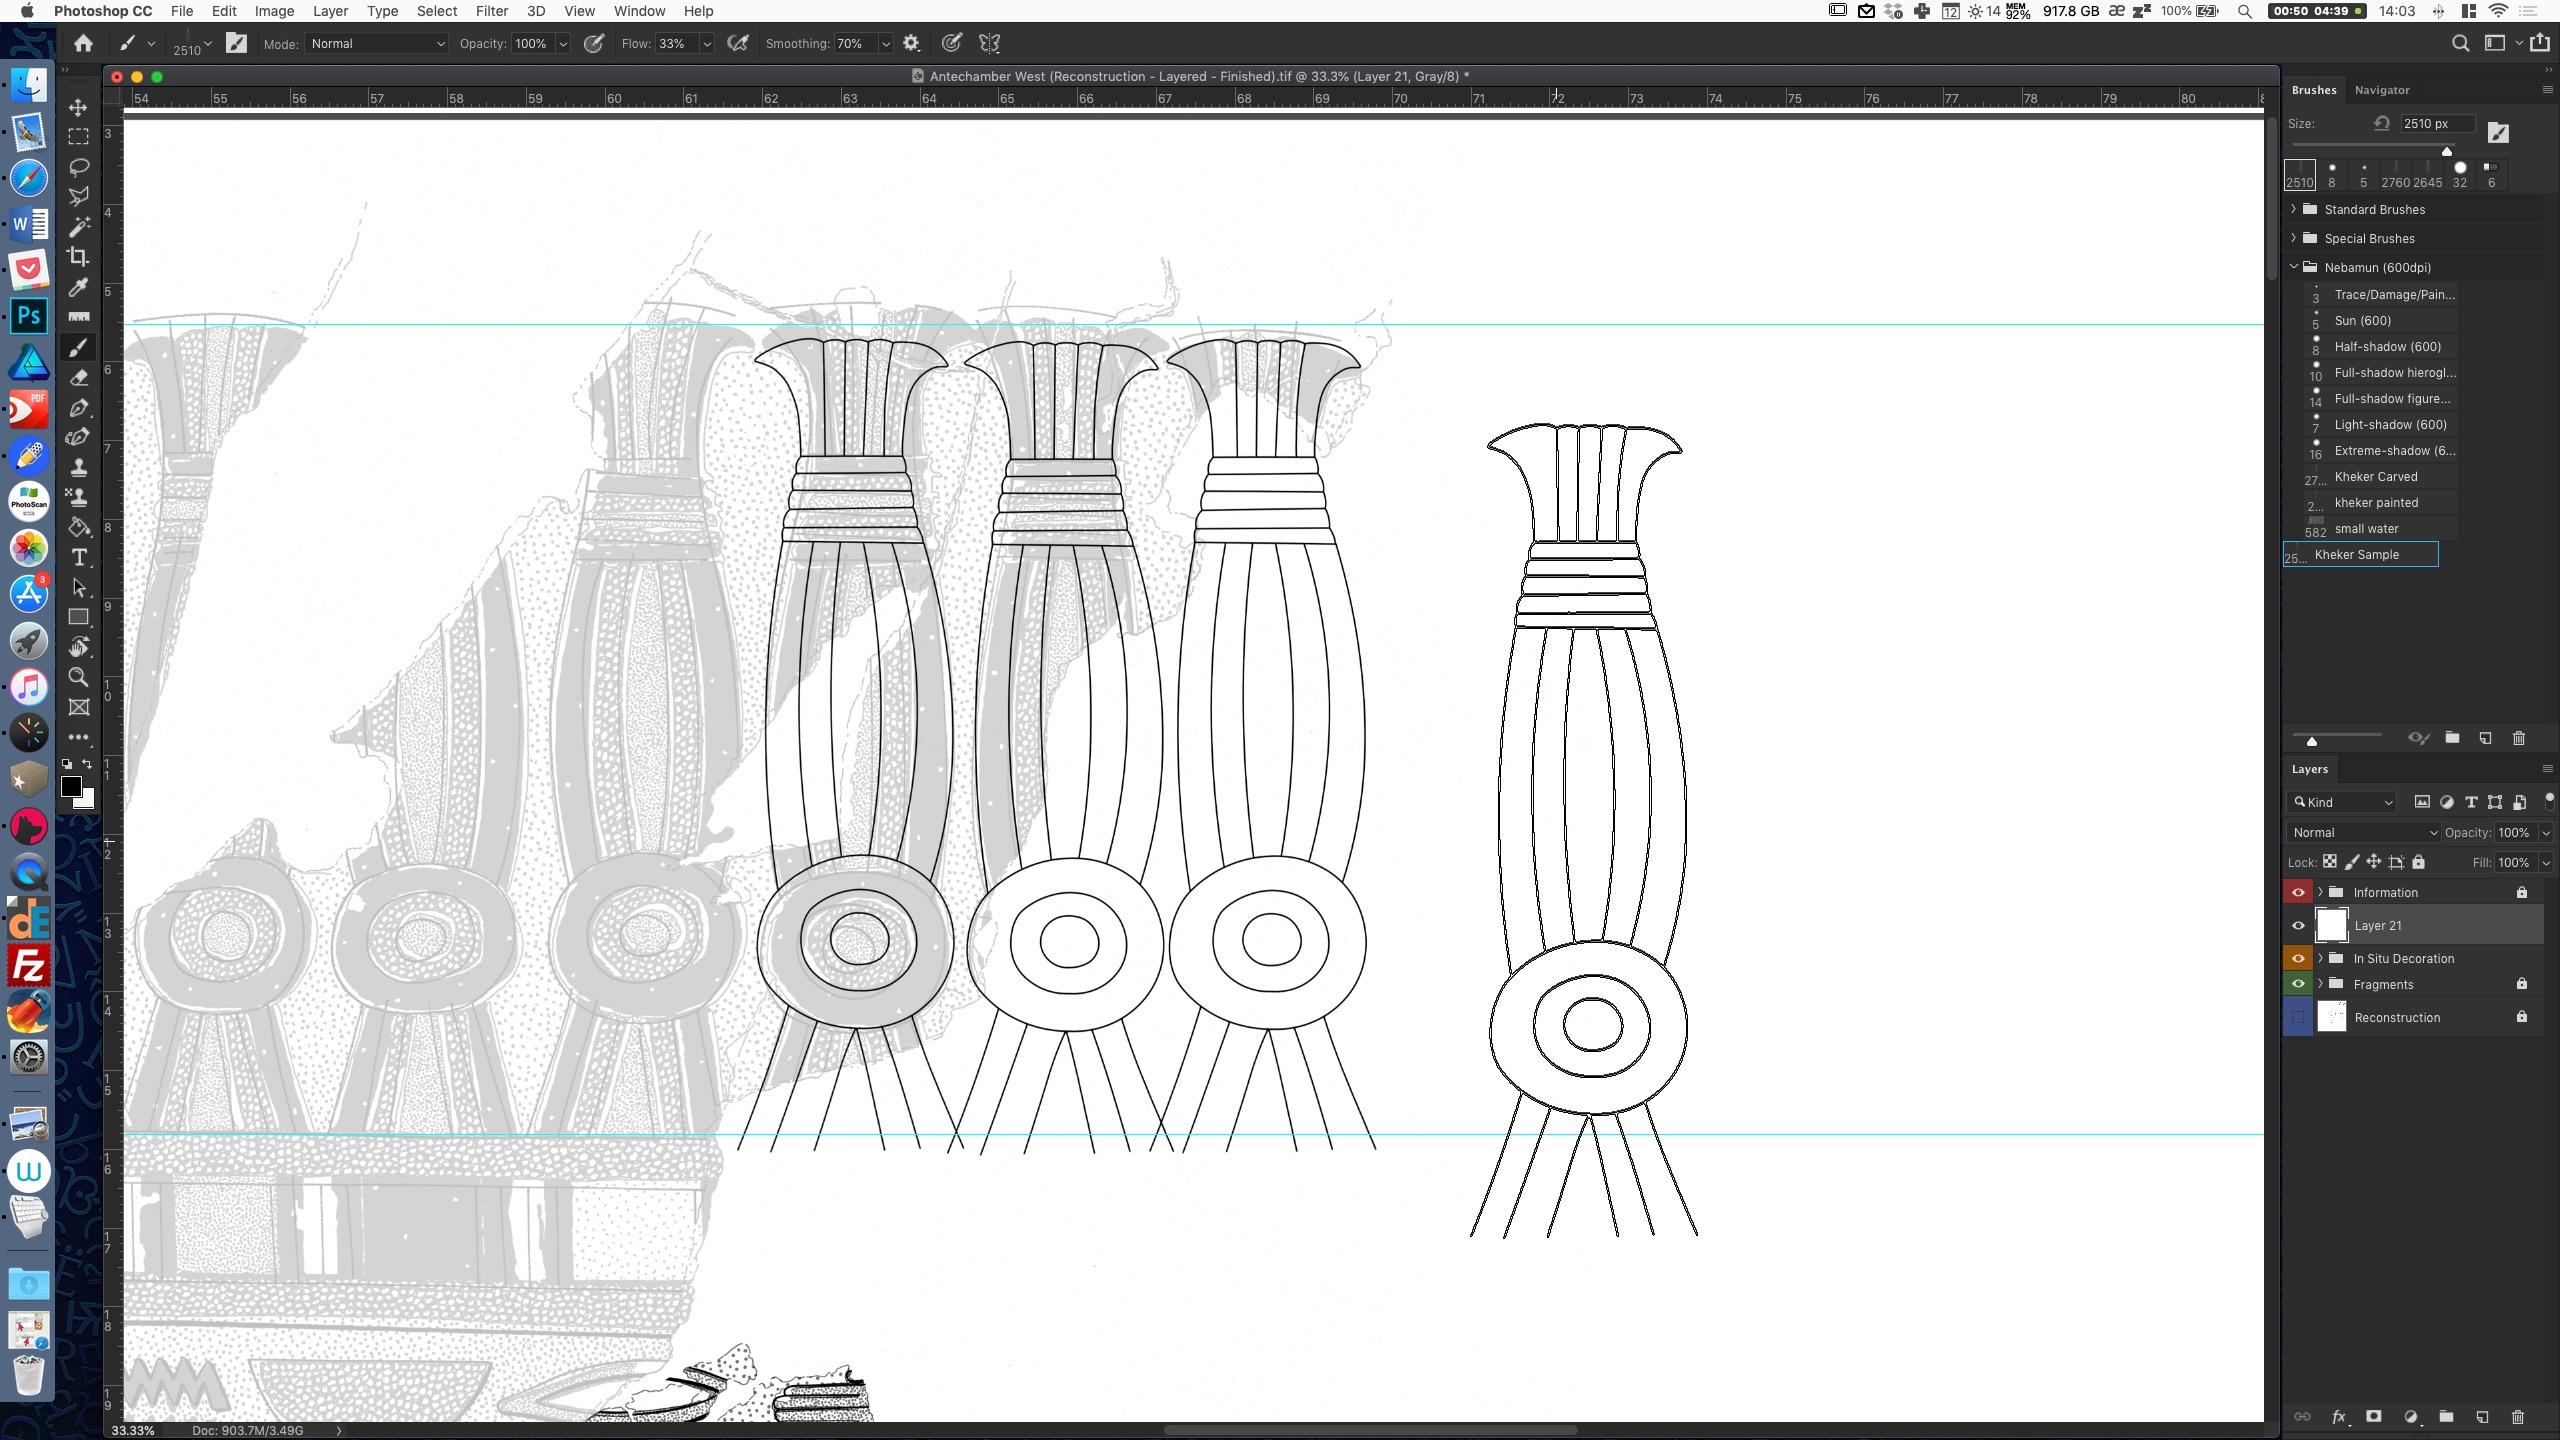
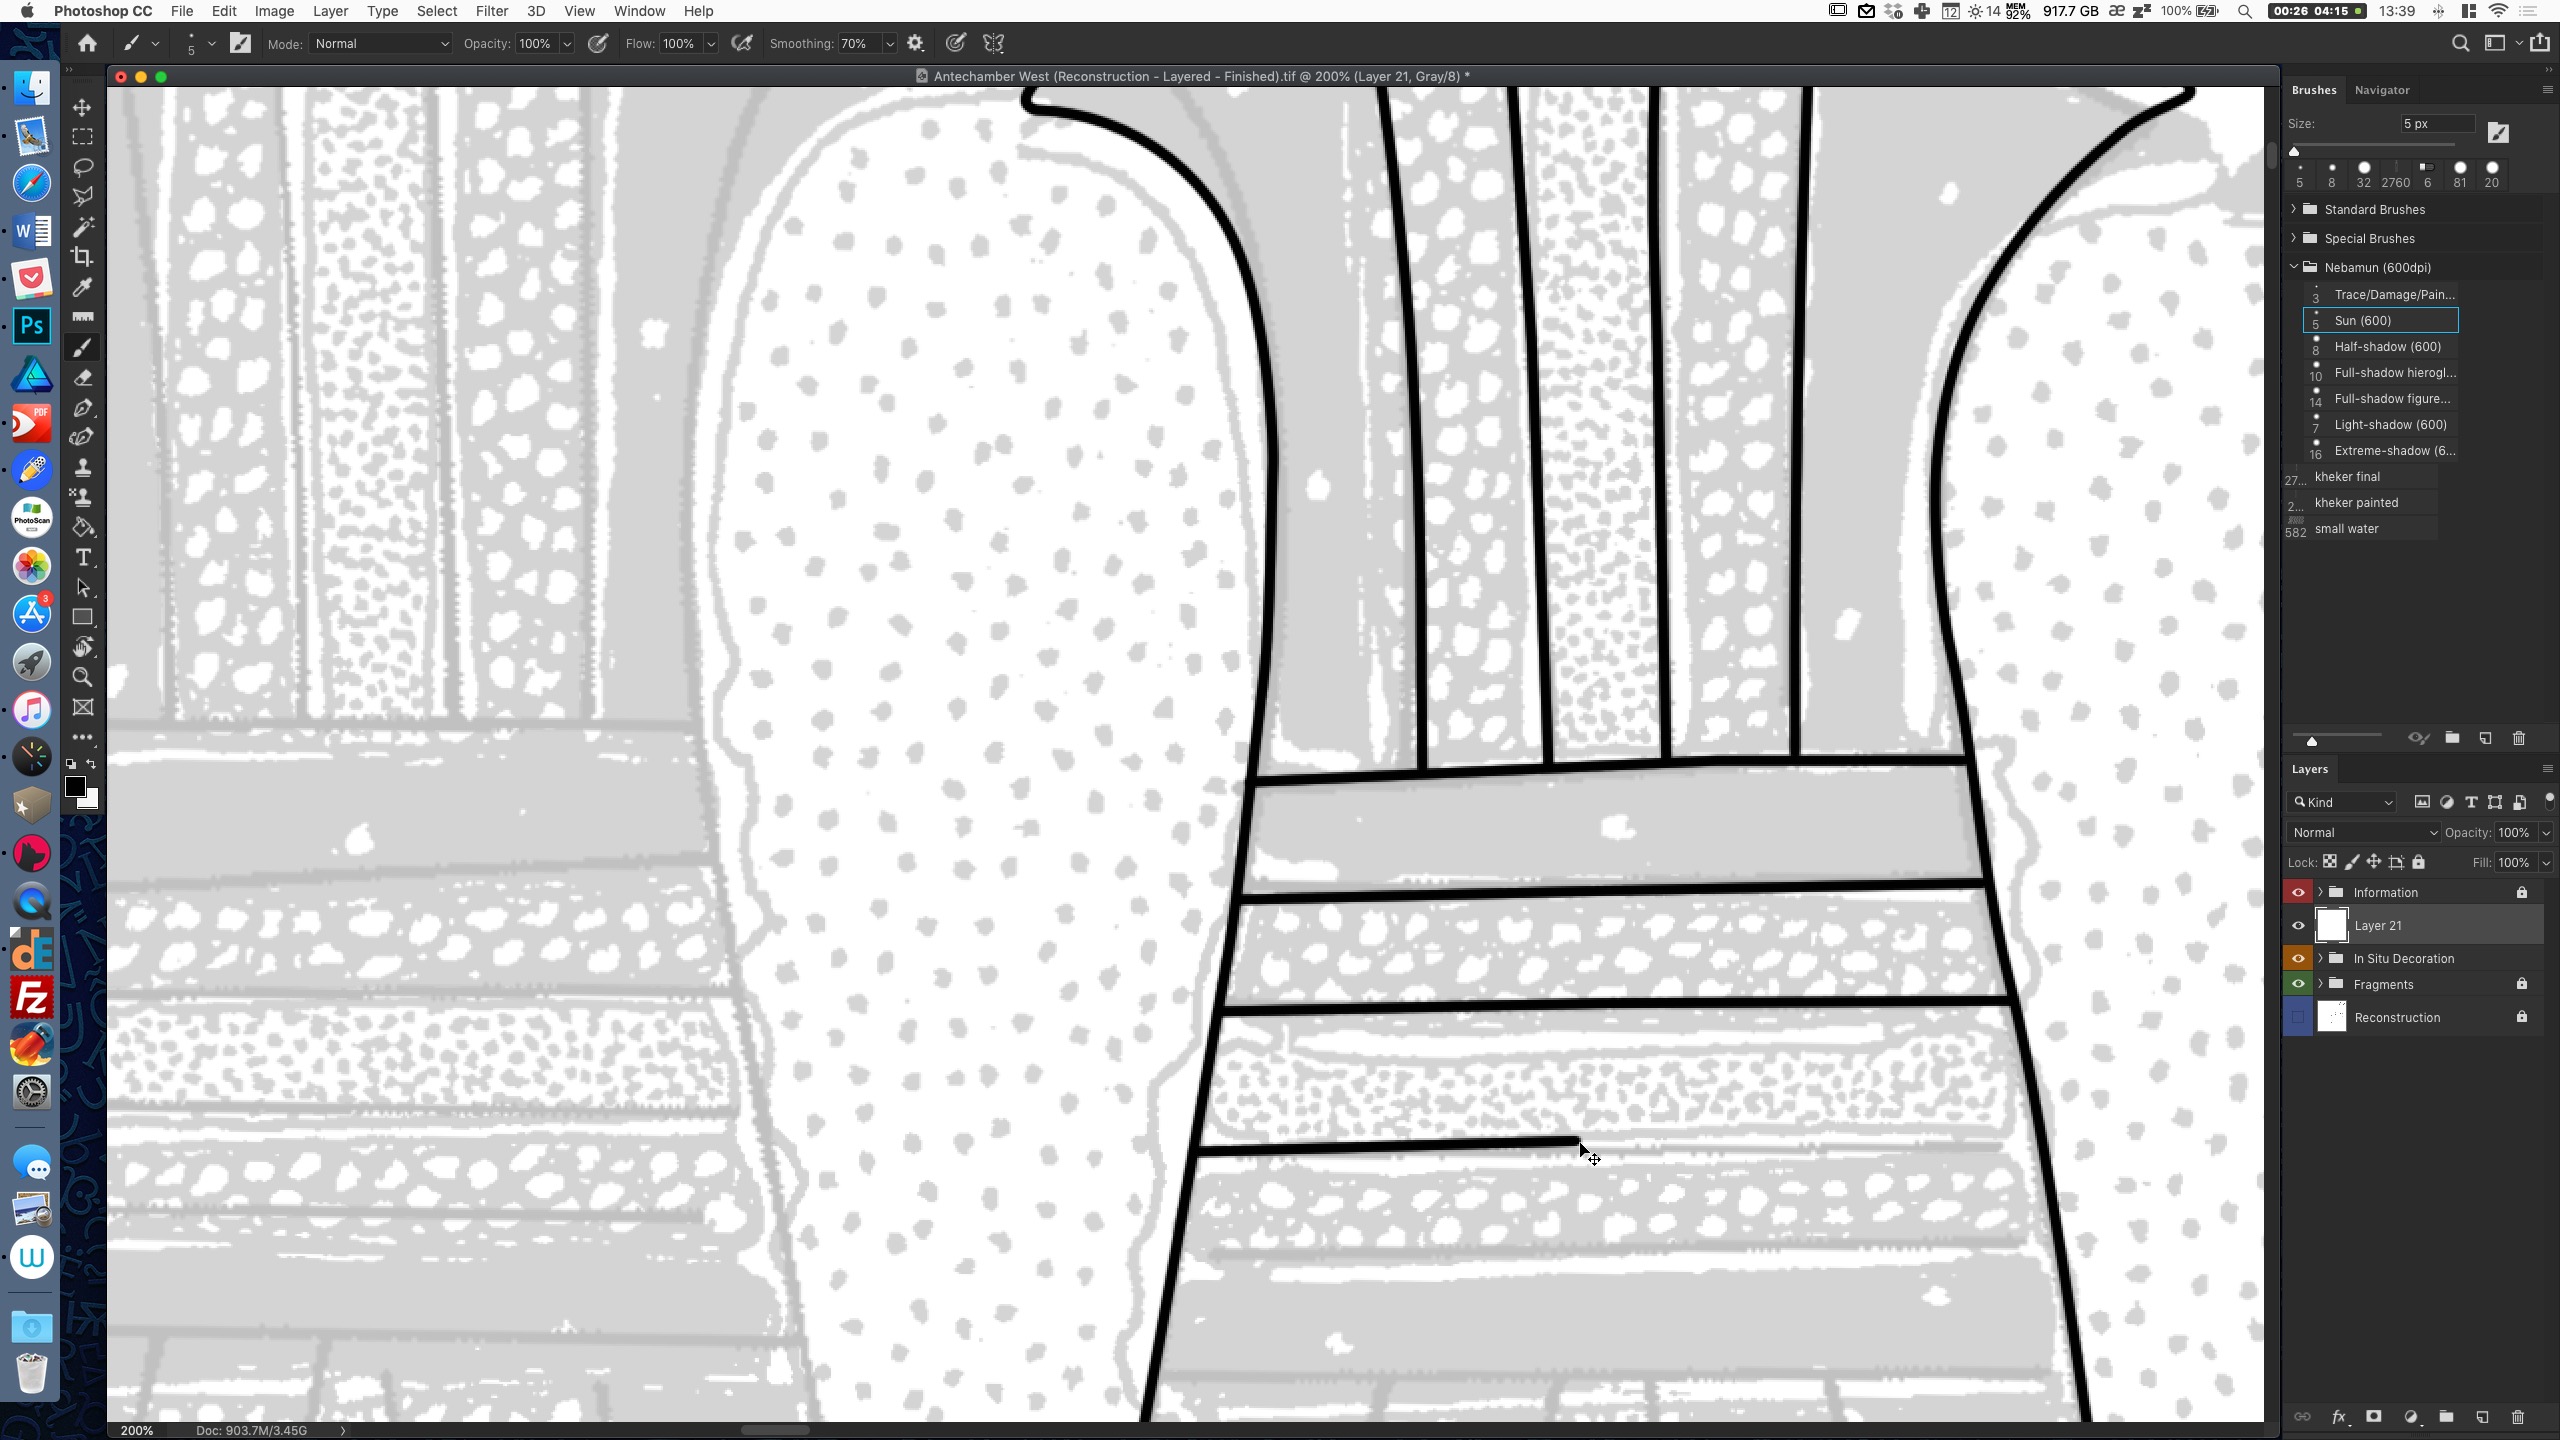
Now that we have a beautiful kheker-brush, we can start drawing with it. First, you need to define the area you’d be using your brush, which can be easily set by pulling in some horizontal guidelines. Once we have our guide, we can start adding the kheker frieze over the first broken kheker at the edge of the decorated surface.

There is a certain element of eyeballing needed to place the khekers accurately in relative distance from each other, which requires some practice. If you feel unsure about their positioning, you can use a more elaborate guide system. However, you don’t have to be “pixel-perfect” about their placement; a certain level of variety will help blending in with the original and will create a less artificial-looking reconstruction.
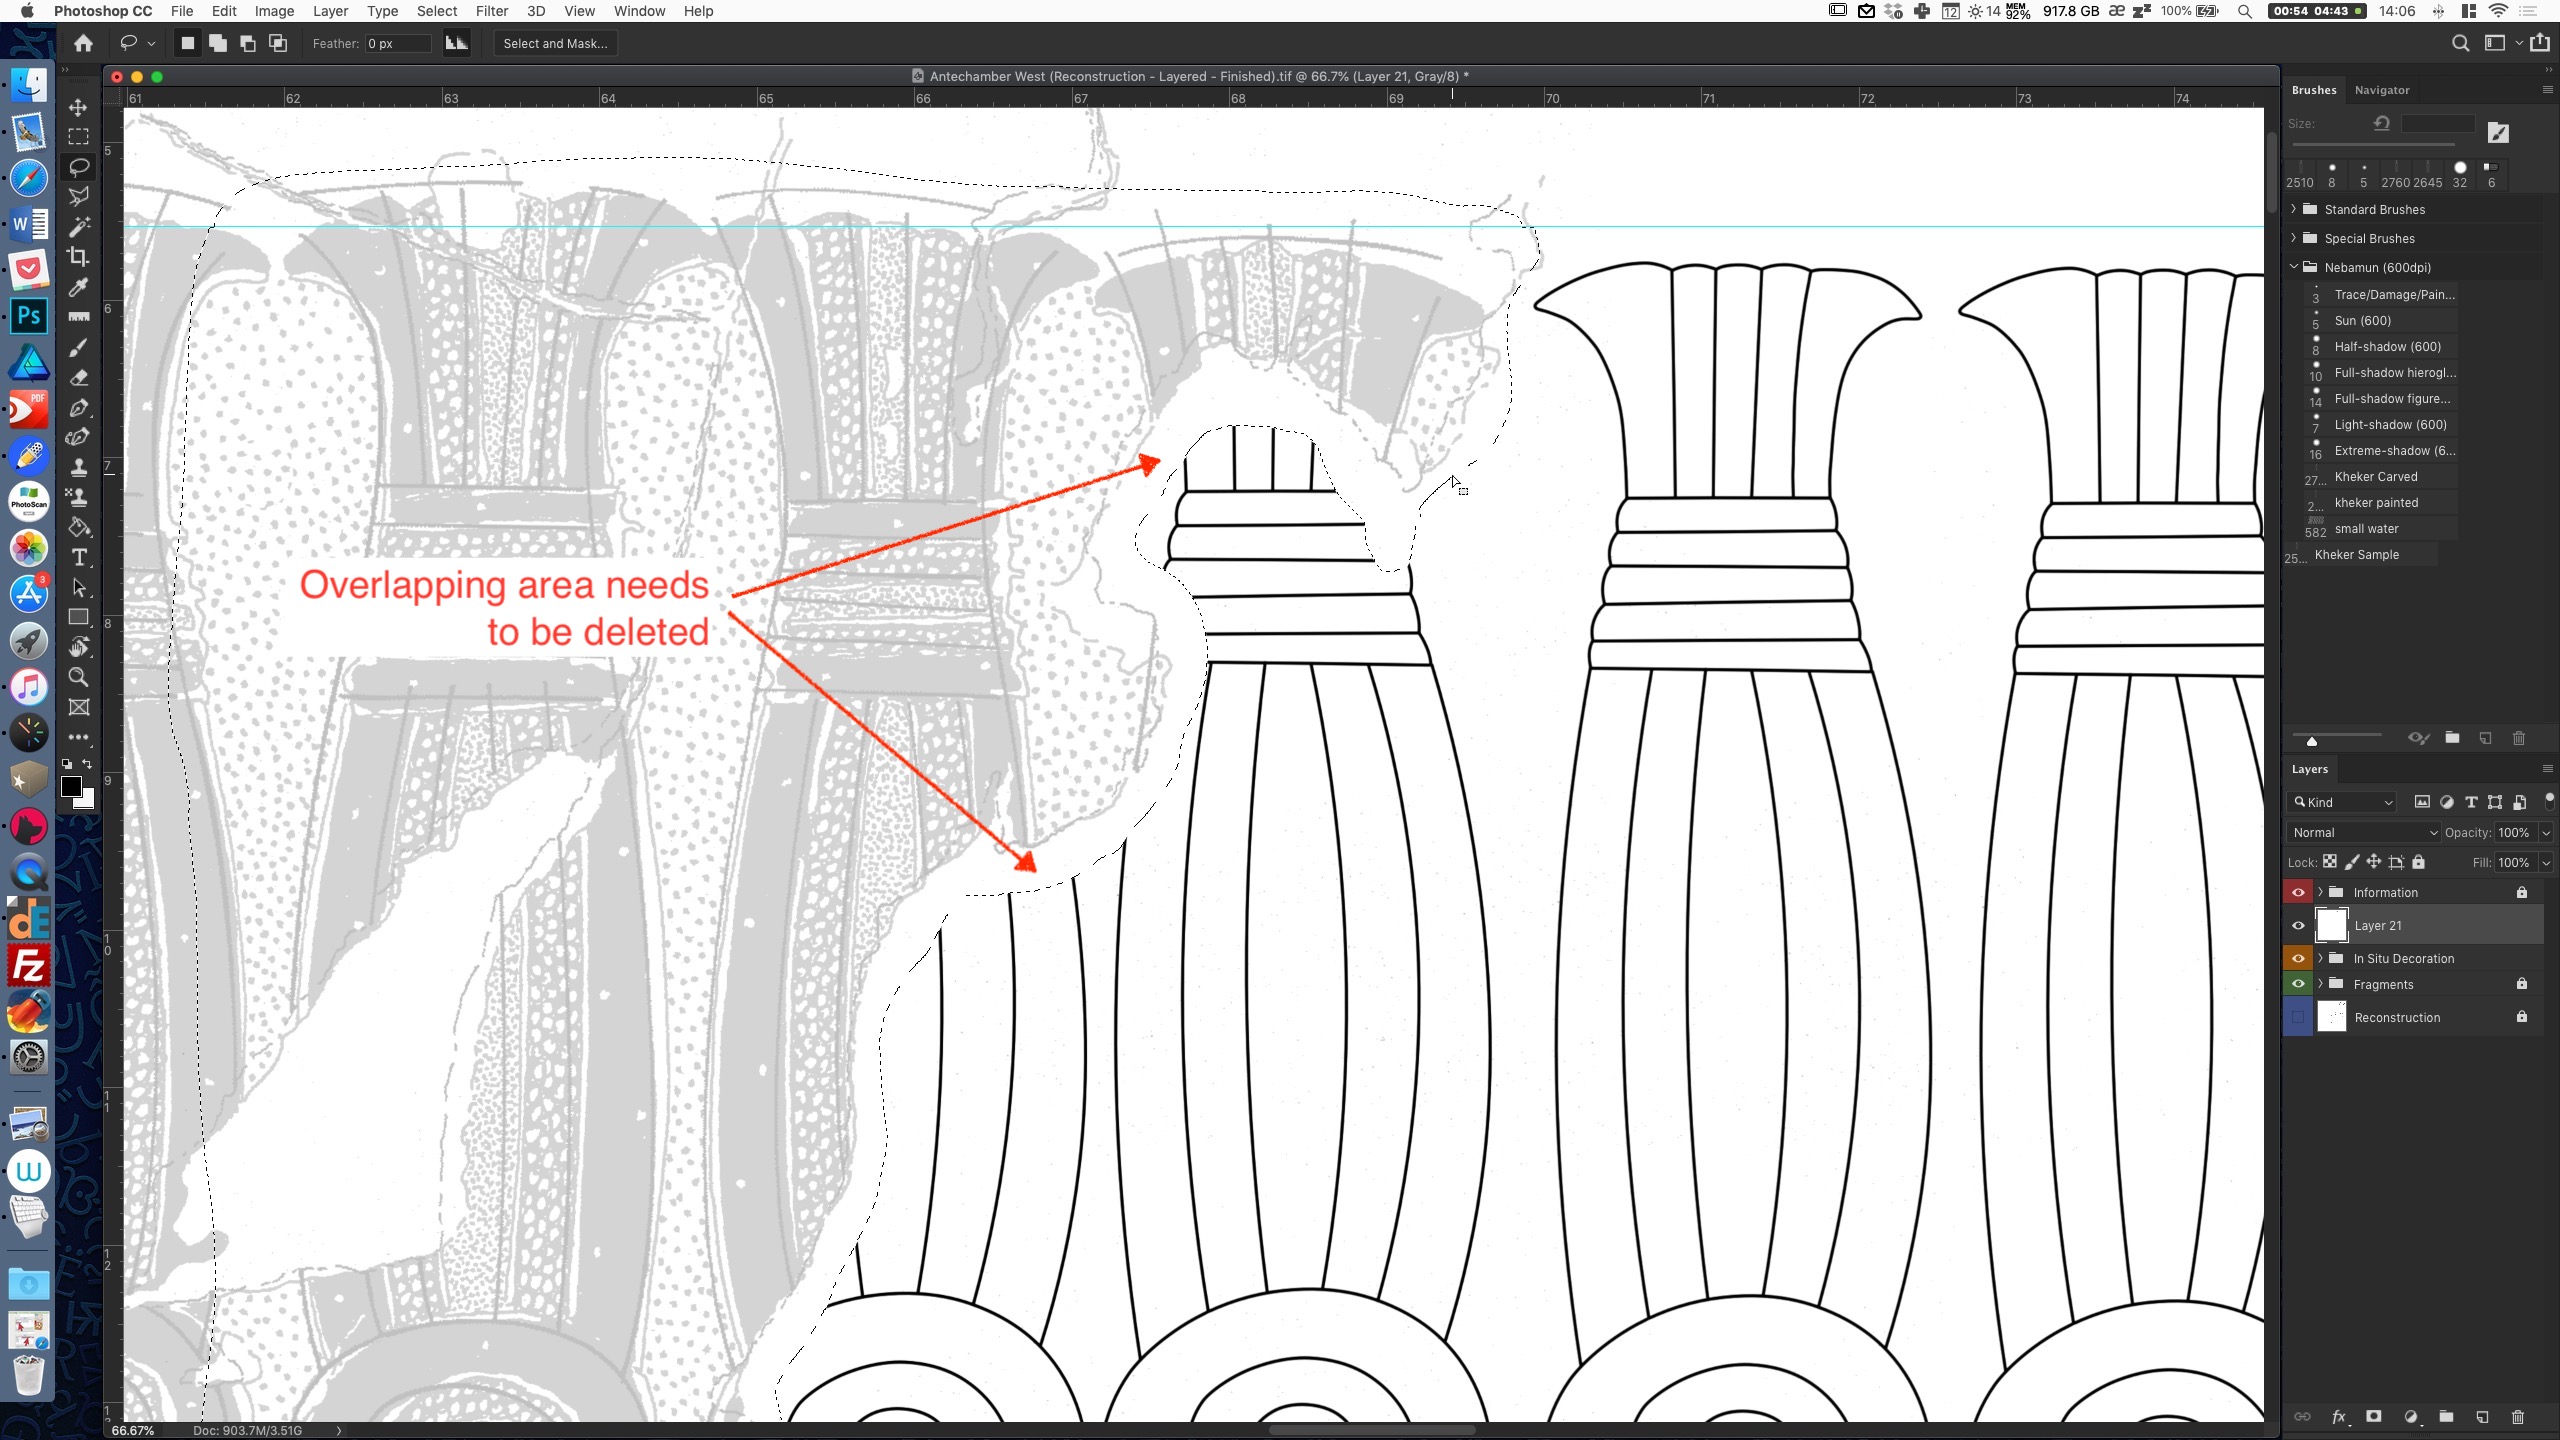
Naturally, the part that overlaps with the original needs to be deleted. I personally like to leave a little gap between the original and my reconstruction drawing, it helps a great deal in distinguishing between the many elements of the documentation.
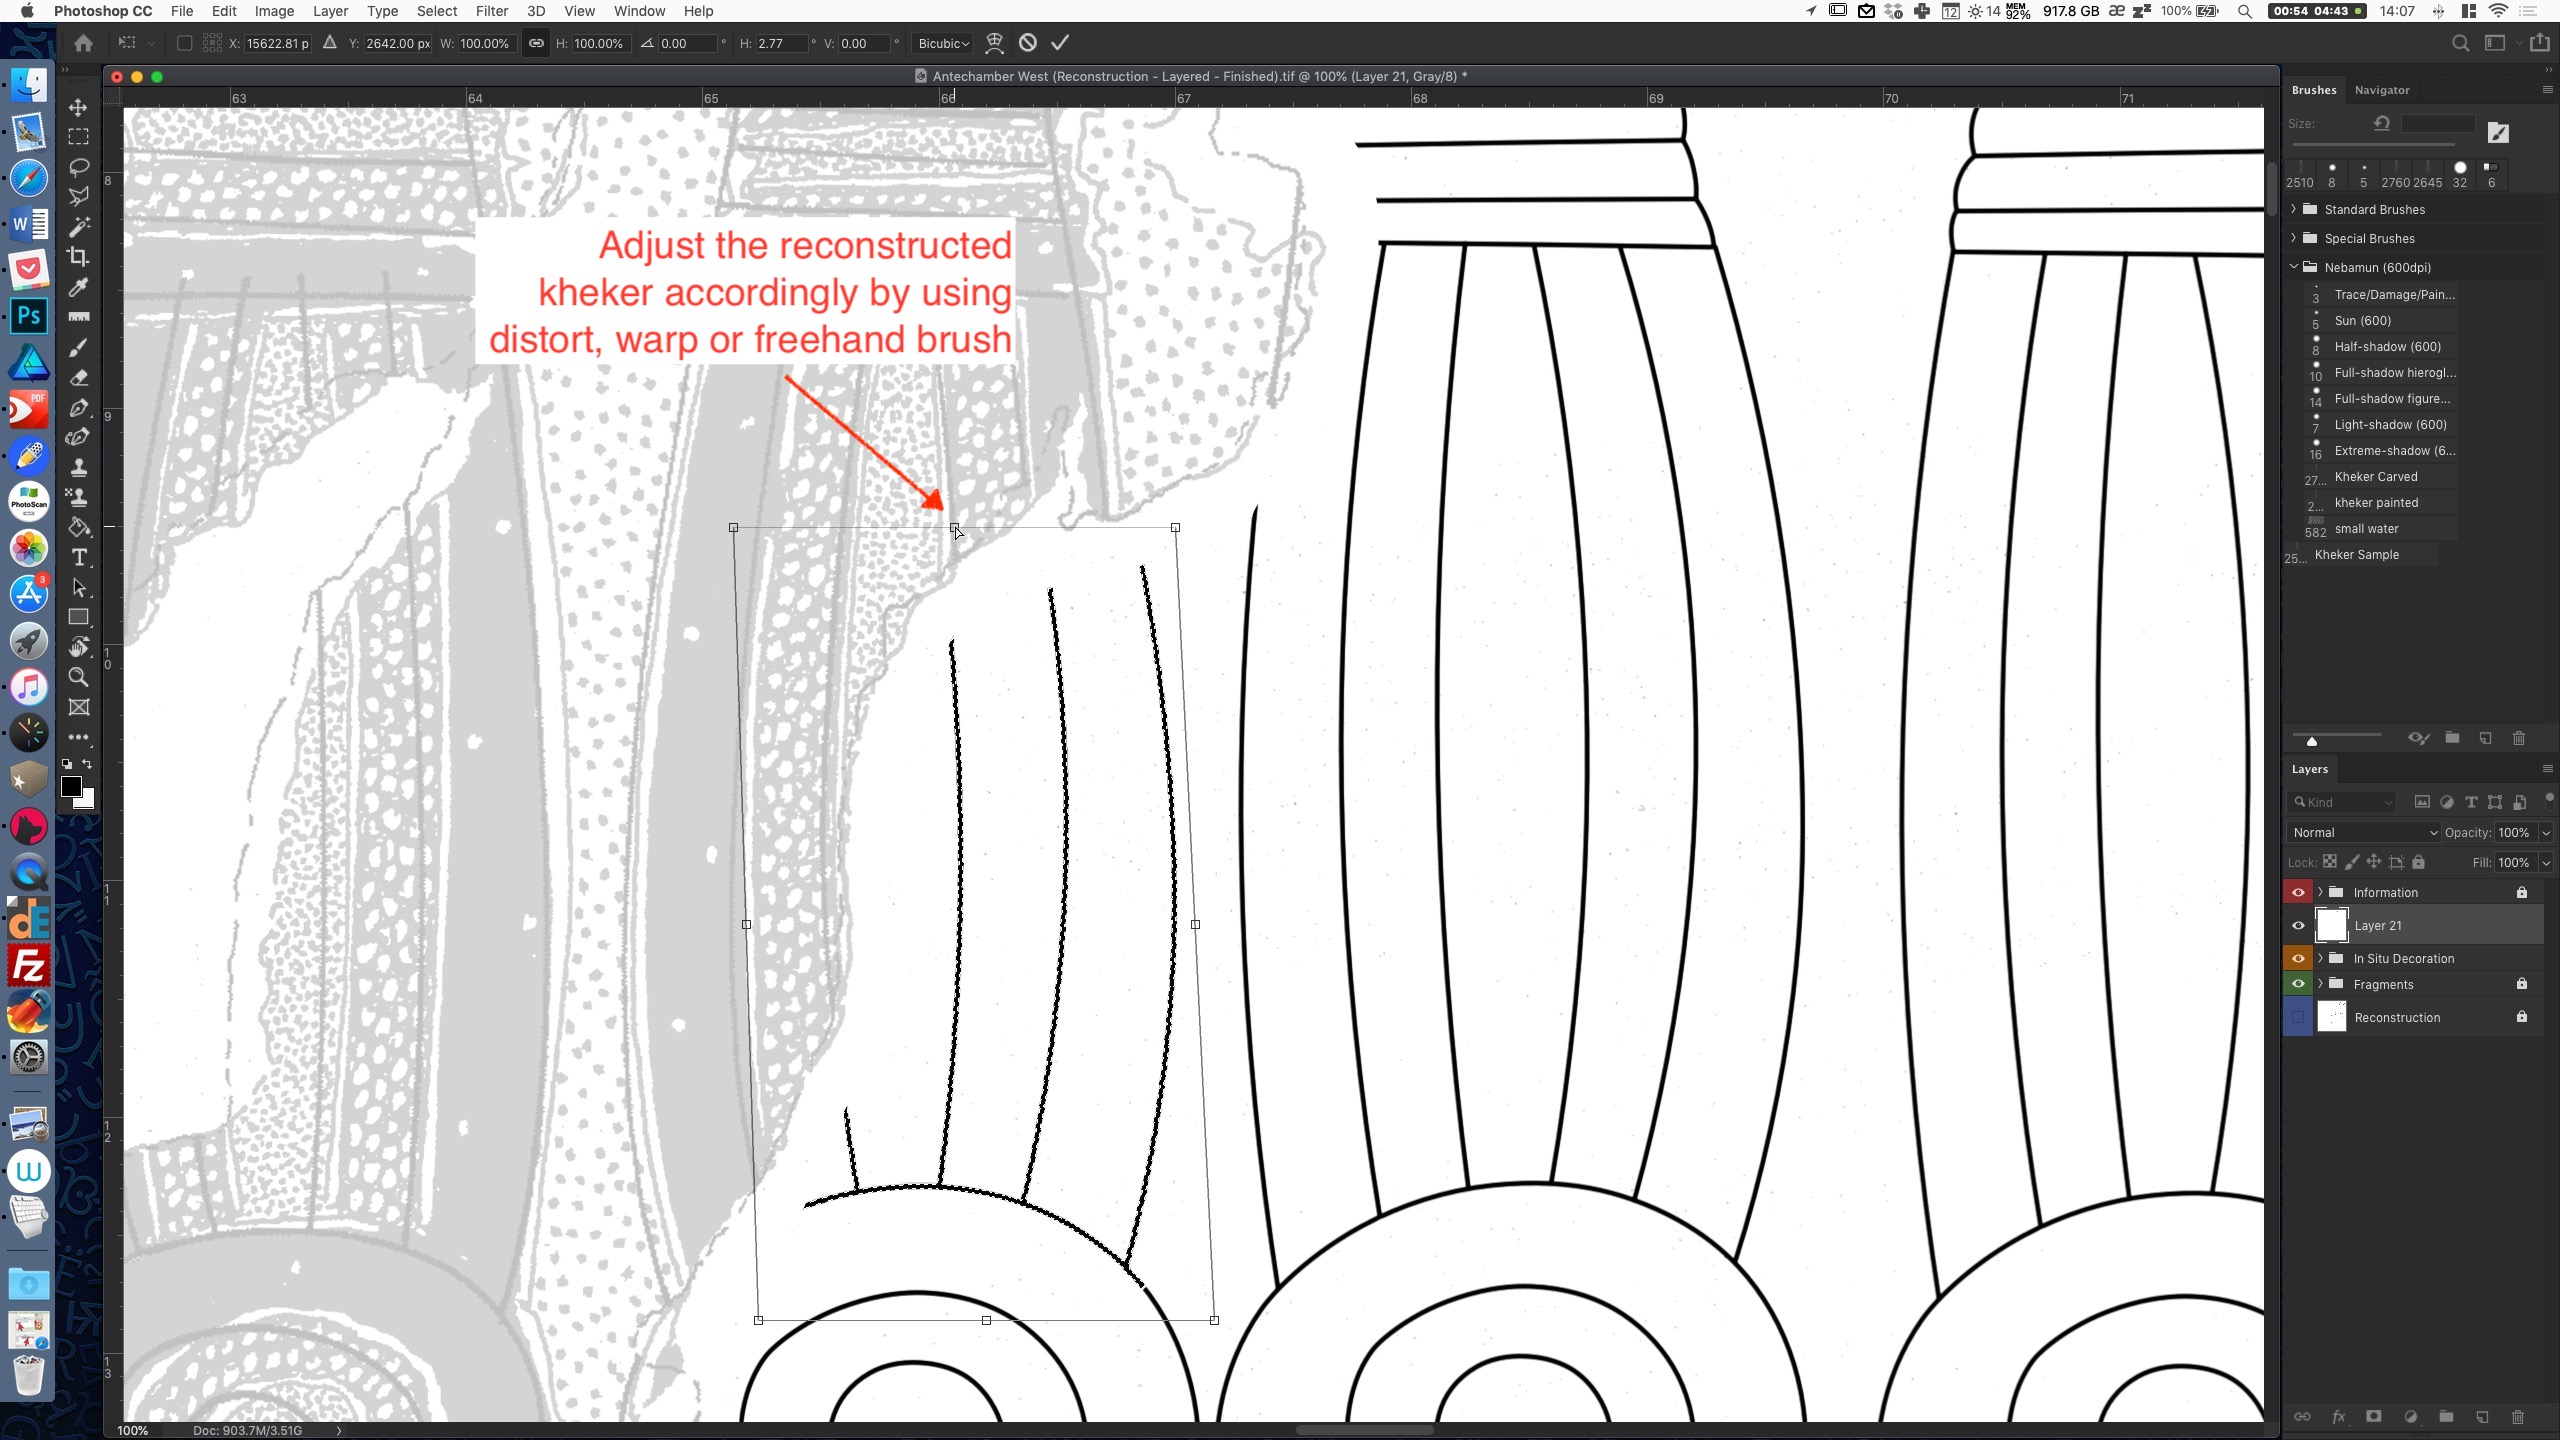
At the end, you’d want to align the reconstruction with the existing parts, therefore certain adjustments need to be executed before we are done. You can use a whole arsenal of solutions here, from slightly distorting a section through warping the entire feature to simply redrawing the elements that need to be aligned.
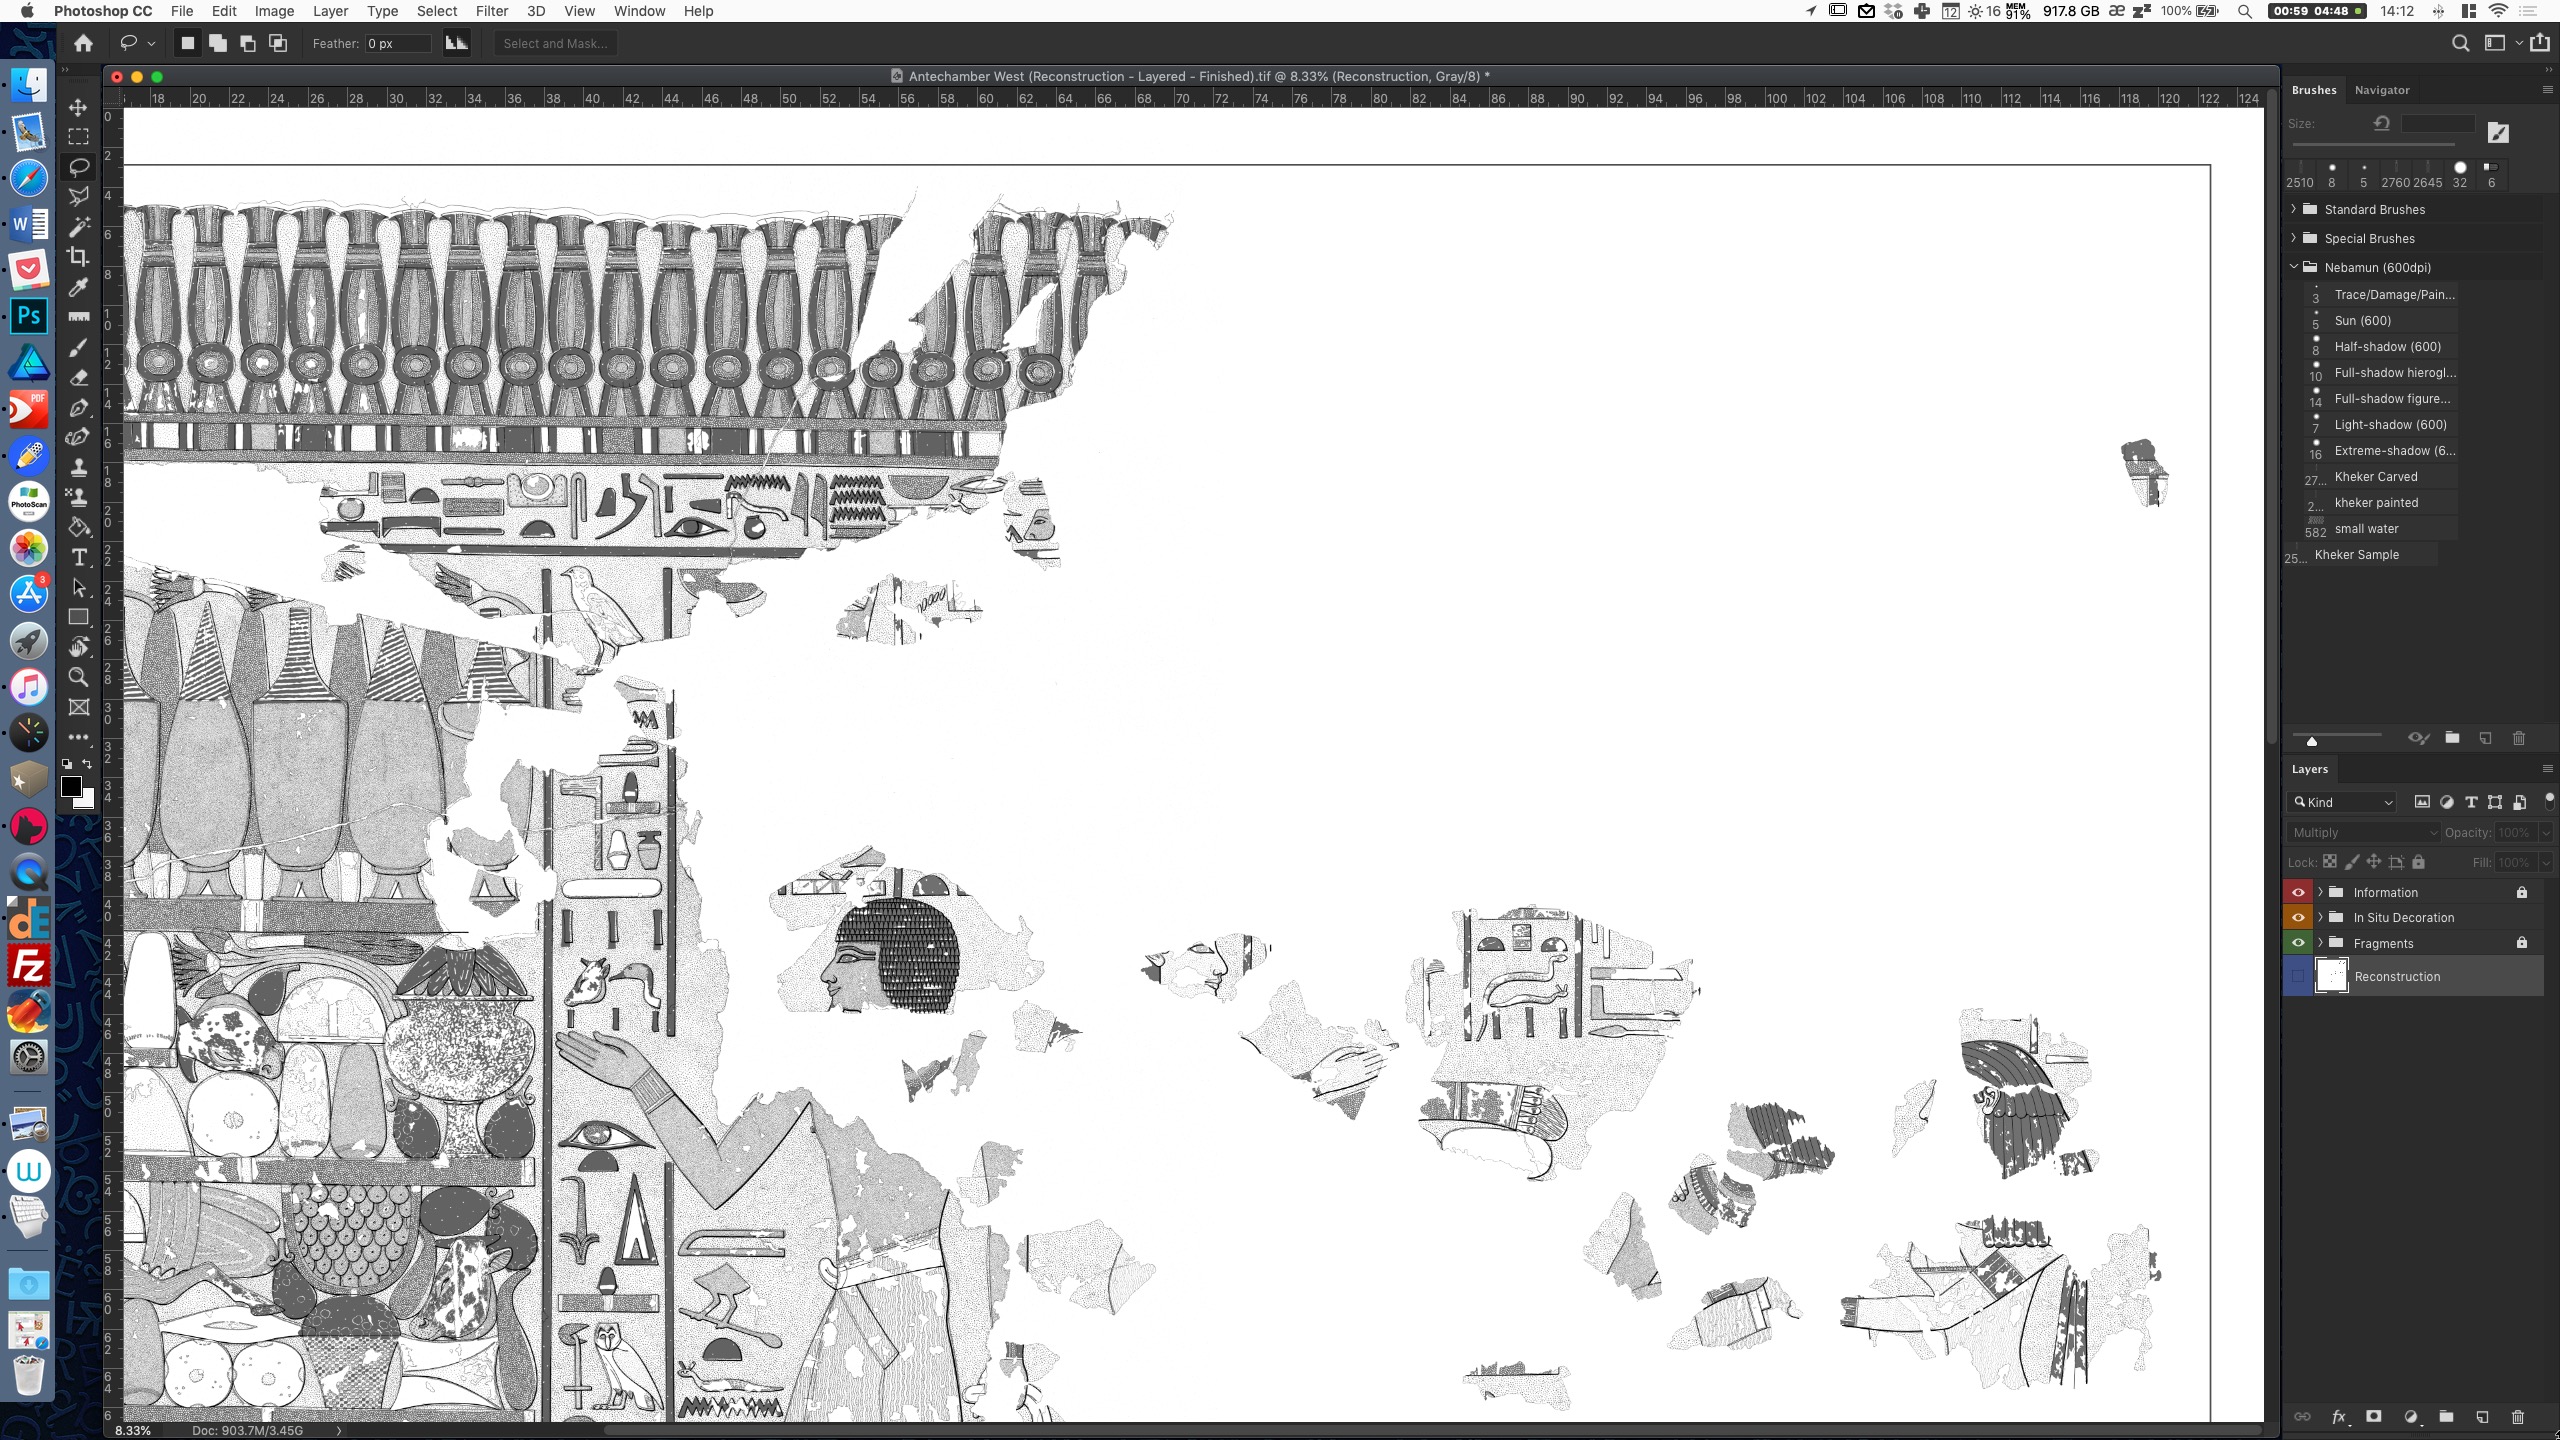
Once you’re finished, you need to zoom out and check your drawing for consistency, making sure that your kheker frieze fits in the space available and connects with the rest of the decorative elements on the wall. As a final step, the reconstruction layer can be toned down a little bit by lowering layer opacity.
1 comment(s)
Bjorn Hofman
Nov 21, 2018Hi, This looks very cool but I use Illustrator, which is capable of doing the same repetitive task and is easier to draw with? Thanks for putting out so much information!

Dec 12, 2018Hi Bjorn, thank you very much for your comment! We are happy to hear that you find some useful information for your work on our site. Regarding your remark about using Adobe Illustrator, I'd like to draw your attention towards the quality and detail we are aiming for, which are not achievable via vector-based solutions. Please, read our first case study presented in our Projects section and check out the final results at the end of the article. You'll find plenty of additional examples of single-weight reconstruction drawings created with the same technique. If you have any further questions or suggestions, please, contact us via email.
Leave a comment(We'll keep your email address private)