
Puppet Warp
The Puppet Warp is a function that enables the artist to distort selected areas on a drawing via a mesh overlay and the placement of pins. Although we’ve already applied certain transformations on selected areas (File/Transform/Scale, Rotate, or Distort), these are not comparable with Puppet Warp when it comes to flexibility. Before starting any interaction with the selected areas the artist - as always - needs to familiarize himself/herself with the tool’s settings on its Options Bar:
Mode - determines the elasticity of the mesh, Distort being ultra-stretchy and Rigid being the opposite (Rigid is suggested).
Density - specifies the spacing of the mesh, where small changes in moving the pins result in larger warps (fewer points is suggested).
Expansion - expands or contracts the outer edges of the mesh (changing it to at least 3 pixels suggested, so as to pick up the grayscale edges of the inked line)
Show Mesh - displays the pins without the mesh when unchecked. This helps the artist when executing fine line movements.
Puppet Warp
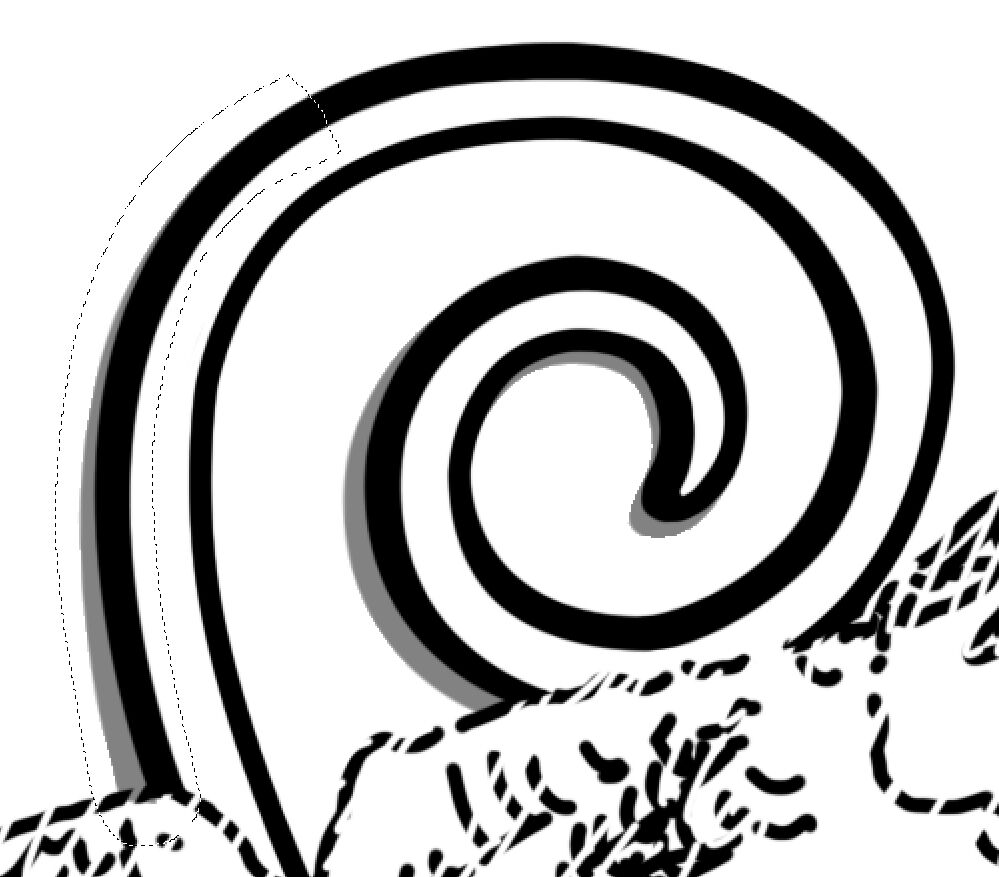
(1) Select the area that needs to be modified by using the Lasso Selection tool.
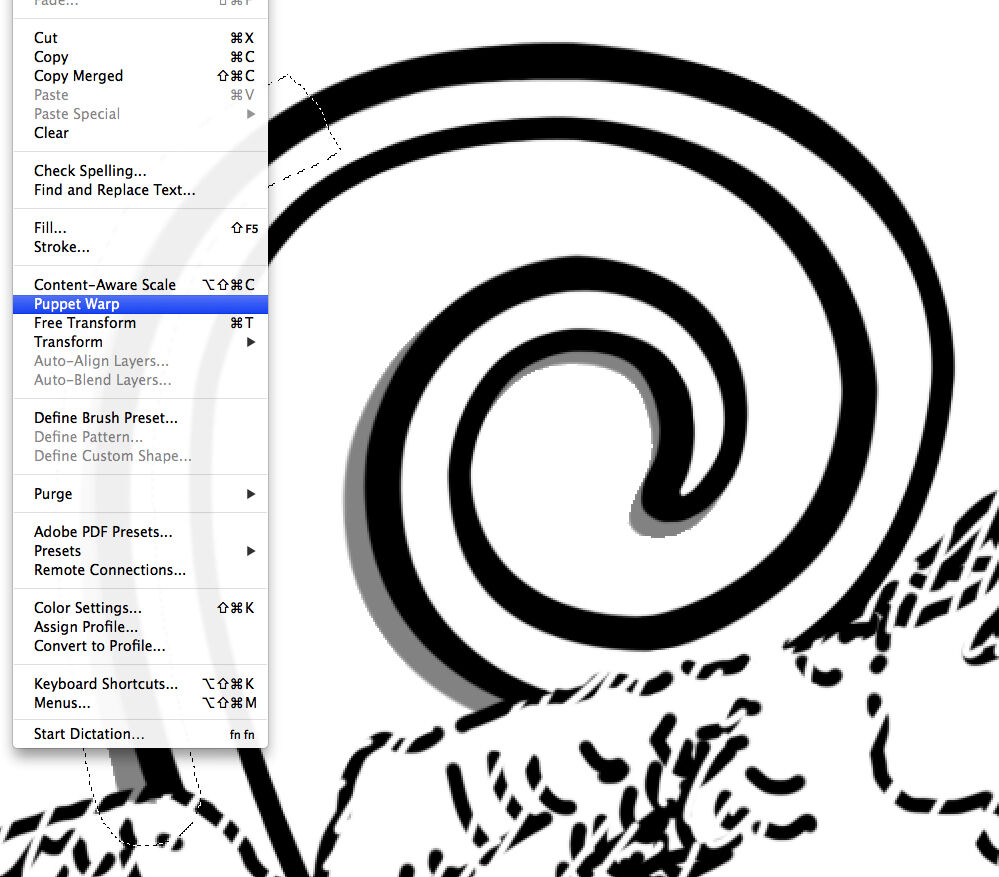
(2) Go to File and select the Puppet Warp tool. Make sure you’re on the right layer.

(3) Pin down (click) the sections you don’t want to move and start “pushing” your line to the right direction (click and drag).
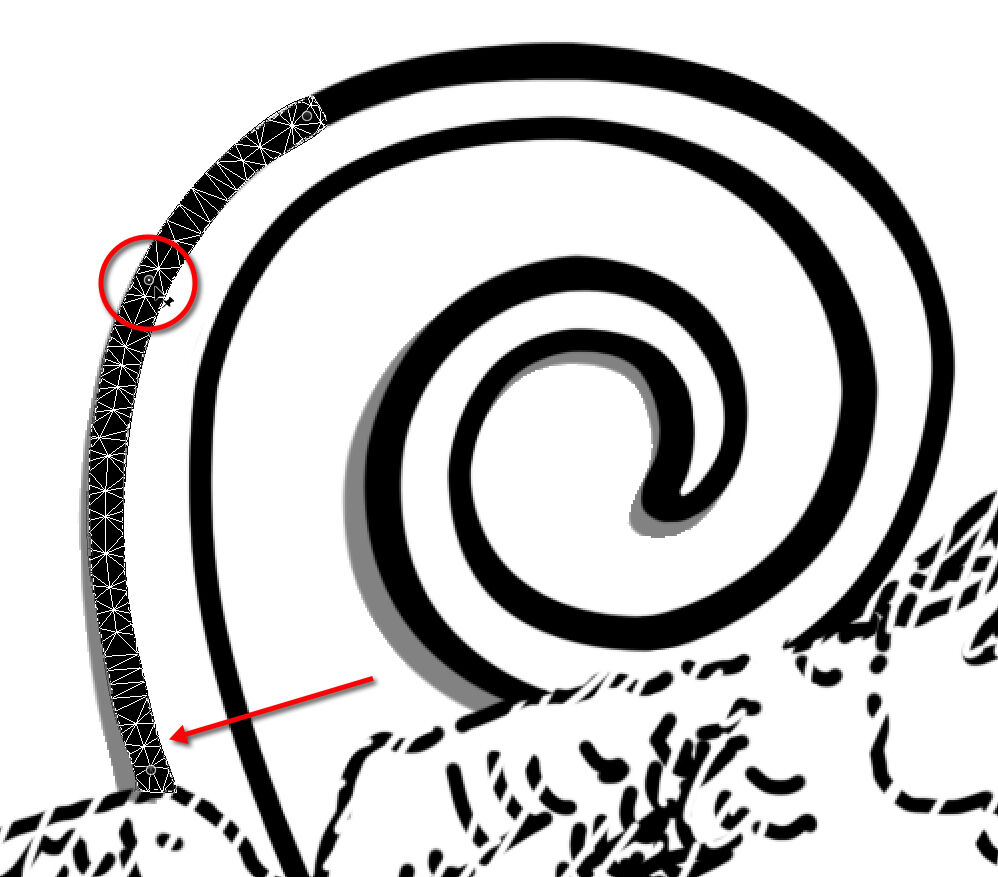
(4) Once more of your line is in place, use additional pins to prevent the sections from movement. Keep “pushing” the line.
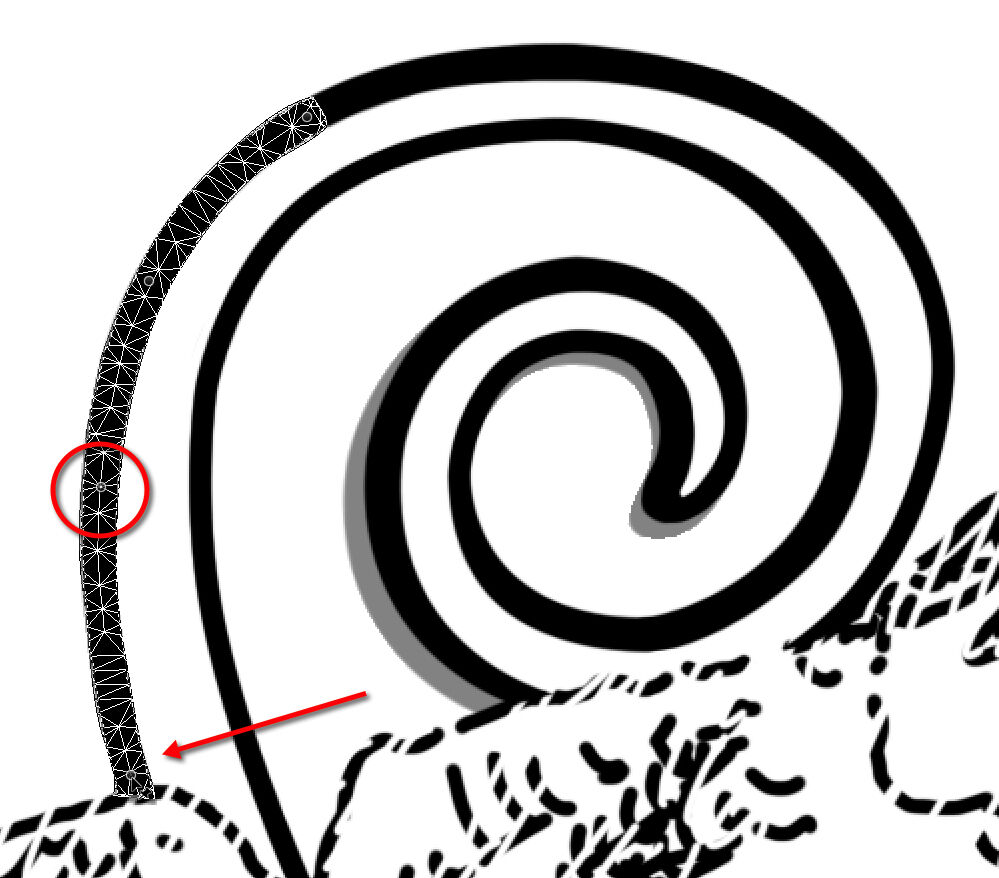
(5) Repeat the last sequence of actions until your line is on the right place.

(6) When done, hit any other tool on the Tool Bar and Apply the changes when asked. Alternatively, you can just press Return/Enter.
You can download the short tutorial to learn this skill.
0 comment(s)
Leave a comment(We'll keep your email address private)