
Photoshop One-on-one – General functions and a specific use-case of the updated Warp Tool

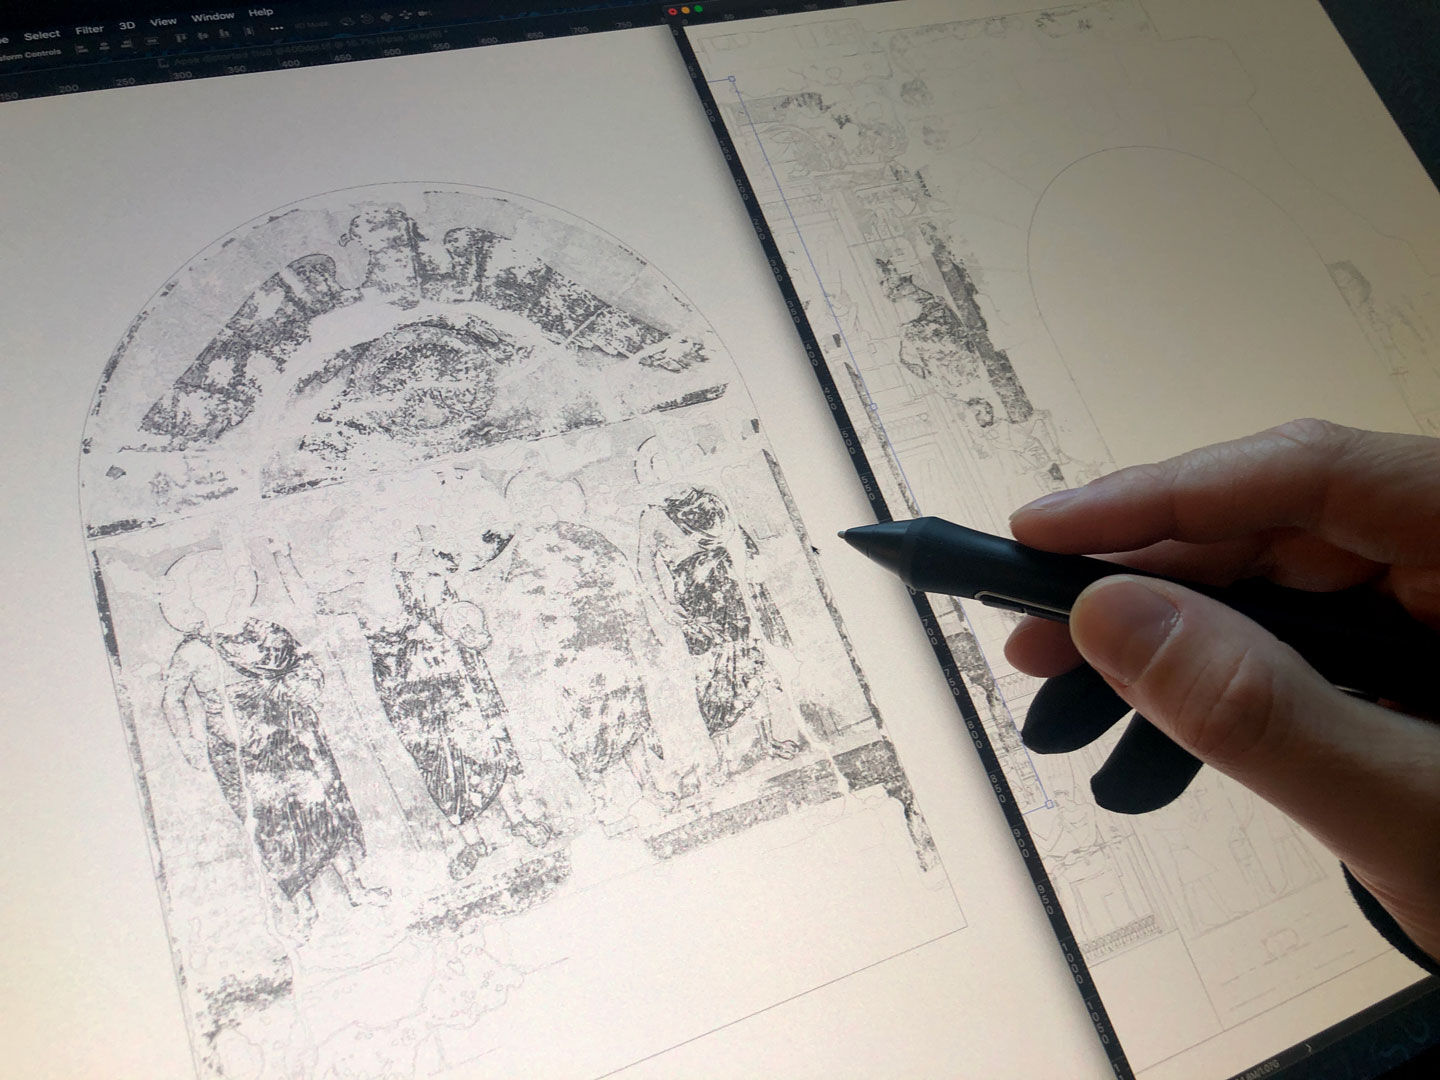
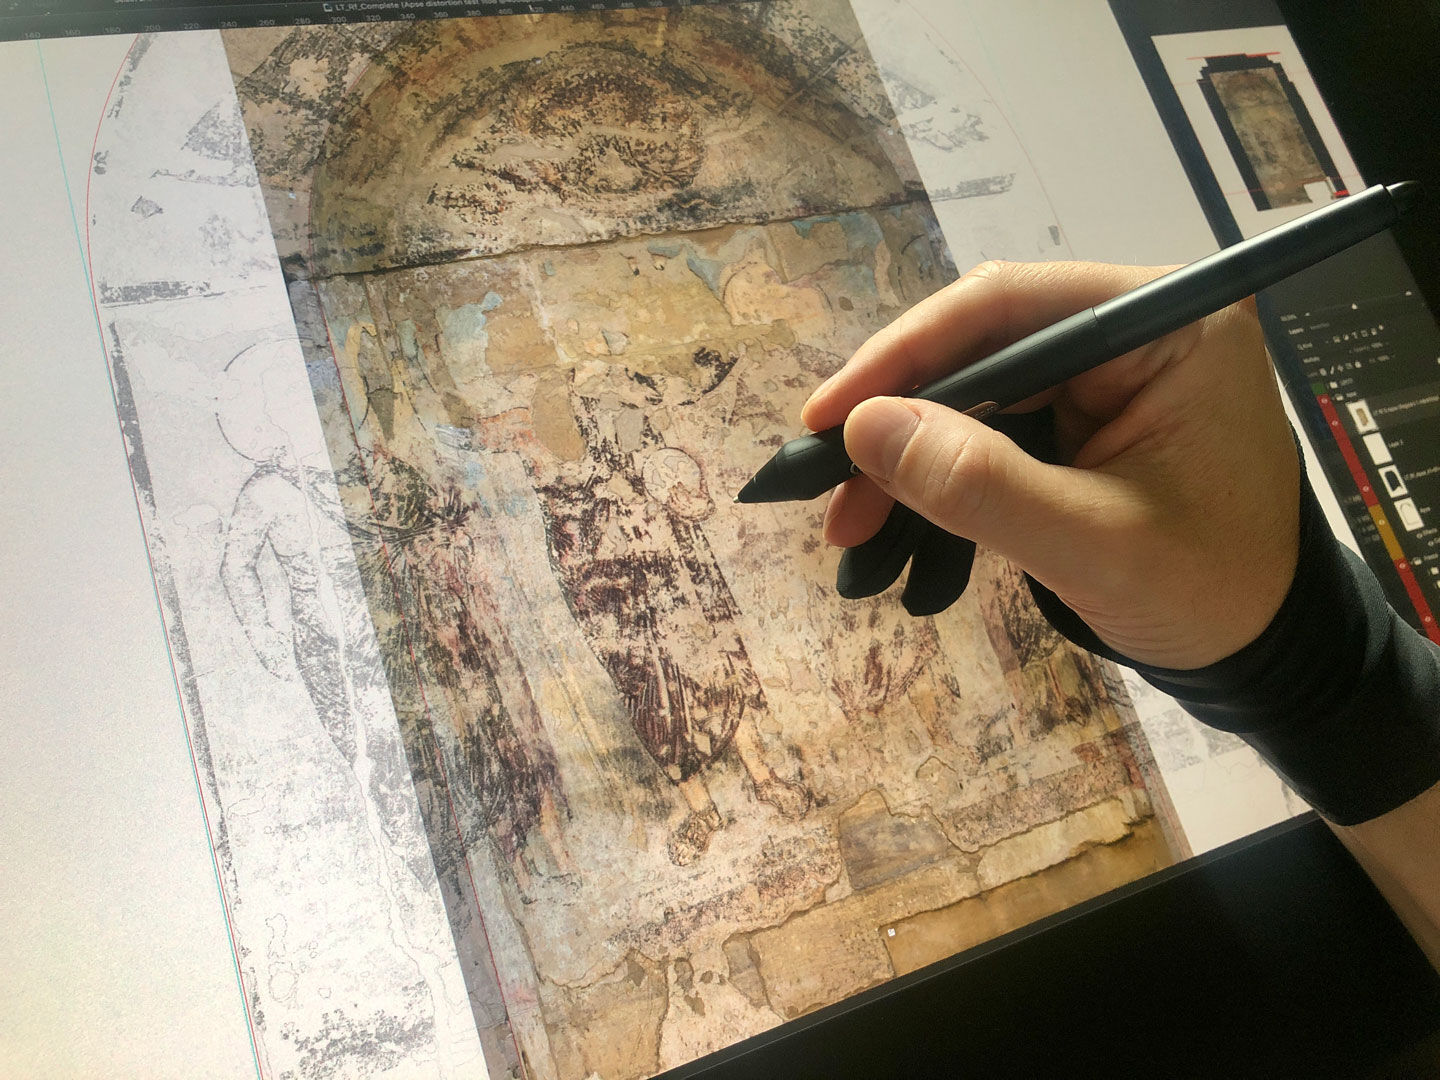
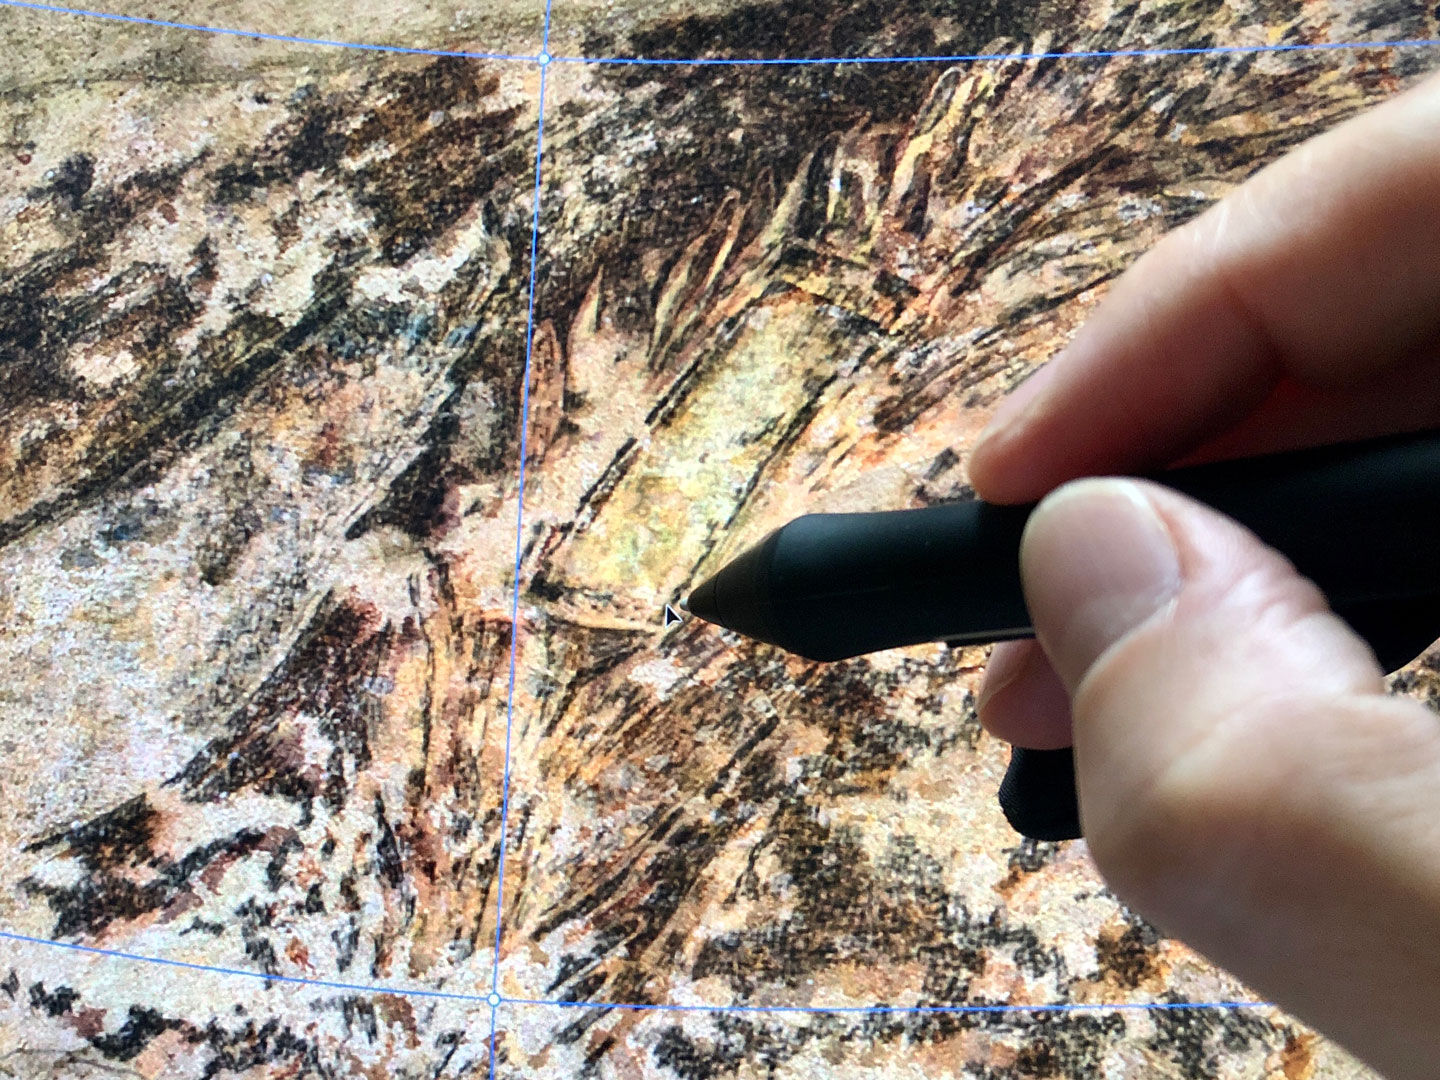
Selecting multiple control points in the Warp Tool to manipulate distortion (Roman murals in the Apse, Luxor Temple).
The Warp Transform Tool has been part of Photoshop for a long time, and it had remained mostly unchanged since its introduction until last year, when Adobe updated its Creative Cloud software suite for 2020. The digitalEPIGRAPHY manual has a brief section dedicated to one of its derivatives called Puppet Warp which is a function that enables the artist to distort selected areas on a drawing via a visual mesh overlay and the placement of pins. We use Puppet Warp in order to reposition a line segment by pinning down the correct portion and dragging the part that needs to be reshaped. It’s usually best to apply the tool when subtle changes are required, as the line weight can be distorted when radical movements happen.
However, the Warp Tool operates on a different level; therefore, it shouldn’t be confused with Puppet Warp. Warp, instead of putting a mesh above the selected area, lets you drag control points to manipulate the shape of the drawing. Although Warp proved useful for approximate image fitting in the past, with the recent update, Adobe has added a plethora of powerful new enhancements to the tool, making it infinitely more useful for specific documentation processes. The additions include new grid presets and customizable grid sizes with the ability to add further grid lines and control points wherever needed. First, we’d like to show you how to operate the updated Warp Tool.
Warp Tool – What’s Changed?
(1) There are multiple ways to access the Warp command. One is by clicking Edit in the Menu Bar, choosing Transform, and then choosing Warp. Alternatively, you can initiate Free Transform by pressing CMD+T (Ctrl+T in Windows) and with Free Transform active, clicking on the Warp icon in the Options Bar.
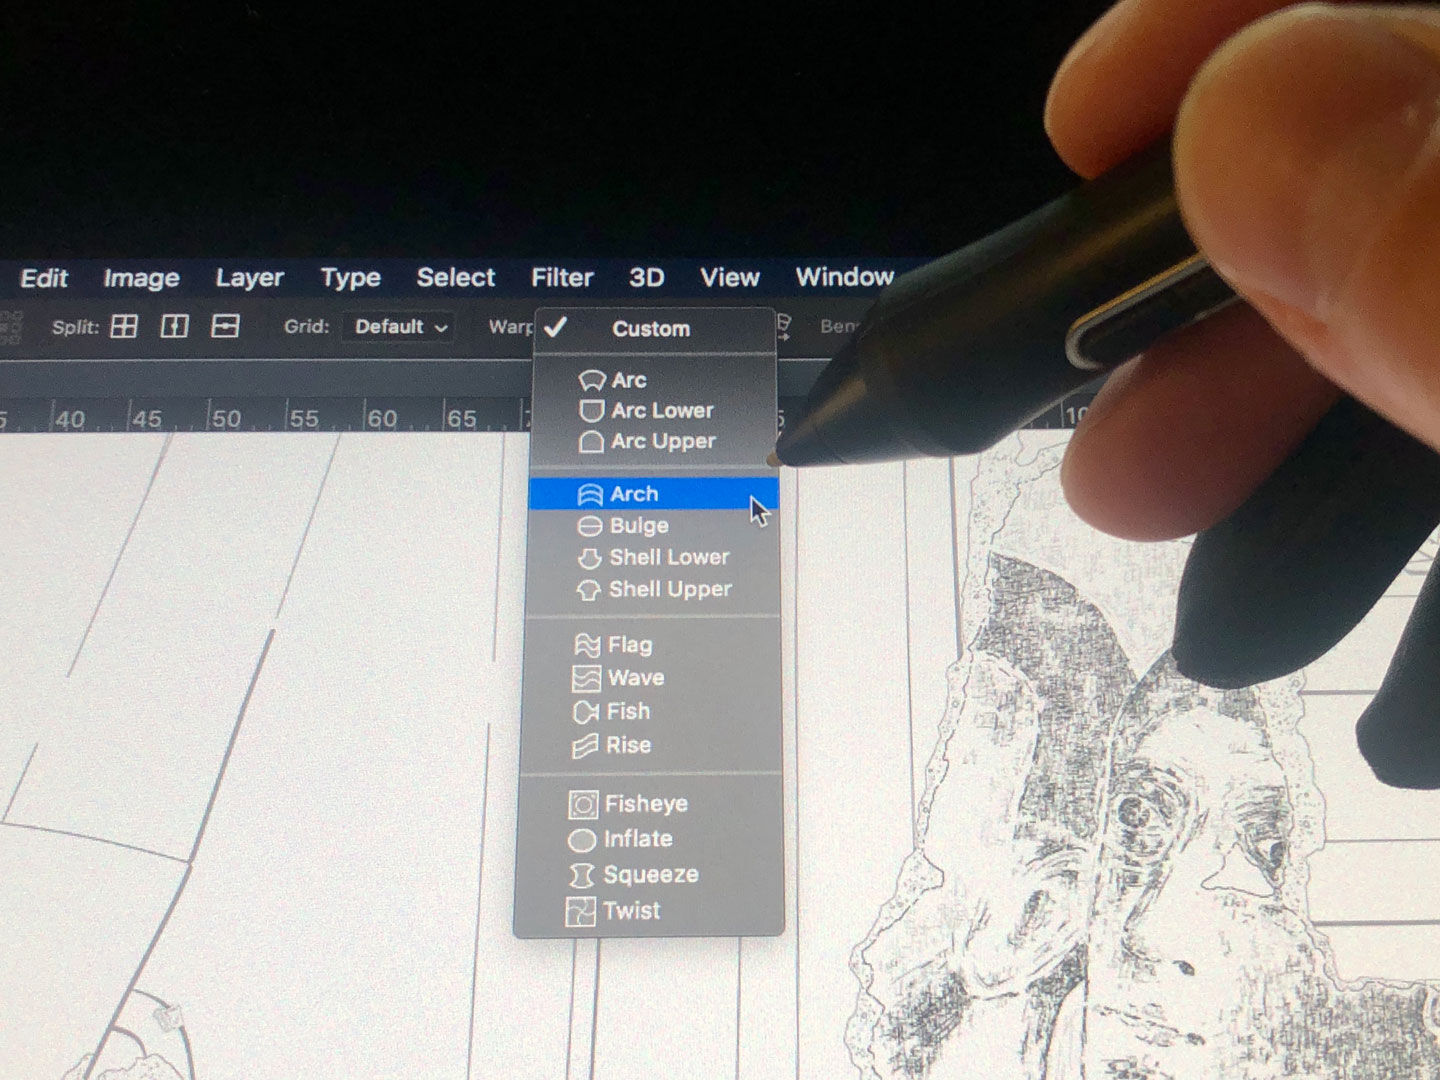
(2) There are multiple preset warp shapes accessible through a Warp pop-up menu. Some of them, such as Arc or Arch, provide a quick starting point for putting drawings back on the wall. All of these shapes are customizable by dragging their white rectangular access points.

(3) In case more control is needed over the warp than what the default controls (ranging between 3x3 and 5x5) offer, one can easily add their grid by clicking Custom in the drop-down menu.
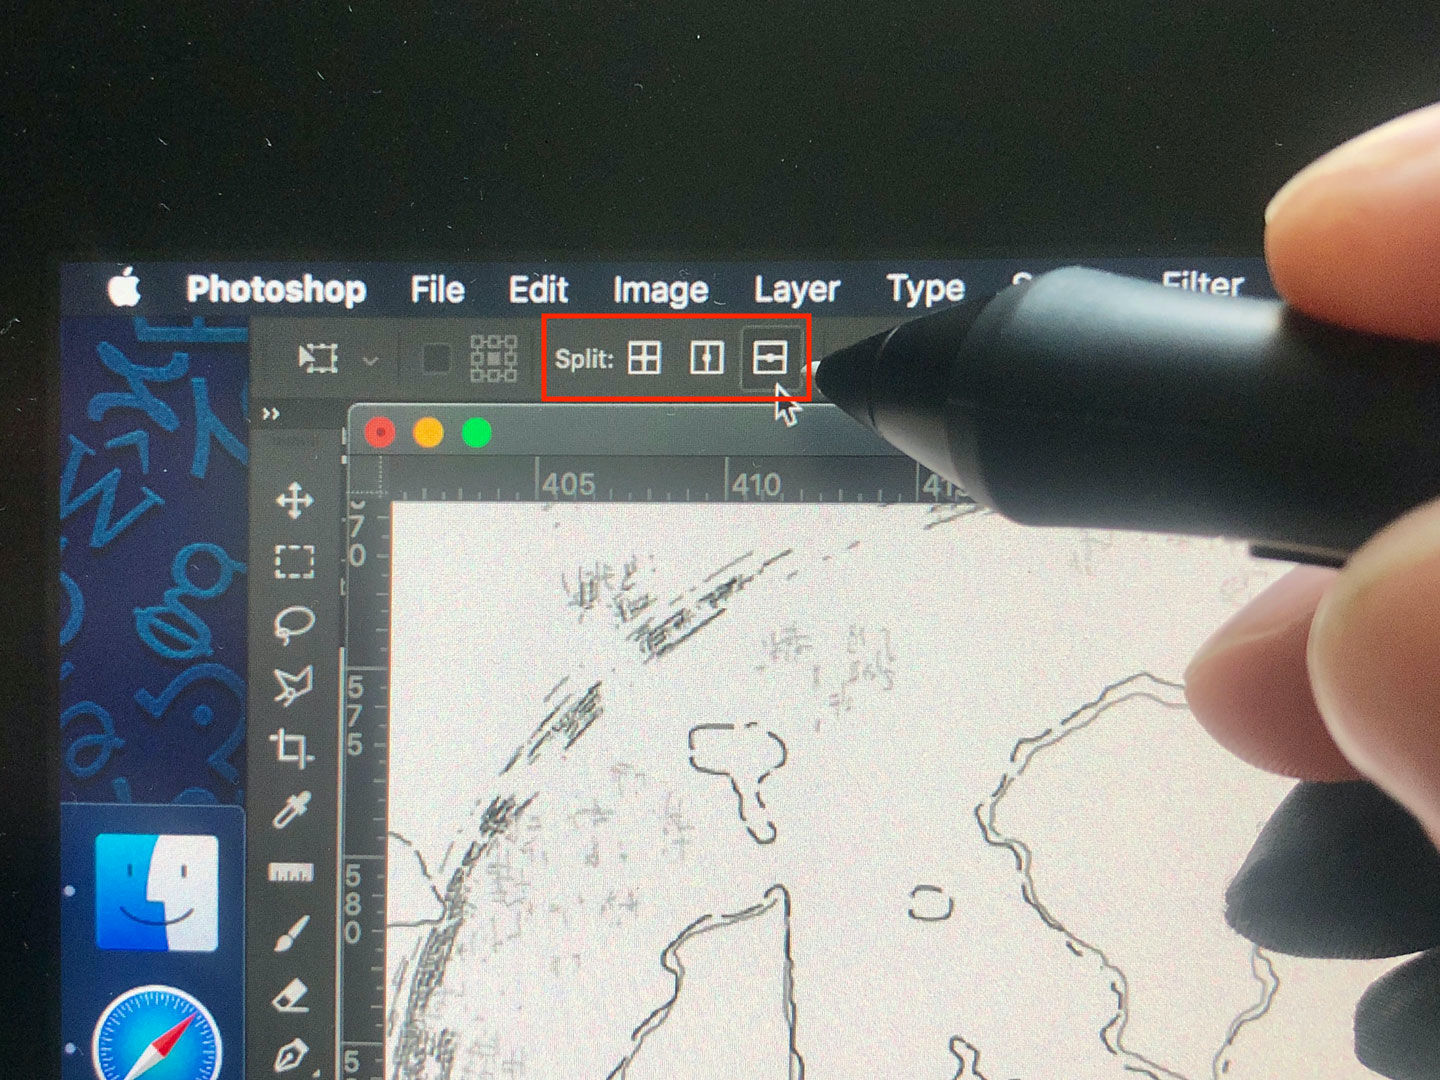
(4) For the most precise control over the warp, Photoshop CC 2020 allows you to add your own grid lines wherever needed. To add a gridline, one can choose between 3 options: Split Crosswise, Split Horizontal, and Split Vertical.
General functions
With the latest Photoshop, when you first enter Warp transform mode, you won’t see the familiar grid from previous iterations. Instead, a simple rectangular frame appears around your selection with handles on each of the four corners. This simplified set of controls is designed to allow free adjusment of an object with an astonishing amount of elasticity without overwhelming the user. The behavior of the handles is very similar to drawing vector paths using the Pen Tool. Moving these access points allows you to twist and rotate selected parts of the drawing, while holding and dragging the cursor within the area helps with the precise repositioning of individual elements. It’s essential to remark here that it’s advised to convert your active layer into a Smart Object using the options bar before diving into Warp modifications. When warping a regular pixel layer the changes become permanent, while transformations on Smart objects allow to undo the entire warp and revert to the first shape without losing image quality.

Converting a layer to Smart Object allows the artist to execute non-destructive and reversible changes to the layer content.
Preparations and basic use aside, using the updated Warp Tool gets exciting with the added extra control over these modifications. In CC 2020, in order to warp a drawing (or drawing segment) using the grid, you can click on any control point and drag it independently of the others. You can also pull any of the control handles protruding from the selected point or rotate the drawing segment around the point by clicking and dragging the control handle clockwise or counterclockwise. Along with using the control points and handles, you can also click and drag directly on the gridline itself between two points to warp and curve the line into shape. Of course, these actions should be applied with great care to avoid extreme distortions, as shown below.

Dragging control points using the new Warp Tool creates modifications that only affect their immediate environment.
Here are the main actions concerning the new Warp tool:
- To manipulate the shape, drag the control points, a segment of the bounding box or mesh, or an area within the mesh. When adjusting a curve, use the control point handles. It is similar to adjusting the handles in the curved segment of a vector graphic.
- Click on a grid line to activate control points for editing the warp. Clicking on an anchor point (at the intersection of the grid lines) lets you edit the control points surrounding that anchor. Drag the control points to warp the image.
- To select multiple points, Shift+click on the anchor points or click-and-drag the pointer over the points while holding down the Shift key. A rectangle appears around the selected points if two or more points are selected.
- To deselect multiple points, Shift+click on the active anchor points or click-and-drag the pointer over the active points while holding down the Shift key. The rectangle surrounding the selected points automatically resizes as points are selected or deselected.
- To delete a selected grid line (control points along the route are visible), press Delete or choose Edit > Transform > Remove Warp Split.
- To delete both the horizontal and vertical grid lines passing through an anchor point, click the anchor point, then press Delete or choose Edit > Transform > Remove Warp Split.
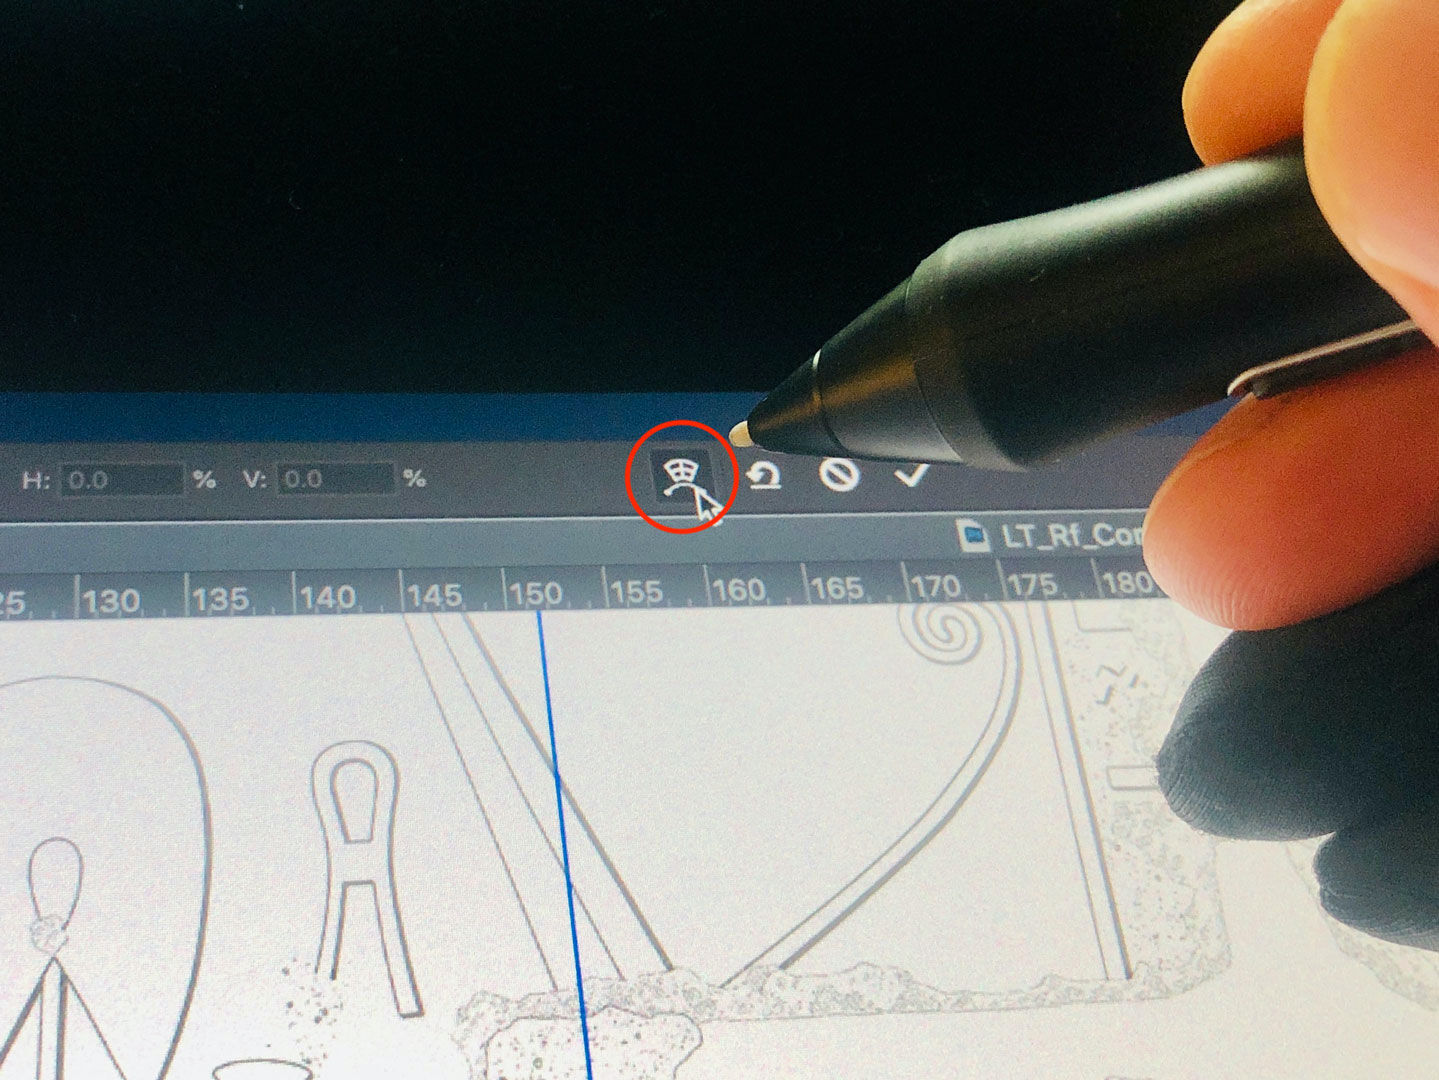
- To change the orientation of a warp style that you chose from the Warp menu, click the Change The Warp Orientation button in the options bar.
- To change the reference point, click a square on the Reference point locator in the options bar.
- To specify the amount of warp using numeric values, enter the values in the Bend (set bend), X (set horizontal distortion), and Y (set vertical distortion) text boxes in the options bar. You can’t enter numeric values if you have chosen None or Custom from the Warp Style pop‑up menu.
- Press Return (Enter on Windows) to accept the changes or ESC to cancel out all your Warp transformations.
Using the Warp Tool for modifying the Roman Mural drawings in the Luxor Temple Apse

The modified orthorectified photo montage of the Apse (by Owen Murray) and the multilayered Photoshop drawing ready to be retrofitted within the available space.
In 2012, when the epigraphic method for documenting and reconstructing the late Roman murals in the Roman vestibule at Luxor Temple was designed, we had a minimal technical arsenal at our disposal. There were no excellent drawing tablets to be taken to the field, and there was no photogrammetry in our service to provide rectified drawing backgrounds. The Survey always suspected that the niche at the South end of the vestibule would propose a unique challenge. In the end, this area, with all its perspective-related issues, proved to be the most complicated part of the documentation; therefore, it was reserved for last, while waiting for the technology to catch up. This is not the place to give you a detailed overview of the method used by Owen Murray for unraveling the fresco from the background and how the complex MetaShape model was unrolled and opened up to provide the most comprehensive look at the frescoes while retaining its general shape. One can get a basic orientation to the photogrammetric practices used for the Survey by reading Owen’s article here.

The niche (with the closing semi-dome) is almost a half-circle in diameter, holding a significant amount of detail, invisible on a full-frontal view (Photo by Dominique Navarro).

The Apse of the Roman vestibule at Luxor Temple. Full-frontal view (left) versus “flattened,” data-maximized view (right).

The nature of the semi-dome wouldn’t allow even distortion correction. While the wreath held in the eagle’s talons remains almost the same, most of the eagle disappears on the frontal view.
We’d like to point out that the Survey’s goal all along was to present the painted remains within the Apse with the epigraphic data maximized. Therefore, the multilayered texture drawing, based on the “flattened” orthomosaic, was considered to be the ultimate documentation of the Tetrarchic remains. Nonetheless, in order to present the Apse drawing within its broader context, a full-frontal version had to be created, retrofitted within the available space.
Using multiple modification tools to warp the Apse drawing
(1) The only transformation tools being able to modify multiple layers in tandem are Scale and Rotate. In order to interact with the Apse using the Warp Tool, all layers had to be merged. This was a compromise that had to be considered when retrofitting the fresco within the original space.
(2) Adding the regular (unaltered) orthorectified image to the mix was essential as the modified drawing didn’t only have to fit within the available space but also to align with the specific, uneven distortions caused by the architectural scene.
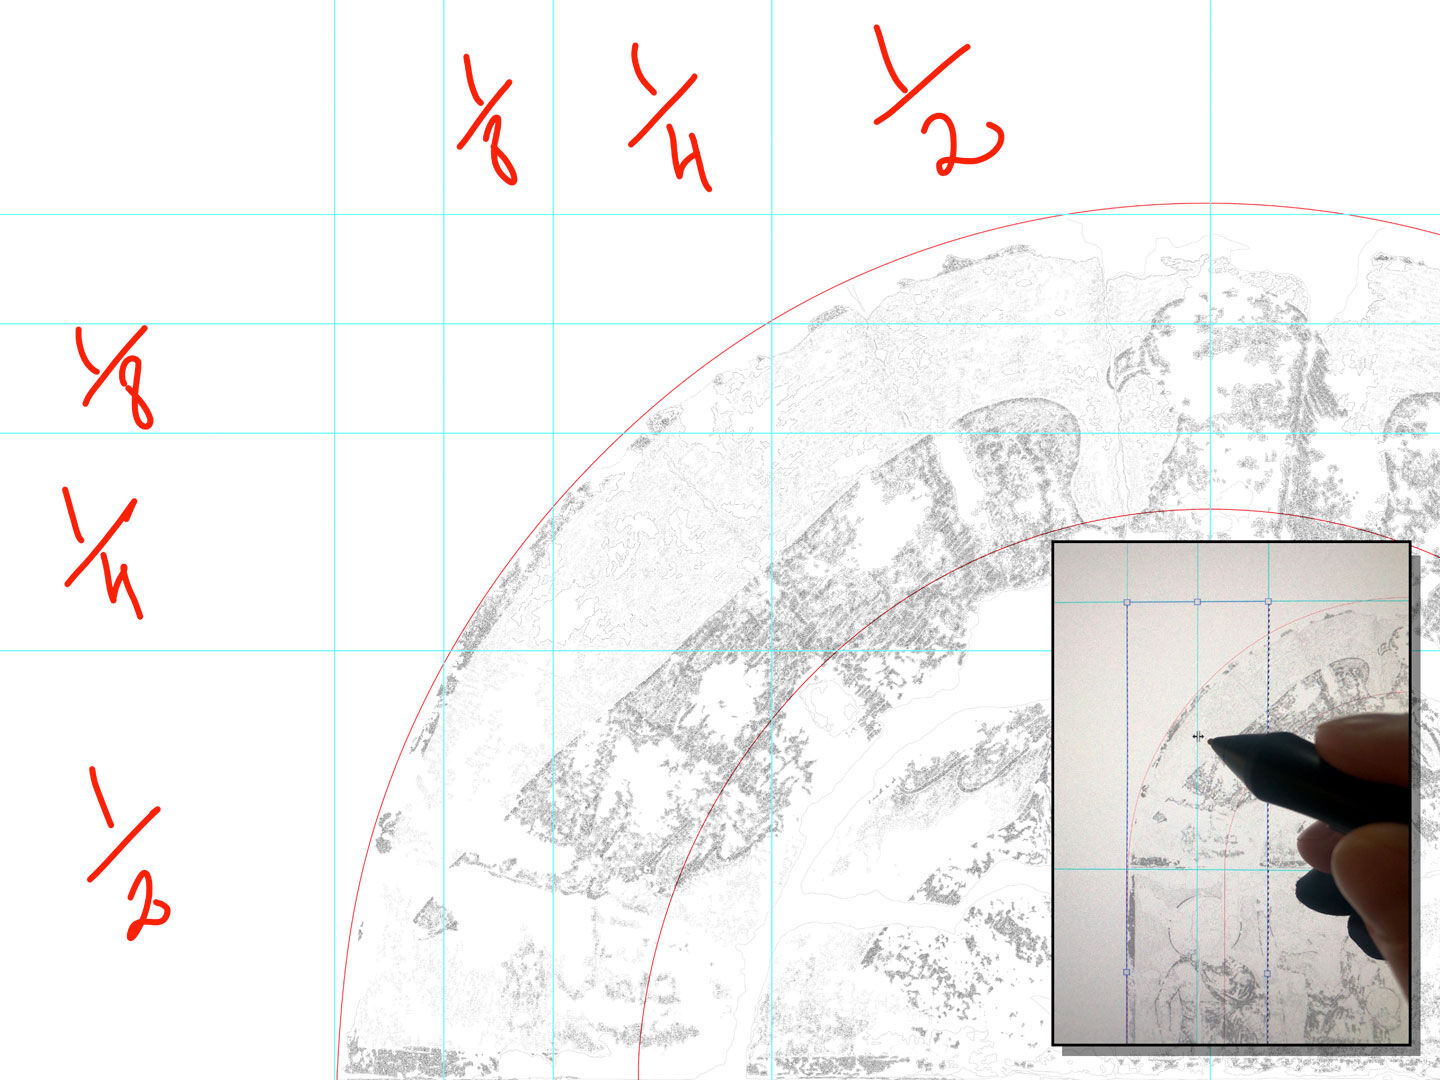
(3) To apply the first set of modifications, one had to create a grid system consisting of guidelines set in variable distances. To halve the distance between guides, with Snap active (View/Snap to/Guides) a rectangular selection was drawn between two guides. Once selected, CMD+T was repeatedly applied to provide the necessary center point for the new guide to snap to.
(4) With the grid system in place and the available space halved, quartered, etc. accordingly, the sides of the Apse drawing could be gently pulled inwards by using the Transform Tool. The same sequence was executed on the semi-dome portion that was transferred onto a separate layer.
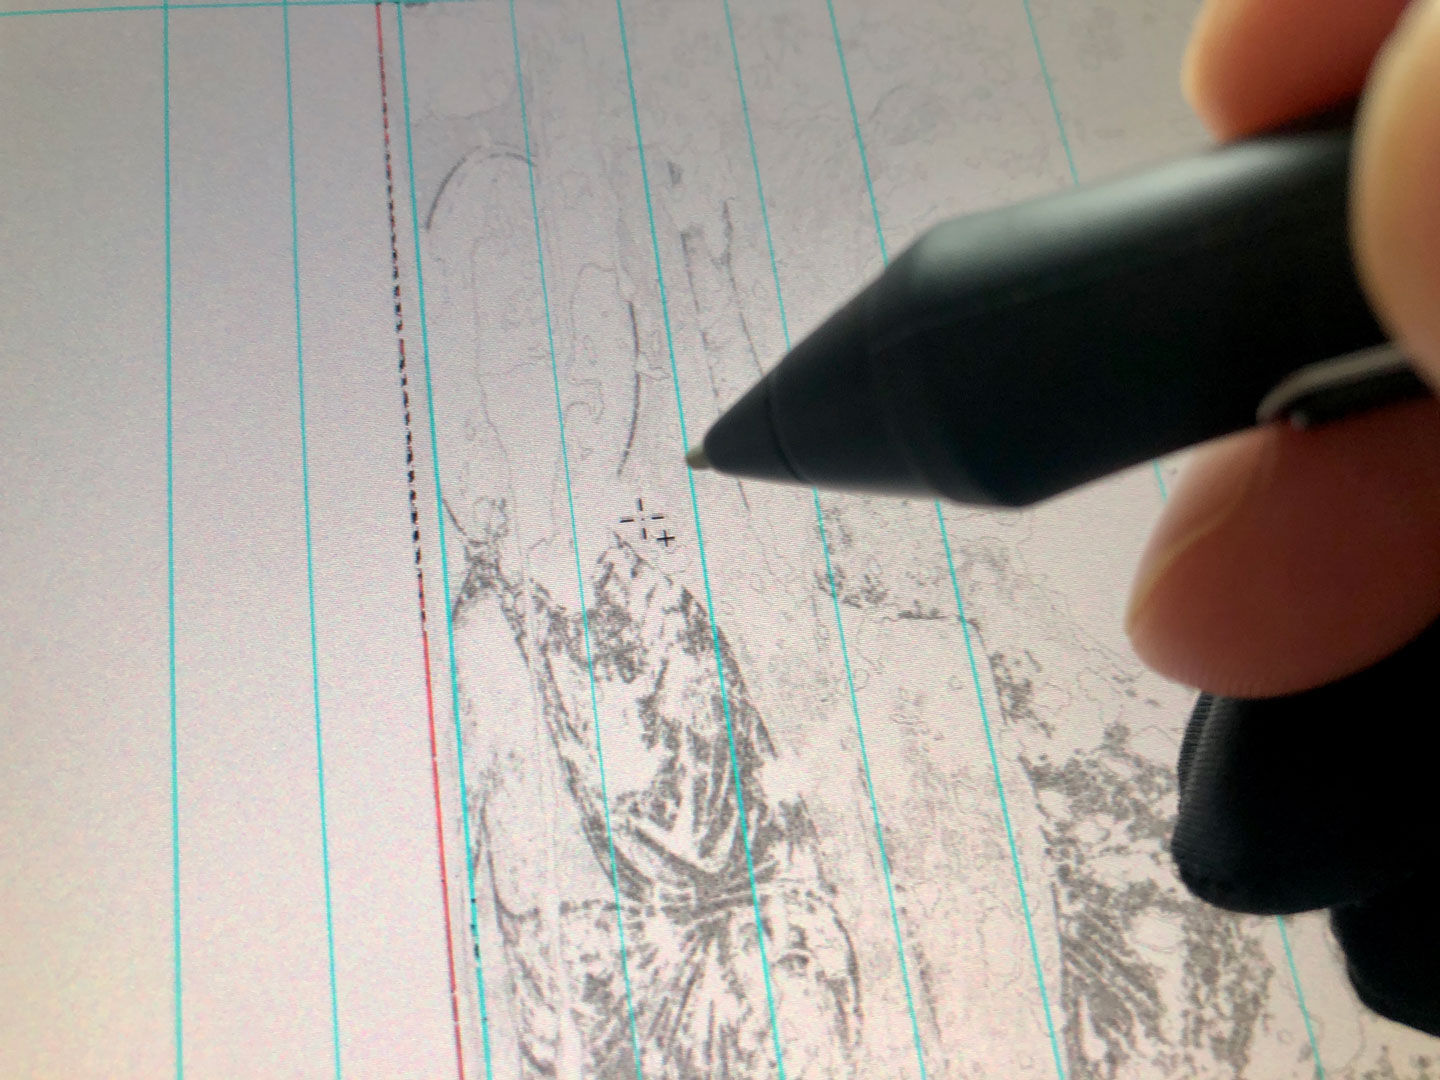
(5) With the sides and top approximated within the available space, the grid system was not needed any longer (View/Clear Guides). In the next step, the corners of the Apse had to be pulled inwards, using the Warp Tool. Smaller adjustments could be initiated only by using the new upgrades available with CC 2020.

(6) The basic Warp setting was perfect for broad adjustments, mostly initiated by control point handles. At the same time, semi-sensitive refinements could be added by pulling the drawing accordingly within the selection boundaries.
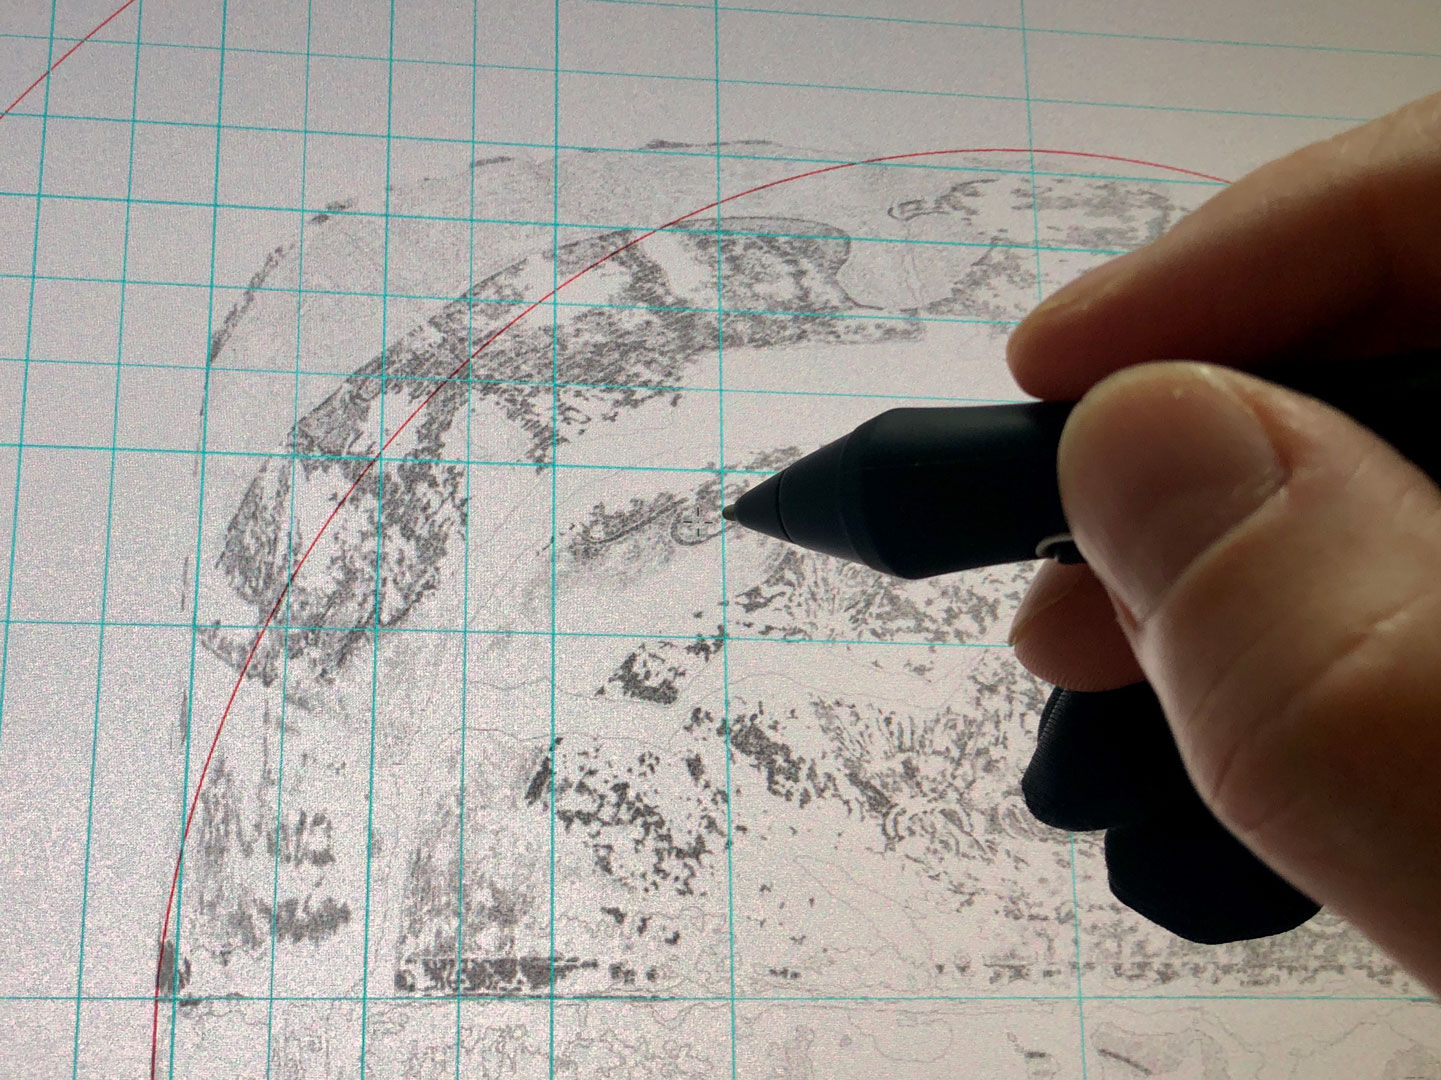
(7) Finally, by calling up a 5x10 Warp grid over the drawing with the background photo activated, the artist was able to tweak certain parts of the drawing independently of others, putting the final touches over the retrofitted artwork.
Fresco Apse retrofitted within available space - detail (Click photo to discover in higher resolution)
0 comment(s)
Leave a comment(We'll keep your email address private)