
Drawing Curves by Using the Pen Tool
Using the Pen tool is the most precise and most controllable way of drawing curved paths for brush strokes. Its main advantage over the Freeform Pen tool is that the artist determines the number and position of the Anchor Points he/ she wants to use along the path. The step-by-step guide below shows the process. Its advantages are even more obvious when dealing with fine transitions between different line thicknesses, such as sun-shadow adjustments. Adding sun-shadow transitions by freehand can be very difficult when the artist works with large curved elements (circles, loops, figures, etc.). When inking on paper we usually use templates (French curves) to help accomplish this task, and - in a way - the Pen tool is our digital French curve in Photoshop.
Drawing Curves by Using the Pen Tool
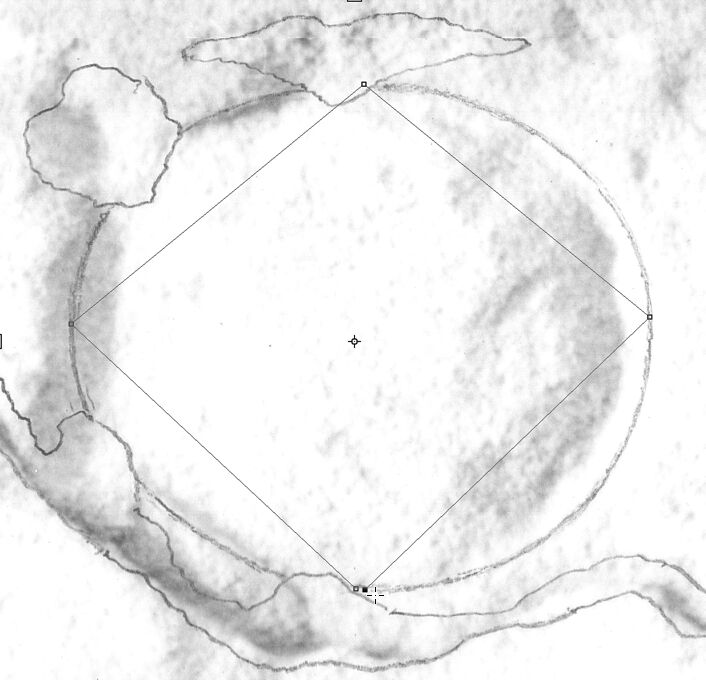
(1) Draw a rectangular area touching the lines you want to trace over. Don’t use too many anchor points and don’t close the path, to prevent it from becoming a Shape.

(2) Make sure Auto Add/Delete is active on the Tool Menu and add your first extra Anchor Point to the path.

(3) Adjust the shape of your curve by holding down Command (Cmd + Drag) and moving your path section towards the line. Try to position it so it follows the line as closely as possible.

(4) Adjust your path section further by holding down Command and clicking and moving the Adjustment Points until you get the desired shape. Add more anchor points if necessary.

(5) Don’t forget that because Auto Add/Delete is checked, you can add any number Anchor Points by hovering over your path, but Command should be released while adding them.

(6) Once you are satisfied with your path, right click (secondary click) anywhere along the path and choose Stroke Path from the menu.
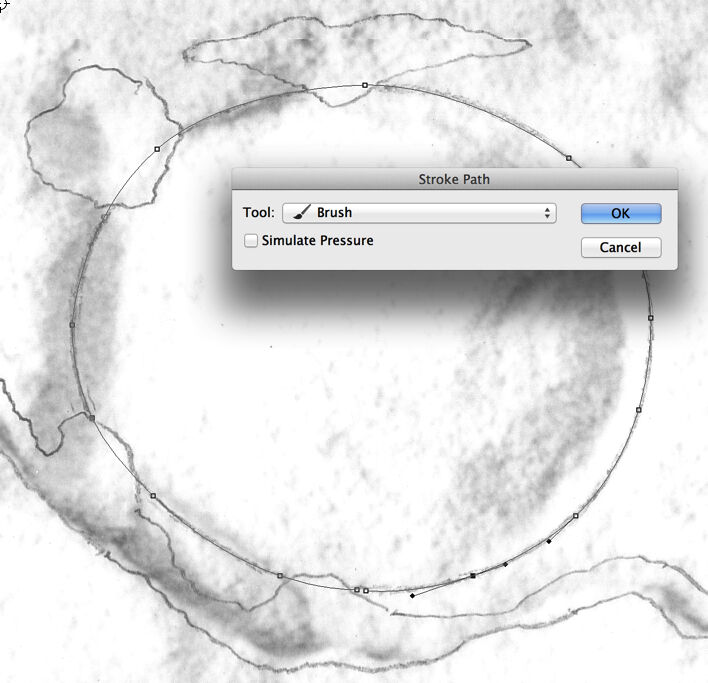
(7) This option opens up another panel, where you can choose the tool with which you’d like Photoshop to stroke your path. The width of the stroke is the same as what you used last time with that particular tool. Use the Brush tool for inking purposes.
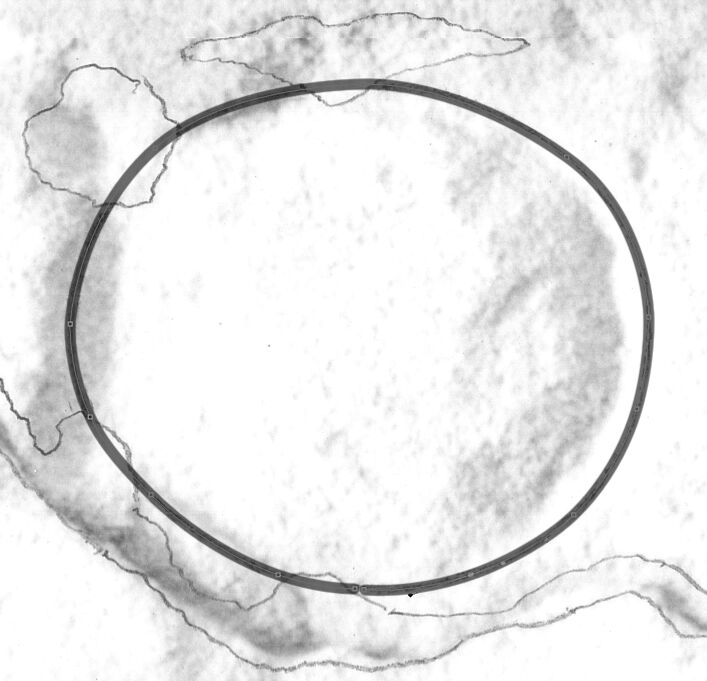
(8) The generated brush stroke uses your path as a center line, so half of its width is added to the outside of the path, the other half is added to the inside. You must take this into consideration when drawing paths.
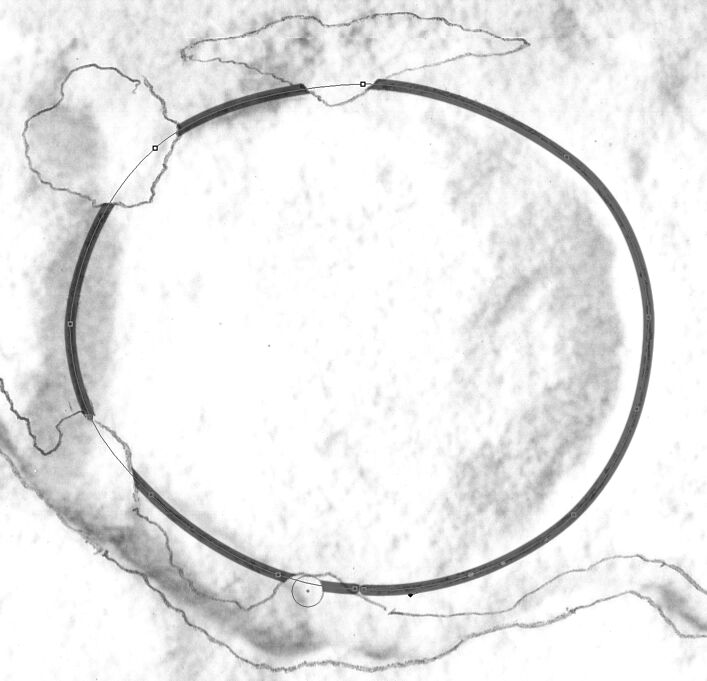
(9) As a general rule, it is easier to draw one continuous path for the entire shape, even if it has some damaged areas, than to draw separate paths for each section. Unwanted brush strokes can always be deleted later.
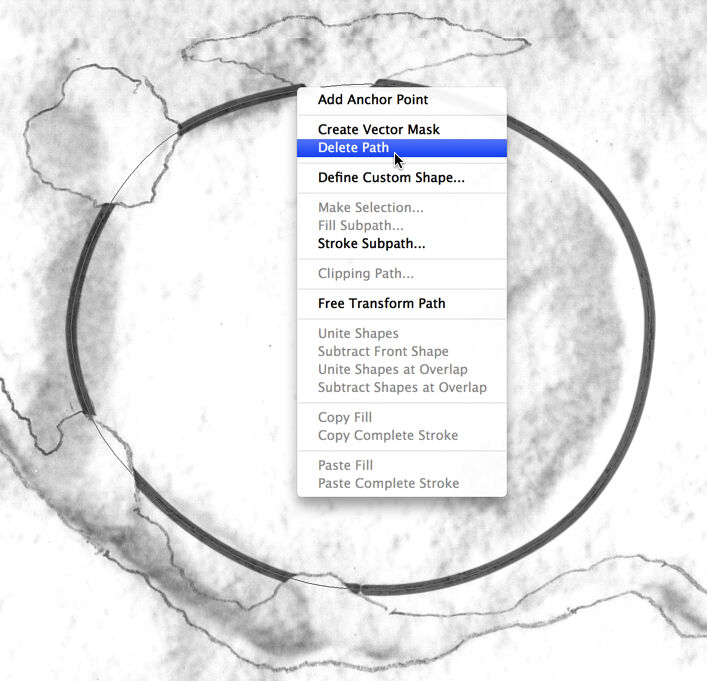
(10) When you have your desired lines stroked along the path, it can be deleted by using right click (secondary click) anywhere along the path and choosing Delete Path from the menu.
You can download the short tutorial to learn this skill.
0 comment(s)
Leave a comment(We'll keep your email address private)