Using your studio computer in the field Part 1 - Introducing the work environment
Just a few years ago it wouldn’t have occurred to me to take my precious laptop to the temple, however in the last couple of years I grew accustomed to having the benefits of accessing desktop applications when working on certain field projects. Although the iPad Pro is getting better and better as a laptop replacement, unfortunately it still doesn’t have the necessary desktop quality software arsenal to live up to its hardware capabilities. However, with Photoshop coming to the platform in 2019 and Affinity Designer already available at your fingertips, the situation seems to change slowly but surely. Until next year, when we can test out the new iPad Pro and Photoshop CC for iPad, our best option to work on multi-gigabyte, multi-layered tiff and psd files in the field is to take our computer with us and use the iPad as a drawing display tethered to the computer’s brain. In the following tutorial, instead of giving you step-by-step instructions on how to master a certain skill, I’d like to introduce my work environment for this specific case scenario.
Drawing in the field using iPad and a laptop computer

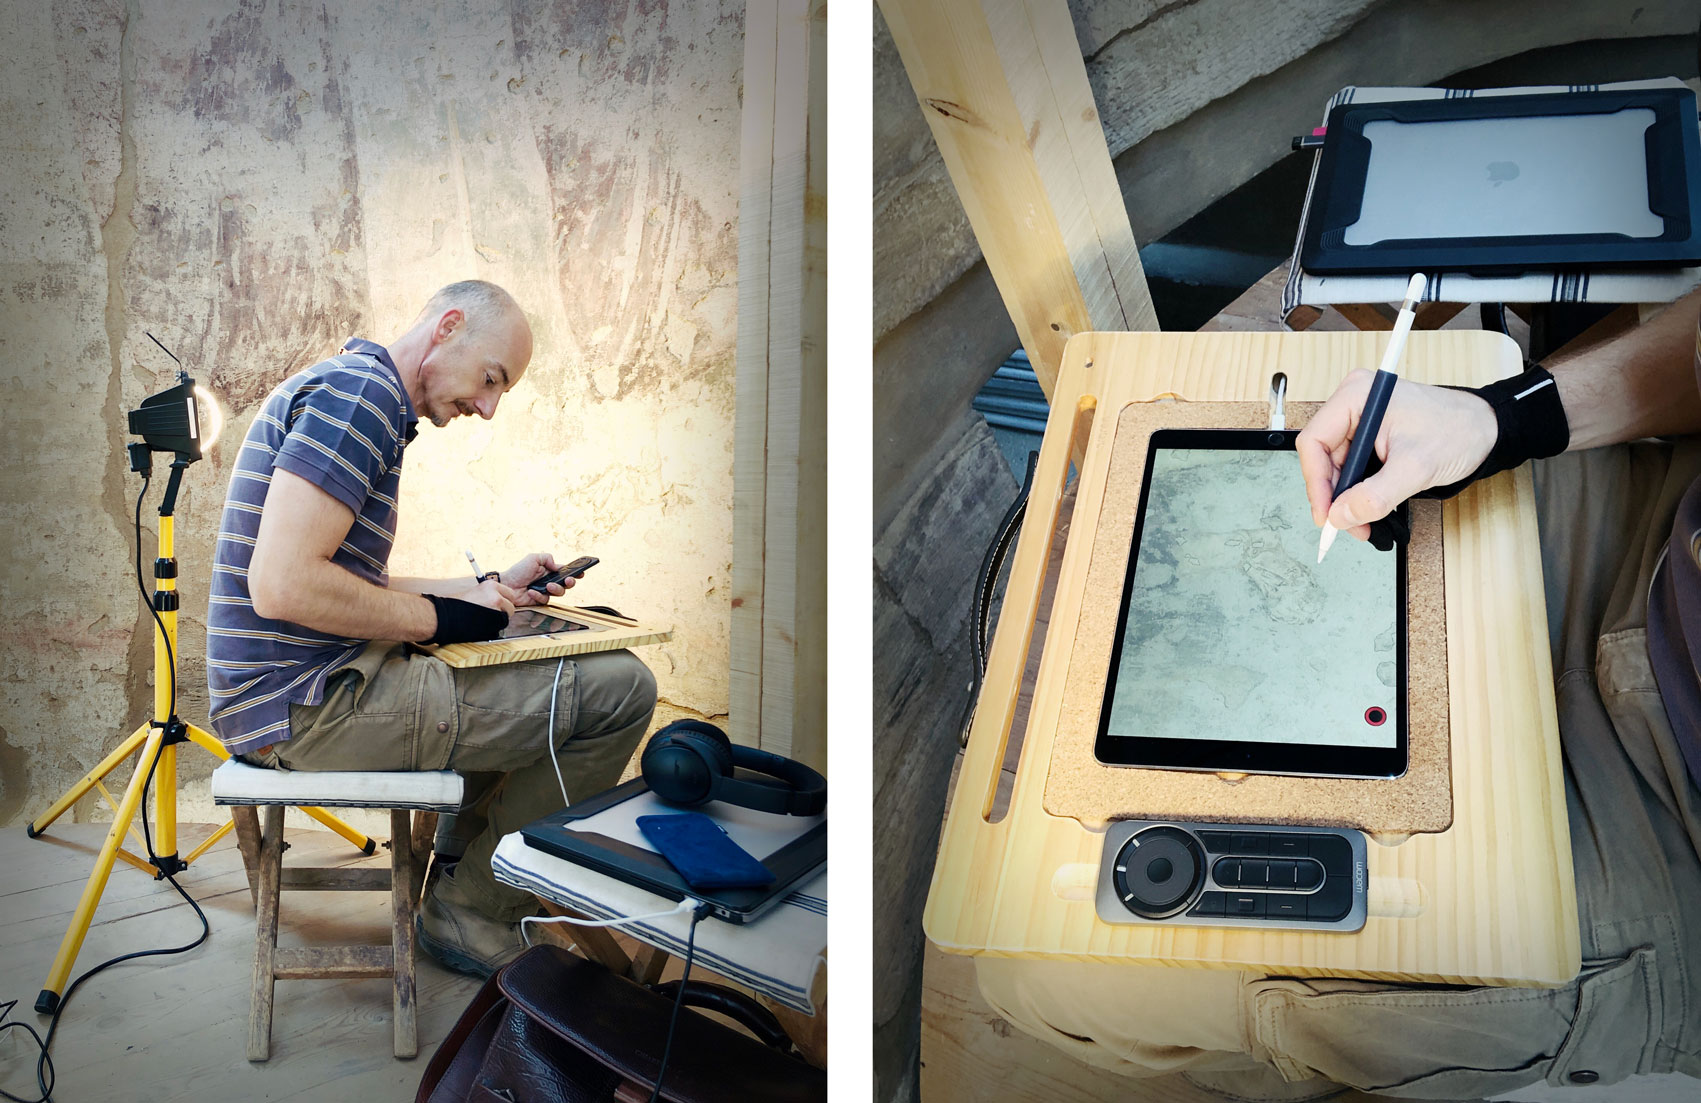
You’ll need to do some serious preparations before you are ready to create a studio-grade environment at the monument. Most importantly, you need to seal all your computer equipment against dust. To protect my MacBook Pro, I have a plastic case cover applied on it, which is not only dust proof but provides a certain level of protection in the – hopefully unlikely – scenario of the machine getting dropped to the ground. The specific case I chose is very light and doesn’t add much bulk to the computer while leaving some space around the ports and in the back for ventilation. Additionally, I have a silicone keyboard cover preventing dust getting through the little gaps between the key caps. On my MacBook Pro I have a little program which runs in the menu bar and – just by the click of a button – prevents my computer from going to sleep when the lid is closed. Luckily I don’t usually need to use another screen besides my readily available drawing display, therefore enabling this feature adds a huge amount of extra protection in the field. My computer is connected to a surge protection multi-plug power strip via a 3-meter-long USB-C charging cable. Exchanging factory cables to longer cords gives me more freedom when moving around on my scaffolding.
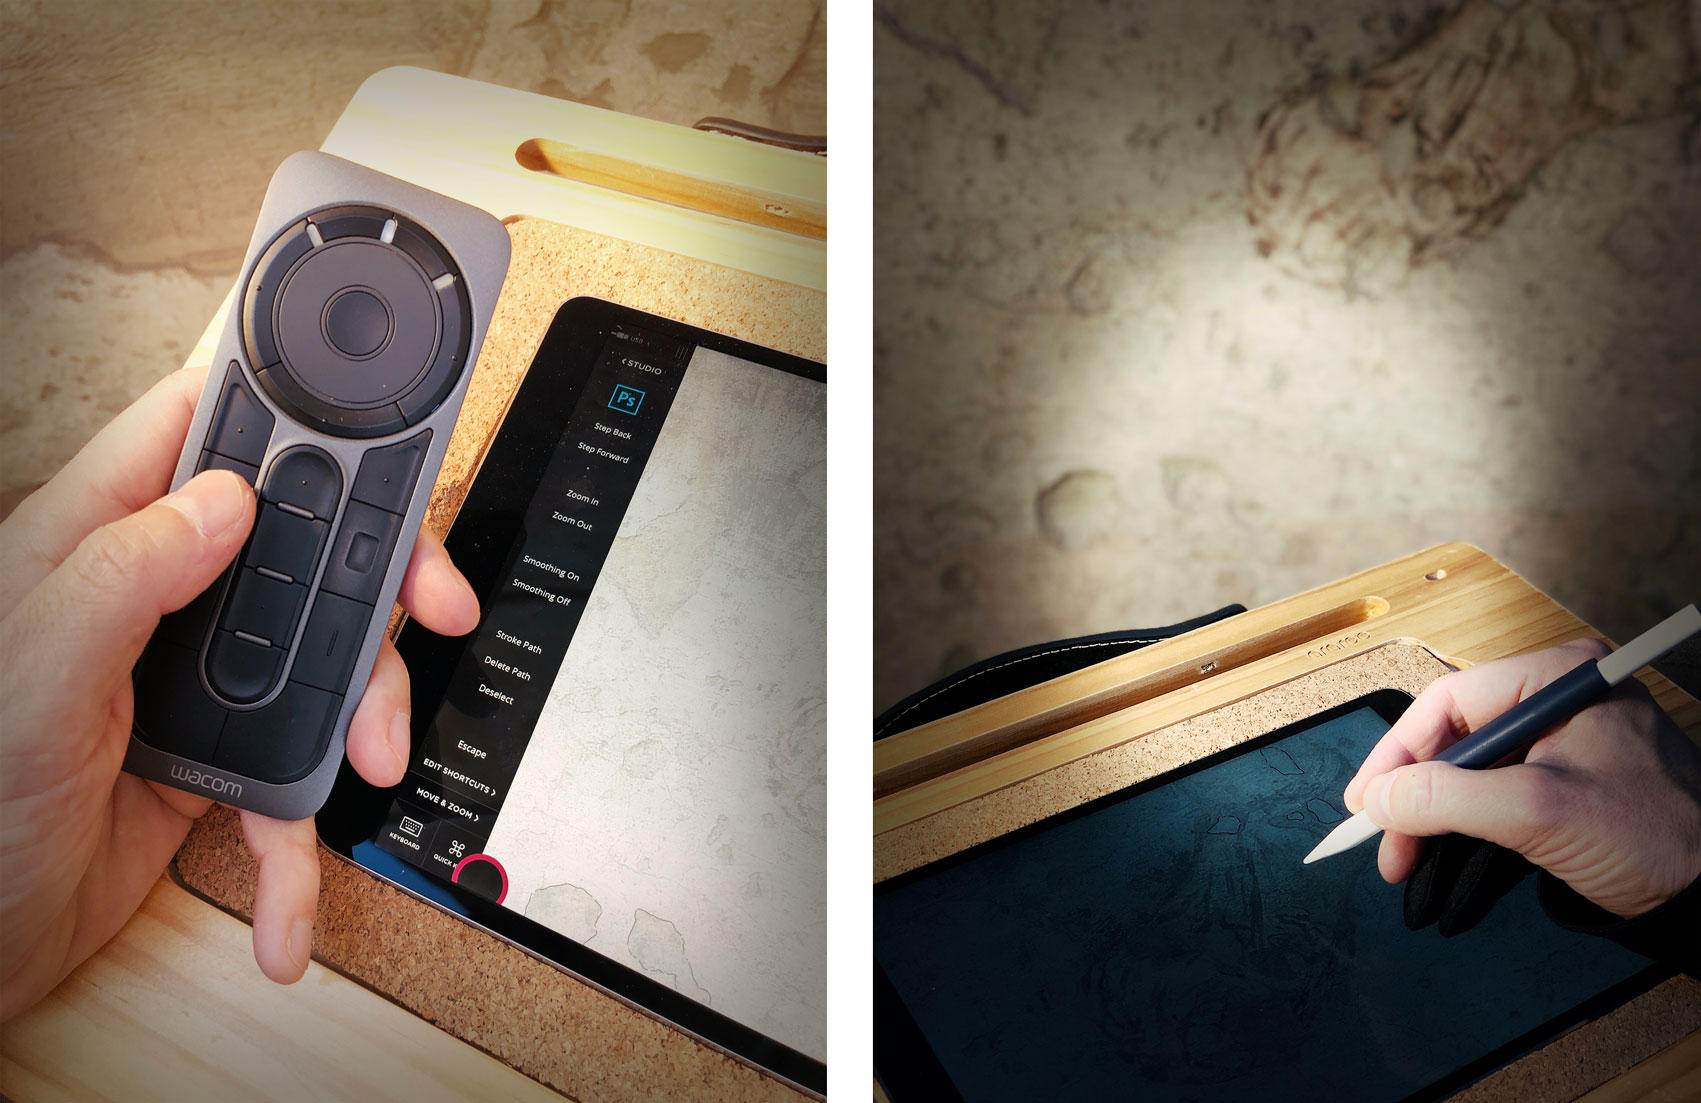
Moving on to the actual drawing device, which in my case is the iPad Pro 10,5 Inch, there is not much to be said regarding protection, because it is operated while inserted into my Araree drawing board. I use a screen protector to prevent my screen from getting scratched. The iPad is connected to the computer by a single 3-meter-long USB-C to Lightning cable. When drawing I wear special drawing gloves to prevent my iPad screen from collecting smudge. Having a fabric layer between my – sometimes sweaty – hand and the display also adds to the precision when drawing smoother curves and more nuanced brush strokes. Naturally, covering the slippery Apple Pencil with a silicone grip serves the same purpose.

There are two more aspects of my general field setup that need to be mentioned here. First, I always sit when drawing digitally. Sitting gives me the necessary grip on the board I’m holding and allows me to lay down more streamlined brush strokes creating an environment that is very similar to drawing in the studio. To be able to sit right in front of the wall section to be drawn, approximately at eye level, requires a lot of planning ahead. Naturally, you’ll need adjustable scaffolding if you intend to cover large surfaces. Also, I always cover my scaffolding with fabric from top to bottom, creating a relatively dark atmosphere within. Doing so I can control the orientation of the light on the wall by adding a strong halogen lamp to my setup. Setting up my own raking or direct light allows me to capture more details while the cover keeps my devices out of the sun.
Once the general setup is aligned with your field drawing needs, the next logical step is to create the appropriate computer-setup required for your chosen documentation method. Working on the late-Roman murals at Luxor temple, I need to be able to access and work with the multi-layered Photoshop files on my computer, therefore I must have the same shortcuts available at my fingertips when working on the iPad. Unfortunately, neither Astropad Studio nor my Wacom Express Key Remote is capable enough to handle this task alone, therefore I use them simultaneously. I’ll give you more details about the exact button layout and shortcut-setup for my field-devices in the 2nd part of this tutorial.

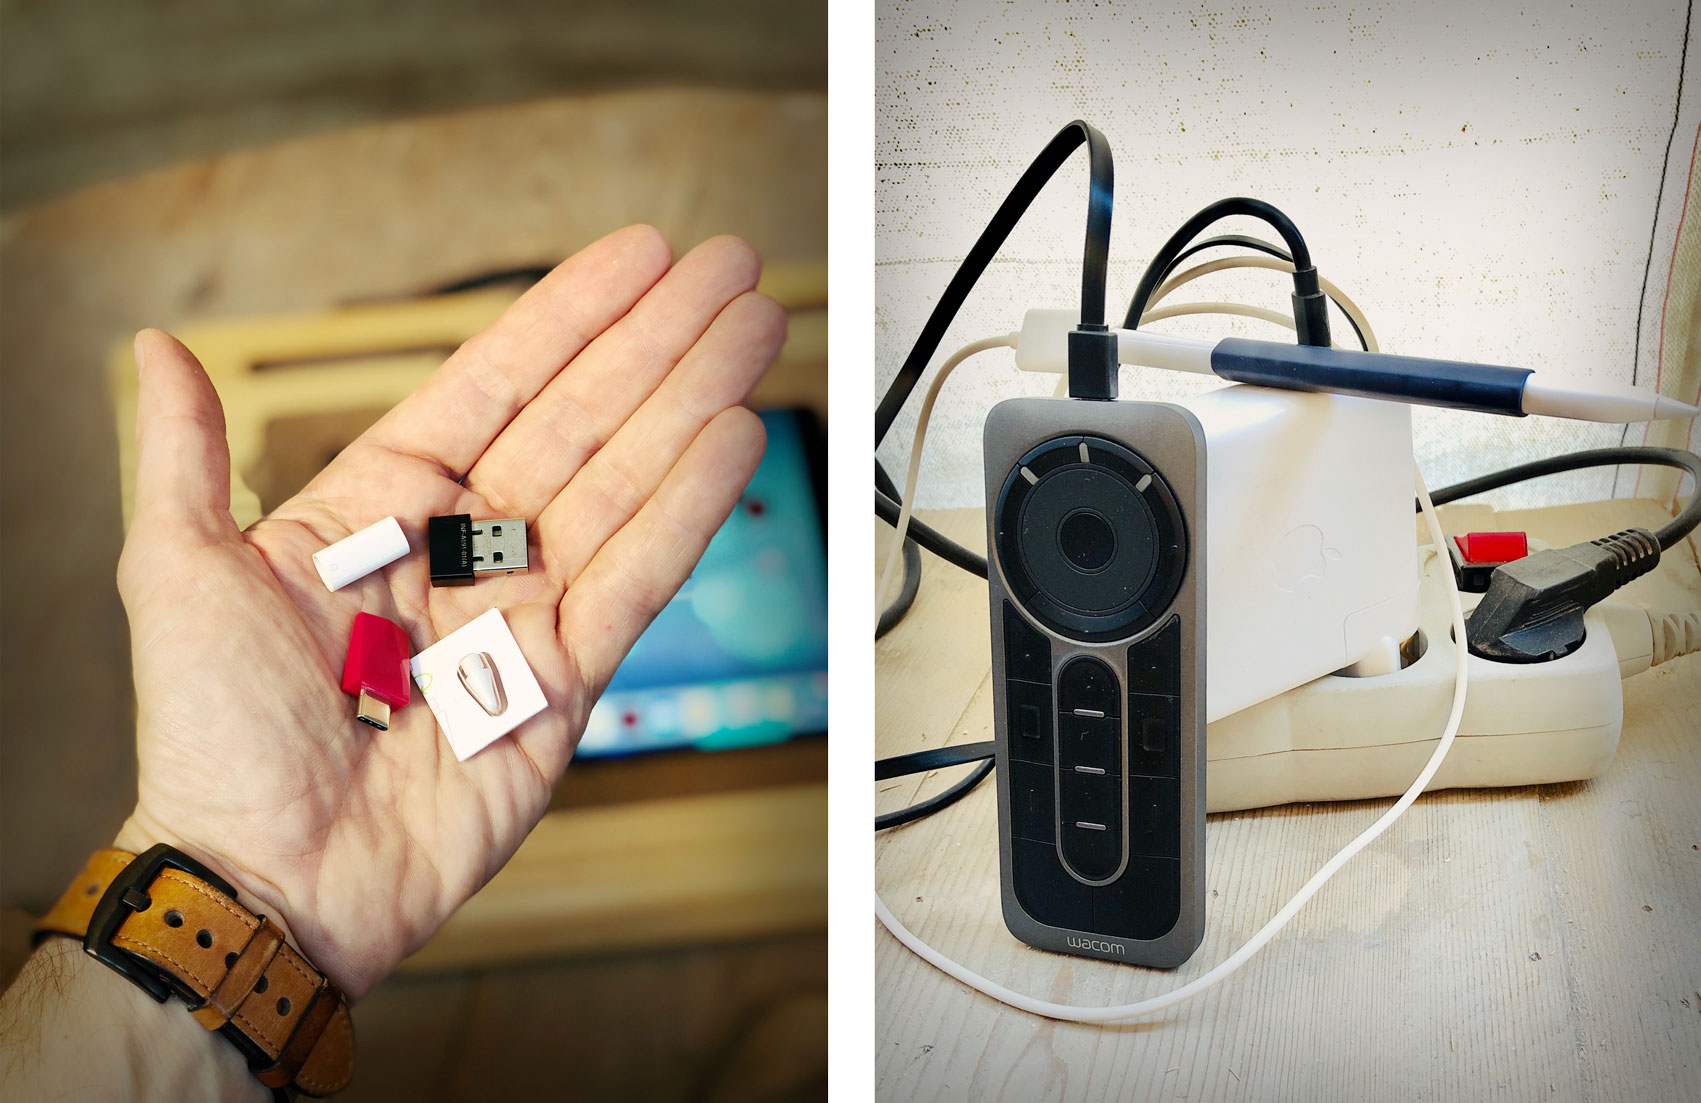
And now let’s talk about all the little things. While working in the field you need to be able to charge your devices. I always have a spare Macbook Pro charger, extra cables, USB-C to USB-A connectors etc. in my bag in case one of the regular options malfunctions. Although I have already mentioned the importance of having a surge protector, you might want to prepare for not having electricity at all. Although the iPad has excellent battery life that would last for the entire day, your computer running Photoshop tethered to another device wouldn’t last long without power. For such situations I recommend buying a capable and reliable Power Bank. There are plenty of good options available on this front, however one must be sure that their battery capacity is in accordance with the most recent airport regulations. Finally, one must find a safe spot for the handful of minuscule computer parts that need to be carried back and forth, such as the Wacom connector for the remote, the Luna Display, the Apple Pencil adapter and an extra tip for the Pencil. As soon as all the above logistics are resolved, your computer is ready to take a field trip to the monument. Stay tuned for the next part of this tutorial where I’ll dig into the actual drawing part and show you how to use all this equipment efficiently in the field!


0 comment(s)
Leave a comment(We'll keep your email address private)