
Preparing the source file in Procreate
Once the artist creates the highest resolution background that is still usable in Procreate, all the layers can be merged and the file can be saved as a regular jpeg, keeping its quality at its maximum.
For the next step, this high resolution jpeg file needs to be imported into Procreate. This could happen in many different ways. Importing through iTunes is the simplest of our options and requires the iPad to be connected to the computer via cable.
Preparing the source file
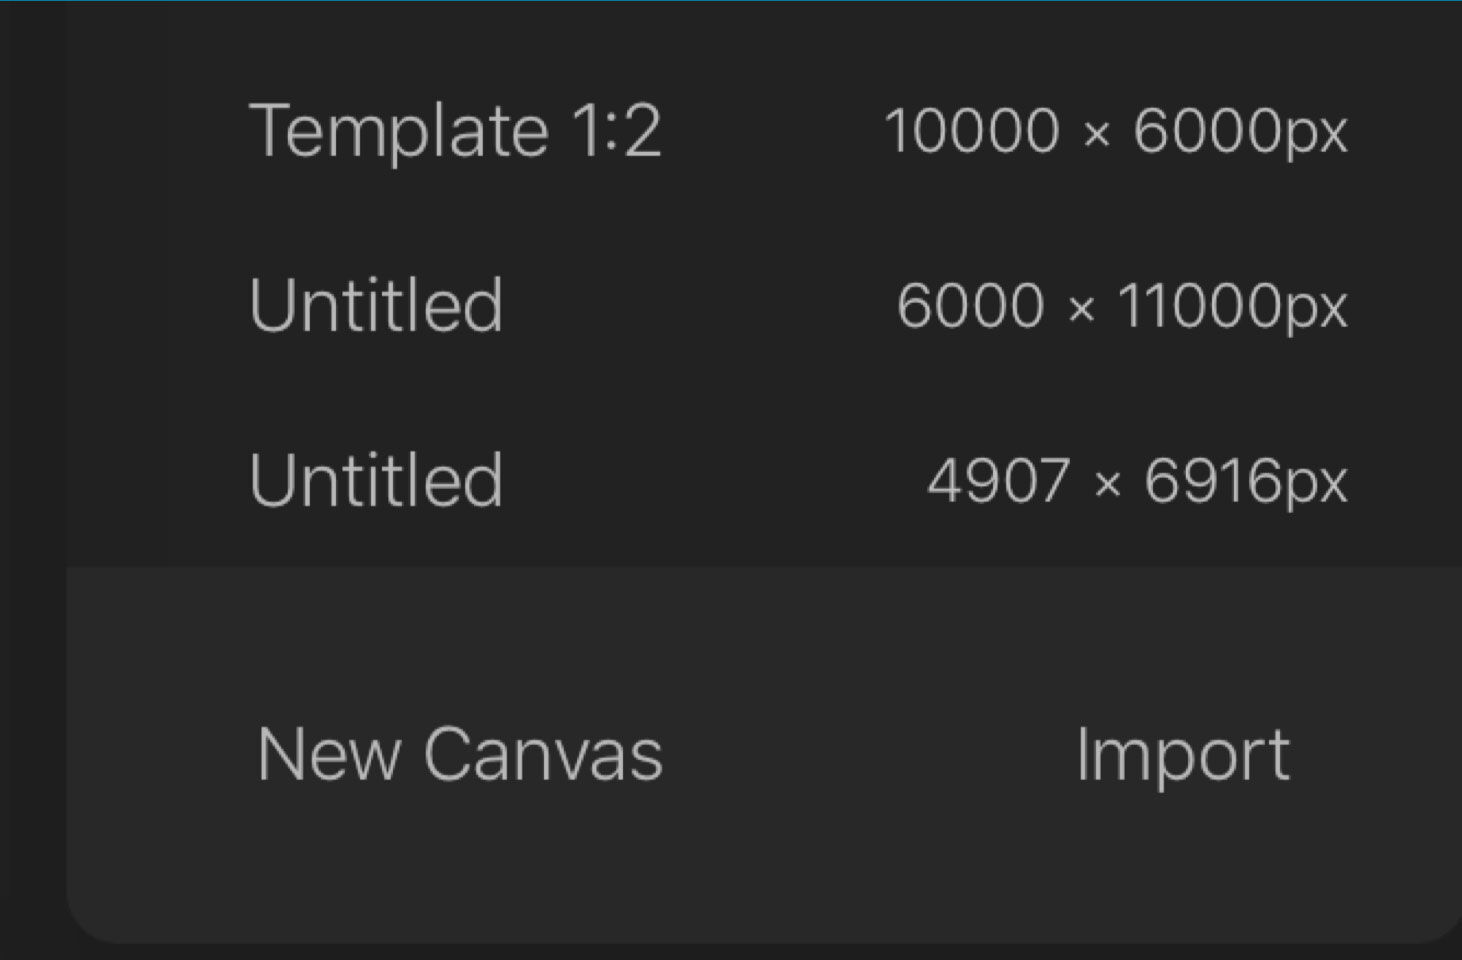
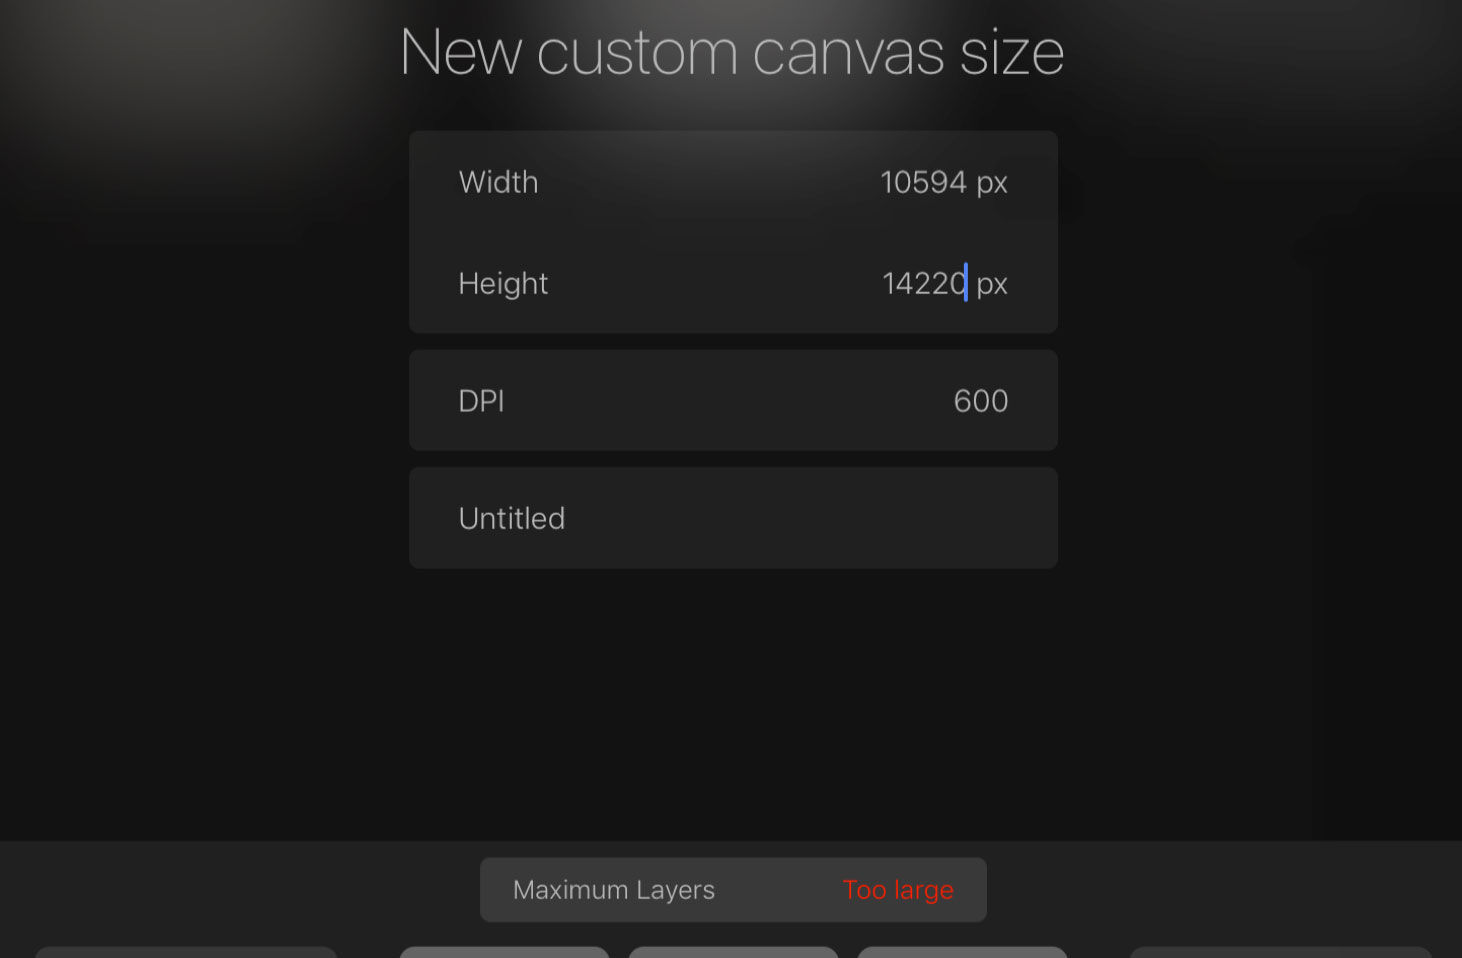
(1) Procreate’s New Canvas set up landing page can be used to see if our intended background’s resolution is within the software’s limitations.
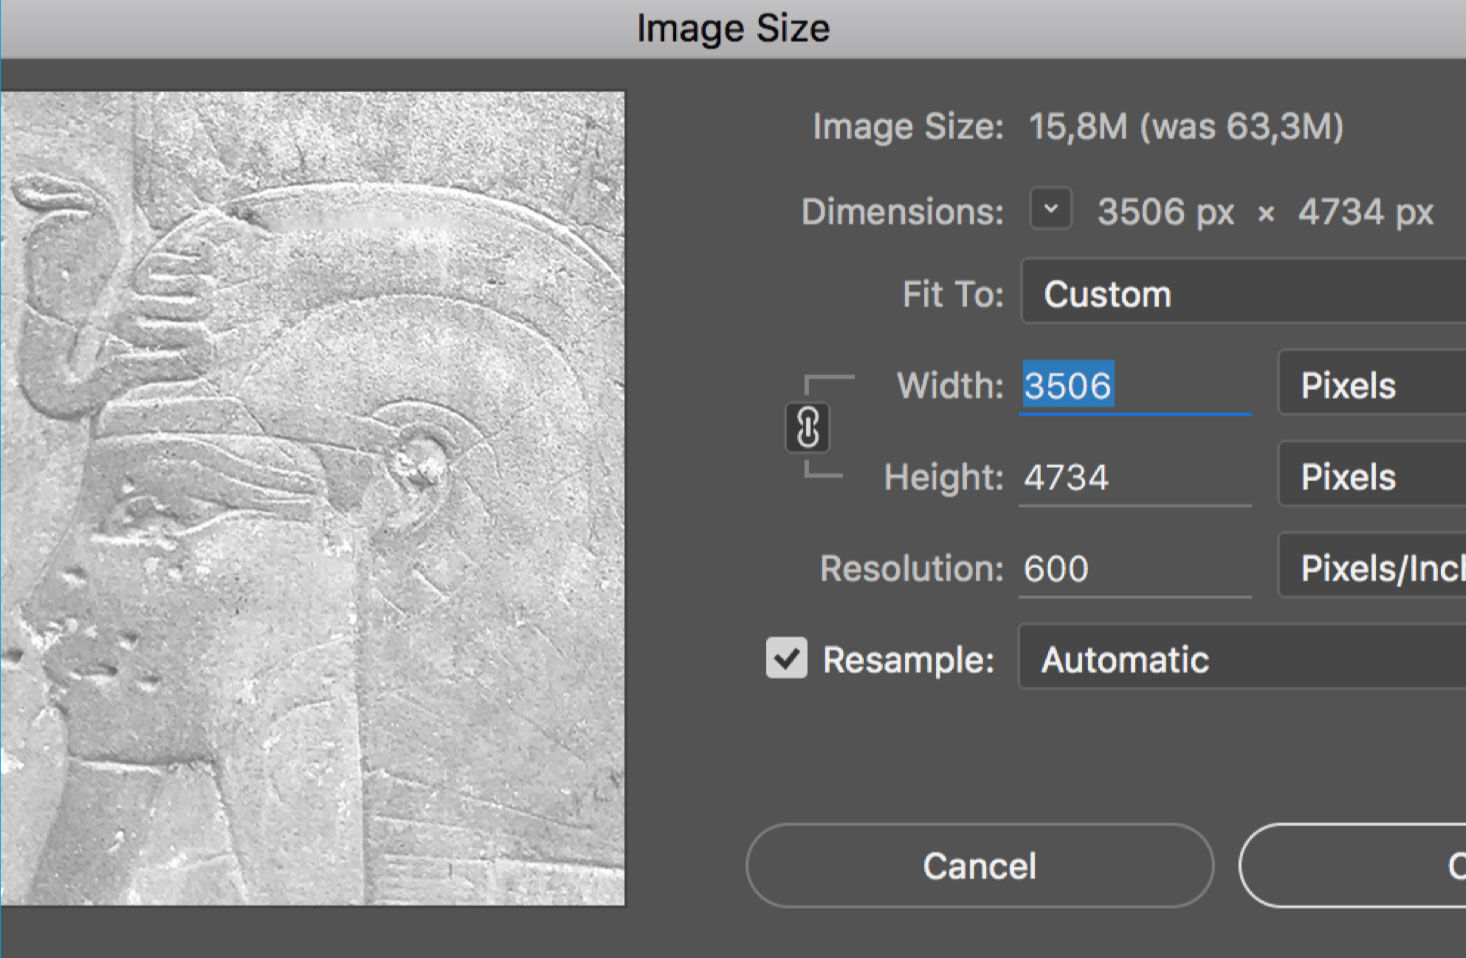
(2) The original 1200 dpi background as set up in the Template exceeds the highest resolution that the iPad Pro can accommodate.
(3) When we try to set up a canvas with the same resolution, Procreate indicates a red warning message (Too large) in the Max. Layers box.
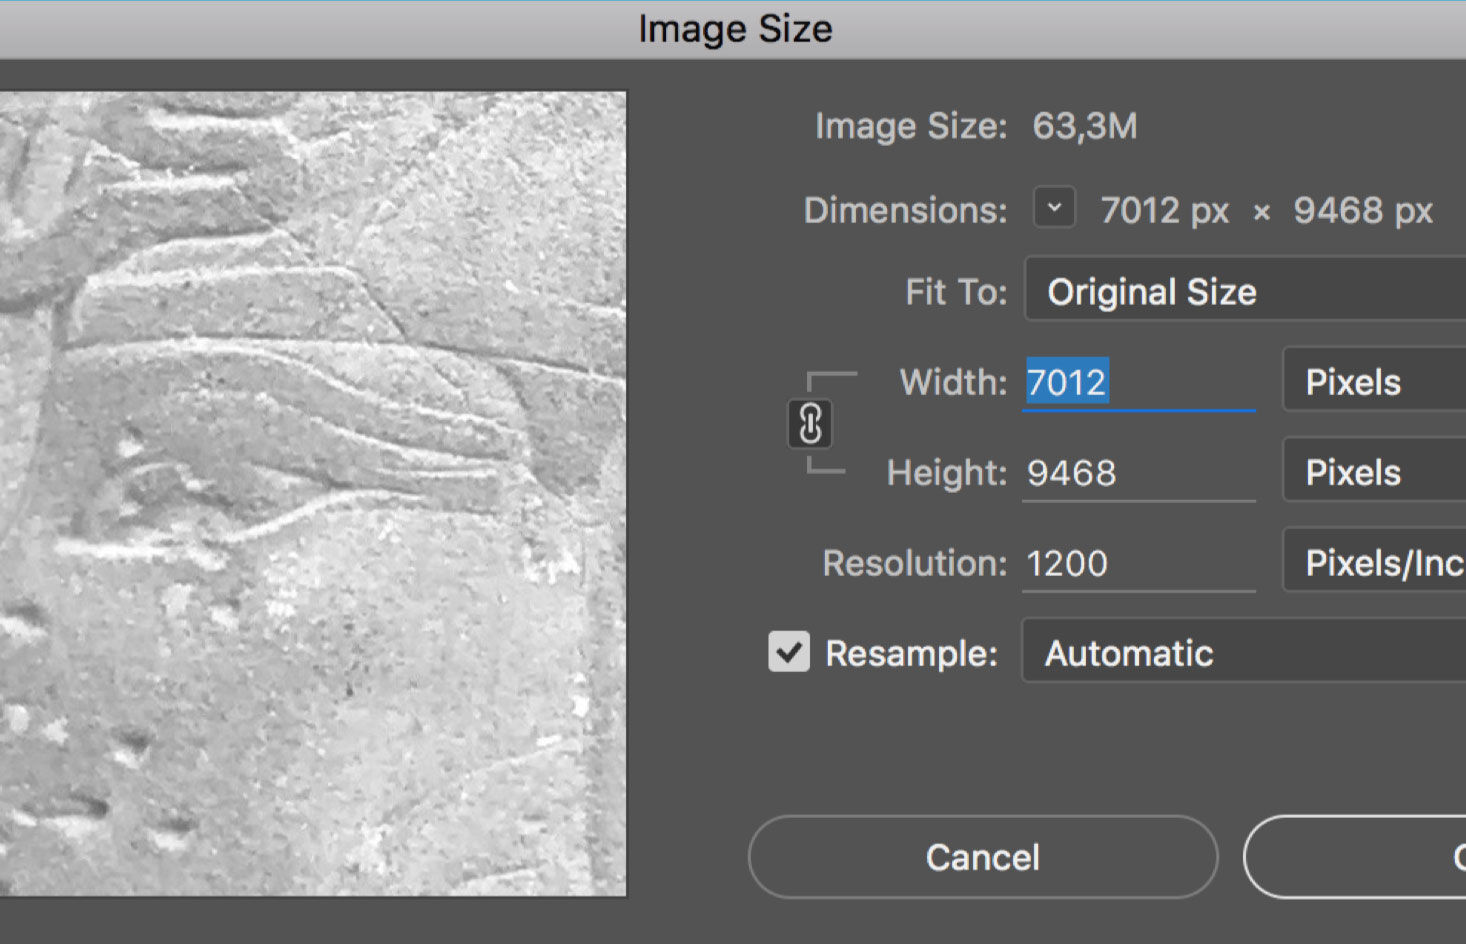
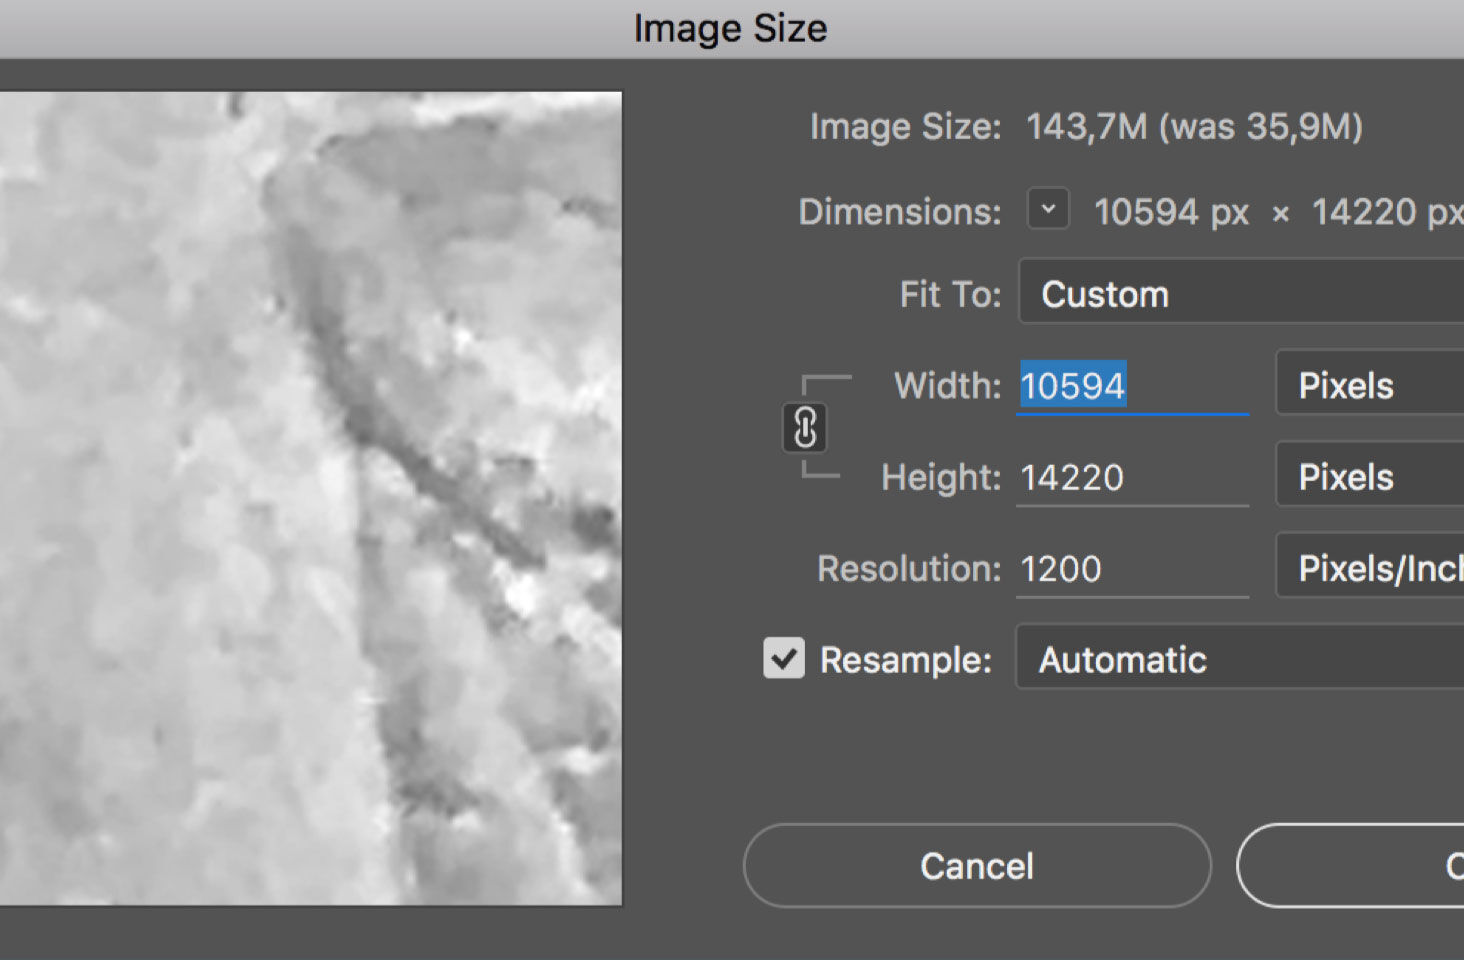
(4) Downsizing the drawing also reduces the quality. It is important to aim for the highest possible resolution that is still accepted by Procreate.
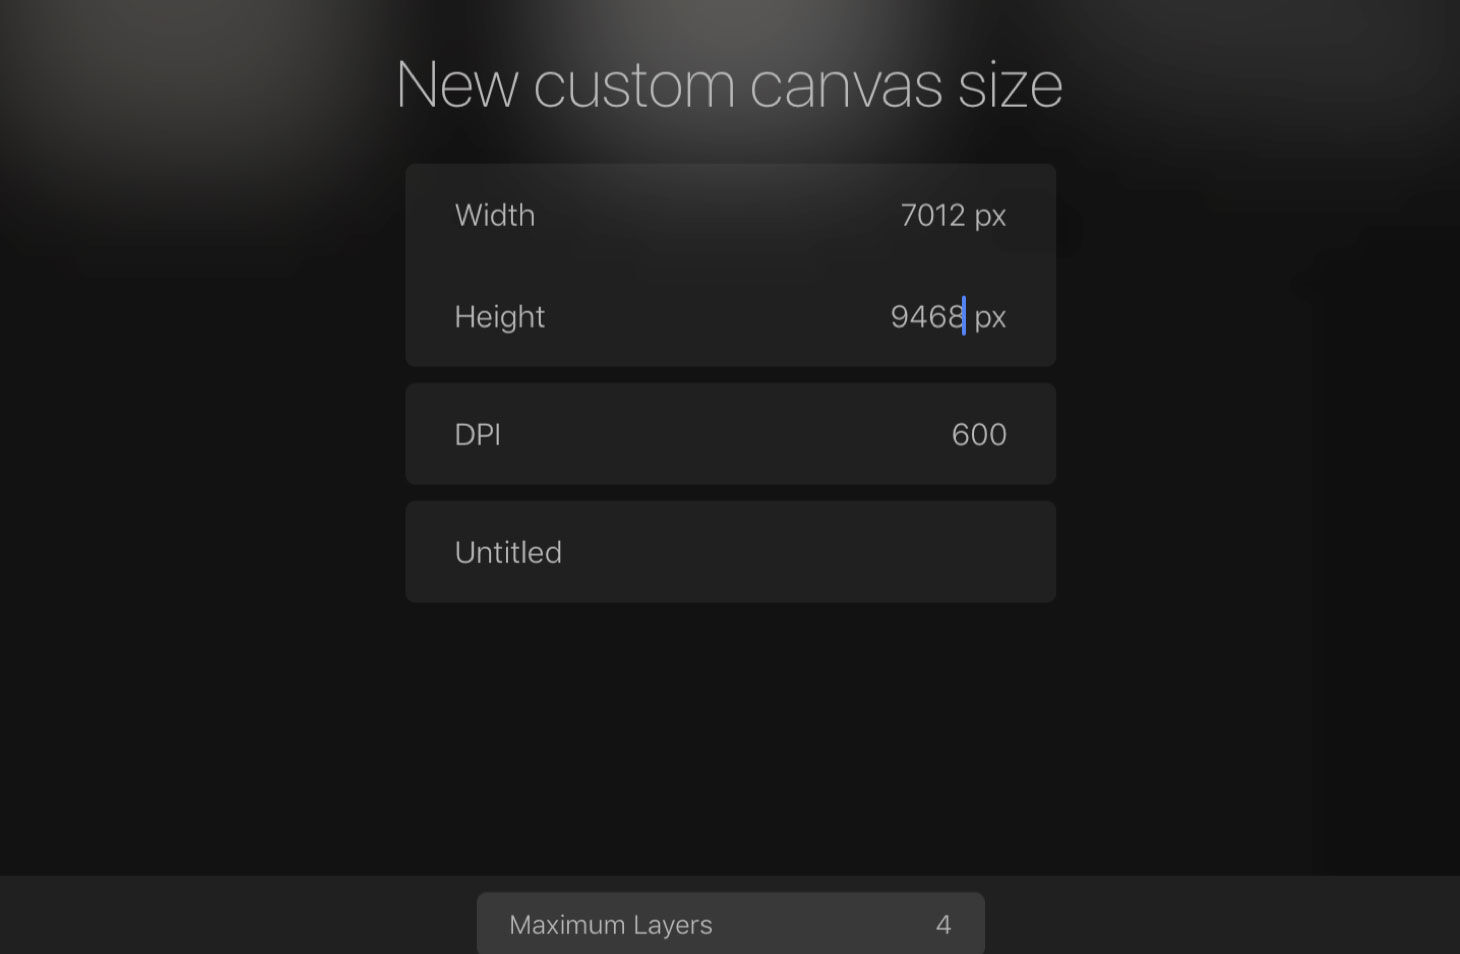
(5) Setting up the pixel count equivalent with the downscaled Photoshop file specifies the total number of layers one can use on the iPad.
(6) Dividing the background into smaller sections allows us to work in higher resolution when penciling in Procreate.
Once the connection is established, the artist has to navigate to Procreate’s folder in iTunes and drag and drop the jpeg file so it appears among the iTunes files on the iPad. The artist must then import the file into Procreate on the iPad by selecting Import/iTunes.
To learn more about the context of this tutorial read the following chapter:
0 comment(s)
Leave a comment(We'll keep your email address private)