
Tidbits of the digital Chicago method Part 5 - Taking and positioning detail snapshots with Procreate

Taking a snapshot in Procreate at Luxor temple to clarify the kilt area on the kneeling figure of Amenhotep III.
In our previous Tidbits entry, we covered some useful tricks to enhance the background photo when working in the field using Procreate on the iPad. In the following entry we’d like to show you how to take advantage of your tablet’s camera during digital ”penciling”, as we all know that the best camera is the one that is with you. Naturally, because we draw over a digital photo background during this initial phase of documentation, we need to aspire to have the best possible visual aid for our Procreate file. However, there could be instances when we receive a background where a shadow is a little too dark, a highlight is a bit burnt out or a detail is a bit blurry, making it hard to see the details and find the perfect line placement. Sometimes a slight modification in positioning our light source can help tremendously to clarify these areas on the wall. We’ve all been in a situation when directing raking light over the surface revealed carved details previously invisible to the naked eye. Sometimes spraying alcohol on the wall surface exposes additional painted details, such as preliminary sketches or traces of a grid, that are not present on the background image provided for us. Obviously, no photographer can deliver a single photo that has all the visual information required for a thorough scientific documentation, therefore always necessitating the production of a drawing. Luckily, whenever clarification is needed over a certain problematic area, we can always support ourselves by creating quick snapshots right on the iPad.
Take and position a snapshot in Procreate
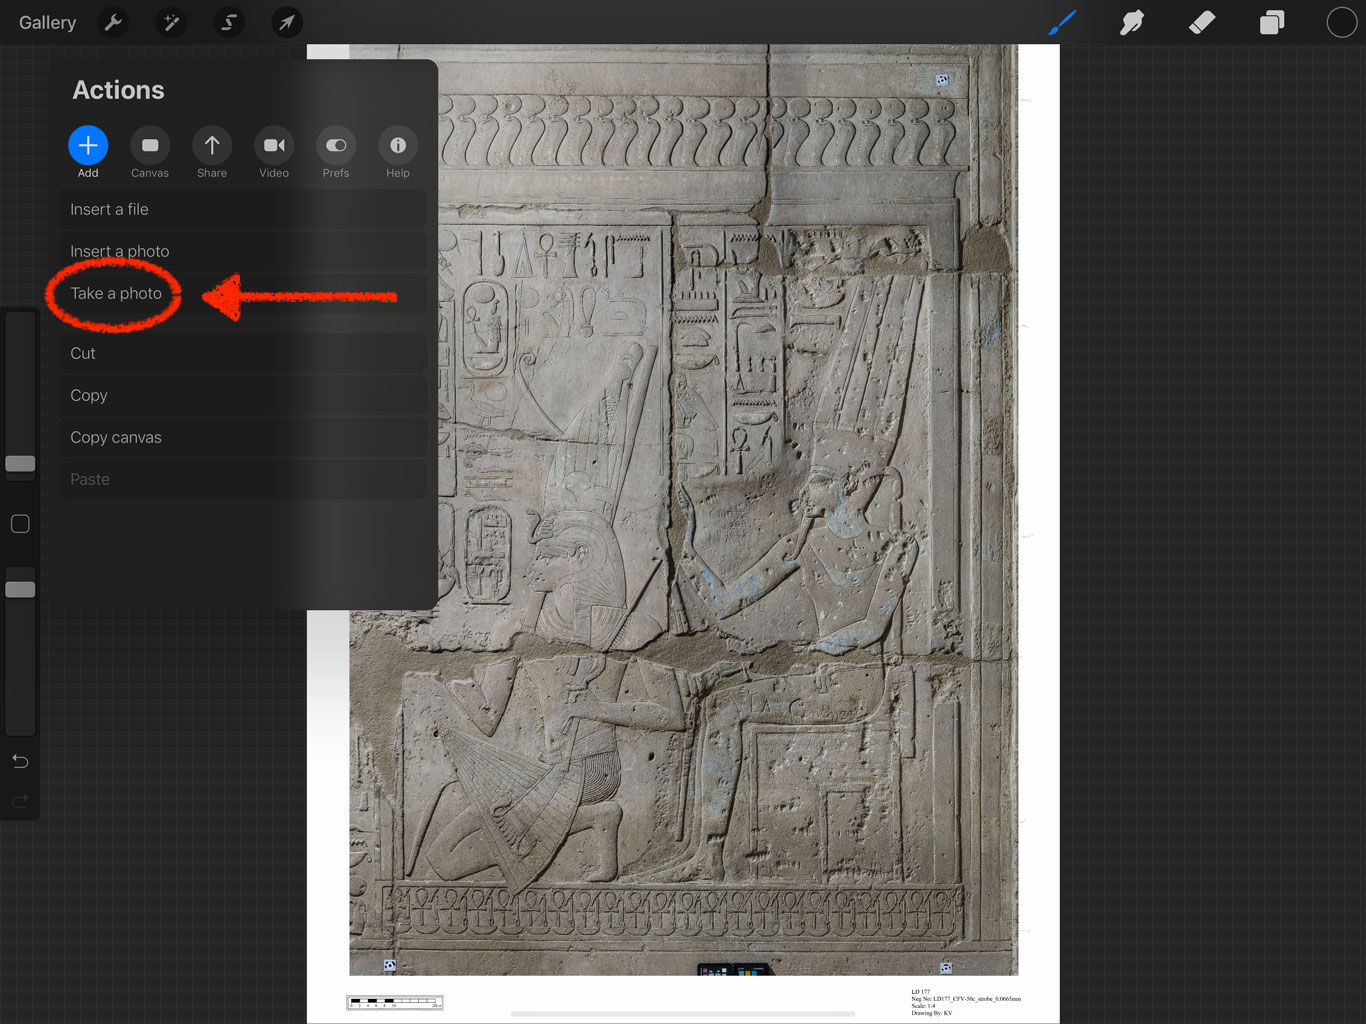
(1) Position your light source in a way that it provides the right conditions for your snapshot area. Open Actions and choose Add/Take a photo.
(2) Position your iPad in a way that your snapshot covers an area that is extended in every direction beyond the desired detail.
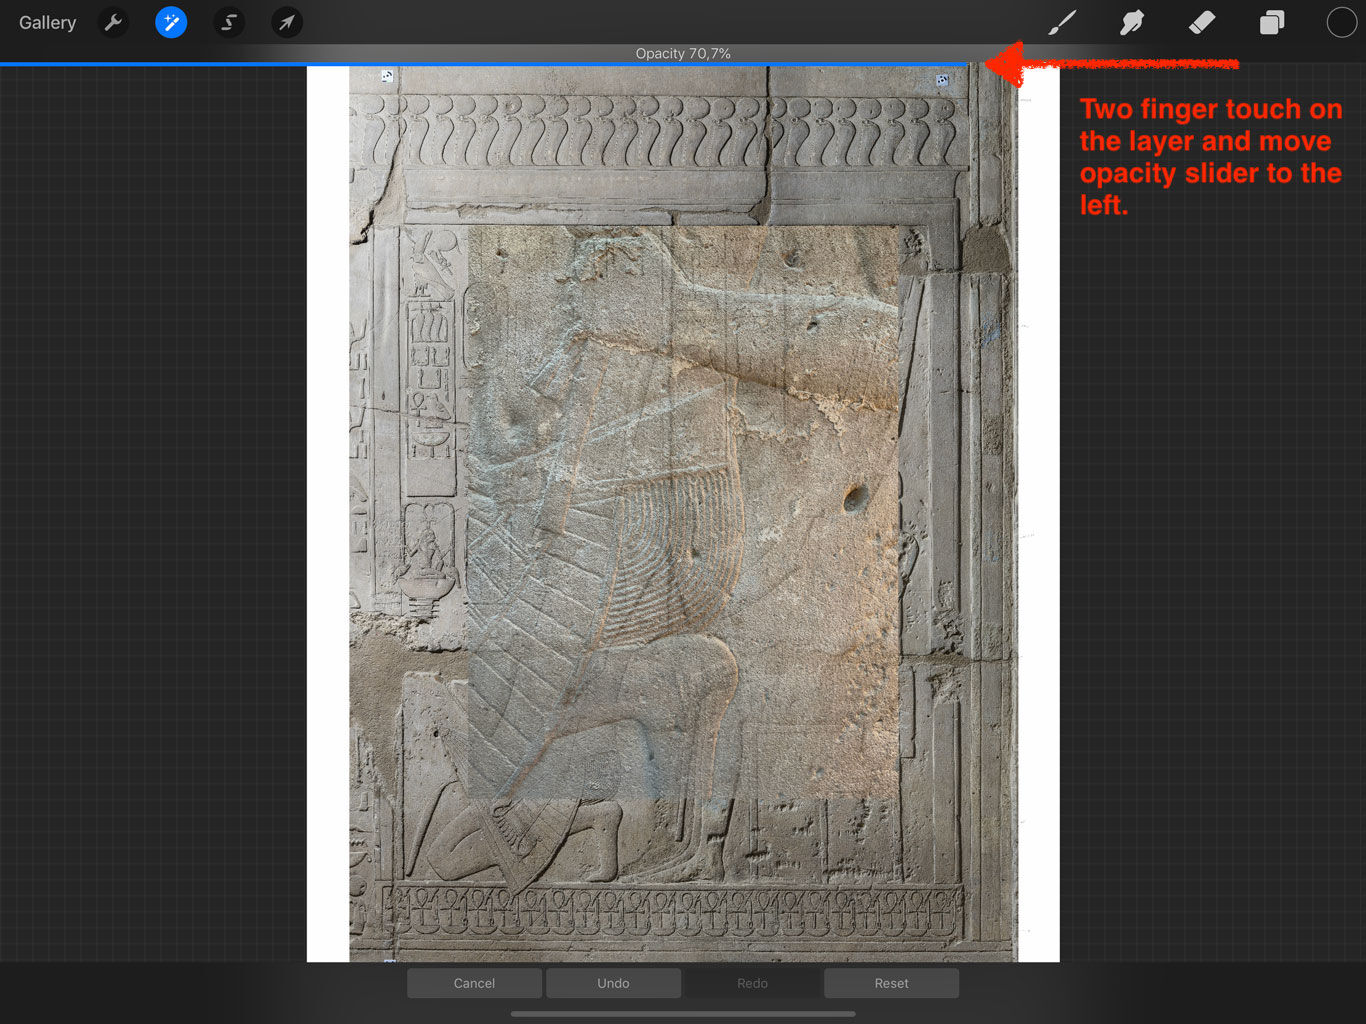
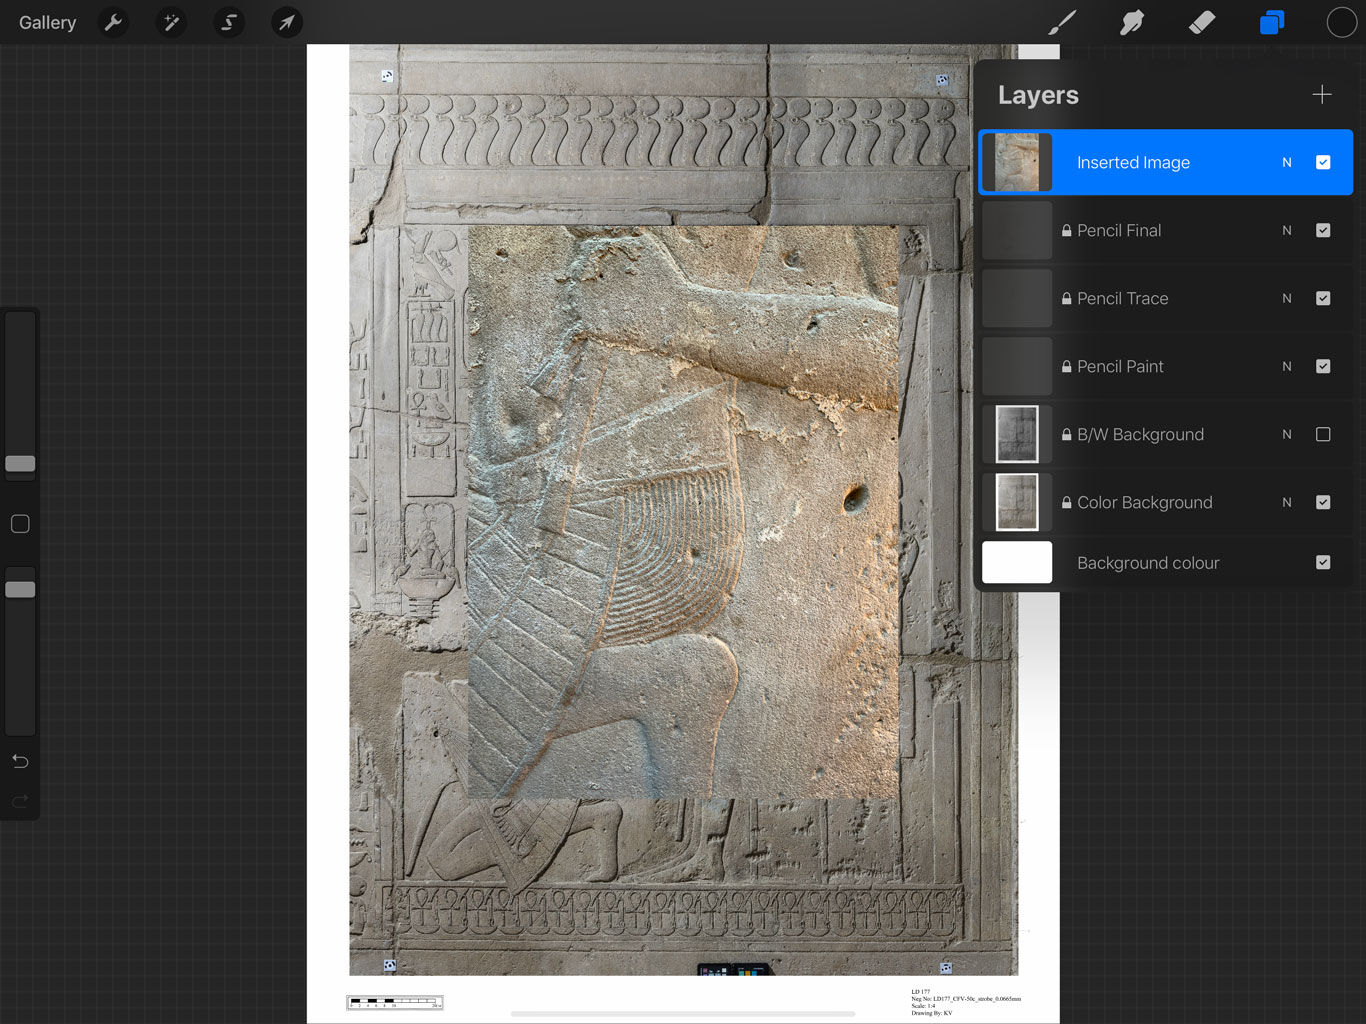
(3) Once taken, your snapshot appears on a separate layer at the top called “Inserted Image”. Lower the opacity of this layer to 70%.

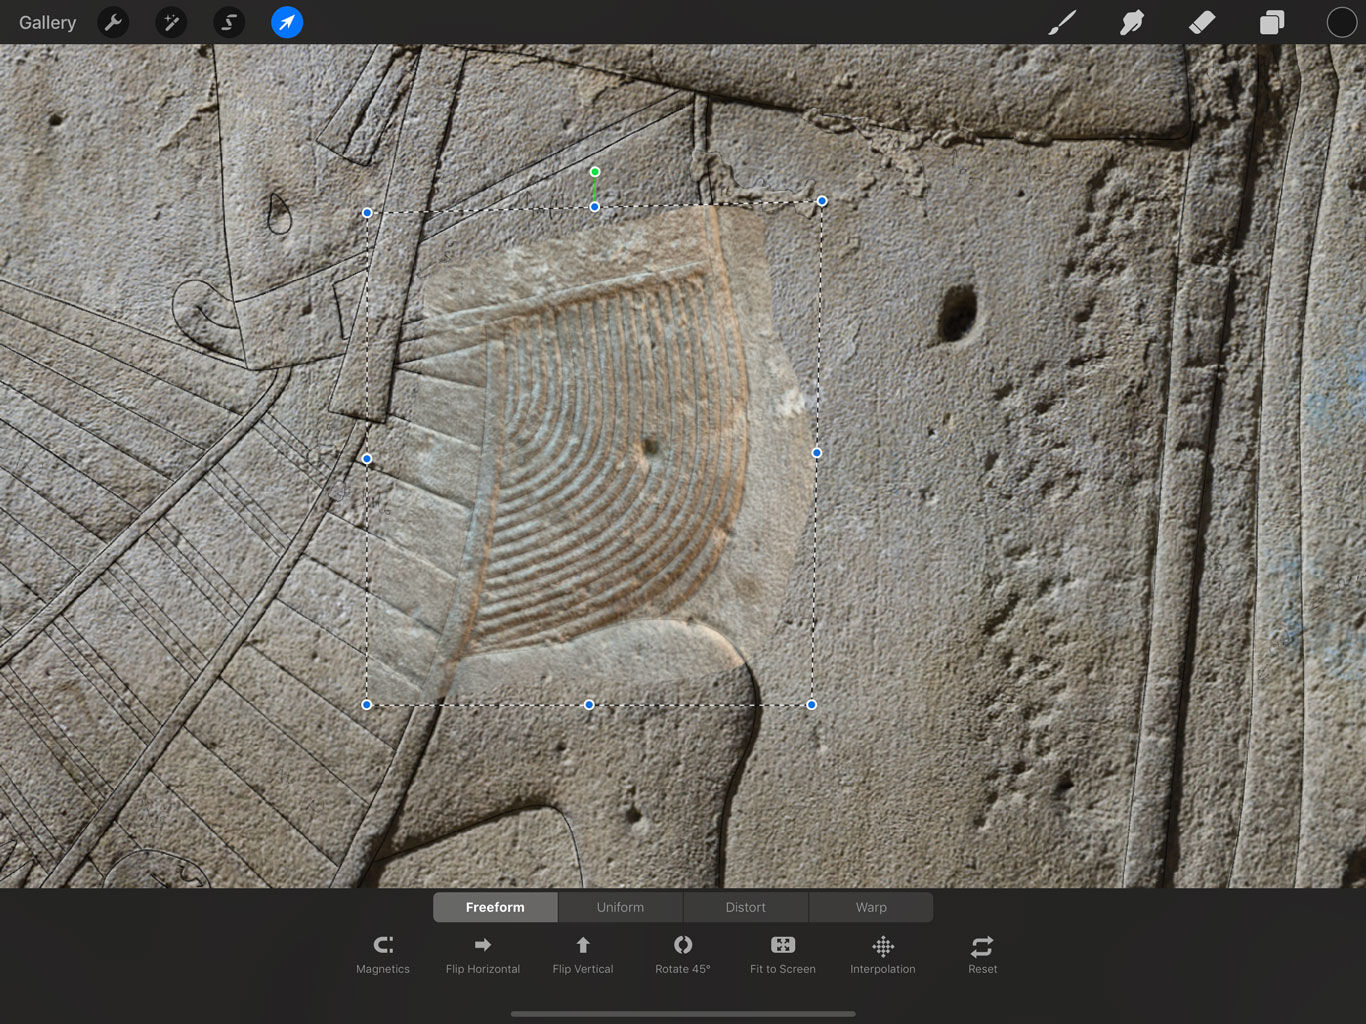
(4) Scale and position your snapshot to its approximate place by pinching and rotating with your fingers, using the Transform tool.
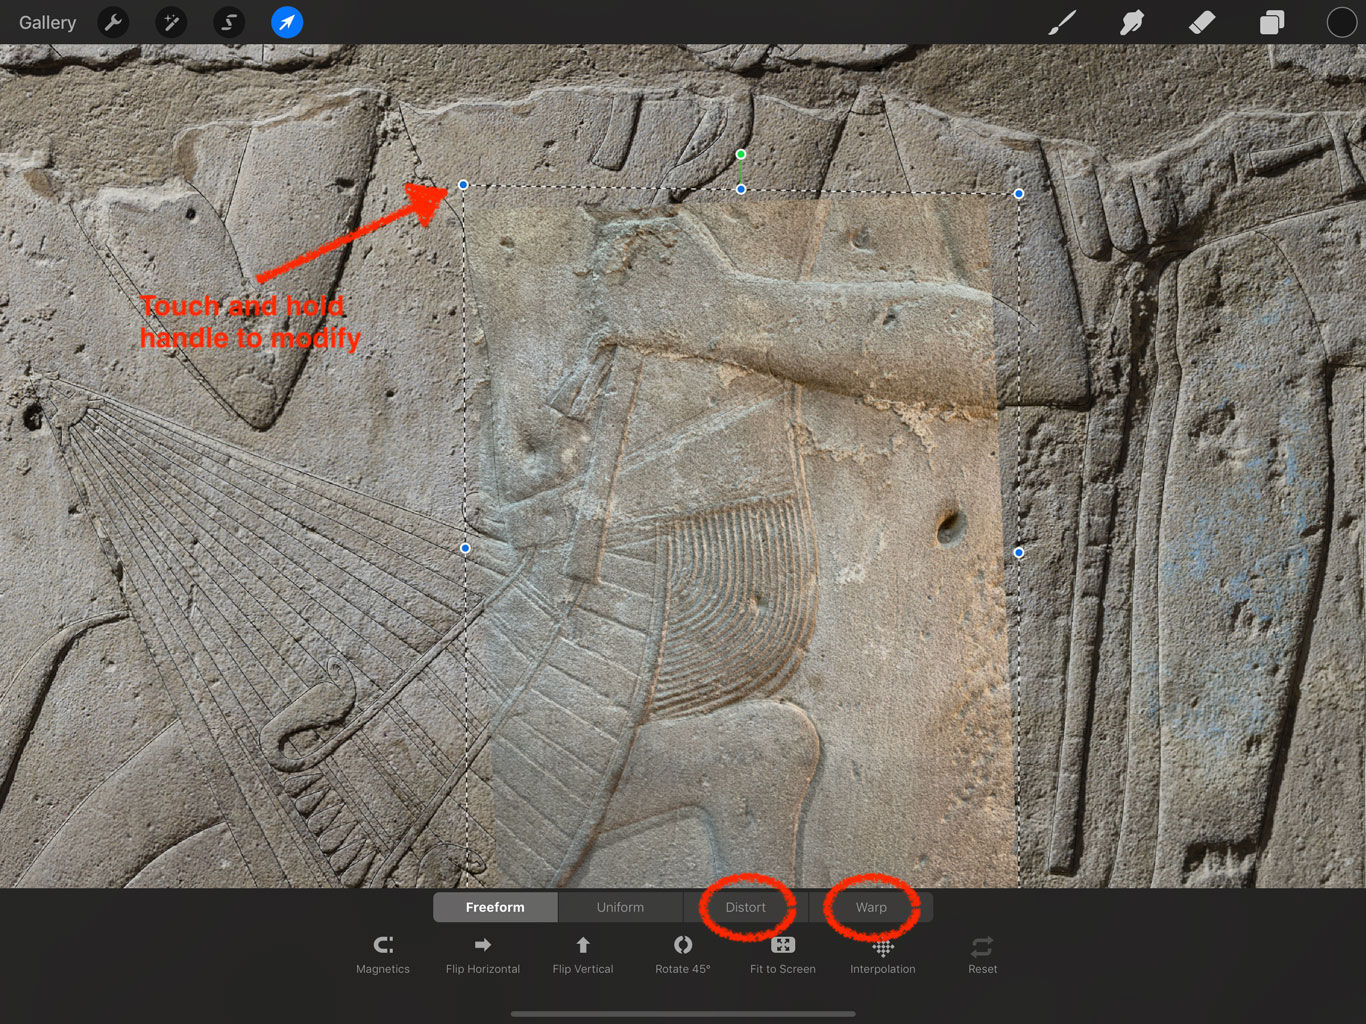
(5) Zoom in and refine the placement by dragging the Transform handles using the Distortion and Warp tools.
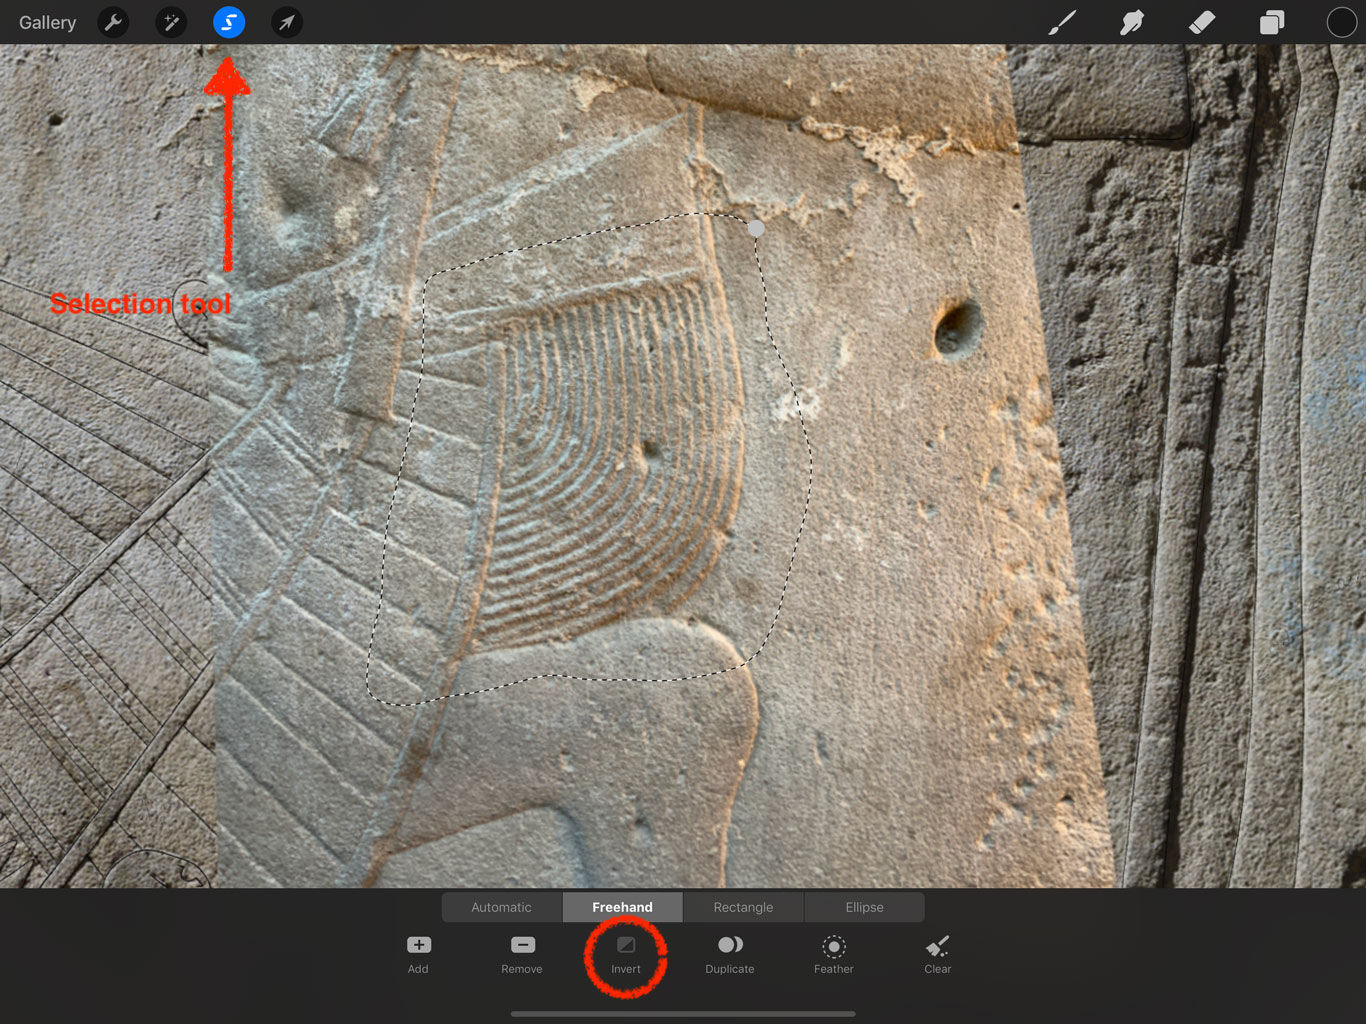
(6) Select your desired detail using the Freehand Selection tool, invert your selection and delete the surrounding area (Actions/Add/Cut).
(7) Repeat step 5 if necessary to get your snapshot positioned exactly over the background photo.
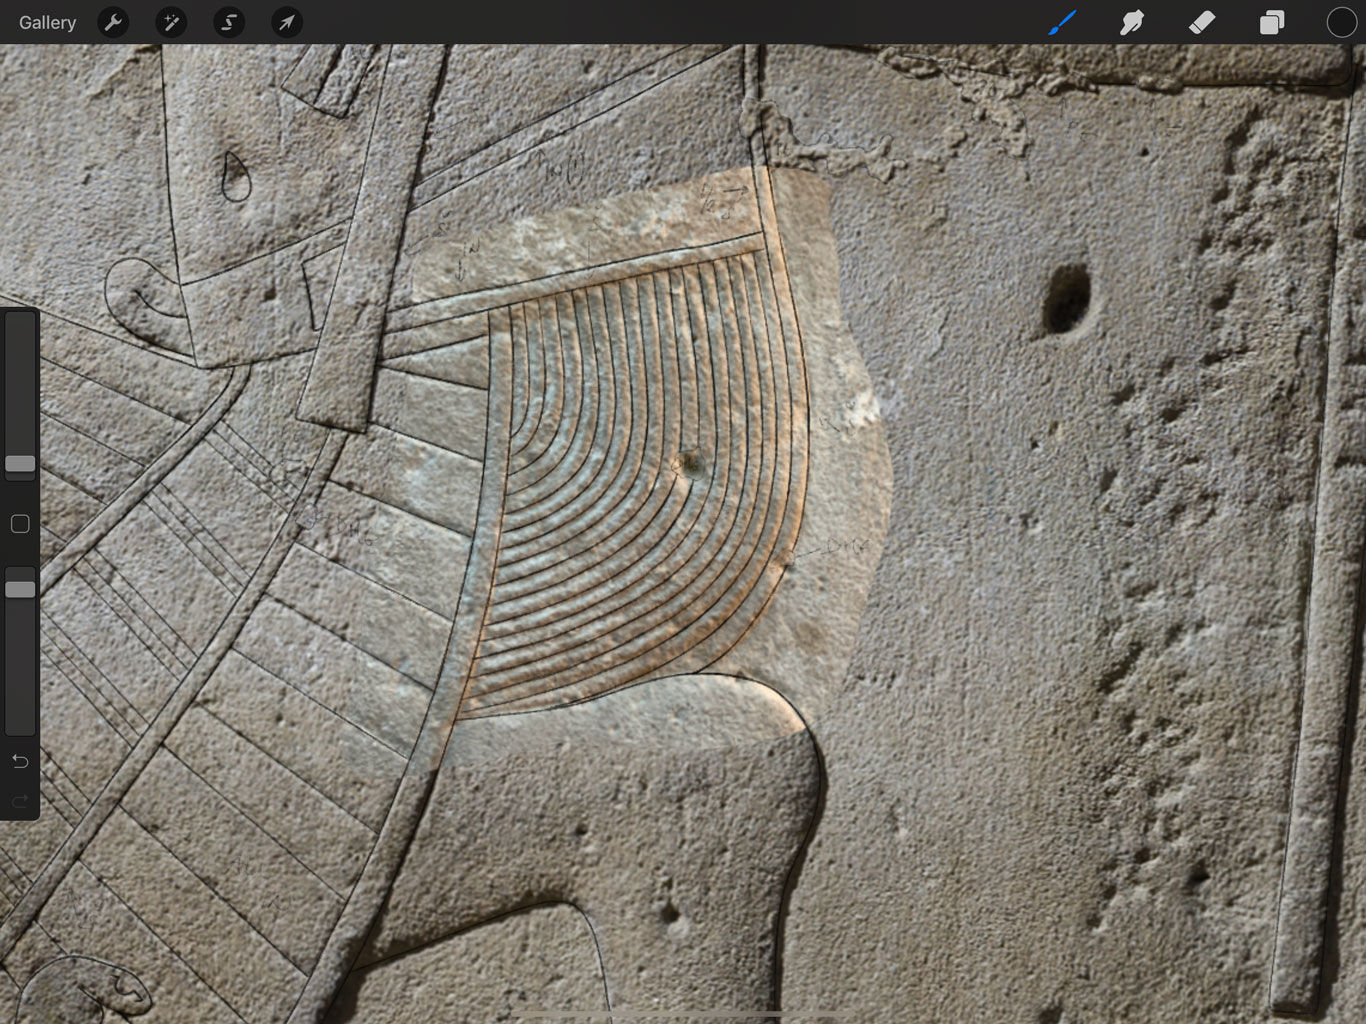
(8) Change “Inserted Image” layer opacity back to 100%, proceed forward with your pencil drawing and delete your “snapshot” layer when not needed anymore.
We'd like to provide one more remark at the end of this short tutorial: when you take your detail snapshots, always make sure that the captured area extends beyond the area you’d like to use in your Procreate file. First, the iPad always focuses to the center of the photo therefore some blurriness might occur towards the edges. Second, since you most probably position yourself very close to the wall to be able to take the sharpest close-up of a wall section, your photo is going to be distorted. This barrel distortion effect on images taken at a close distance is due to the iPad’s wide-angle lenses being unable to correct perspective. Obviously, being dragged down by endlessly fiddling with these anomalies while in the field would defy the very purpose of taking these quick snapshots.
0 comment(s)
Leave a comment(We'll keep your email address private)