
Tidbits of the digital Chicago method Part 4 – Implementing enhanced photographs with Procreate using iDStretch

DStretch enhancement applied in the Small Amun temple in Medinet Habu to augment blue pigment on a painted serekh
DStretch – a well-known and widely used piece of software – is an ImageJ plugin written by Jon Harman to enhance rock art images invisible to the naked eye. To be able to use DStretch on your computer you need to go through a few rather tedious steps. First, you need to install ImageJ, a barebone Java image processing program that is available for both Mac and PC. Once you have it on your computer, you must send an email request to receive your free DStretch plugin directly from the developers. When you have the file, you need to put it into your ImageJ Plugins directory. When you start ImageJ for the next time, the DStretch menu should appear in your ImageJ Plugins menu. If everything goes as intended, you’re ready to turn on DStretch by choosing Plugins / DStretch / DStretch…Run and you can start trying out its various enhancements to tweak your photo.
The reason why we didn’t include any screenshots to demonstrate this process is because we don’t want you to go through these tedious steps every time you need to enhance a photograph. Instead, in this tutorial, digitalEPIGRAPHY would like to show you how you can implement DStretch enhancements directly into your Procreate workflow on the iPad. First, you need to purchase the mobile version of DStretch, called iDStretch. It is available on both Android and iOS devices and costs $19.99 (one-time purchase). iDStretch, just like its desktop iteration, is a fairly simple and straightforward program that includes different enhancements covering the common pigment occurrences to be encountered during paint analysis. Several of the enhancements are intended to increase the visibility of red pigments, by far the most common pigment found at rock art sites and – not entirely by chance – a common color used for preliminary sketches in pharaonic art.
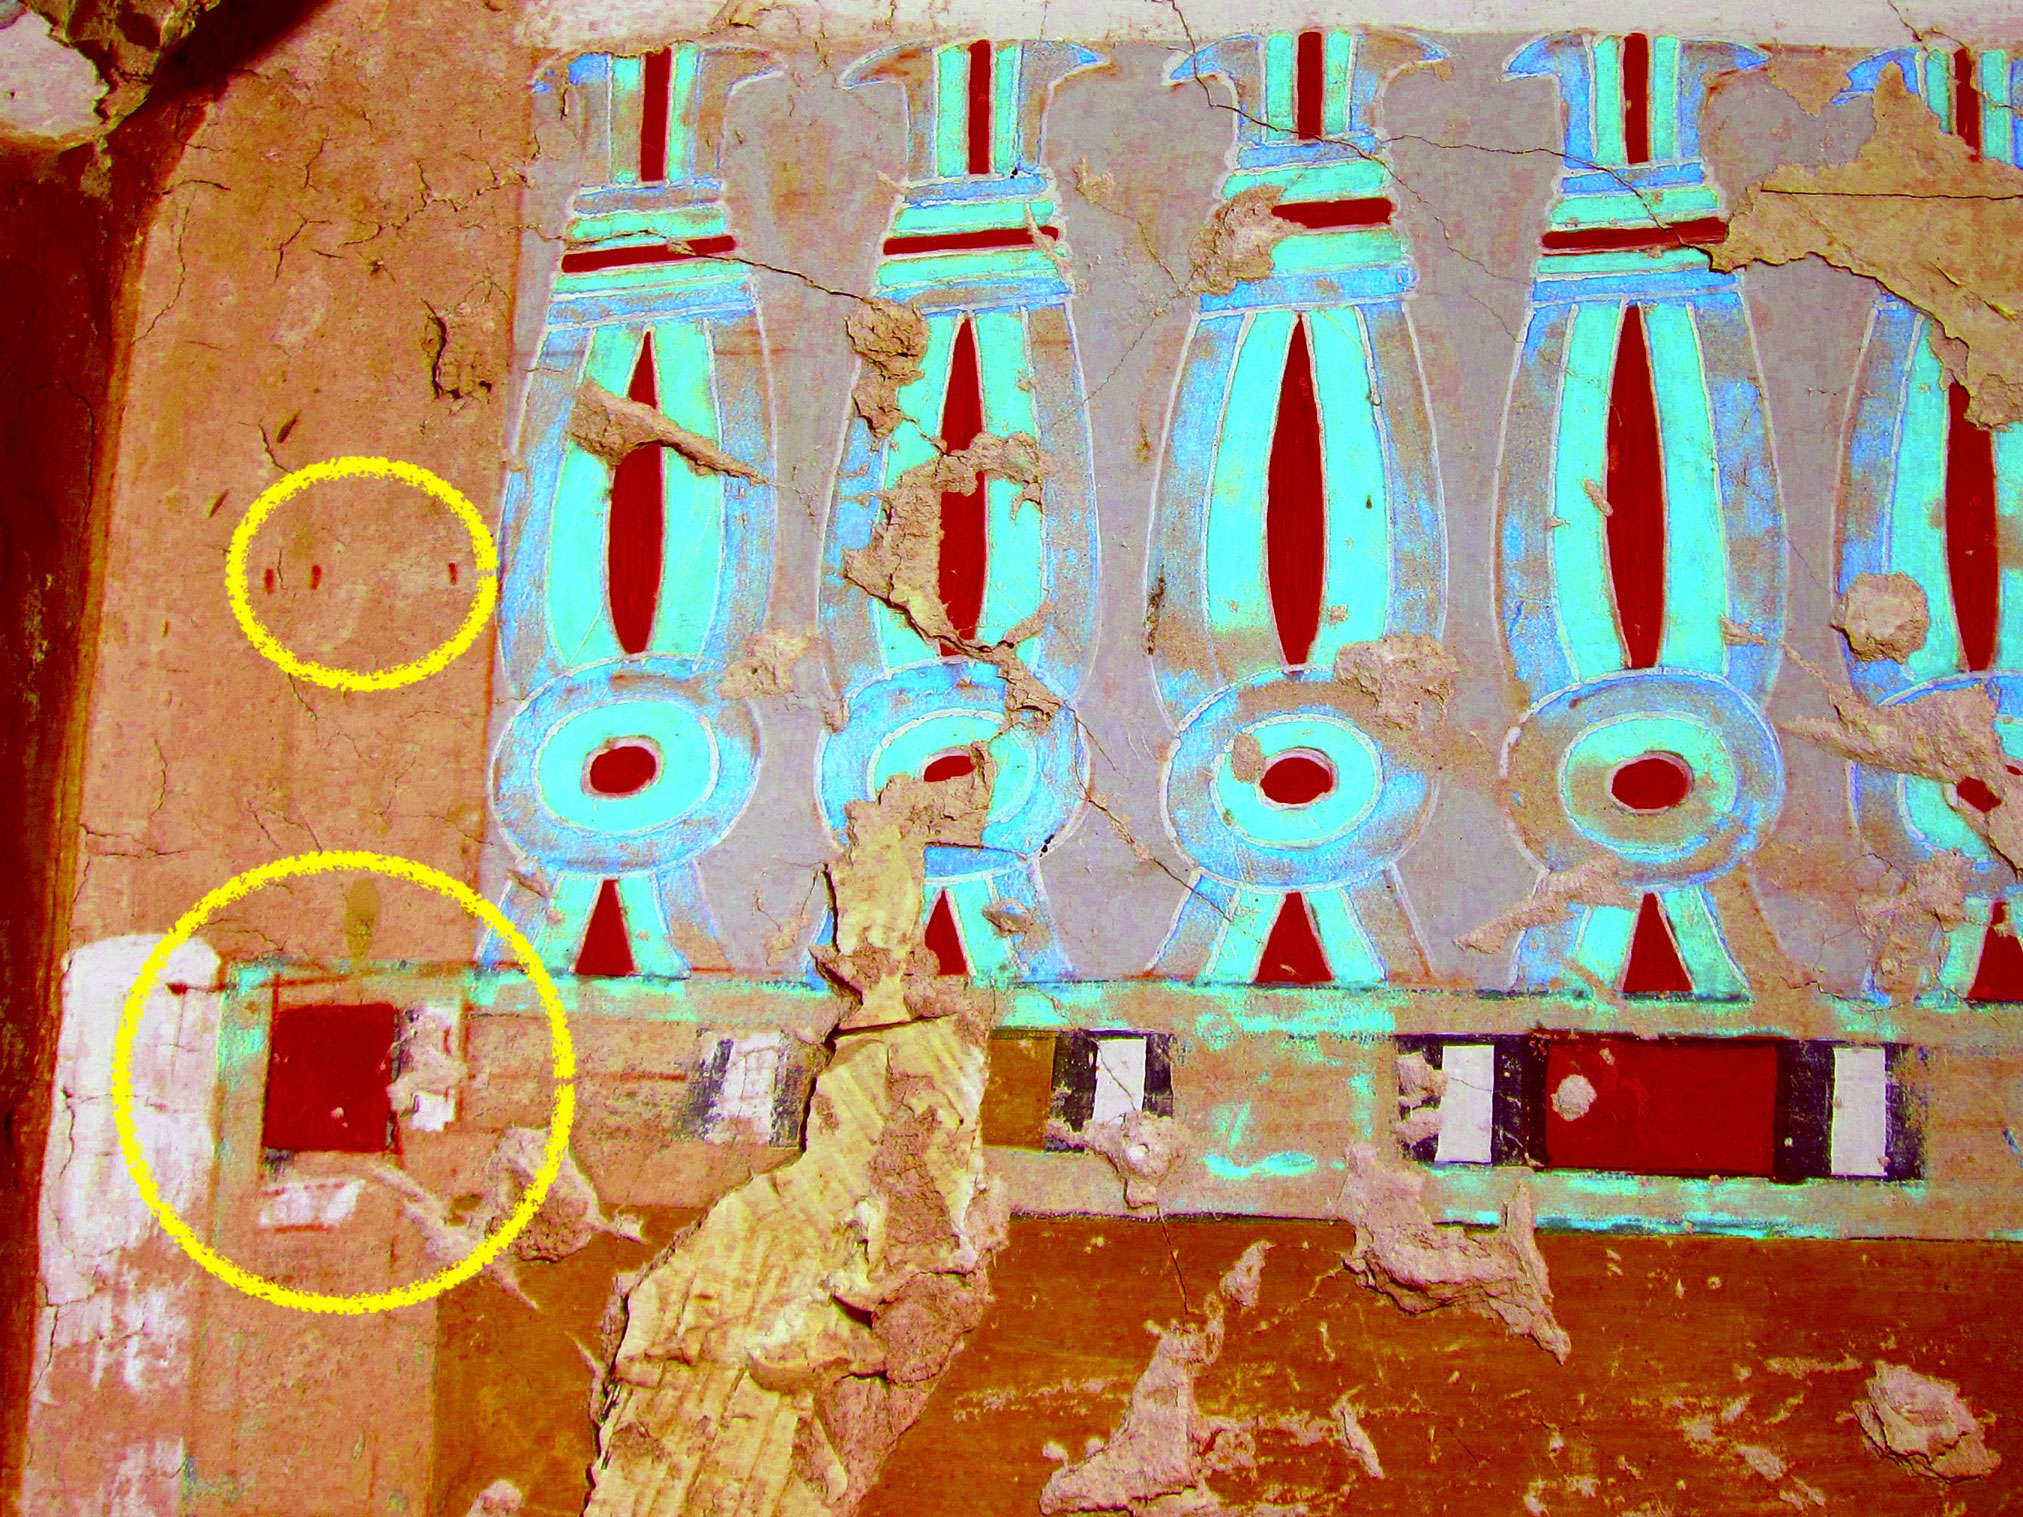
iDStretch-enhanced alignment marks and preliminary sketches (encircled in yellow) on the wall in Theban Tomb 179
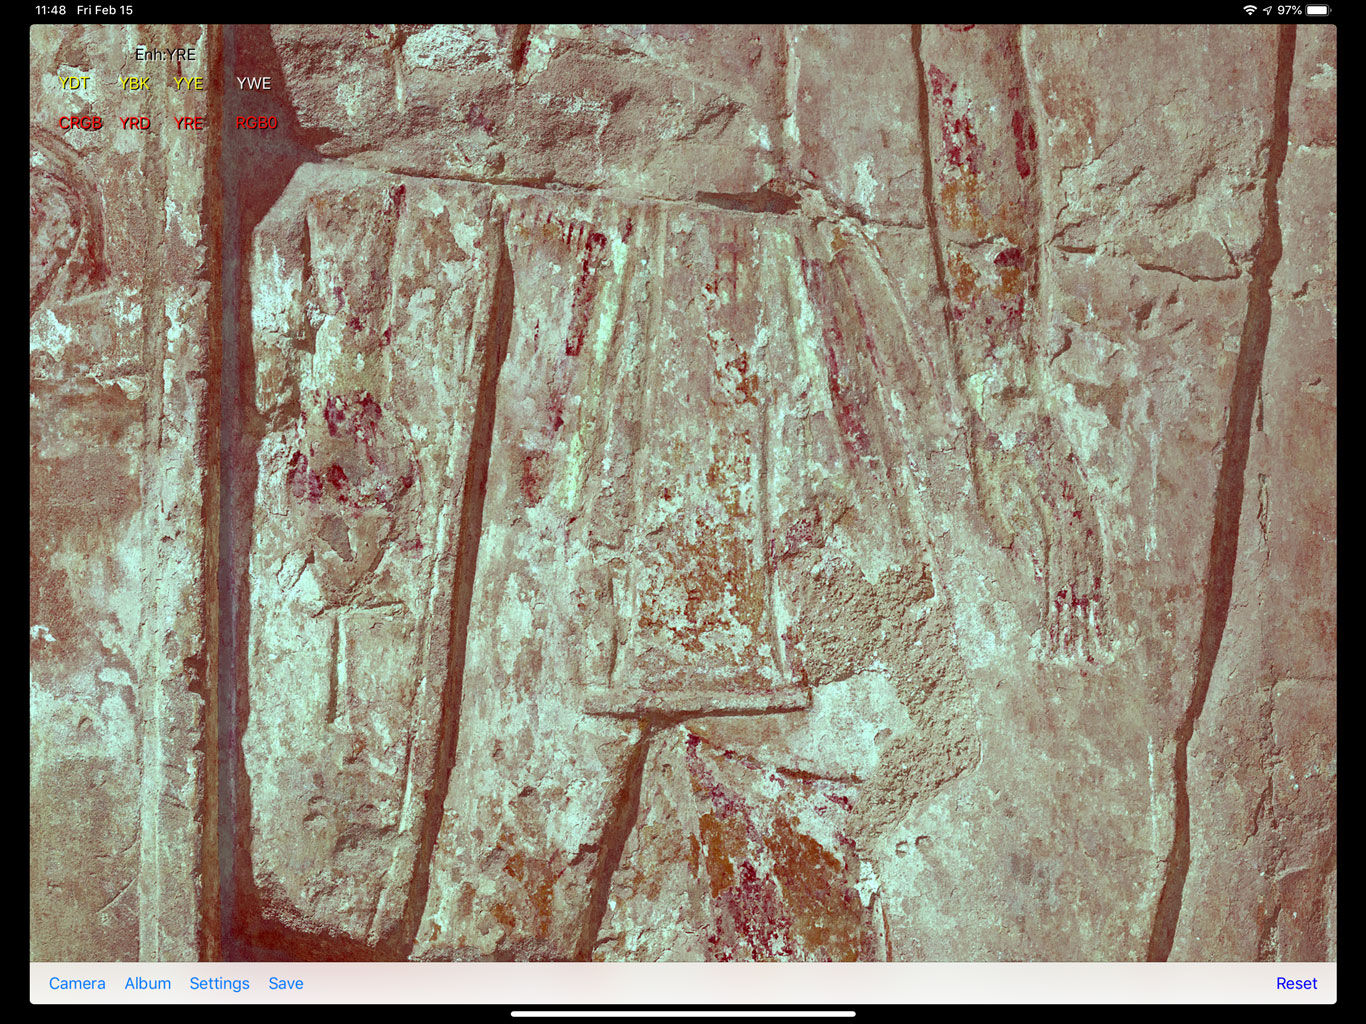
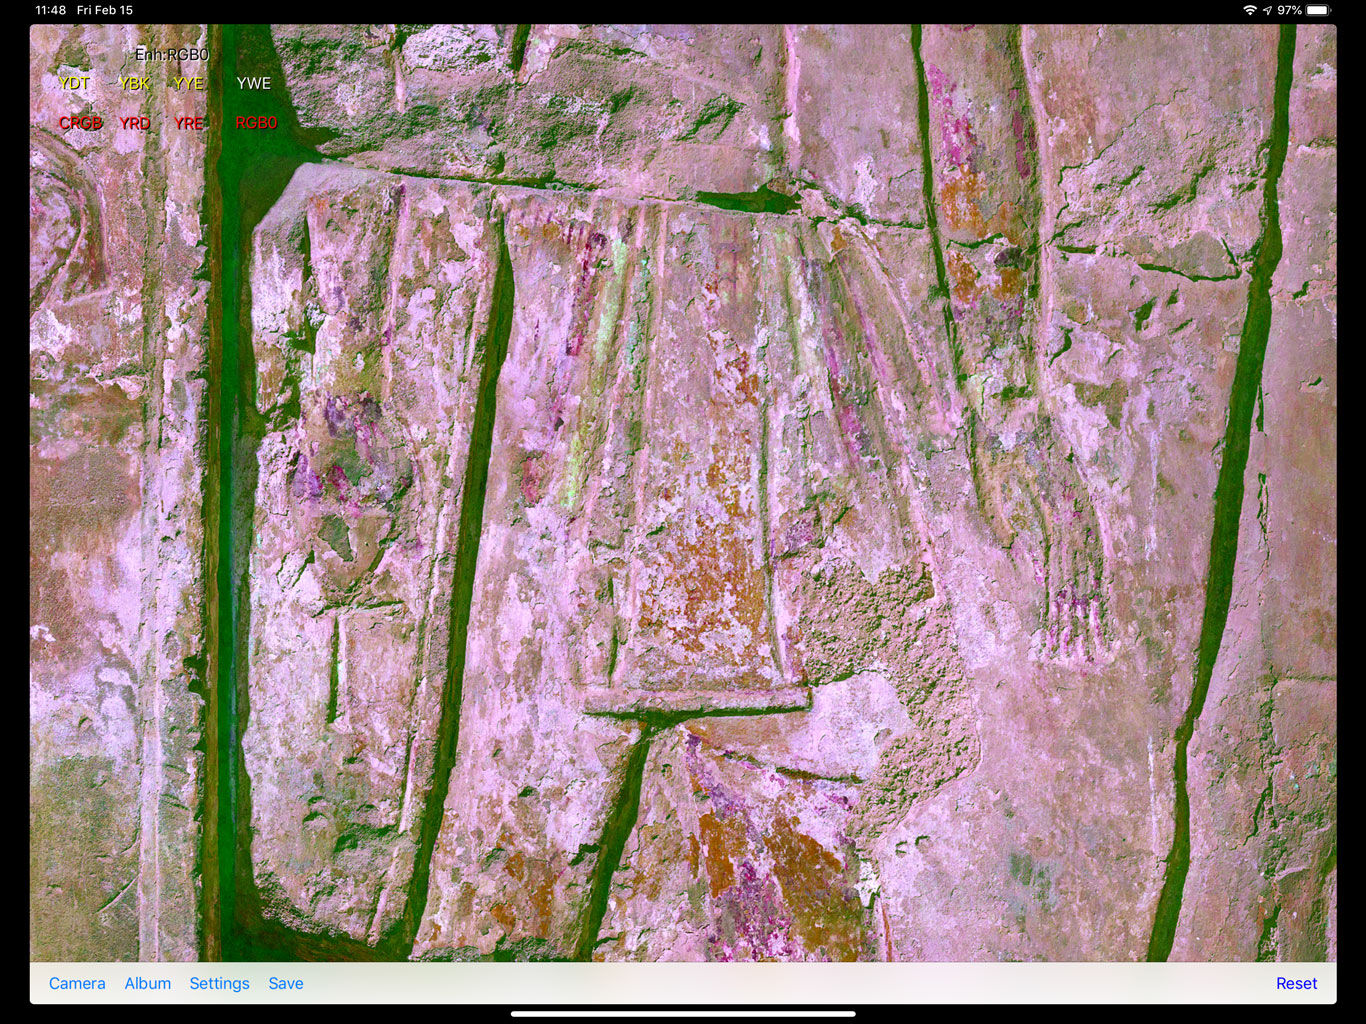
Upon opening the app you’re greeted with eight different enhancements to apply over your photos, appearing in the upper left corner in the following order:
YDT (general purpose), YBK (for blacks), YYE (for yellows), YWE (for whites),
CRGB (for reds), YRD (for reds), YRE (for reds), and finally RGB0 (for reds).
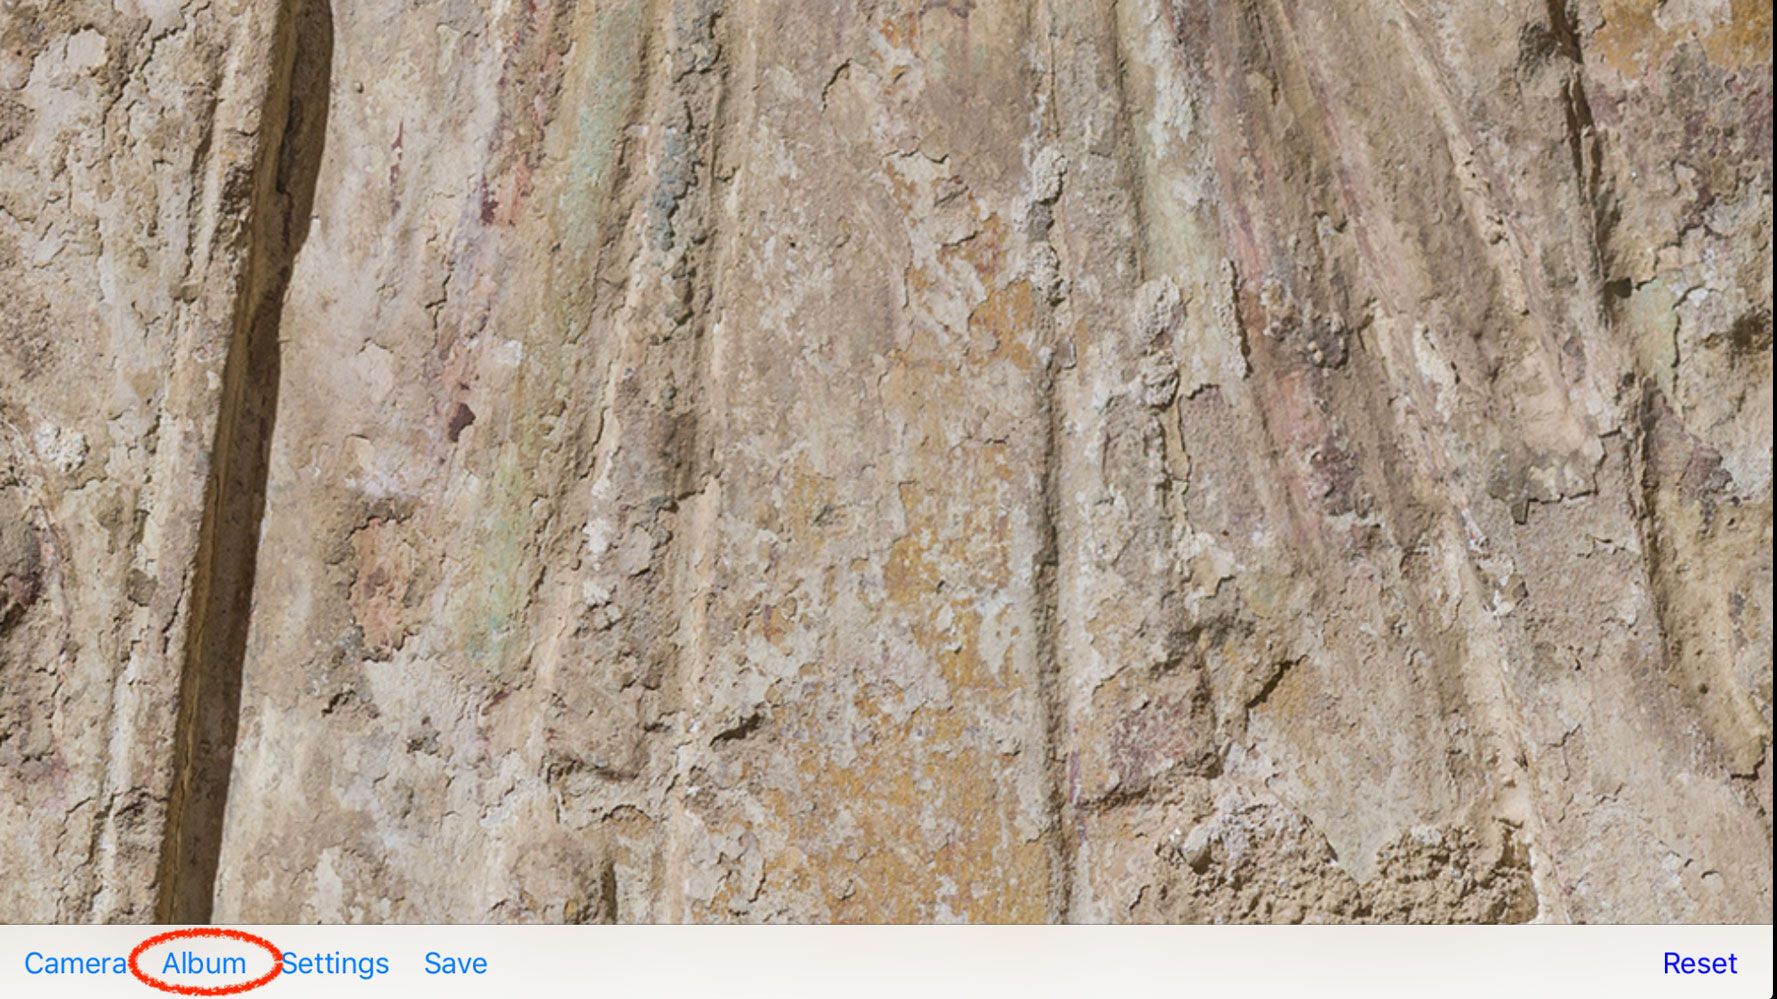
These enhancements will be familiar to anybody who has ever used the desktop DStretch plugin, however they appear somewhat different due to the limitations of certain mobile devices. As you move to the bottom right corner of the app interface, you’ll find the usual Camera and Album (Photos app) options as your image sources. As soon as you take a photo or import one from your Photos album, it is ready to be modified. Once your photo appears in the viewer, all you need to do is push any of the enhancement buttons to see the results. When you find your desired filter, it needs to be saved to the Photos app by hitting the Save button at the bottom. You can always reset your image to its original appearance and start over the entire process by tapping on the Reset button at the bottom on the right. Below, we’d like to demonstrate the main attributes of each filter for your reference:
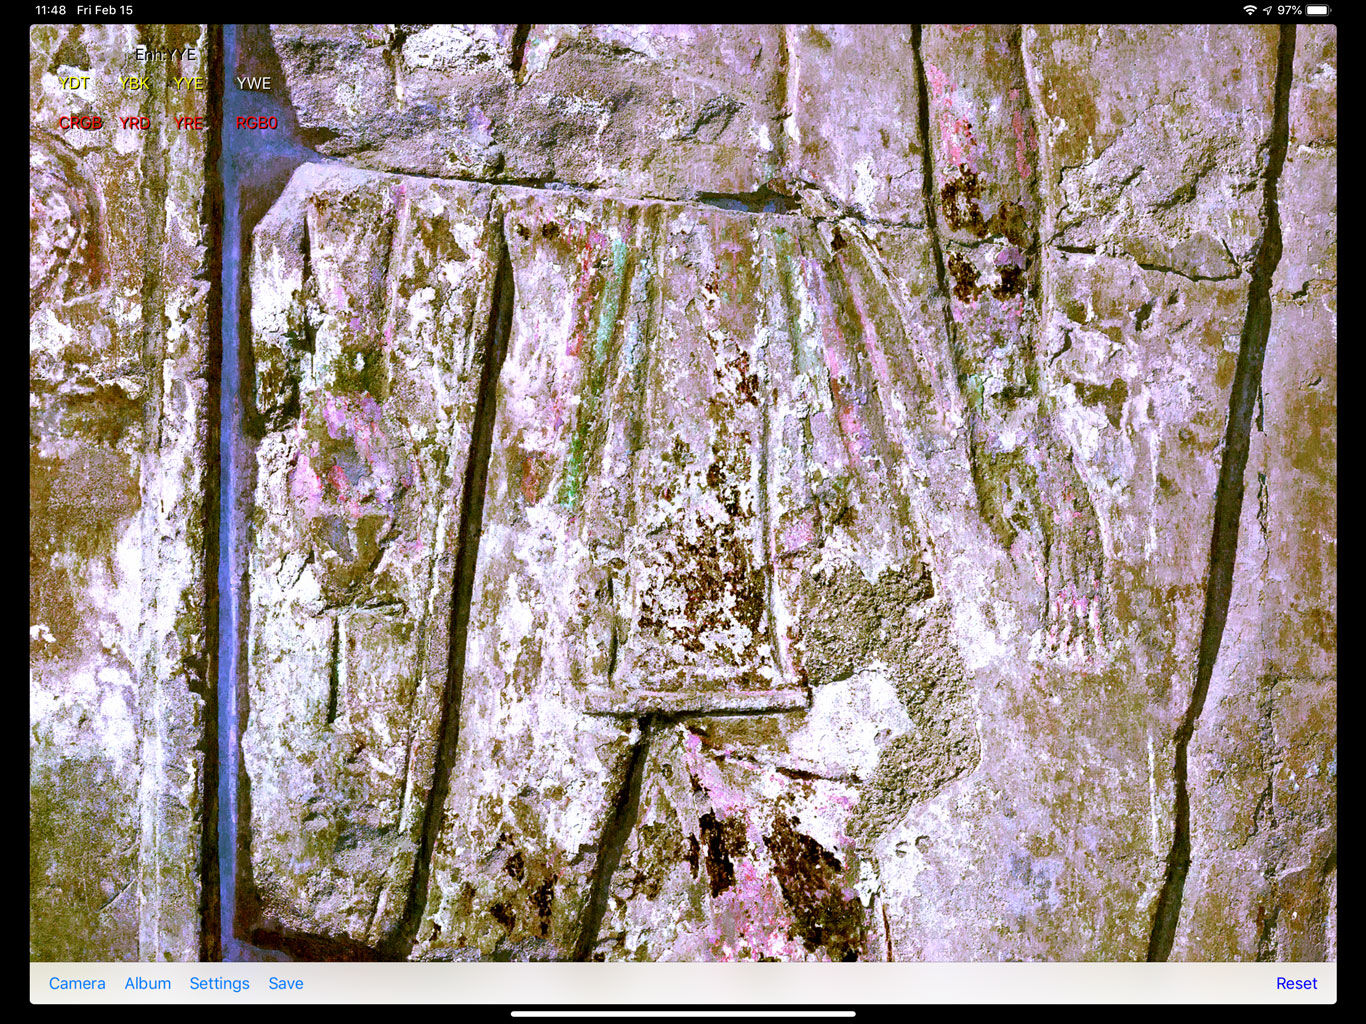
iDStretch filters applied over paint traces
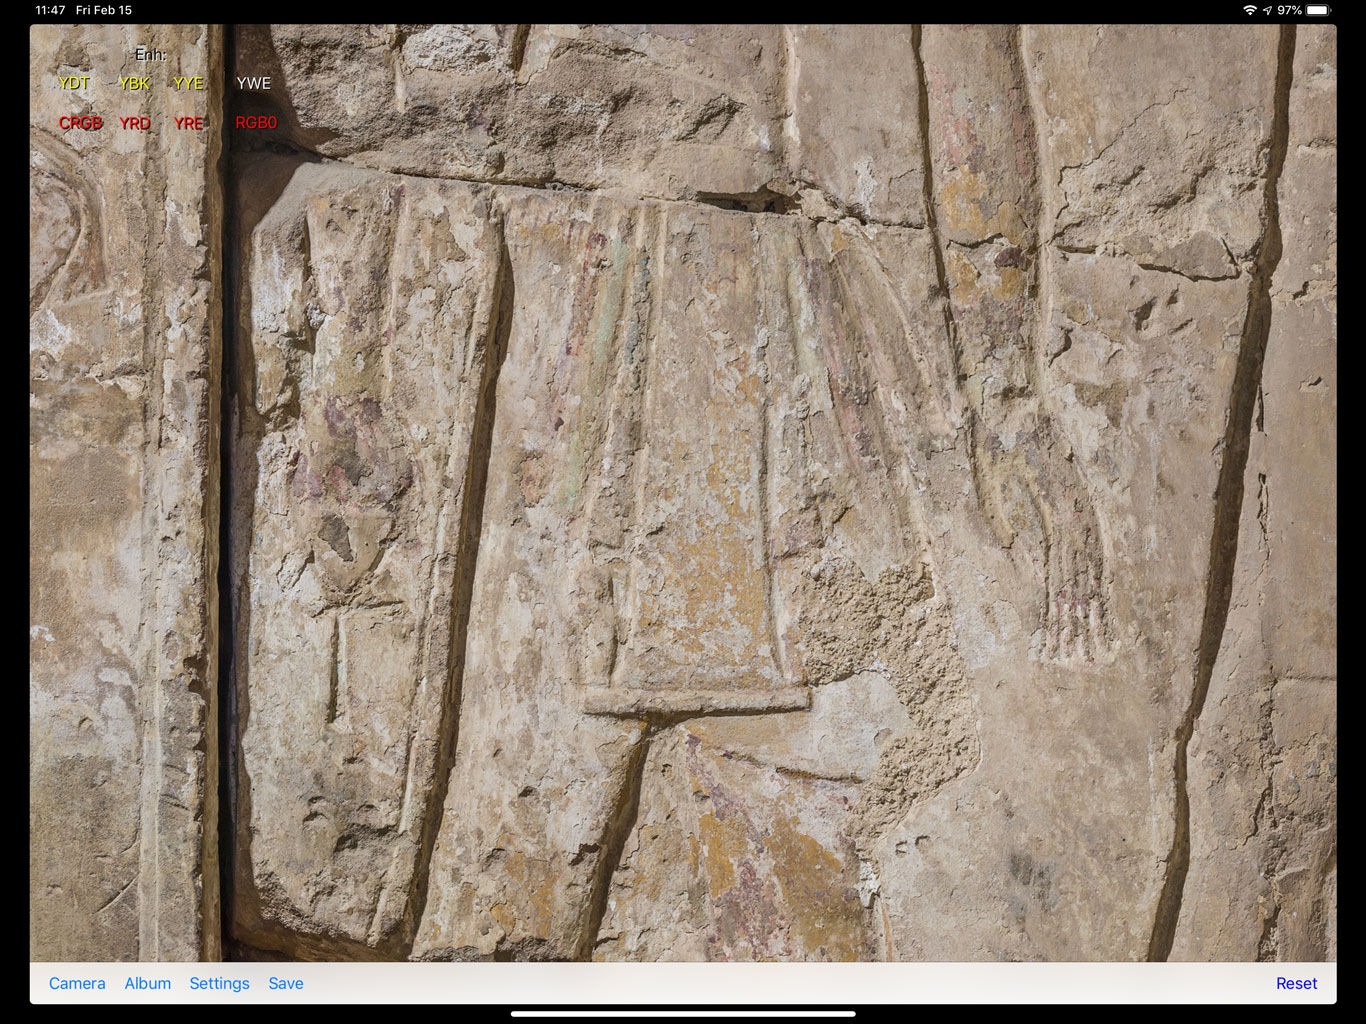
(1) Original image without any modifications
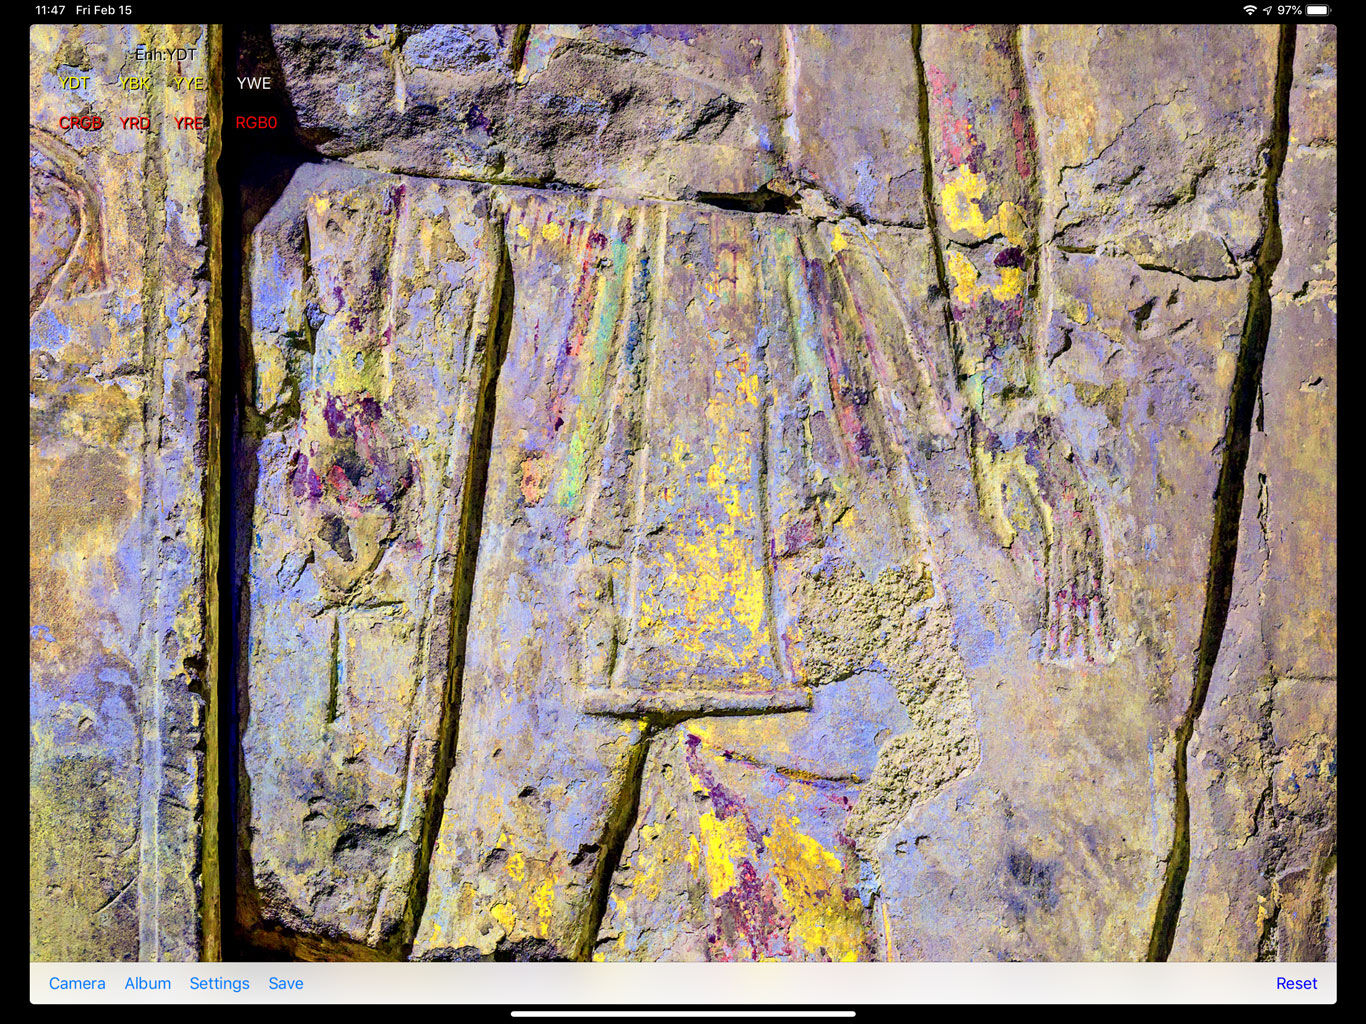
(2) YDT (general purpose)
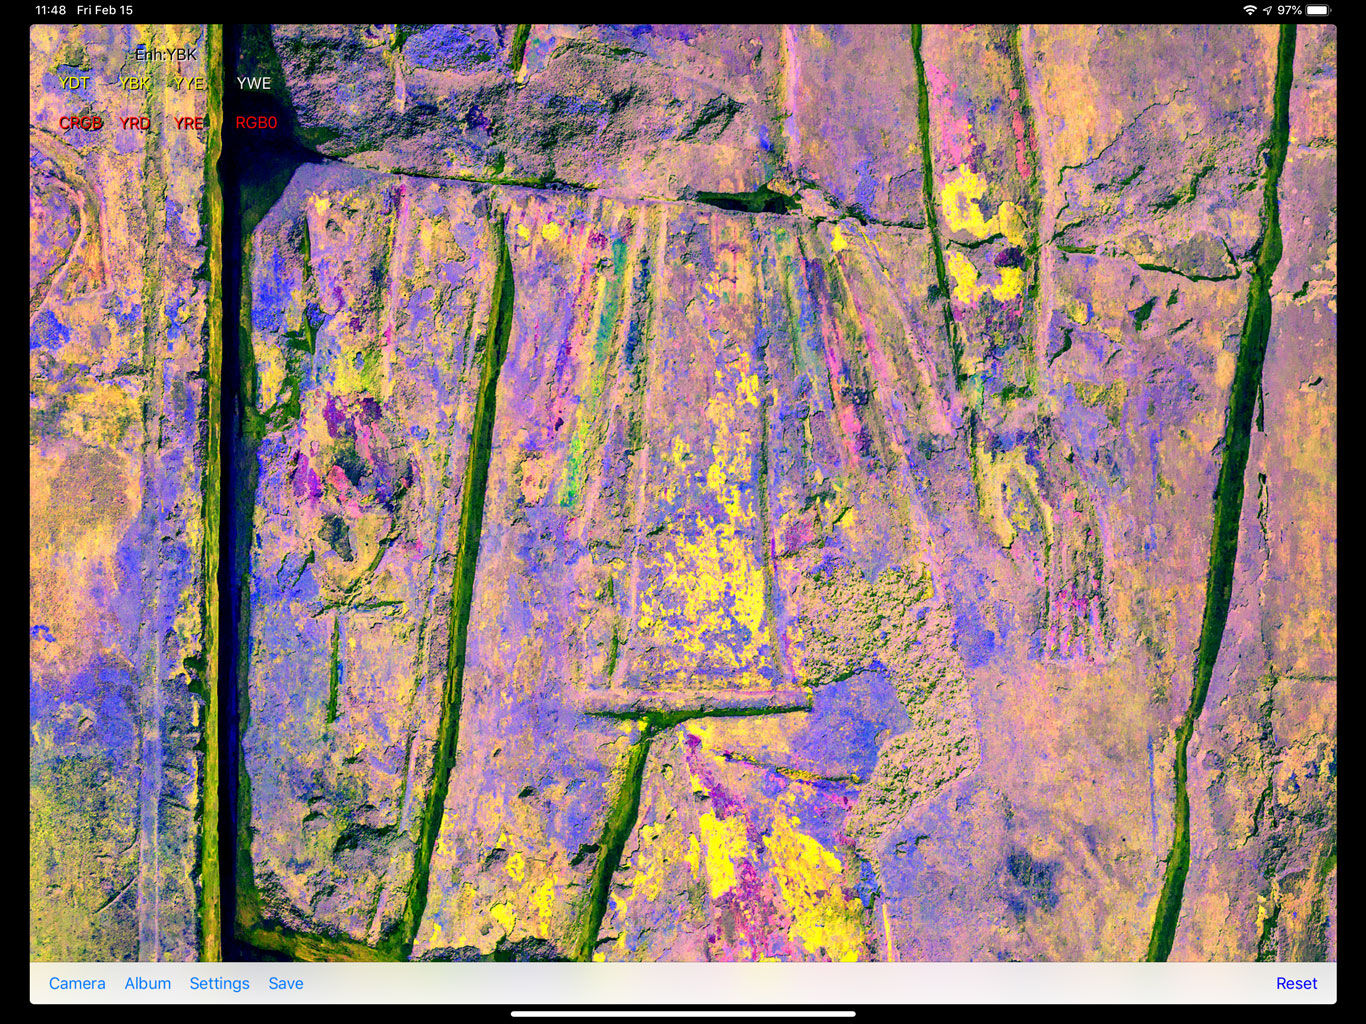
(3) YBK (enhancing blacks)
(4) YYE (enhancing yellows)
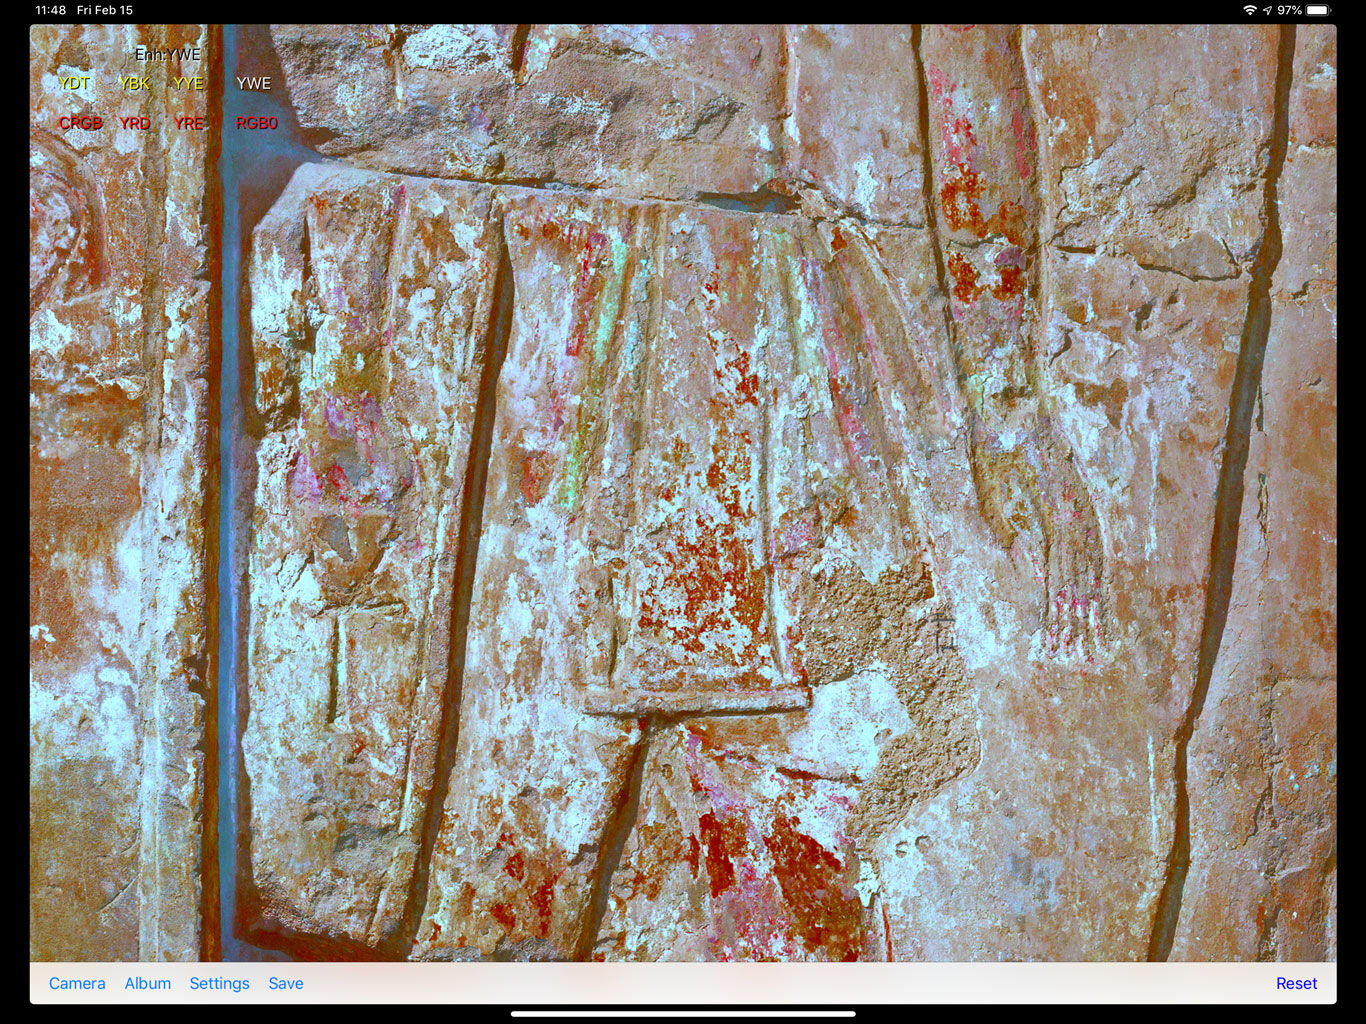
(5) YWE (enhancing whites)
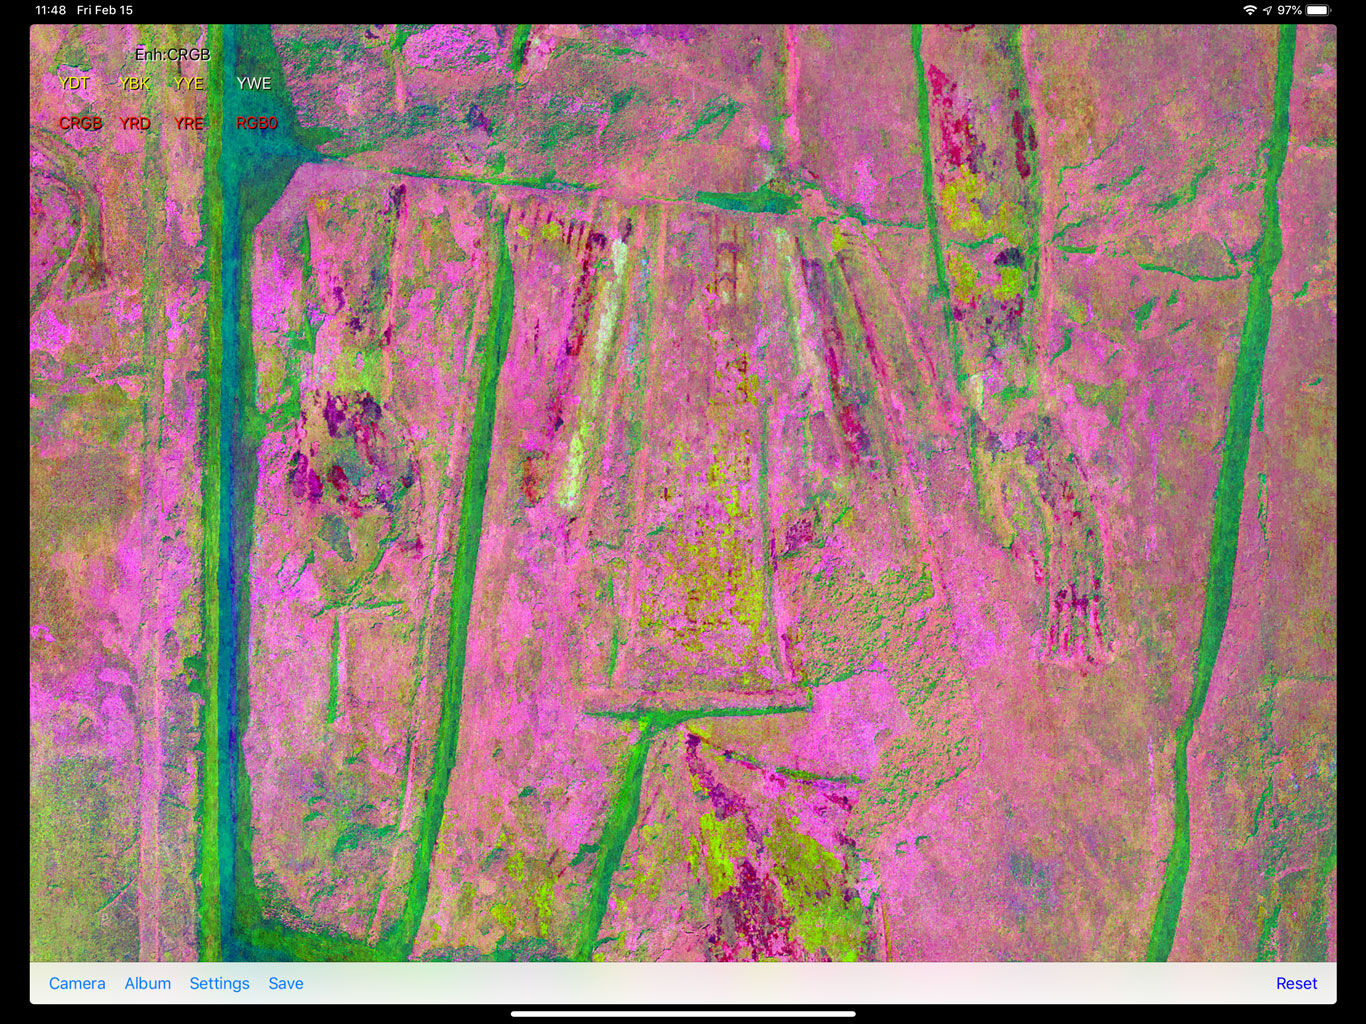
(6) CRGB (enhancing reds)
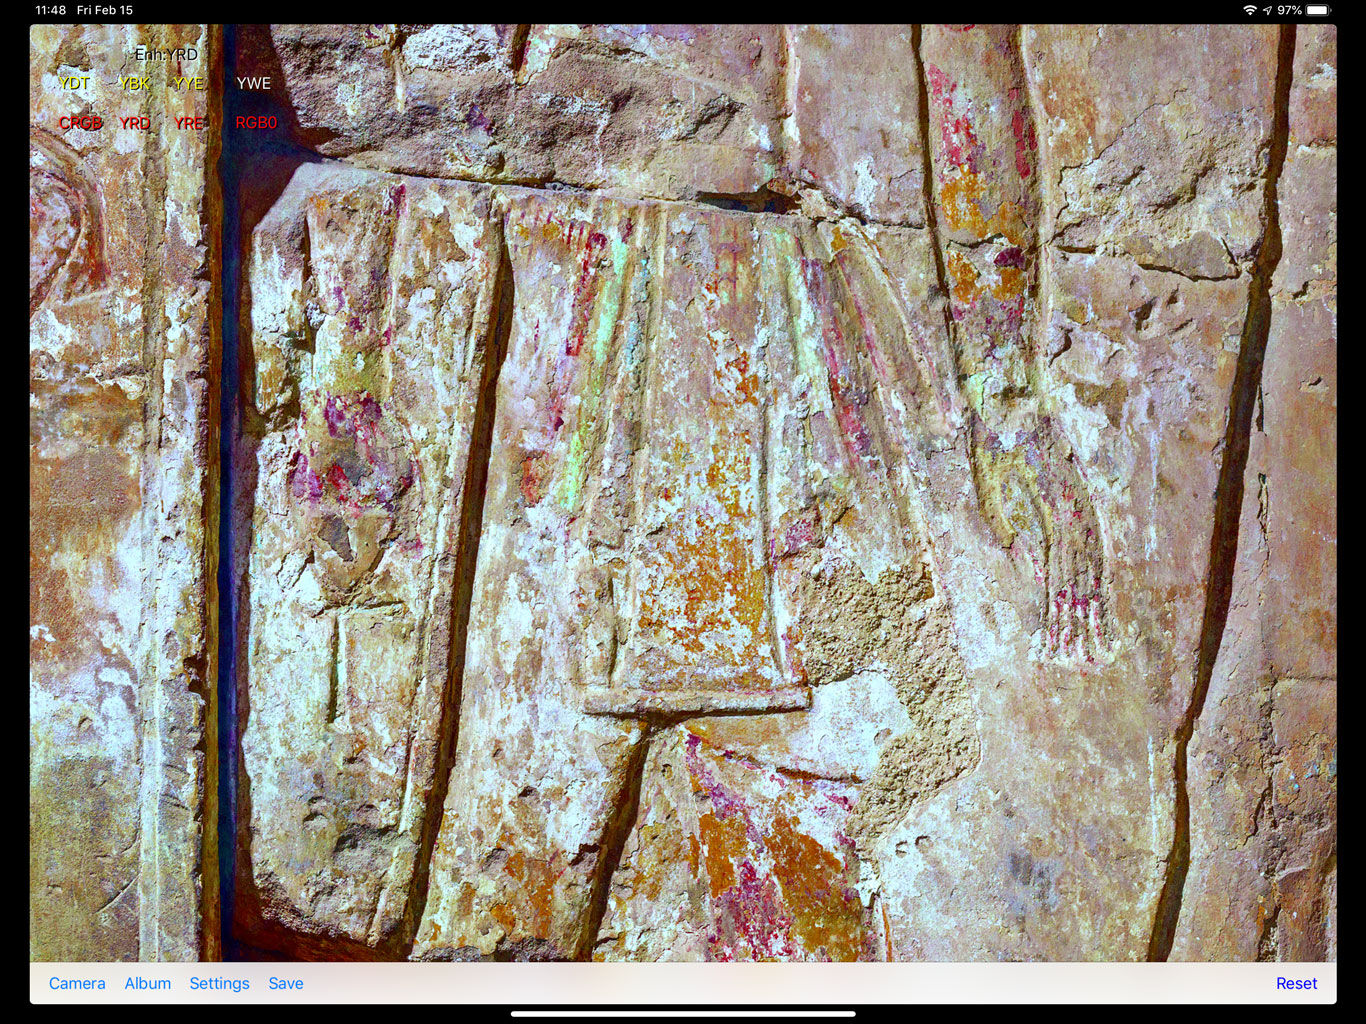
(7) YRD (enhancing reds)
(8) YRE (enhancing reds)
(9) RGB0 (enhancing reds)
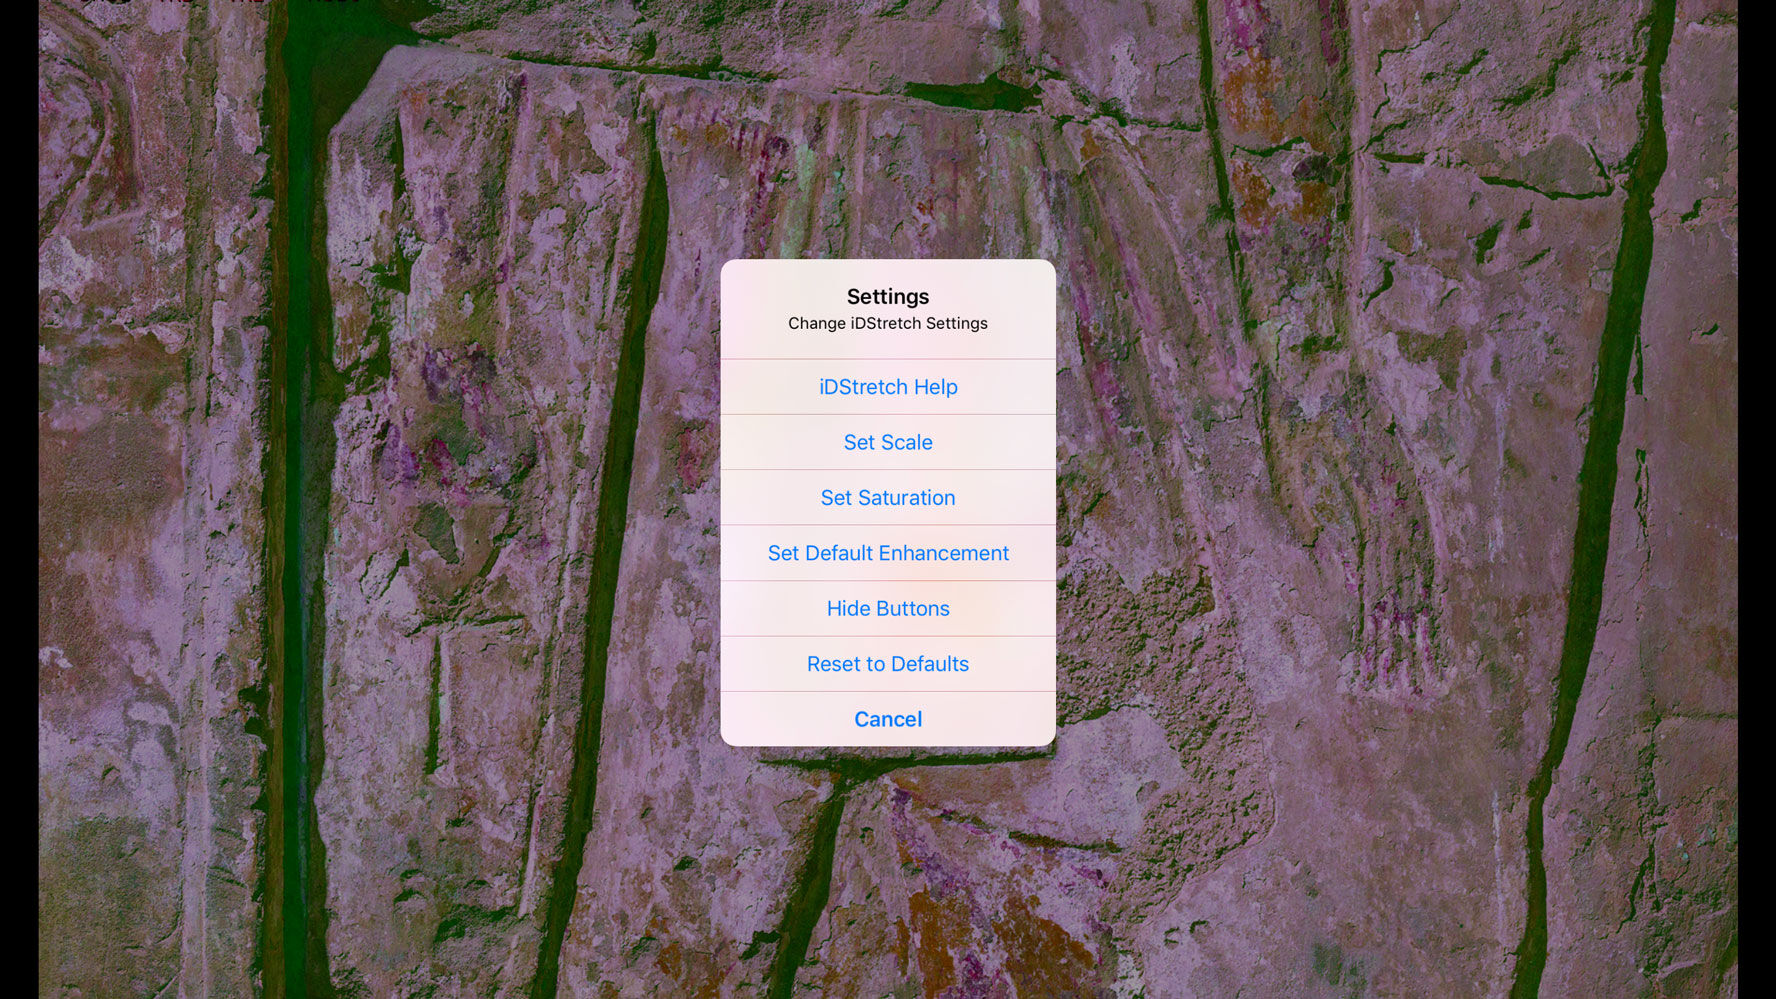
In addition to choosing the default enhancements, you can use the Settings menu to Set Scale, which controls the strength of the enhancement and adjust Saturation, which gives you the option to experiment with the filters in different image modes, such as greyscale. Finally, you can use this menu to determine your default (favorite) enhancement.
Now let’s turn our attention towards the implementation of iDStretch into our digital documentation process. It is obvious that the most use we could get from a photo enhancement tool would be at the monument where we must make the initial record of the color information. Therefore implementing iDStretch with Procreate occurs as the most natural use case for our epigraphic fieldwork. In the following tutorial we’ll provide you with a step-by-step guide of how to enhance your Procreate photo backgrounds on the go.
Applying iDStretch enhancements in Procreate
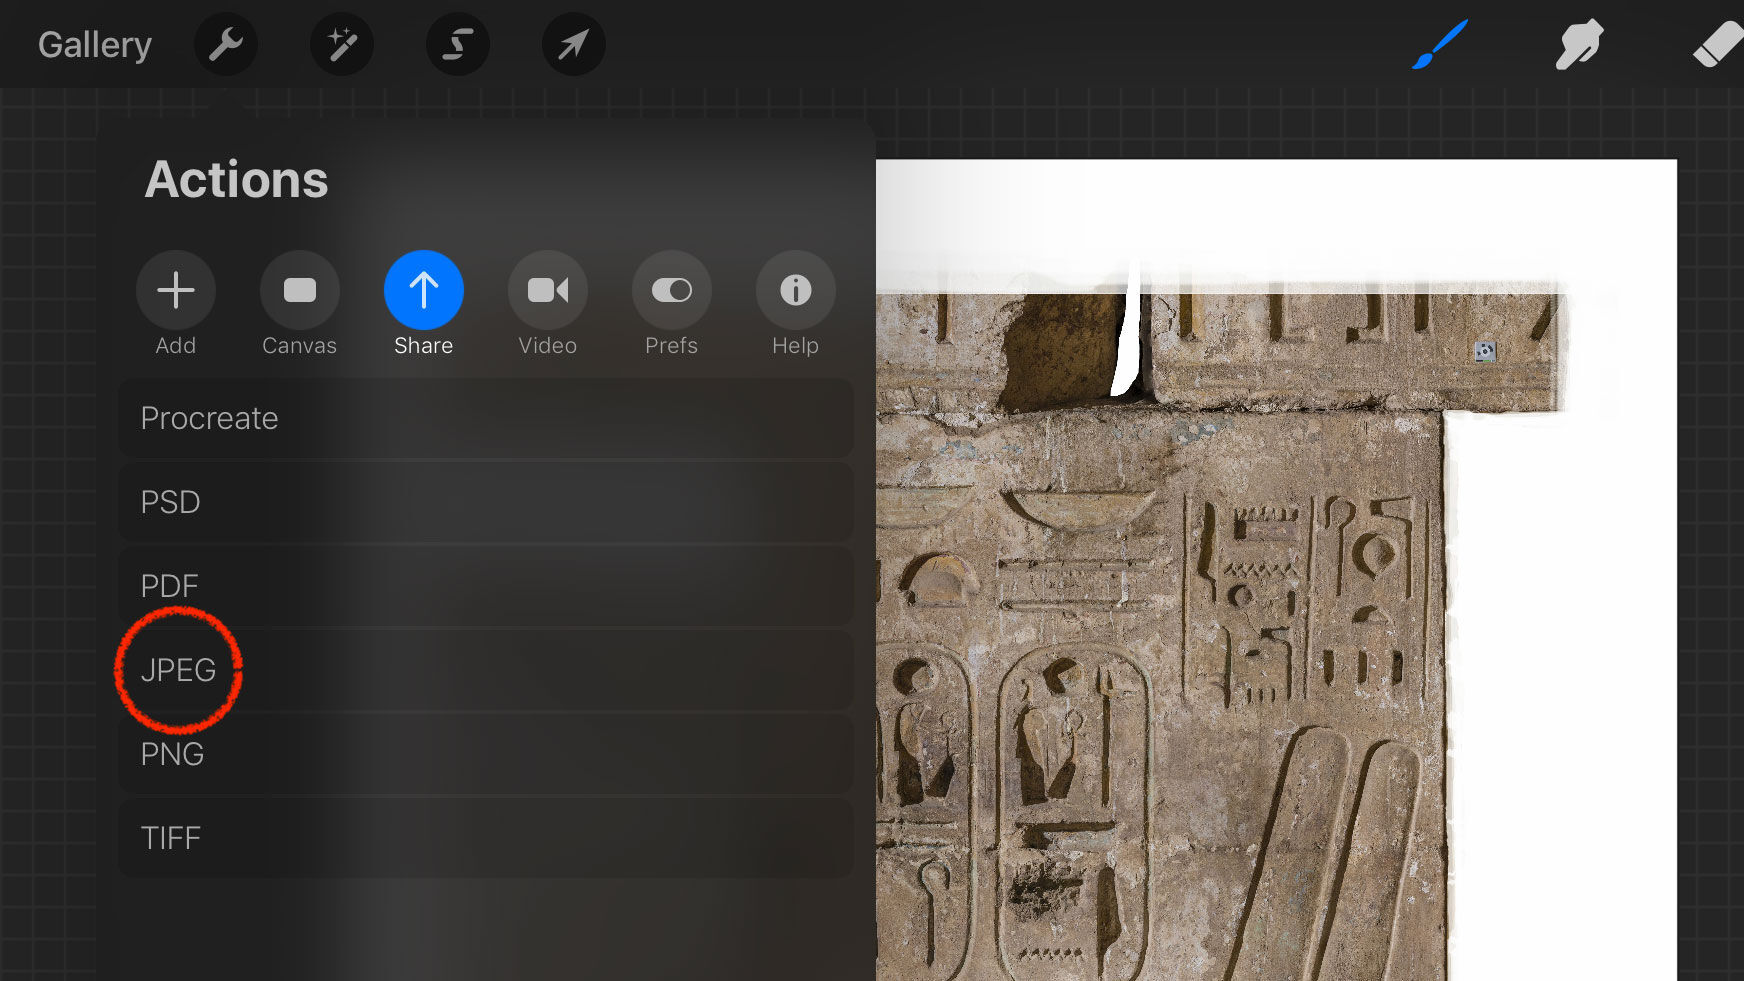
(1) When penciling on a photo background in Procreate, click on the wrench icon then click share and save your canvas as JPEG.
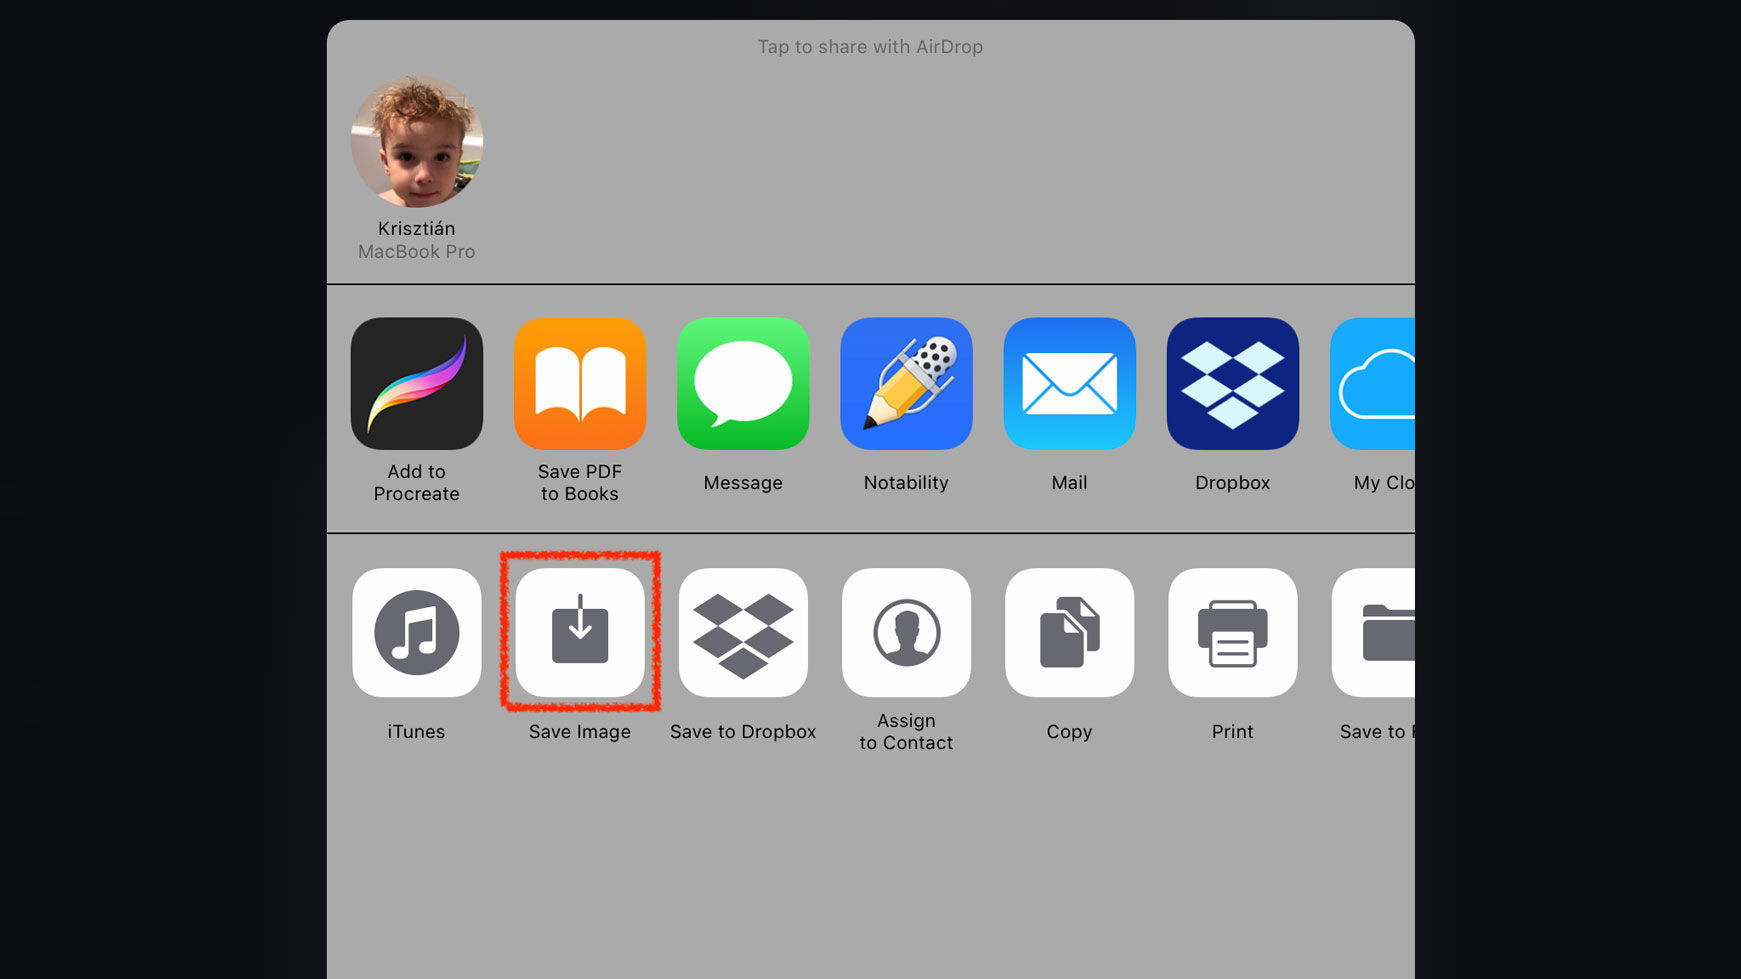
(2) Choose Save Image from the iPad’s share sheet to export your canvas into the Photos app on your iPad.
(3) Open iDStretch and click on Album to import your saved Procreate image to the app.
(4) Once the image is open, you can experiment with the different filters or tweak the Settings for further enhancements.
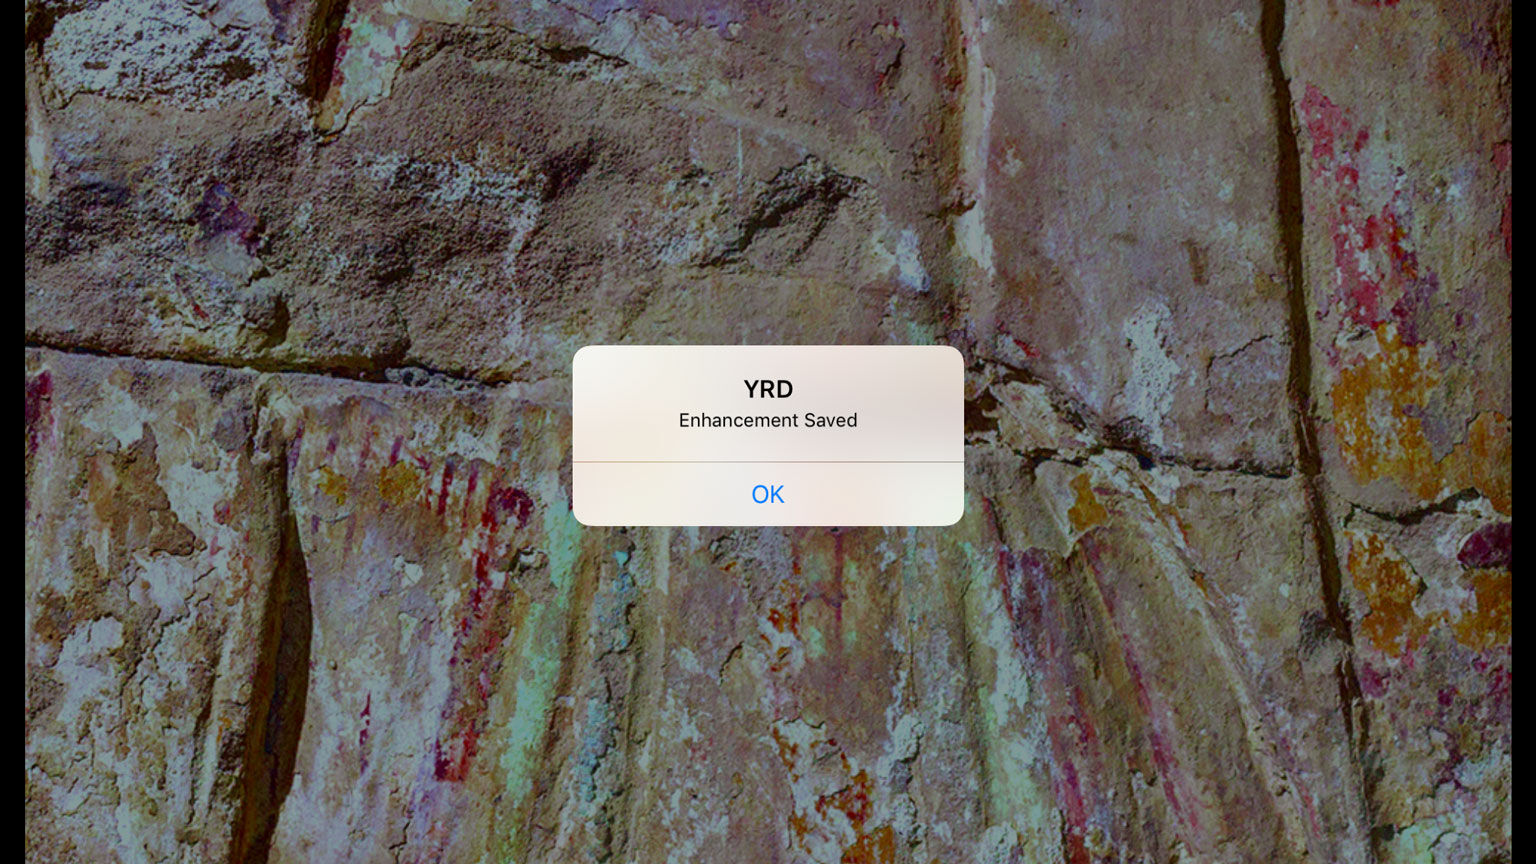
(5) The photo can always be reverted to its original state by a click of a button for a quick visual comparison. Don’t forget to save your desired filter at the end.
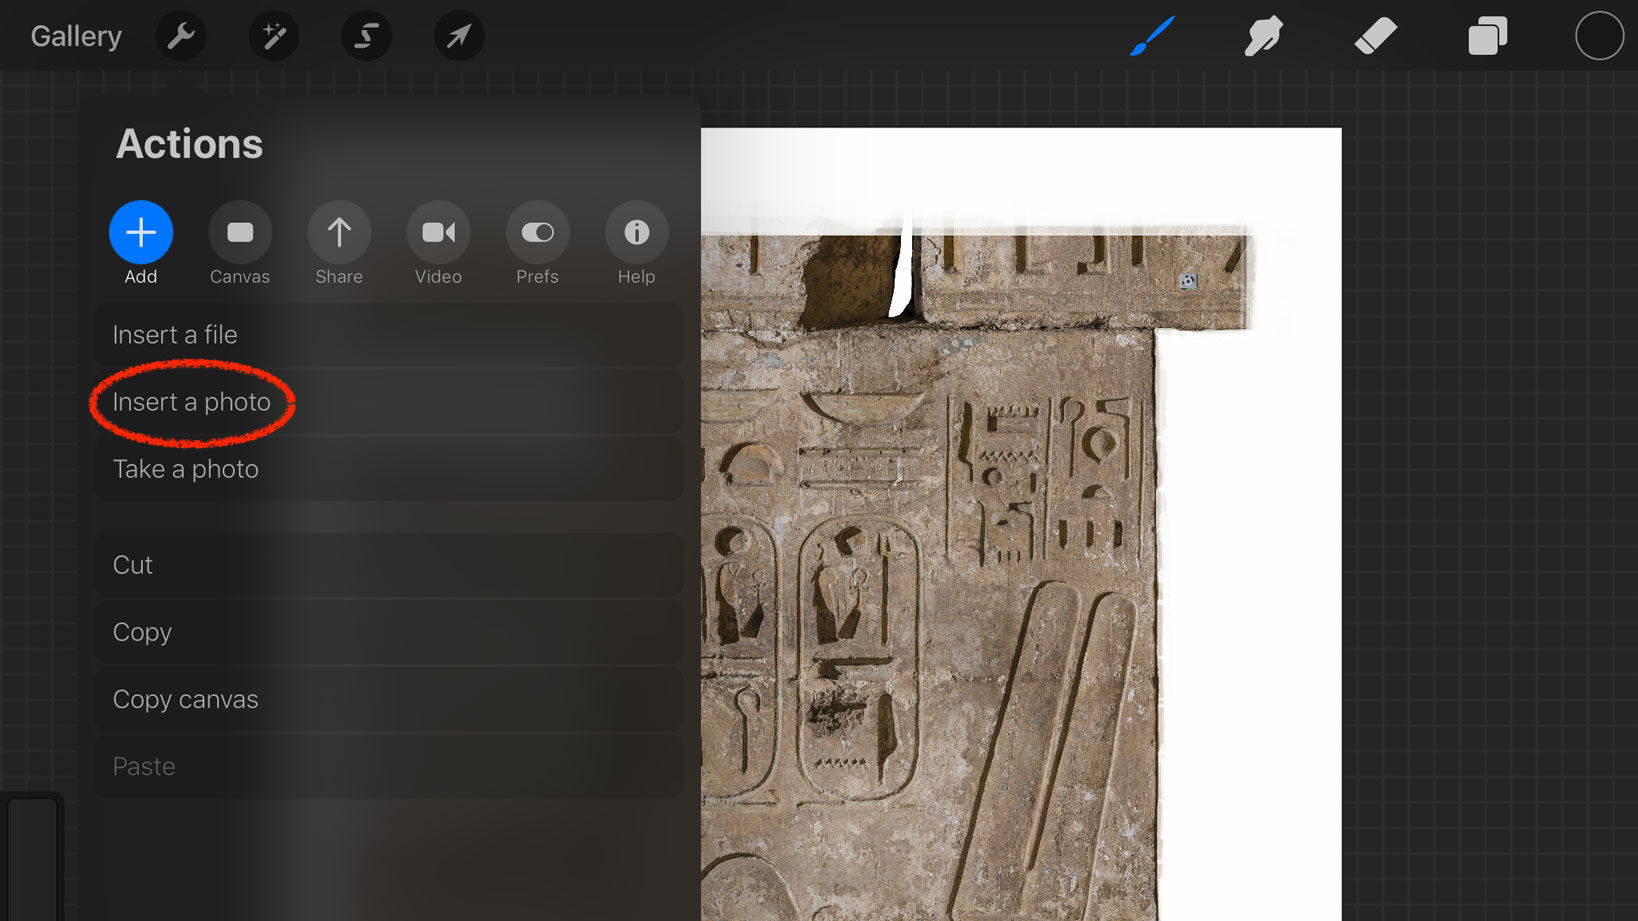
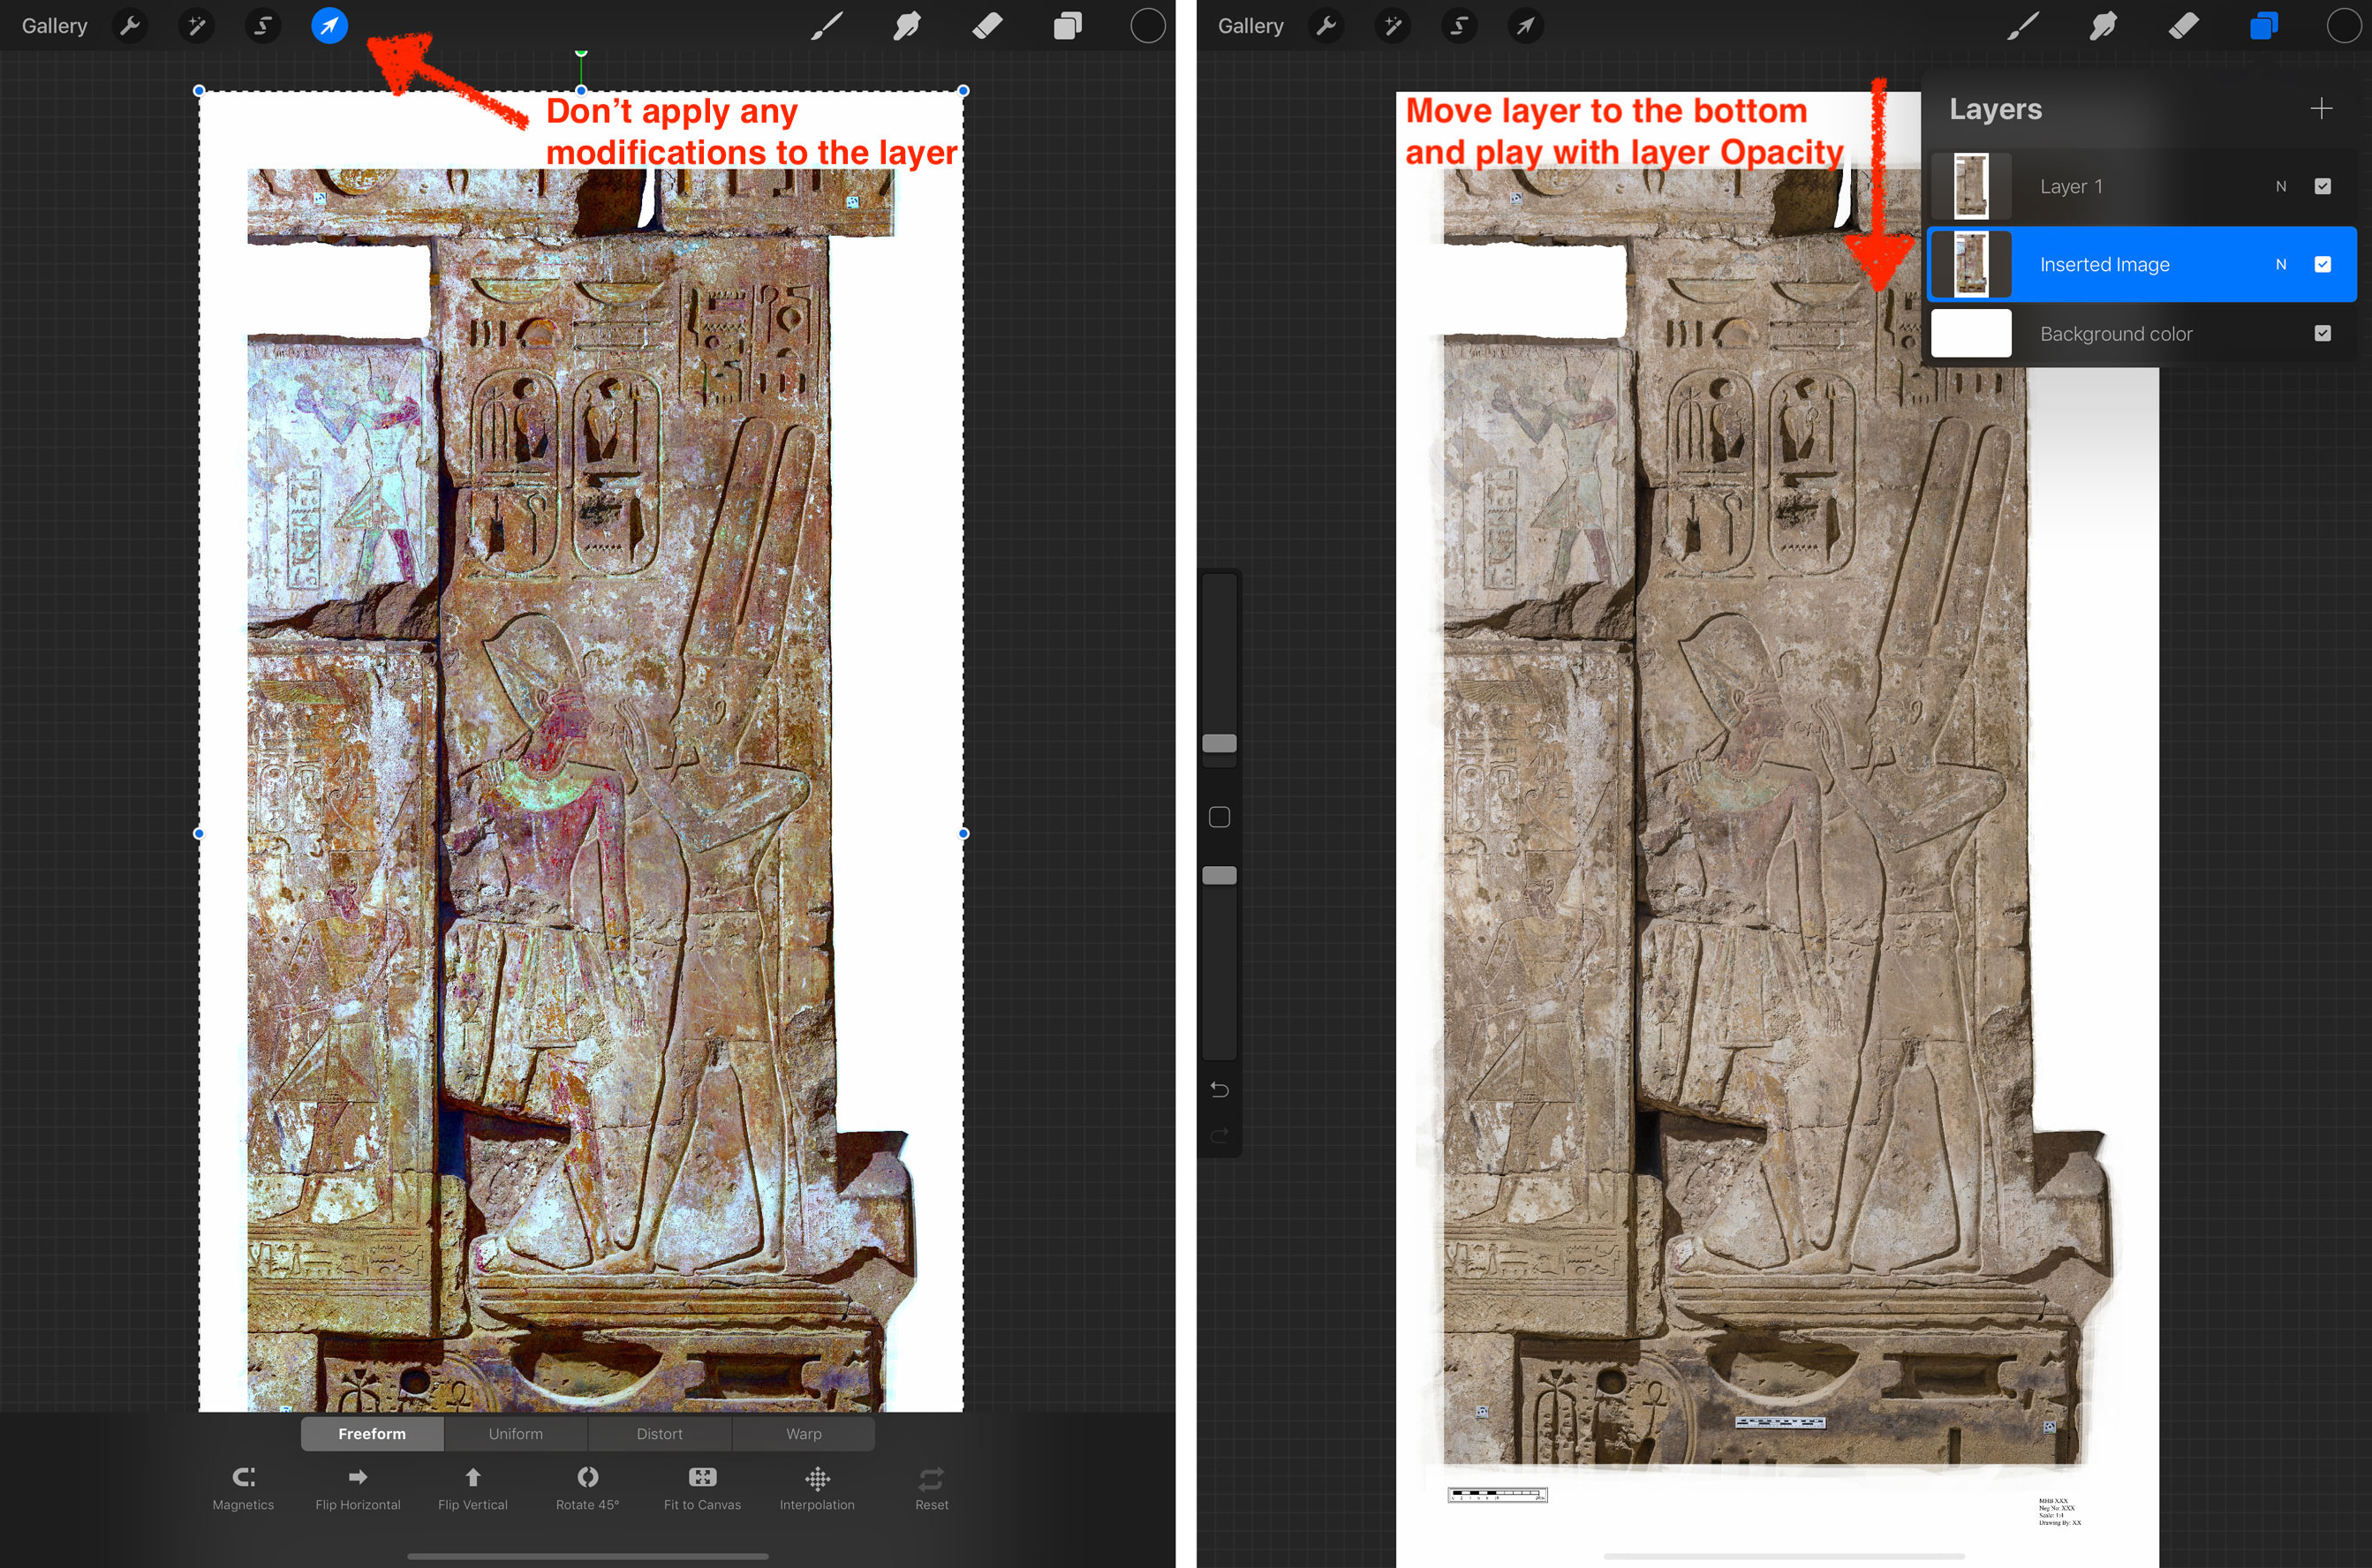
(6) Now the filter is ready to be imported into Procreate. Go back to Procreate, hit the wrench icon again, choose Add/Insert Photo and find your filter in your Photo Album.
Luckily, Procreate is very smart about photo placement when it comes to importing images from the Photo Album. As long as your iDStretch image is the exact copy of your canvas, it will always place the enhanced image accurately on top of your Procreate canvas, there is no need to scale or distort anything. The imported image appears as a new layer, named Inserted Image. If you import more than one filters in the same manner, it is useful to rename these layers with their appropriate filters accordingly.
iDStretch filter applied on MHB 125 and imported into Procreate to help with pigment recognition.
Naturally, you can take advantage of your newly created enhancement layers by clicking back and forth among them while searching for paint on the surface. However, there is another simple tweak that might provide you with a subtle blend between your original background and the iDStretch image. If you move the new layer underneath the original background, and lower your background’s layer opacity, your enhanced image starts shining through the surface. This little trick could offer you just the right amount of color reinforcement that you might need for a more efficient paint documentation in the field.
For those who’d like to learn more about DStretch and its use cases for interpreting polychrome paintings, we’d like to recommend reading the following article at ResearchGate.
1 comment(s)
Joses Felix Alonso Garcia
Apr 25, 2021It's interesting indeed. I began working with Sketchbook in photos. I mean that the application is very easy to work with, and you can export also to photoshop or another adobe application. I would star saying that I work with apple Macmini and photos were taken with a sony alpha 99II and a 50mm 1,4 Zeiss. ( I got part of the photos before with a Sony Alpha 7). Photos were composed with Agisoft Metashape application, and some other with Photoshop. Usually I work with iPad and Sketchbook. The problem I have is that the tomb is incomplete and scene sometimes are like 'washed' and lost, so lining is a headache. I got rests of painting from filters using photoshop and (curiously) Photos ( Mac application)...Actually I am finishing the epigraphical work in TT 221, a small, unfinished and forgotten tomb, and actually I am trying to solve some 'scenes problems'. Well, really most are lost, but can be 'reconstructed' the complete sequences in some places. Best and I will take in account your works...as I began by myself time ago working with digital epigraphy. Best for all the team.

Apr 27, 2021Dear Joses Felix, thank you very much for your comment and for sharing a few of your own practices with us! I also find working with shallow relief or fragmentary paint traces the most difficult to document, just as you described. When one creates a drawing, one must define certain boundaries, it is often difficult to represent a "perhaps" or "maybe" in epigraphic work. We are there to explain what was once there, after all. Nonetheless, there are tools to remain vague, when there is not much visual evidence remaining on the wall or provide several possible explanations. One of the strengths of working digitally is that a digital drawing can be a lot more flexible than its traditional counterpart in this regard. I hope we can continue this discussion at some point! Good luck with your work and thank you very much for your interest and support! Sincerely, Krisztian Vertes
Leave a comment(We'll keep your email address private)