
Digital Epigraphy (Second Edition)
Chapter 5 – Digital Inking Method
Chapter 5, Section 3 - Setting Up the Layers
Now that photo manipulation, workspace customization, and the layer-based environment don’t seem to be such alien concepts anymore, we have to deal with the task of producing actual drawings. In this section the artist will use all the skills he/she has learned about in the previous chapters, starting with the enhancement of the primary material upon which our final inked version is based. From now on, all the steps are based on certain inking projects, which we’ll follow from the very beginning until they reach their final stage and are ready for the final review by the field director. Of course, some of the Epigraphic Survey’s projects don’t contain all of the following steps, and in some cases additional steps might have to be added as well.
%20-%20Layer%20arrangement%20of%20a%20typical%20inked%20drawing.jpg)
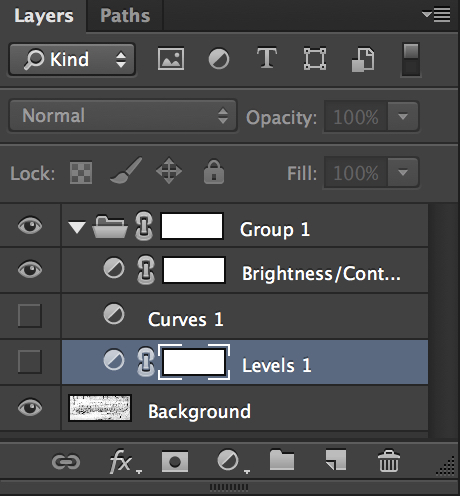
MhB 91 (detail) - Layer arrangement of a typical inked drawing
We will pick up the work process at the stage when the original enlargement is already scanned, merged, and ready to be enhanced to provide better visibility of the pencil lines. Artists tend to like lighter photos to be able to see their pencil lines better, but it affects the details of the image, which are much needed when inking damage, plaster, etc. Therefore, the photo should be enhanced in more than one way.
Enhancing pencil lines
There are endless methods of photo modification in Photoshop; in fact the entire software is mainly dedicated to enhancing and modifying images. We don’t have the necessary space in this guide to give the user a detailed manual for photo manipulation, although some basic steps were already mentioned in Chapter 3, Section 2. Nonetheless there are a few standpoints that the Epigraphic Survey artist must take into consideration:
Photo manipulation doesn’t necessarily have to preserve the overall quality of the image, because the enlargement itself is never part of the final product. Therefore, it’s best to duplicate the Background Layer as many times as needed for all the different problematic areas, and just use the one that provides the best result for a particular area when inking. These background copies can be deleted when no longer needed so as to reduce file size. One has to make sure the original background image is preserved untouched (i.e., locked to prevent any modification) and that all the enhancements happen on different layers.
Another good way to add nondestructive modifications to our entire background photo is by adding as many Adjustment Layers (Layer/New Adjustment Layer/Levels, etc.) to the photo layer as needed. In doing so, the artist doesn’t have to deal with the increased number of layers, and the effects can be inactivated or deleted separately whenever they are not needed. One should keep in mind that the Adjustment Layers always affect all the layers beneath them; therefore they must be placed right above the background photo to be modified.
Adjustment Layers
Adjustment Layers also have their own settings panels that are very similar to their image modification counterparts (Image/Adjustments/Levels, etc.), which might be a little confusing at first sight. These settings can be called up and edited by hitting the half-full circle in front of the Adjustment Layer on the Layers Panel.
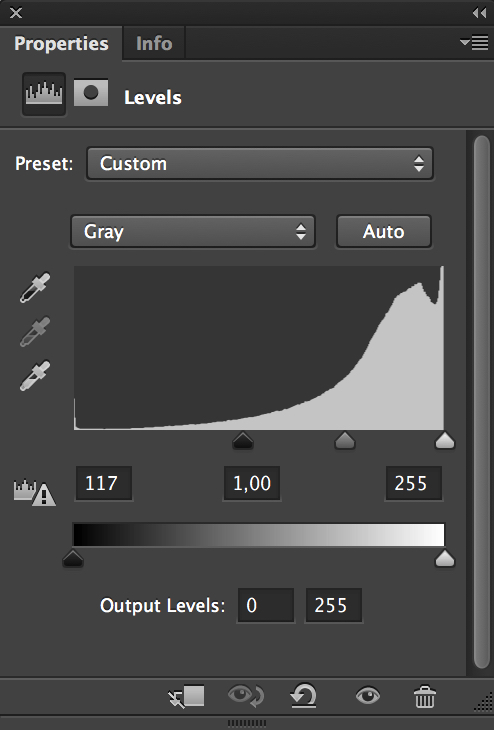
Level's Adjustment Layer Panel
The best way to make local enhancements over smaller areas is by using the Burn and Dodge tools. The Burn tool can be used over light areas to make the pencil lines appear darker. When the artist uses the Burn tool, he/she has to be very careful about setting the Range to shadows or Midtones, because setting it to Highlights just draws a cast over the area. The Dodge tool can be used to lighten up dark areas, to make the photo enlargement around the pencil lines appear lighter. When applying this tool, the range has to be set to Highlights; otherwise the line disappears.
Modifying Pencil Lines on B/W Photo Enlargements
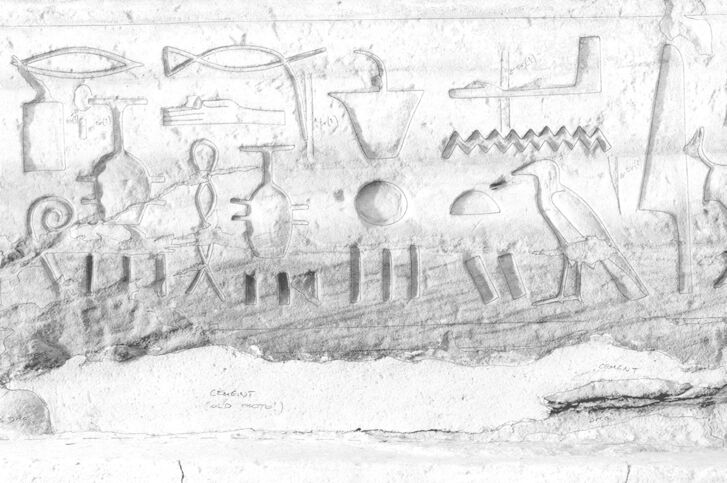
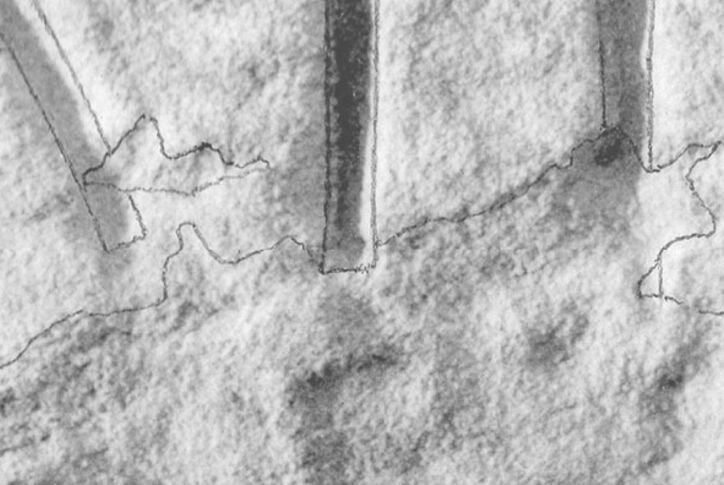
(1) Original scanned photo with darker and lighter areas. While lighter photos are generally better backgrounds for penciling, the photo details tend to disappear.
(2) Pencil lines over lighter areas are more visible, but sometimes need to be darkened for more contrast.
(3) Pencil lines over darker areas tend to be less visible, and sometimes they need to be further emphasized by lightening up the background.
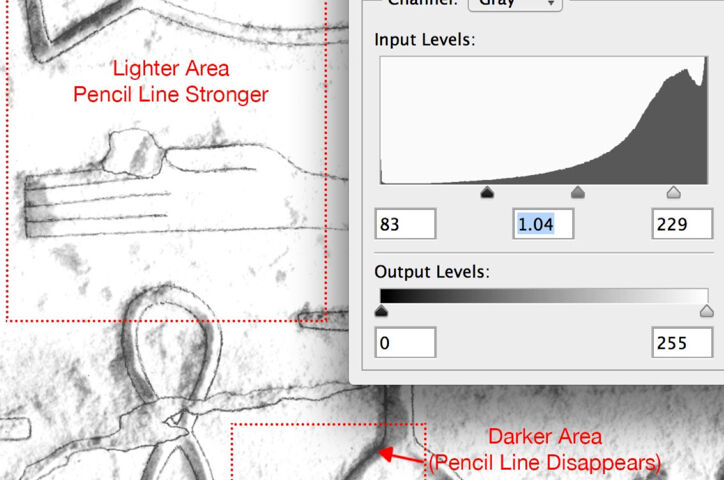
(4) One can make general photo enhancements by using Levels. These modifications can be counterproductive when used over the entire photo.
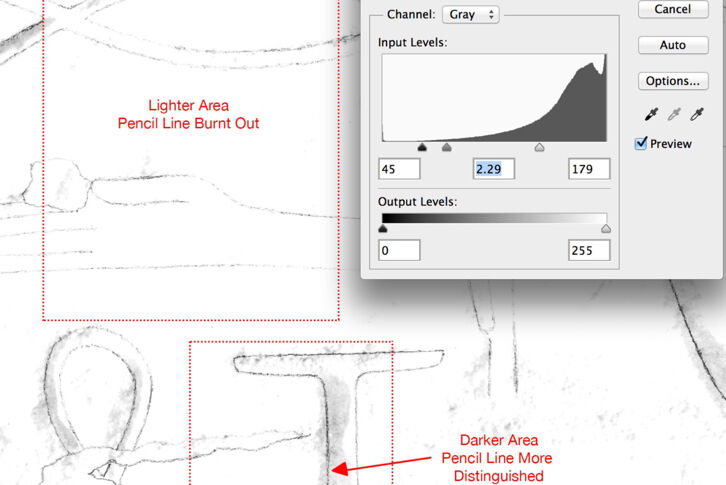
(5) One option is to select certain areas for particular modifications and/or to use Layer Masks for specific enhancements.
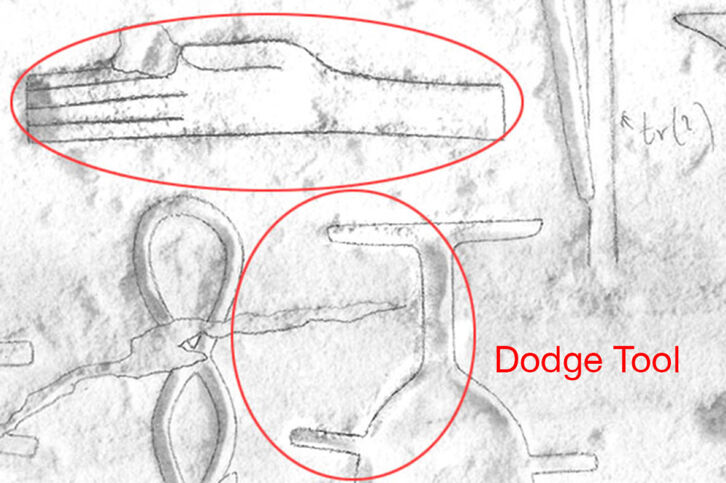
(6) The easiest way for quick enhancements is to use the Burn and Dodge tools for strengthening pencil lines or for lightening up darker areas respectively.
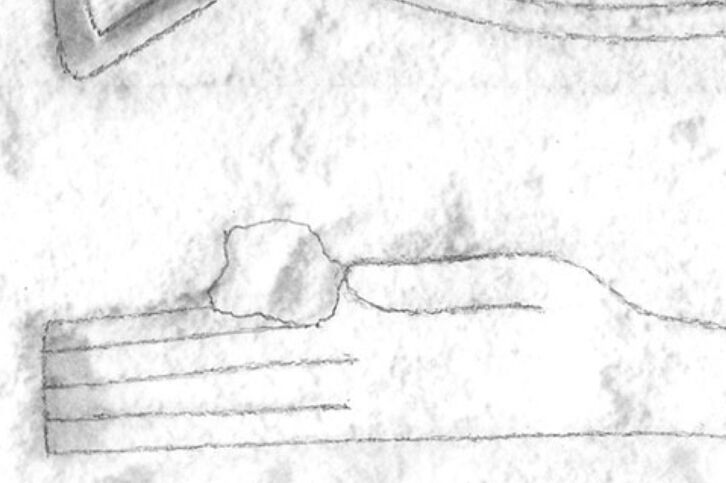
If further clarification of the pencil lines is needed for some reason, the artist has one more tool in his/her hands, but the process has to be carried out meticulously from the first manipulation of the enlargement. There is a way to produce a separate pencil layer over the photo enlargement thanks to the bleaching system, which the Epigraphic Survey has been using for many decades. Traditionally, bleaching is used at the very end of the drawing process, as has been described in Chapter 1. Because inking in Photoshop eliminates the necessity of any background enhancements, we would obviously eliminate the bleaching part of the process. But we can benefit from erasing the photo background after the pencil draft has been applied, but before the entire inking process starts. We need to have 3 scans in our hands:
Detached Pencil Lines on Photo Enlargement
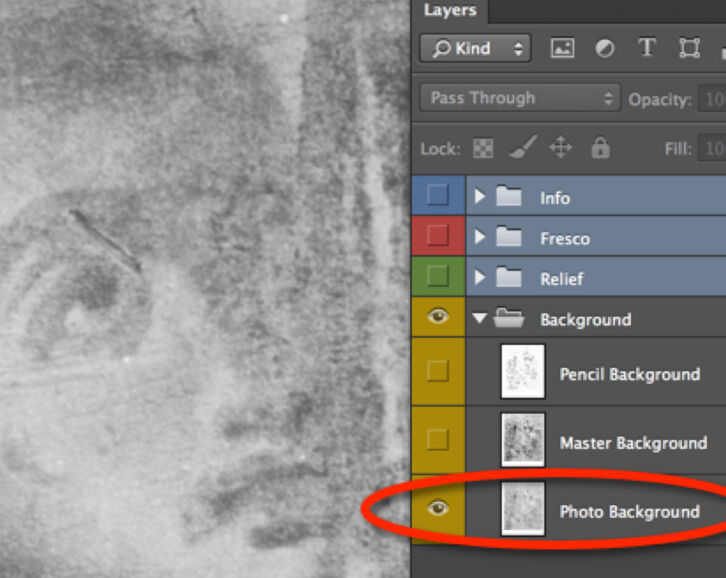
(1.) Scan of the photo enlargement before any pencil lines are added to it.
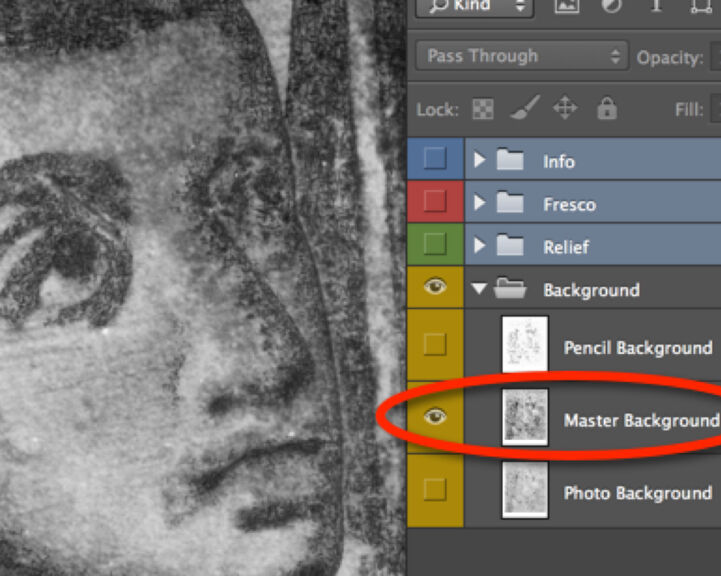
(2.) Scan of the photo enlargement after adding all the pencil lines to it.
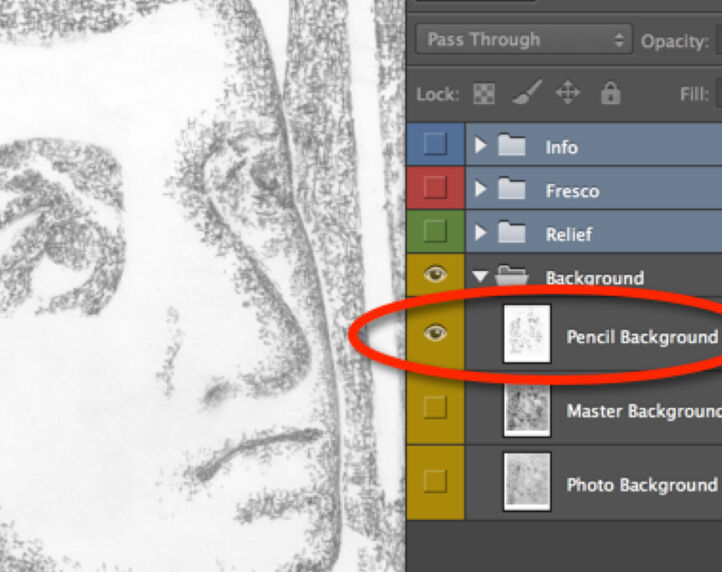
(3.) Scan of the bleached photo enlargement with its white background and exposed pencil lines.
When we have all three scans open in Photoshop, we have to set them up as three aligned layers on top of each other. We have to use the one with both the photo and the penciling present (Master Background) as our alignment guide. Once it’s done, we can delete the Master Background.
Setting up the drawing layers
Drawing layers should be set up according to the various categories of information appearing on the wall. Each layer allows its content to be treated separately from the other layers, so it’s very important to determine and sort out important data categories early on. As described in Chapter 1, the Epigraphic Survey has strict rules about what kinds of information should be represented, and how. The main categories are:
- carved lines of the final decorated surface, along with any earlier versions, in either raised or sunk relief
- painted details associated with the final and with any earlier carved decoration
- any intentional non-decorative surface modification (hacking, plastering, etc.) if it gives historically relevant information
- damage obscuring carved lines
A layer, when set up, automatically becomes transparent, meaning that the lines drawn on a layer at the bottom of the stack are still visible even when the artist works on the top layer. This feature is indispensable for keeping an eye on the relationship between various decorative elements. Although the layer setup might vary on certain drawings, the Epigraphic Survey’s digital layer set is as represented in the following screenshot:
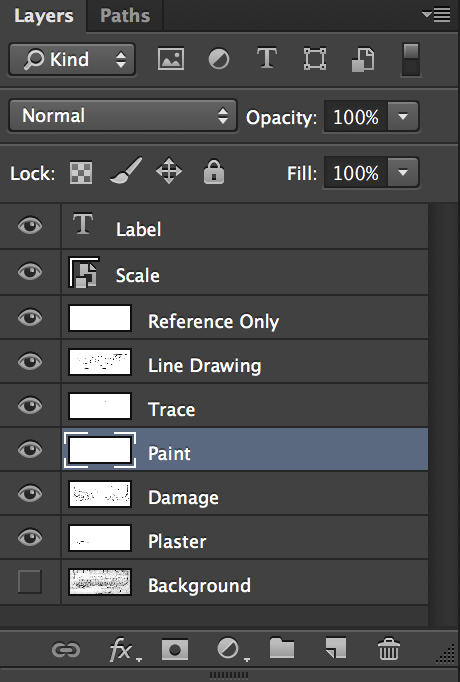
The main layers of digital inking
- Background - scan of the photo enlargement (or any other material) containing the initial epigraphic information as recorded in the field.
- Plaster - represented by an irregular arrangement of dots and circles, shown using solid outlines around the affected area.
- Damage - shown by hatched lines representing the damage surface texture of the photo enlargement. Lines have to be broken with a “digital scalpel.” Outlines for damaged areas should be represented using intermittent lines. Note that the artist should avoid drawing damage outlines when shared with plaster outlines to avoid duplication.
- Paint - regular dotted lines representing the outlines of painted details. By drawing individual dots (instead of setting up a brushstroke for this convention), the artist can be flexible when showing the amount and density of details.
- Trace - a solid line is used to indicate the traces of any earlier carved decoration on the surface. More than one trace layer needs to be set up if there is more than one set of traces, i.e., traces from more than one period or traces of graffiti vs. carved features, etc.
- Line Drawing - this layer represents all the carved lines associated with the final surface decoration. According to the Epigraphic Survey’s drawing conventions discussed in Chapter 2, a system of lines (inked in various thicknesses) is used to create an accurate rendering of the original carving, whether in raised or sunk relief. Any architectural features shown as part of the final print should be drawn on this layer as well.
- Reference Only - contains all the information necessary to join the drawn section with other sections, artist’s remarks, different versions, etc. The data on this layer are not included in the final print.
- Scale - a preset (unified) scale has to be included with every drawing. It has to be resized and fitted to the drawing’s actual scale as accurately as possible, based on whatever scale information we have on our initial field copy.
- Label - represents the precise alphabetical and/or numerical information regarding the drawing (site, Nelson number or drawing number, negative number, date, status or stage of drawing, artist’s initials, etc.).
The representation of the above data should be as consistent as possible throughout the entire corpus of drawings. In case the artist feels that he/she has too many layers to navigate, they can be grouped according to the nature of data they represent. Therefore Label, Scale, and Reference Only can be grouped into an Information folder, Line Drawing, Trace, and Paint can go in the Decoration folder, and finally all the non-decorative layers can form the Miscellaneous folder. If one needs further differentiation, associating different colors with given layers is also a possibility.
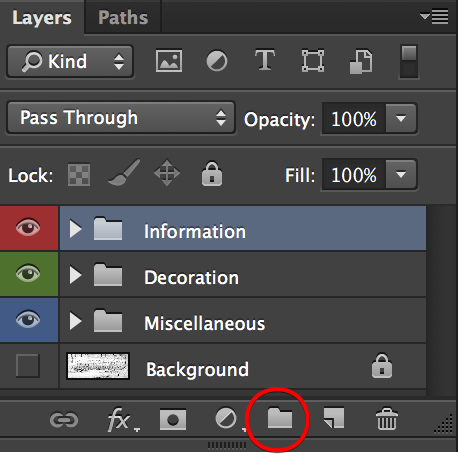
Adding folders to simplify the layer-arrangement
As an important rule, the artist has to keep in mind the necessity of locking the layers he/she is not working on to avoid drawing on the wrong layer.
Additional Reading:
0 comment(s)
Leave a comment(We'll keep your email address private)