
Digital Epigraphy (Second Edition)
Chapter 4 - Digital Fieldwork
Chapter 4, Section 3 - iPad Pro and Apple Pencil
-digitally-penciled-on-the-12.9-inch-iPad-Pro.jpg)
MHB 172S (detail) digitally penciled on the 12.9-inch iPad Pro
Introducing iPad Pro
Although Apple’s iPad line, implementing touch screens in larger computing devices, was introduced in 2010, supplying it with an actual stylus and making it a competitive alternative to the Wacom tablet is a relatively new approach. From the very start, iOS (Apple’s own operating system developed for mobile devices) was intended to be navigated exclusively by fingertip touch. Many accessory manufacturers (Wacom among them!) nevertheless provided input devices resembling the stylus, but the usability of these was generally clumsy and their level of precision was far from perfect.
When Apple introduced the iPad Pro in October 2015, it included not just a larger (12.9 inch) canvas, but also the necessary technology for precise input achieved with a miniature computing device, termed the Apple Pencil. No field drawing device is without compromise, and this is certainly true for the iPad Pro as well. By choosing the iPad over Wacom’s mobile solutions, the artist not only must learn how to get around another operating system, but also must get accustomed to not having the fully-functional Adobe Photoshop software available for fieldwork.
Specifications of the 12.9-inch iPad Pro:
Technical specifications:
The 12.9-inch iPad Pro is the largest and most powerful iPad ever designed, yet it’s only 6.9 mm thin and weighs just 713/723 grams. It has a 12.9-inch Retina display, along with a powerful A9X chip with 64-bit desktop class architecture, provided with a 12.9” LED backlit Multi-Touch display with IPS technology with 2732 by 2048 resolution at 264 pixels per inch (ppi). It also has 4GB of RAM on board, a major upgrade over previous iPads. The screen has a fingerprint-resistant oleophobic coating, which can be a huge plus in the field. Additional features include Bluetooth 4.2, a fingerprint sensor built into the Home button, an 8MP iSight camera with advanced optics capable of recording 1080p HD video (there is also a built in FaceTime HD Camera on the front of the device, which is capable of shooting 1.2MP photos with Retina Flash). The iPad Pro comes with 32GB, 128GB, or 256GB storage, the latter being a welcome addition for the field artist, who needs to store a lot of large files on the device.
Build and physical design:
The iPad Pro follows the general design principles of the iPad Air 2, and its layout, ports, and the Touch ID-equipped Home button are the same as on the smaller iPad. Although it is taller and wider than the regular iPad, it remains surprisingly thin and light, albeit definitely designed as a two-handed device. Aside from the increase in screen area, there are four speakers included on the chassis. There is a new type of connector on the left-hand side of the iPad Pro, the so-called Smart Connector, which is designed to fit the new Smart Keyboard accessory.
Screen:
The 12.9-inch display provides 78% more space than the regular iPad, which is a huge benefit when working on large canvases. The 5.6 million pixels on the screen make even the smallest details sharp. The screen is not only very responsive, but, thanks to its smart refresh rate, it’s also very energy efficient.
Processing power and battery life:
Thanks to the A9X processor chip, the iPad Pro is far and away the fastest iOS device on the market, which is good news for the field artist working on complex multilayered drawings. Apple claims that the iPad Pro will last for the standard 10 hours between charges, which is somewhat optimistic based on the field artist’s power-demanding habits, but still an impressive gain over the Wacom Companion’s 3-4 hours of battery life.
Apple Pencil:
The stylus offers pressure-sensitive drawing and painting (and handwriting), rather than simply a standard control method. It can be charged by plugging directly into the iPad’s Lightning port, it can be used for many hours on one charge, and - luckily - 15 seconds of charging time is enough for 30 minutes of use.
Preparing the iPad Pro for fieldwork
The iPad has a much simpler interface than either of the previously mentioned operating systems. There are numerous basic and more advanced user guides available online for the artist’s reference when learning to operate the iPad, of which some can be found at the end of this section. Assuming that the artist is already familiar with iOS, in the following paragraphs we shall focus on our fieldwork-specific settings and software.
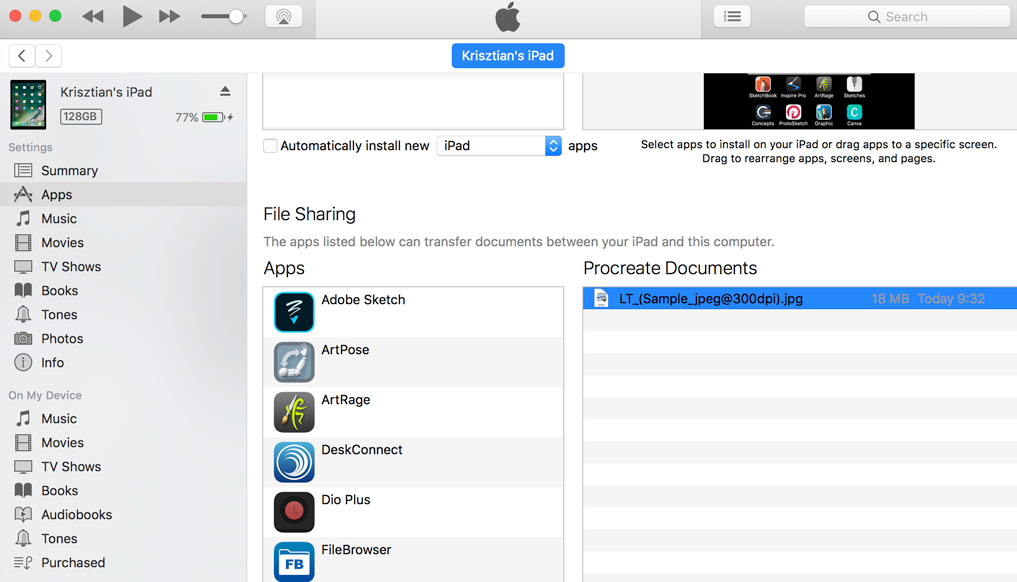
Beforehand, it is worth mentioning the difficulties encountered when moving content in and out of the iPad. One of the peculiarities of iOS is that there is no visible file system to which the user has access. Each program (App/Application in iOS) runs in its own little box, with very limited access to data produced or kept in other programs. This is called sandboxing, and it is one of the core attributes of iOS. Apple started to solve this problem with the introduction of the feature called “open in...”, which basically makes a copy of the file in another App, resulting in further difficulties with inevitable file duplication. For a while, a cloud service called Dropbox became the de facto file system for iOS, but this was replaced later on by Apple’s own cloud service called iCloud. In these services, one has all the folders of the relevant Apps, and they allow the user to open files on the computer.
![]()
iCloud Drive showing available App folders for file transport in iOS 10
In the latest versions of iOS, a feature called Document Picker was introduced, which finally lets Apps access other Apps’ content, allowing four main actions: import, export, open, and move. Import and export always mean duplicating a file, creating a copy in another location. It is also worth mentioning that not all Apps support all four actions, which can be confusing. The Document Picker, combined with cloud services which allow the artist to create folders and subfolders, proves to be an effective combination for moving files around. Needless to say, the people who benefit the most from iOS are those who have adapted to the idea of cloud storage, which will be explained in much greater detail later in this chapter. The other peculiarity that requires explanation is the lack of a full-fledged Photoshop App for the iPad:
Adobe’s Design Philosophy for the iPad
As established earlier in this chapter, because the Wacom Companion runs Windows, it runs the full desktop version of Photoshop and the rest of the programs available in Adobe's Creative Cloud.
On iOS, Adobe took a different approach. Apps are more focused, and they don't have the full functionality of the version designed for the desktop operating system. Instead, what Adobe did was to re-imagine the functionality of their applications and to figure out how to strip down all the features and use cases into building blocks as individual applications. Finally, Adobe presented a way to connect these Apps back to one’s desktop for users to build a better workflow.
For Photoshop, Adobe now has three iOS Apps that mimic three distinct use cases offered on the desktop app. Photoshop Fix, Photoshop Mix and Photoshop Sketch were introduced to replicate three different ways that users employed Photoshop on their PCs or laptops. In Fix, the user is able to use the desktop software’s photo retouching tools, while Mix is used for photo compositing. The most interesting of the three for the field artist is Sketch, which brought in some of Photoshop’s drawing functionality when used with the Apple Pencil stylus.
Adobe's iOS Apps in the App Store
What Adobe has done with these Apps is to connect them all together with a feature called Creative Sync. Creative Sync allows the artist to work on a project across Adobe's suite of apps. For users on multiple devices, it also enables projects to synchronize between an iPad Pro and Photoshop running on the desktop, and this brings added flexibility regarding which device to use for whatever type of creative work that needs to be done.
One of the main limitations on iOS is the camera roll. When one works with images and files, the common ground for sharing these files is the camera roll, but iOS can only recognize JPEG and PNG files. What this means for the artist is that layers and editable elements within a project file would be lost once the final product is exported for sharing with the camera roll. One of the main reasons for companies such as Adobe to find a cloud solution was to overcome this OS-level limitation. Adobe introduced Creative Cloud so content creators could save their work (with the layers included) to the cloud and have access to them in other apps on iOS, as well as on the desktop.
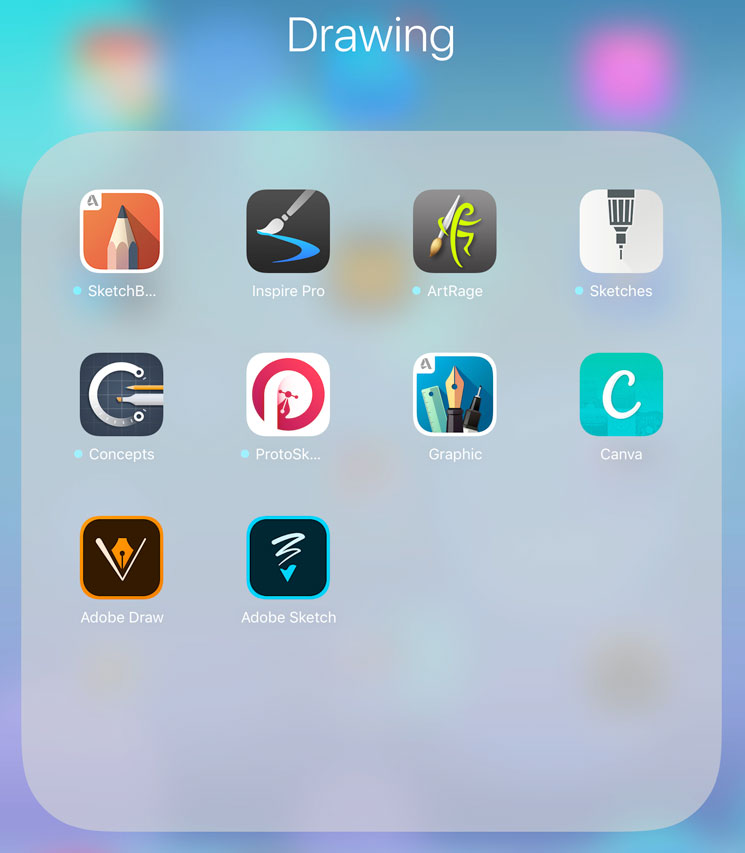
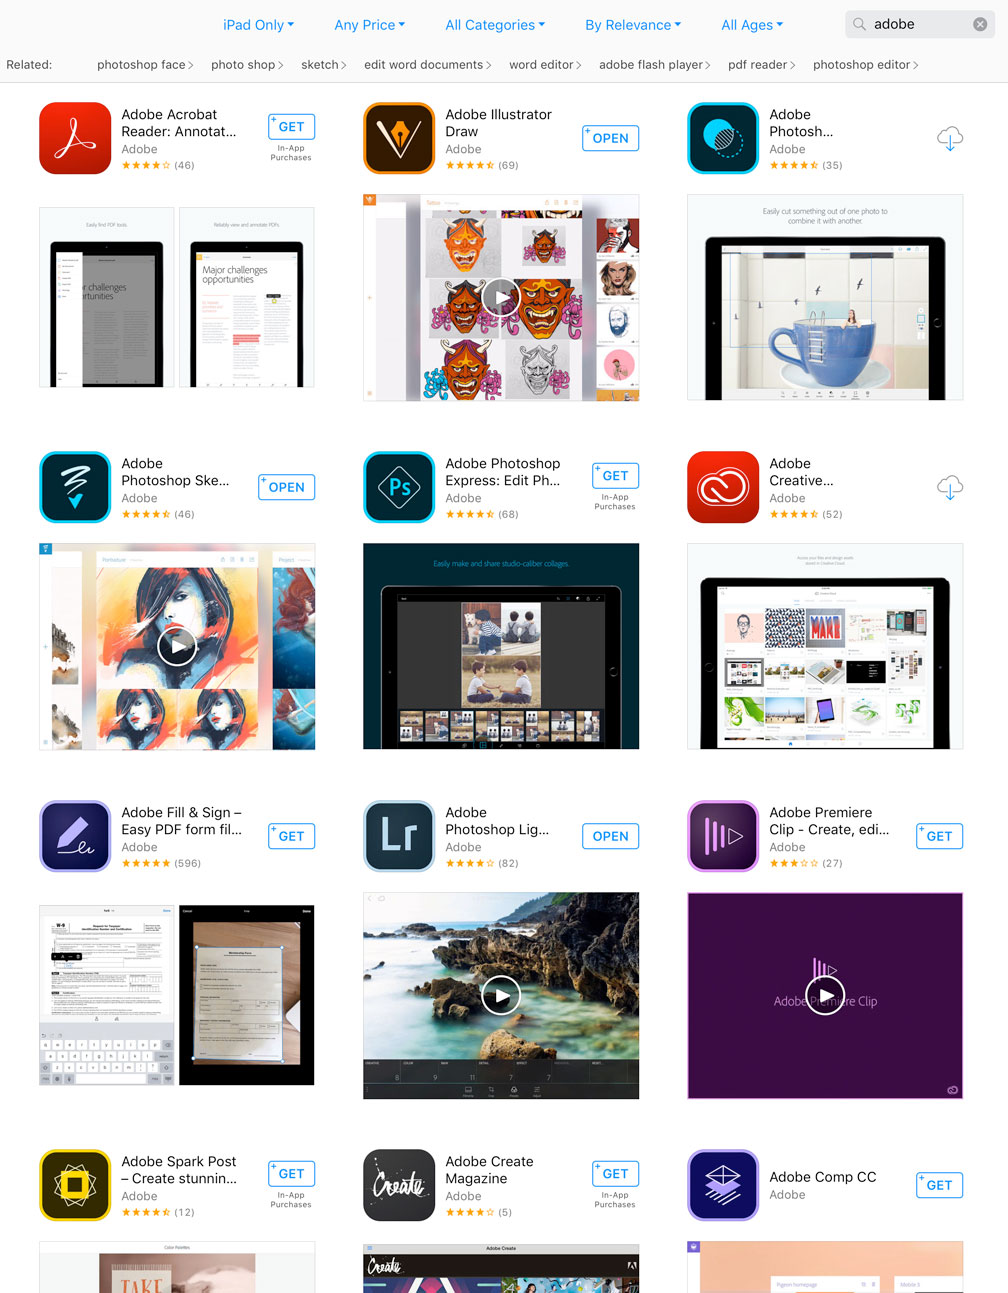
Some of the most sophisticated iOS drawing Apps available in the US App Store
Lacking a comprehensive Adobe Suite in the App Store, the artist needs to find a suitable Photoshop substitute before the iPad Pro can be taken to the field. In the App Store there are plenty of “sketching” Apps available, some of which are very basic, providing only a canvas and a set of primary tools; but there are many sophisticated and complex solutions as well. Some offer a large set of tools and layers, just like the desktop version of Adobe Photoshop (SketchBook, Inspire Pro, ArtRage, or Sketches to name a few) while others take an approach similar to Adobe Illustrator (Graphic, ProtoSketch, Concepts and Canva among others). Adobe’s own Apps, the above-mentioned Adobe Sketch and Adobe Draw, are the distilled variations of their own desktop software. Choosing the right iOS App for one’s field drawing requires consideration of such attributes as the precision and convenience of drawing input or the ease of getting around the user interface. There are, however, some basic criteria that need to be addressed here:
- The App has to accept super-sized high-resolution canvases to be able to work on a standard digitized photo negative.
-
The App has to handle file import and export with ease and recognize the most common file formats.
-
The App has to accept the Apple Pencil as its main input source and provide palm rejection to avoid any accidental interference.
-
The App has to handle many separate layers of information, which must remain intact after exporting for studio work.
-
Finally, the App has to have sophisticated brush customization options to provide the best possible drawing experience.
The list of requirements for the “ideal” drawing App could certainly be much longer, but the ease of use of the iPad Pro merits considering some of the necessary trade-offs.
Although there is never the perfect software with every feature we would want in the field, there is one App in the App Store, called Procreate, that includes almost everything the digital artist might wish when recording on the photographic background at the wall.
Digital penciling on the iPad Pro using Procreate

Procreate's user interface on the iPad Pro
Procreate lets the artist paint in high resolution using customized brushes in a multilayered environment. It has a simple user interface, with most of the settings and options tucked away in hidden menus, keeping the canvas uncluttered. On initial opening of the App, the user is presented with a series of sample artwork made in Procreate to demonstrate its many features for power users. The artist can keep these samples in a dedicated folder for future reference or delete them along with creating new project-specific folders.
Procreate’s basic features
(1) Large canvases, up to 16000 by 4000 ppi on the iPad Pro, optimized for iPad’s multiple cores with 250 levels of undo and redo.
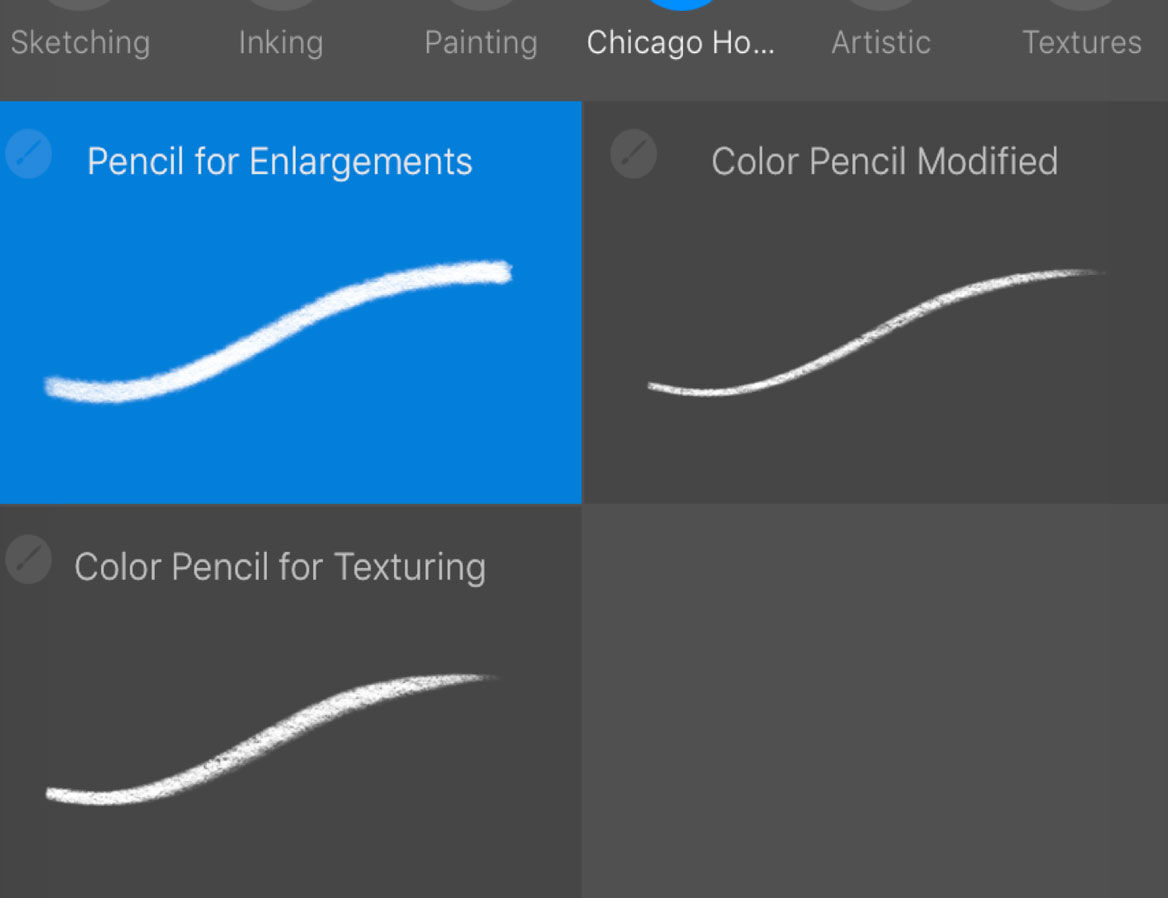
(2) 128 beautifully made brushes ranging from sketching and inking through painting and texture brushes.
(3) Custom folders to create and store brushes created for specific projects, with the option to import and export.
(4) 35 customizable settings for every brush, such as the nature of each stroke, the shape of the brush grain, and dynamics.
(5) The benefit of layers, with adjustable opacity operated by efficient gesture controls built specifically for multi-touch.
(6) Customizable advanced gesture controls specifiable for the Apple Pencil, Touch, the Eyedropper and the Quick Menu.
(7) A customizable Gallery with editable folders to keep the artist’s work organized.
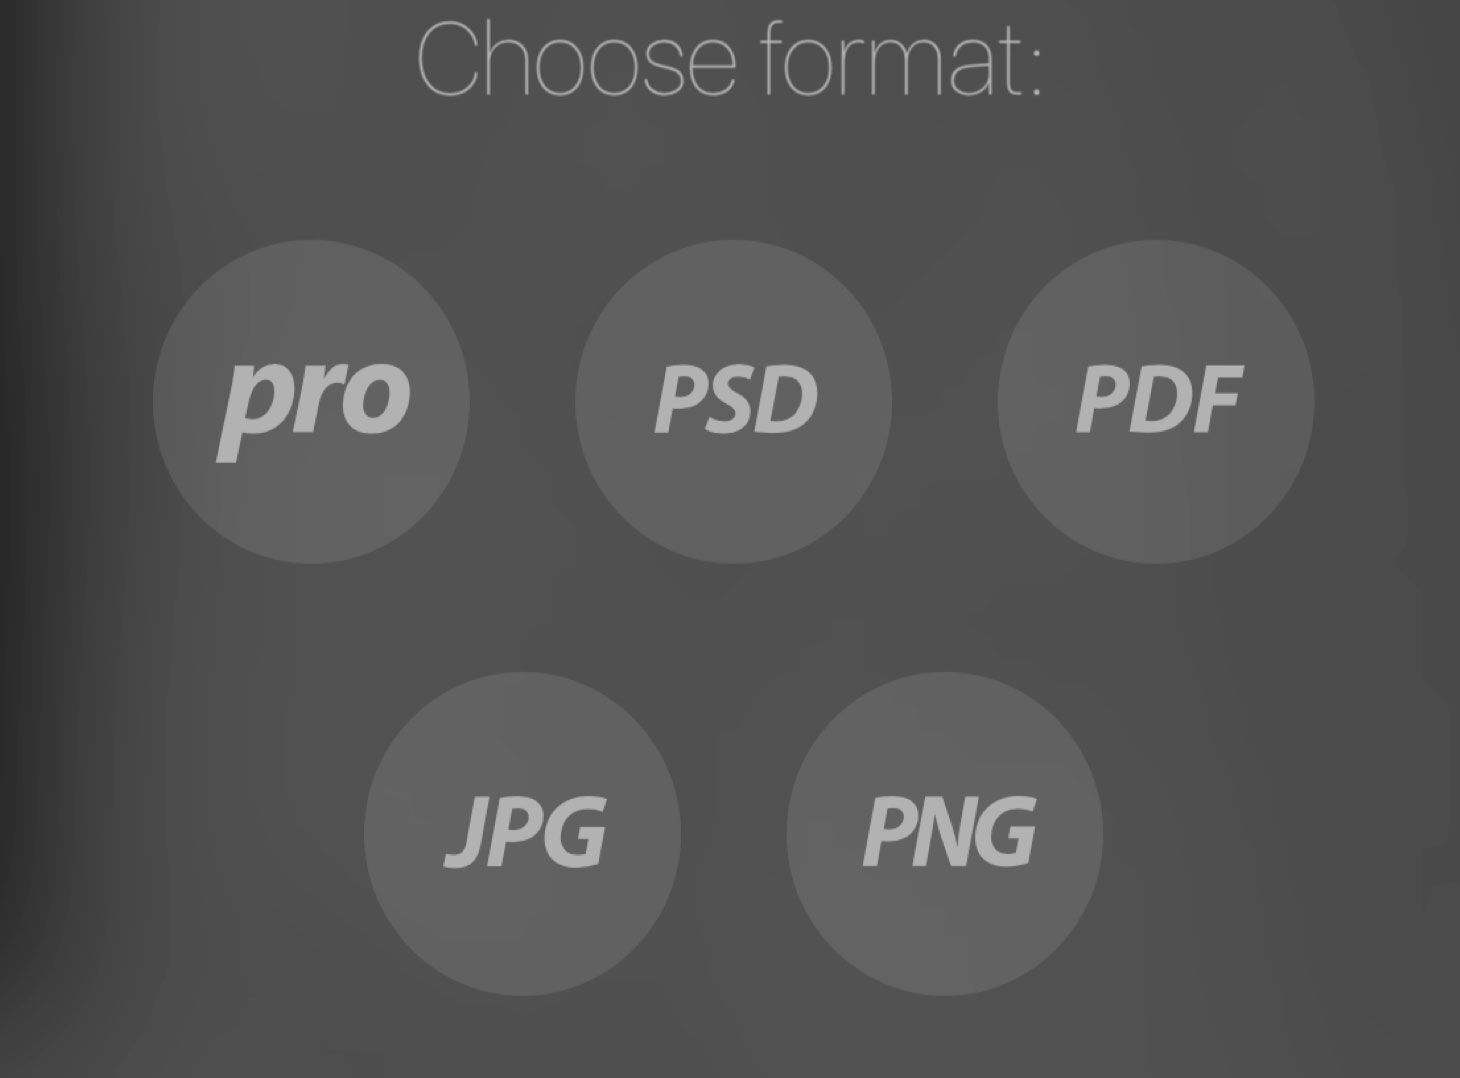
(8) Export to AirDrop, iCloud Drive, Photos, iTunes or Dropbox as layered native Procreate file, PSD, PNG, PDF or JPEG.
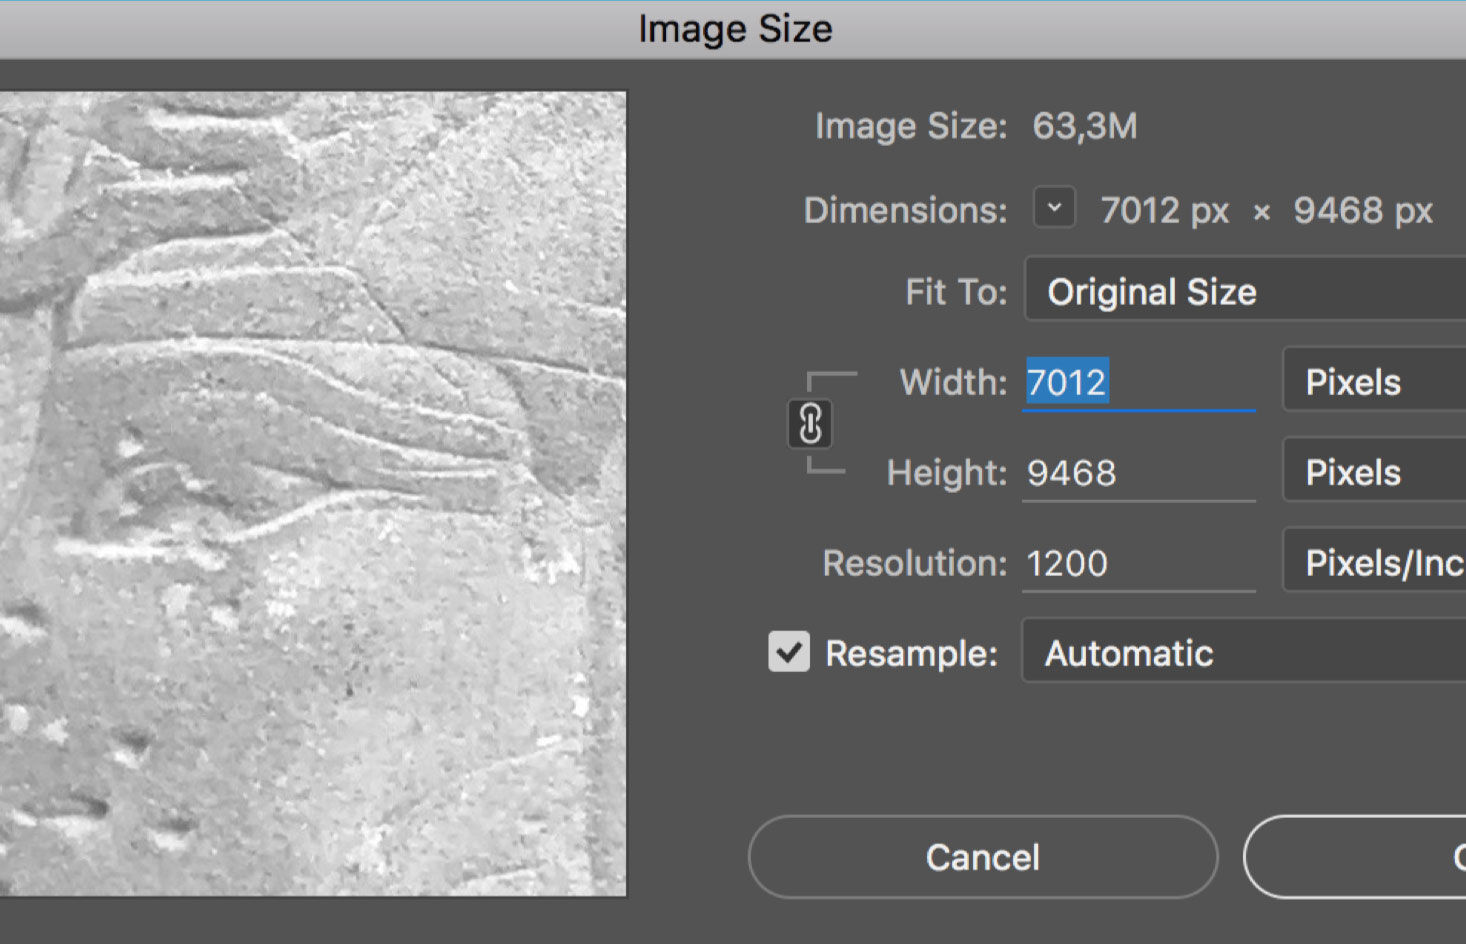
Once the artist is aware of the basic features, the next step towards providing a Procreate background for field drawing leads us back to our regular digital templates created for the Companion. Although working in Photoshop on a PC requires the artist to provide the field drawing at a specific scale, digital penciling in Procreate doesn’t necessarily need to follow the same procedure. It is important to point out that, although importing layered psd files as our background is possible with the software’s latest updates, its limitation of the number of layers that can be imported, together with numerous format specific regulations, makes it unsuitable for the direct application of our predesigned Photoshop templates. The other excluding factor is the usual file size and resolution limitation, which prevents us from importing a large multi-layered 1200 dpi canvas in the software’s current version. Instead, the artist is advised to prepare the file on the computer in the exact same way as for a regular Photoshop file used for penciling on the Companion, based on using the appropriate Template, including the regular layers in the Survey’s standard 1200 dpi resolution. Once the properly scaled digital image is part of the Template, the artist should downscale the image size to the highest pixel combination that would still be suitable for Procreate.
Once the artist creates the highest resolution background that is still usable in Procreate, all the layers can be merged and the file can be saved as a regular jpeg, keeping its quality at its maximum.
For the next step, this high resolution jpeg file needs to be imported into Procreate. This could happen in many different ways. Importing through iTunes is the simplest of our options and requires the iPad to be connected to the computer via cable.
Preparing the source file
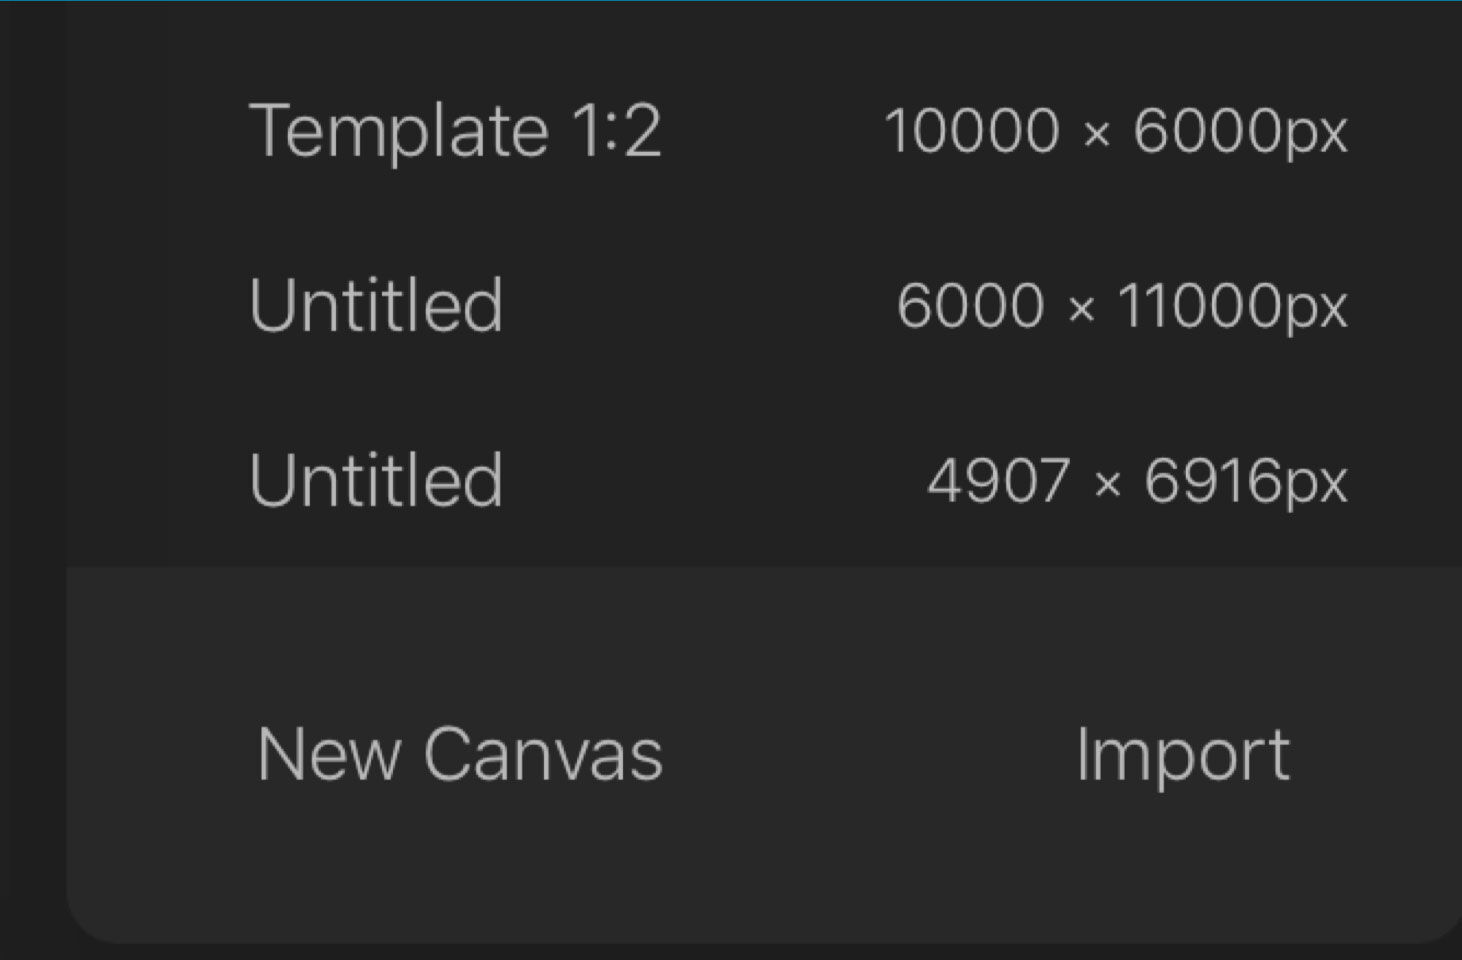
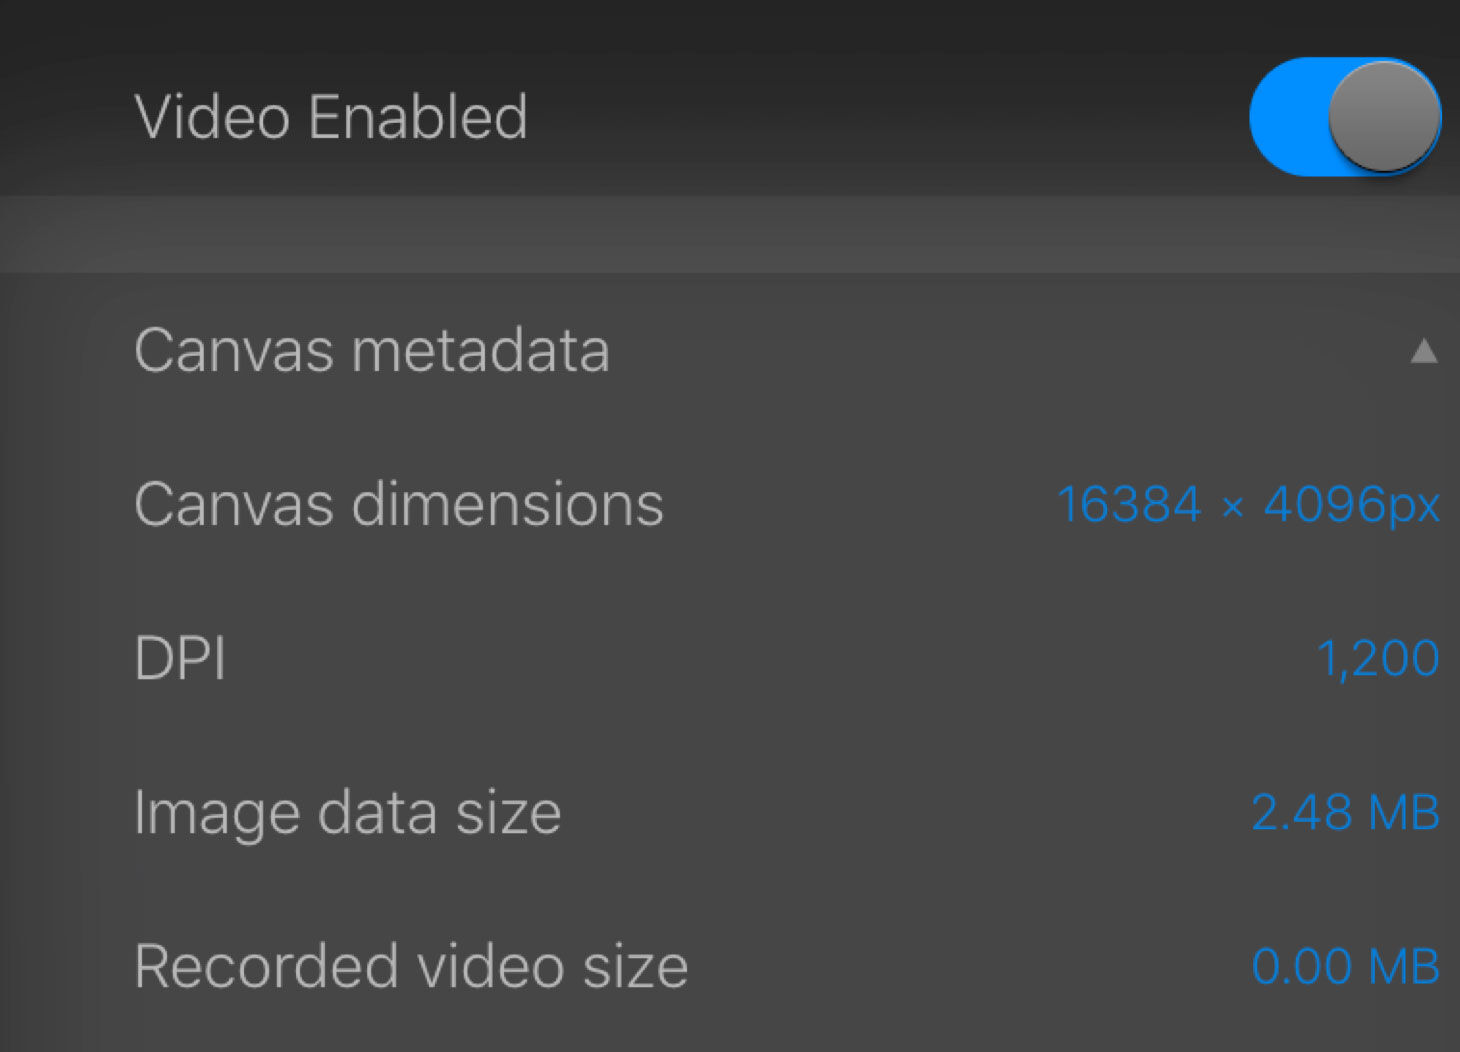
(1) Procreate’s New Canvas set up landing page can be used to see if our intended background’s resolution is within the software’s limitations.
(2) The original 1200 dpi background as set up in the Template exceeds the highest resolution that the iPad Pro can accommodate.
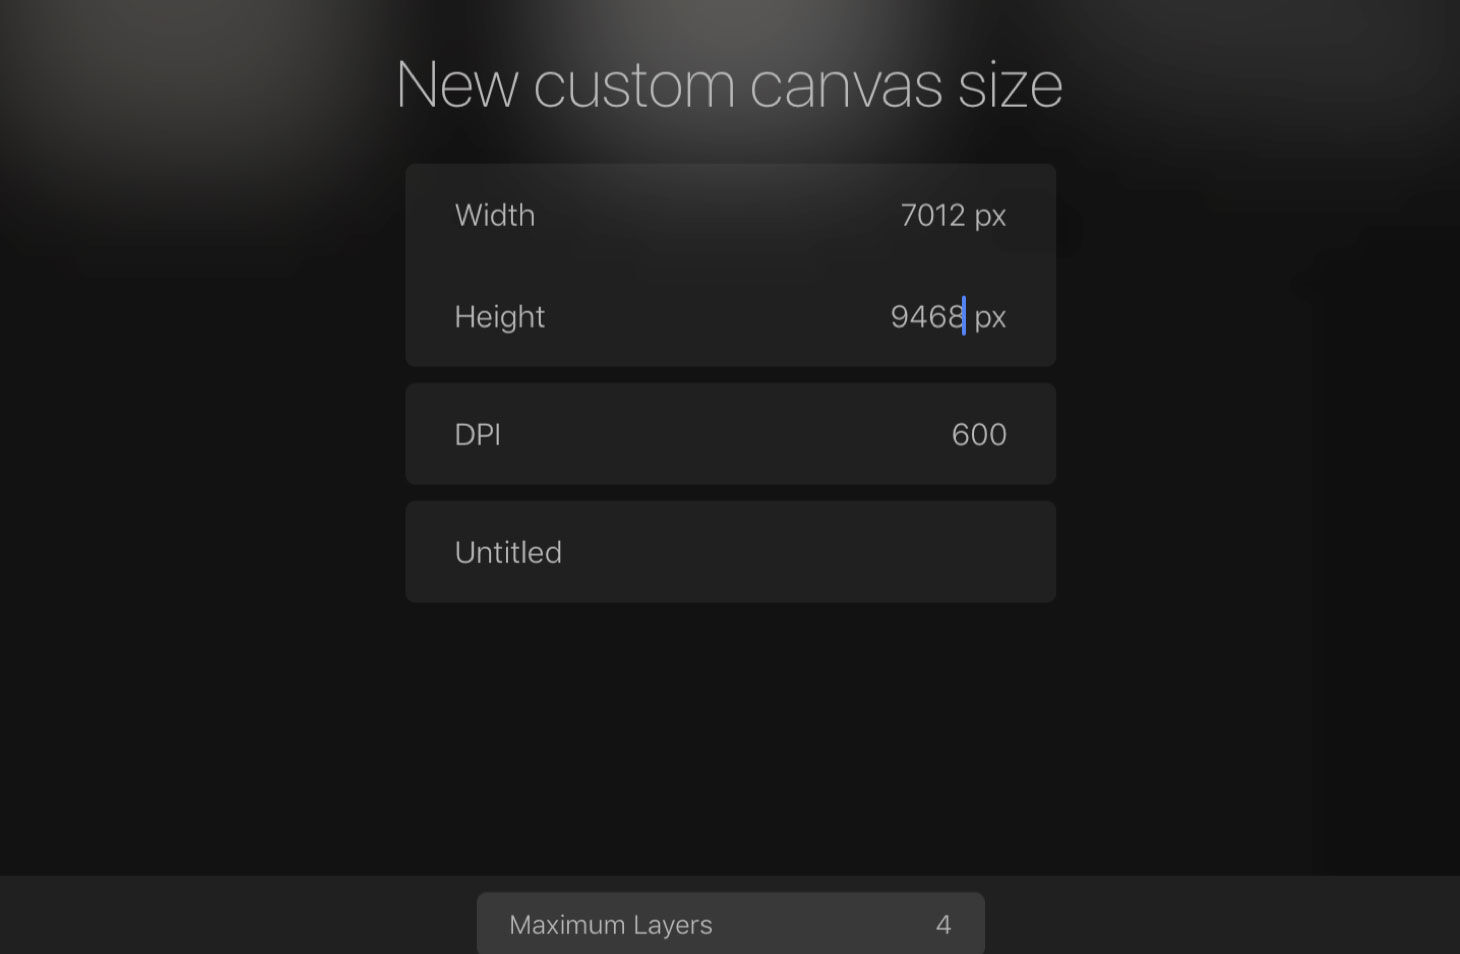
(3) When we try to set up a canvas with the same resolution, Procreate indicates a red warning message (Too large) in the Max. Layers box.
(4) Downsizing the drawing also reduces the quality. It is important to aim for the highest possible resolution that is still accepted by Procreate.
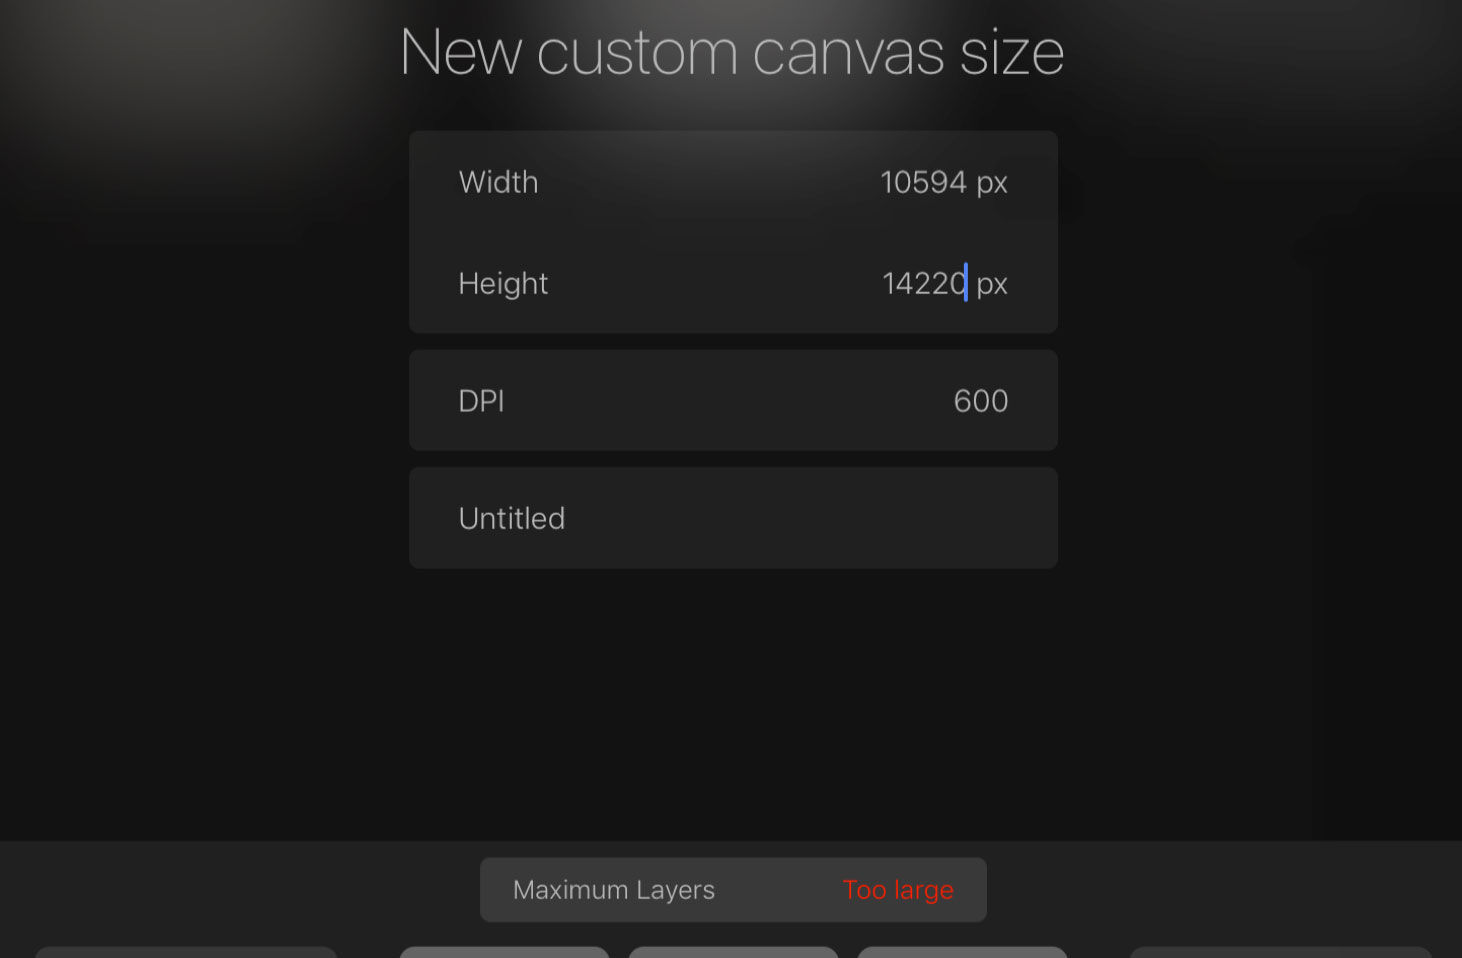
(5) Setting up the pixel count equivalent with the downscaled Photoshop file specifies the total number of layers one can use on the iPad.
(6) Dividing the background into smaller sections allows us to work in higher resolution when penciling in Procreate.
Once the connection is established, the artist has to navigate to Procreate’s folder in iTunes and drag and drop the jpeg file so it appears among the iTunes files on the iPad. The artist must then import the file into Procreate on the iPad by selecting Import/iTunes.
Dropping files into the Procreate folder using iTunes
One can certainly use wireless importing methods as well, but their file transporting speed is dependent on the required internet connection, so they are less recommended. File import can, however, be achieved by saving a copy of our jpeg to the Photos App on the Mac, assuming the artist has iCloud Photo Sharing set up. The more common method would be to use a Cloud sharing service such as Dropbox or iCloud. Once a copy of the jpeg file is uploaded to the preferred cloud service, it can be found through Procreate by selecting Import/Import from.../Locations/Dropbox or iCloud.
Customizing Procreate
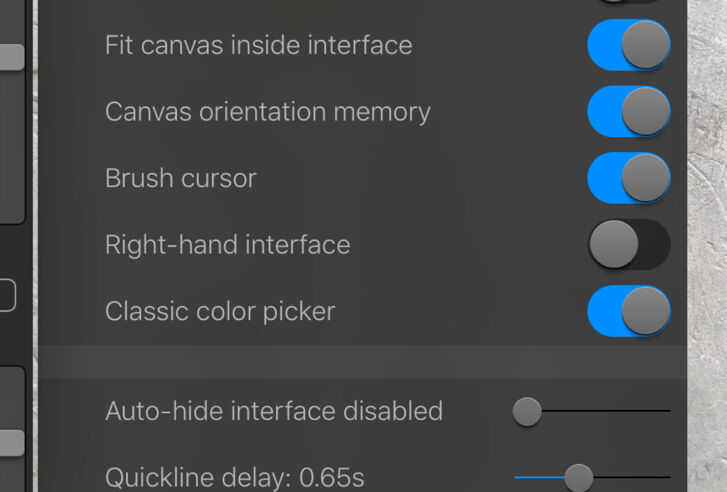
(1) Most of the basic customization tweaks depend on personal preference. The arrangement presented here is the Survey’s standard setting.
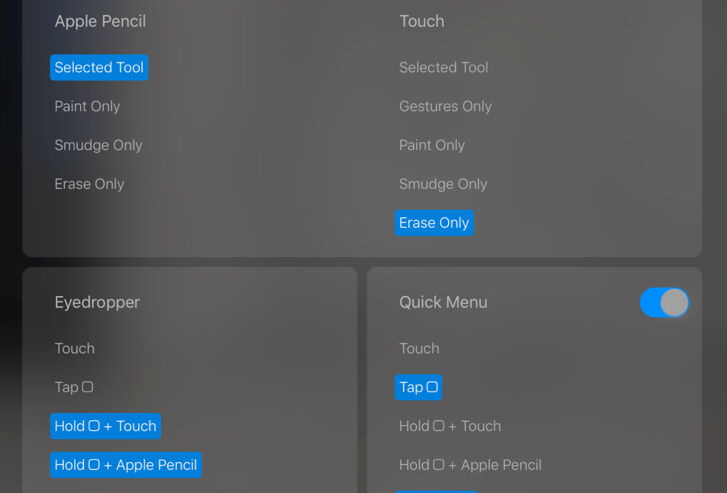
(2) In this setup, only Apple Pencil is used for brushstrokes, while finger is used for erasing. The last panel activates the shortcut menu.
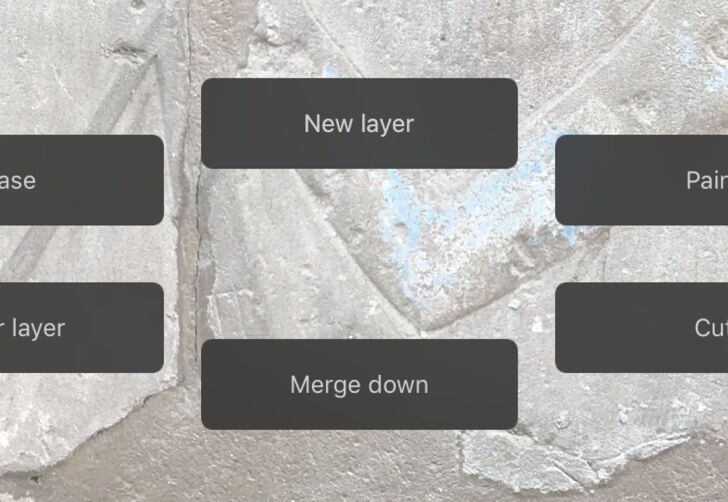
(3) The quick menu calls up hidden menu actions that are often used, and they can be changed by touching and holding their panels.
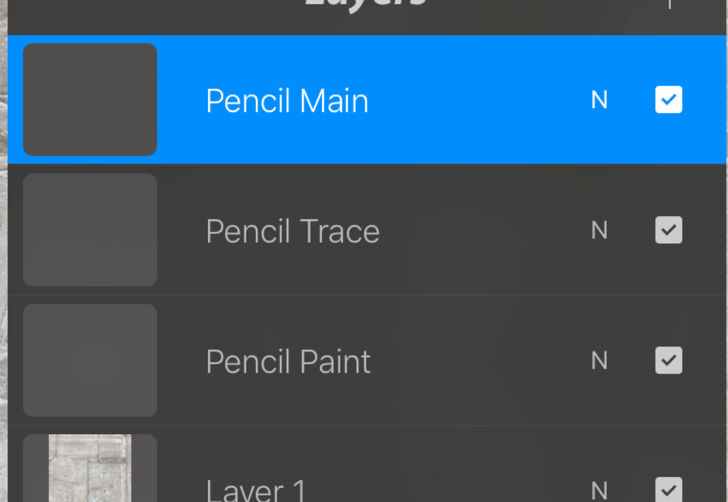
(4) Setting up the proper layers is essential for digital penciling. The arrangement given here is the Survey’s standard setting.
Once the jpeg is imported and placed in the relevant project’s folder, we can move on to Procreate’s interface customization. There is not a lot to do here, but one should be aware of a few tweaks that could potentially help with work in the field.
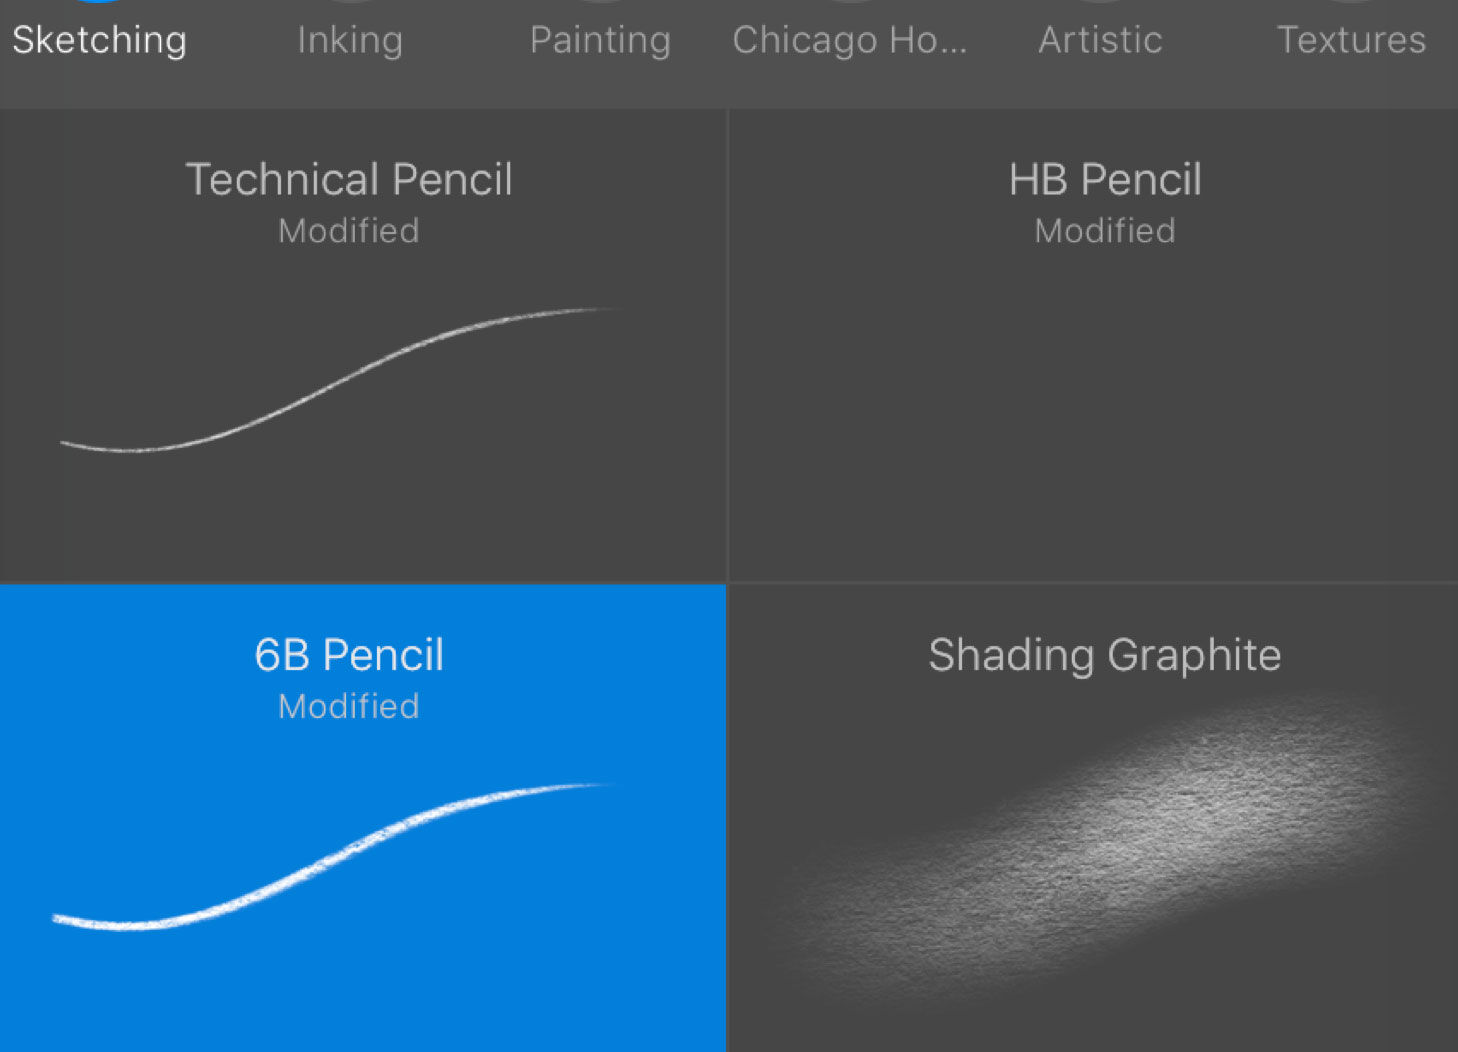
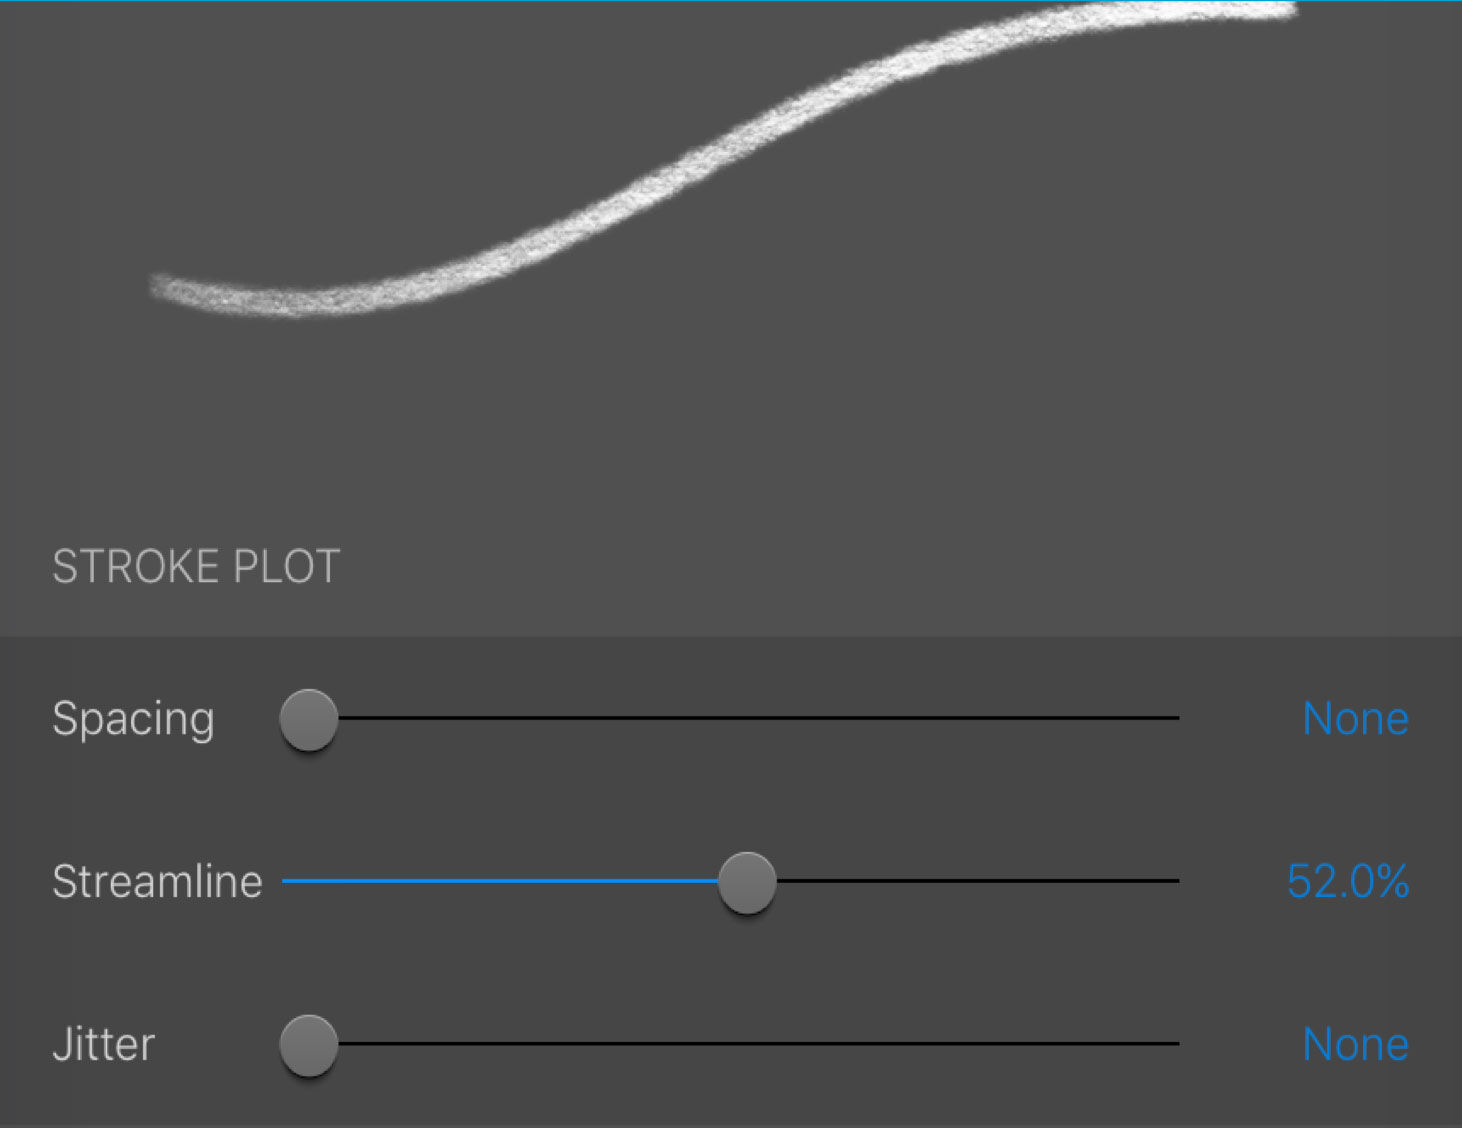
As the last step before digital penciling, the artist has to create the most suitable pencil brush for the field project. Procreate provides a vast amount of brush customization options, which may discourage some at first, but these little nuances are worth exploring. When designing the Survey’s standard digital pencil brush, some features, such as Spacing, Jitter and Stroke Taper needed to be disabled, while Streamline (which is a relatively recent addition to Procreate’s brush settings) was changed to 50% Streamline, helping to smooth the artist’s strokes for near-perfect curves and better line quality. Credit must go to the software’s developers for providing the user with the option to share their custom brushes, allowing the Survey to design their specific brush set and provide all the artists with the same basic and advanced sets for their fieldwork. These Brush files are collected in a specific folder and are part of the Survey’s Procreate design set. Just as Procreate’s backgrounds are not set up in a specified scale, these pressure sensitive brushes don’t have a preset size; instead, the resolution of the background predetermines their optimal thickness.
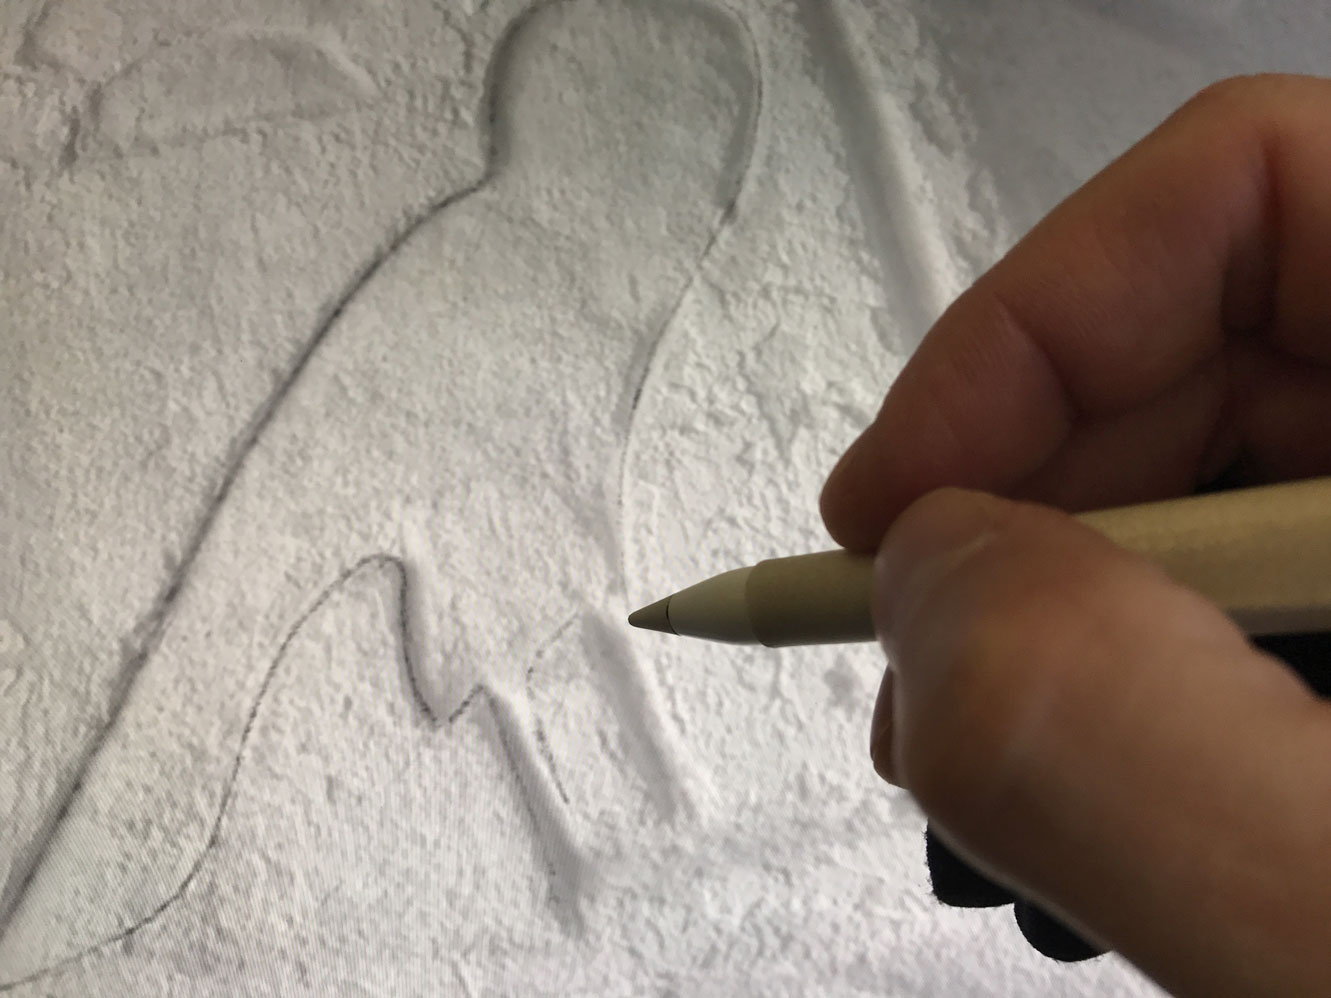
Searching for the right curvature using a pressure sensitive brush stroke
For the actual process of penciling in the field using the iPad Pro and Procreate, the artist will find many useful features that help to accomplish the initial drawing.
Adjusting a selected area using Apple Pencil
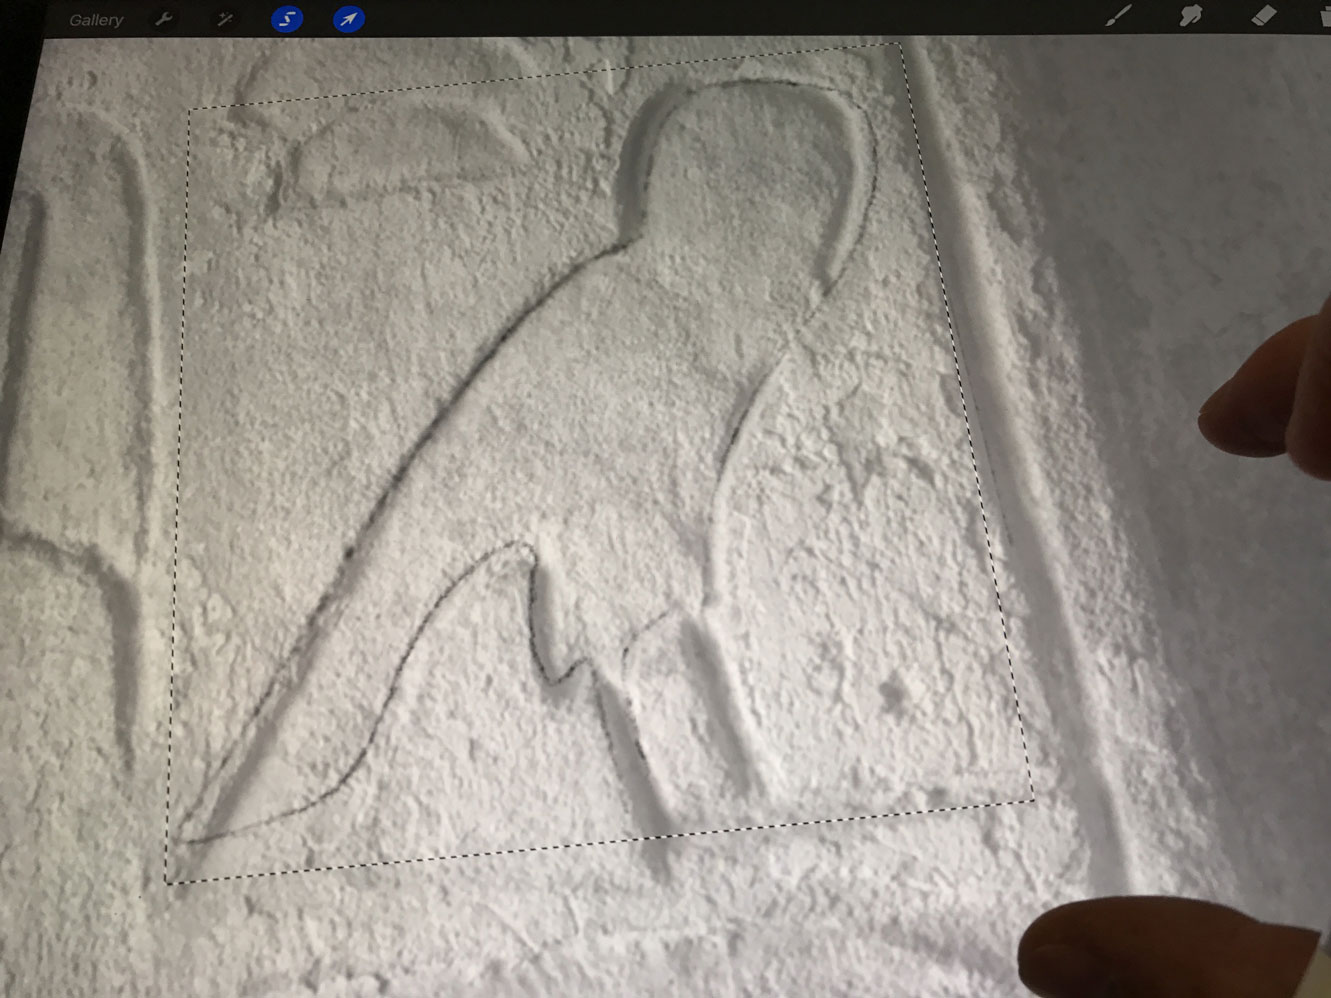
Applying the streamline effect, along with adding some pressure sensitivity and opacity to our brush, helps the artist to master elegant curves, even at the initial penciling stage. Pencil line quality is important when the pencil layers need to be upscaled to provide the necessary guidance for studio work.
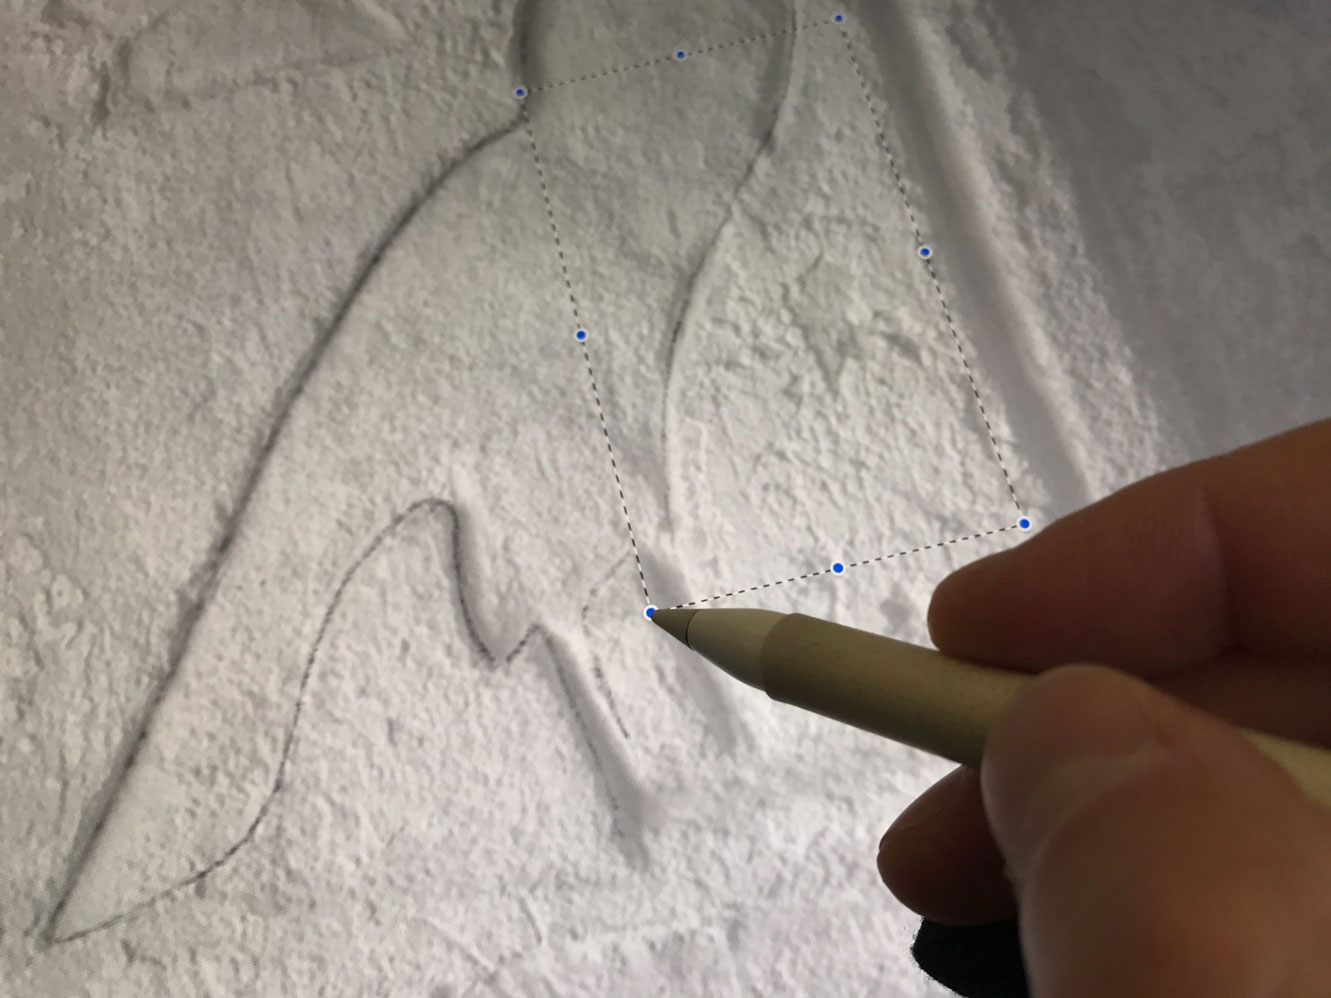
Selecting and distorting an already penciled area or line section that is slightly misplaced is often easier than redrawing the entire feature. To achieve this action, one must press and hold the Apple Pencil to one of the eight blue dots appearing along the selection.
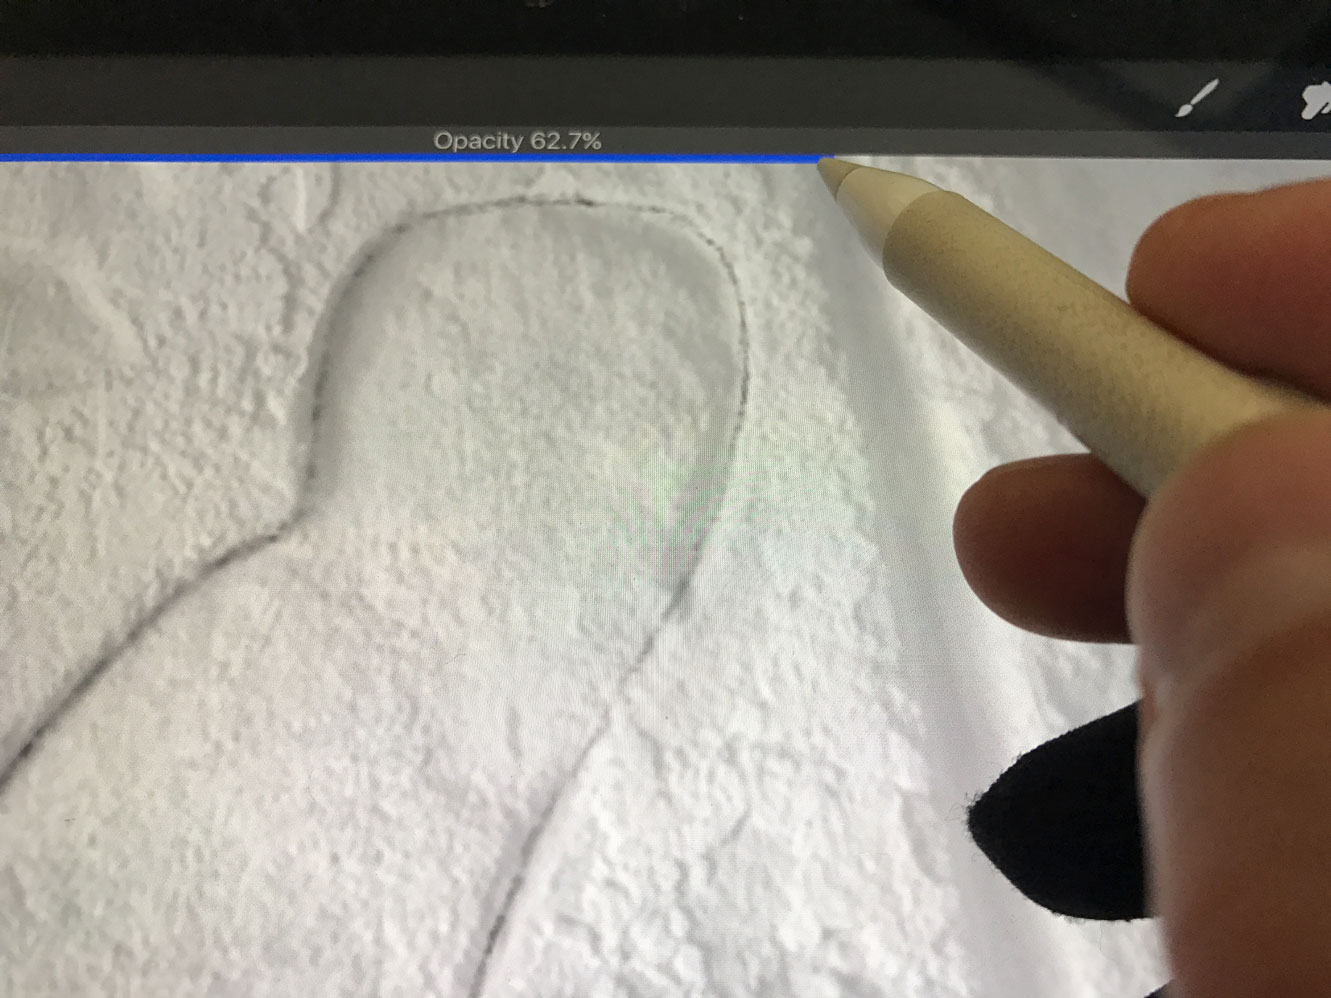
Changing the opacity of the background
Hitting the appropriate layer with two fingers calls up the actual layer’s opacity slider, which can be adjusted by a simple horizontal movement. Temporary lowering of the opacity on the background makes it easy to see the pencil line over dark areas.

Using the auto-straightening option
There are cases when the artist needs to create straight lines either for reference or for architectural features. There is an automation in Procreate that can be used by starting with a brush stroke, then pressing and holding the Apple Pencil while drawing. After the action takes effect, the straight line can be set to its appropriate length. This feature can be helpful, even when drawing with a pressure sensitive pencil brush while working on such features as column lines, by moving the Pencil back and forth in smaller increments.
Rescaling and rotating the selected area
Sometimes more drastic changes are necessary to correct perspective distortion. Again, when selecting the problematic area by pinching and rotating two fingers on the screen, the artist is able to achieve complex modifications with relative ease. Most of these changes that speed up the drawing process can be done using relatively simple gestures, so it is highly recommended to explore the full set of possibilities given the excellent handbook that accompanies Procreate, which can be downloaded for free through the iBook Store.
Finally, there are two features that are unique to our regular documentation process but worth mentioning here: the ability to capture a photo within the App and to set it up as a layer, and screen recording.
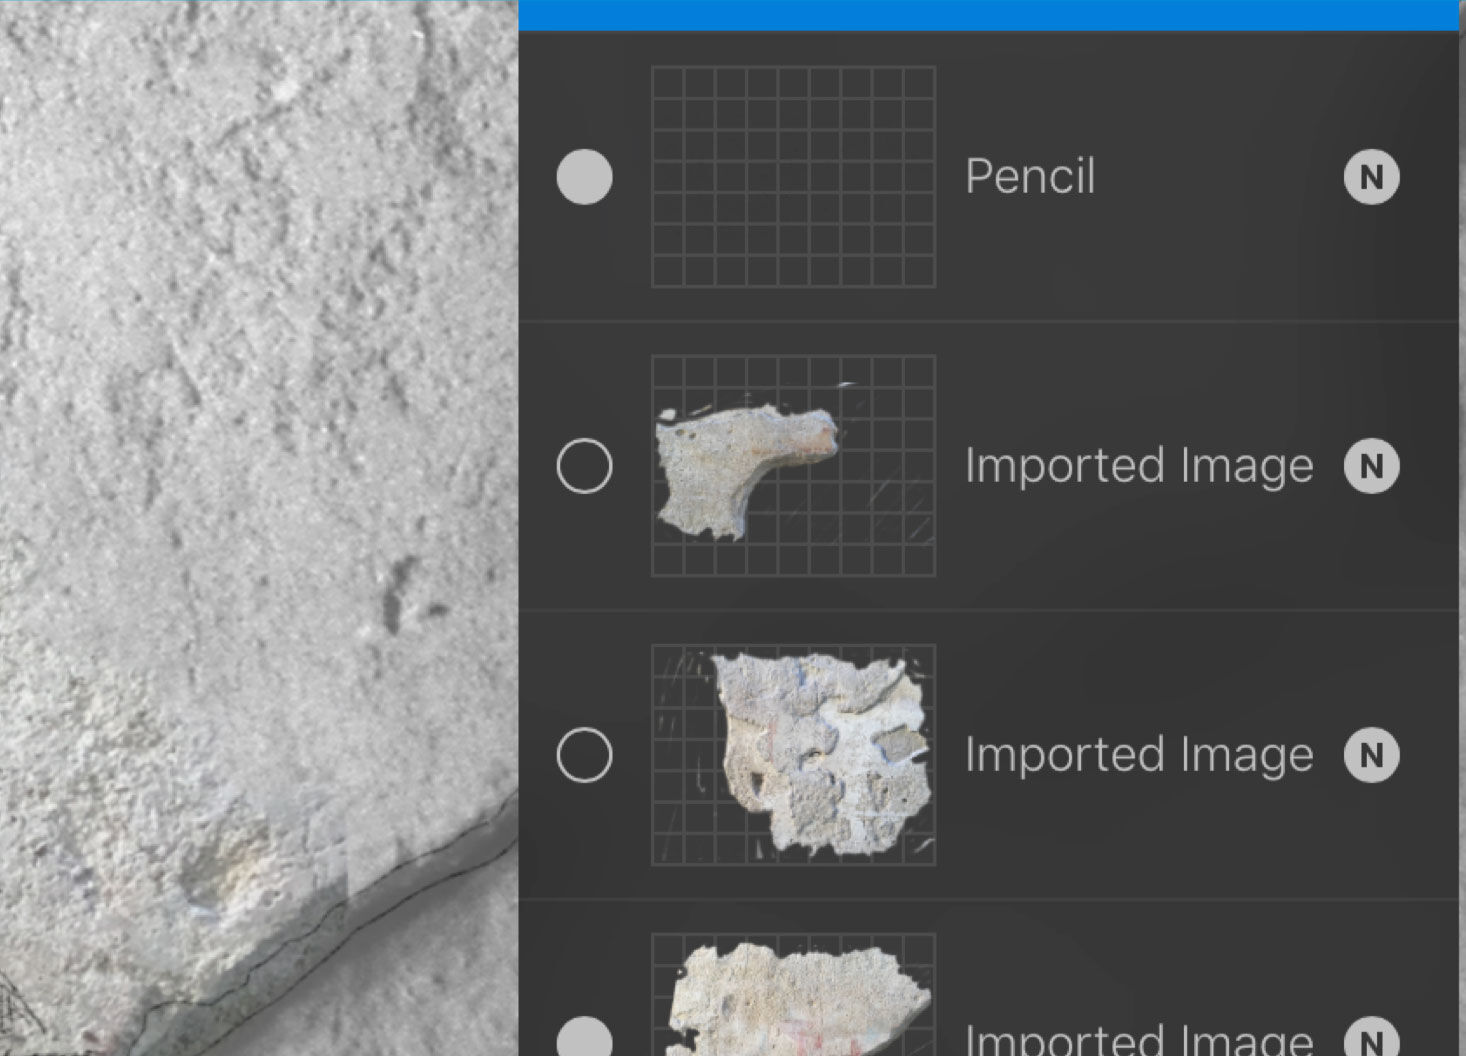
Using a color photo taken by the iPad may be helpful in cases when there are certain features visible on the wall that need to be recorded, but which are less clearly visible on the scanned negative. For instance, paint traces may be hard to distinguish on a B/W photograph but show much more clearly in a digital color photo. A quick photo taken under certain lighting conditions may be helpful when adding damage details as well. One can always take a photo by using the regular Camera App but Procreate allows direct capturing within its workspace (Settings/Insert/Take a photo), which sets up a new color layer immediately. This Imported Image layer can be scaled, distorted and further modified such that it integrates organically with the rest of the scene. Once the information is captured, these layers can be deleted or collected in a specific folder for future reference.
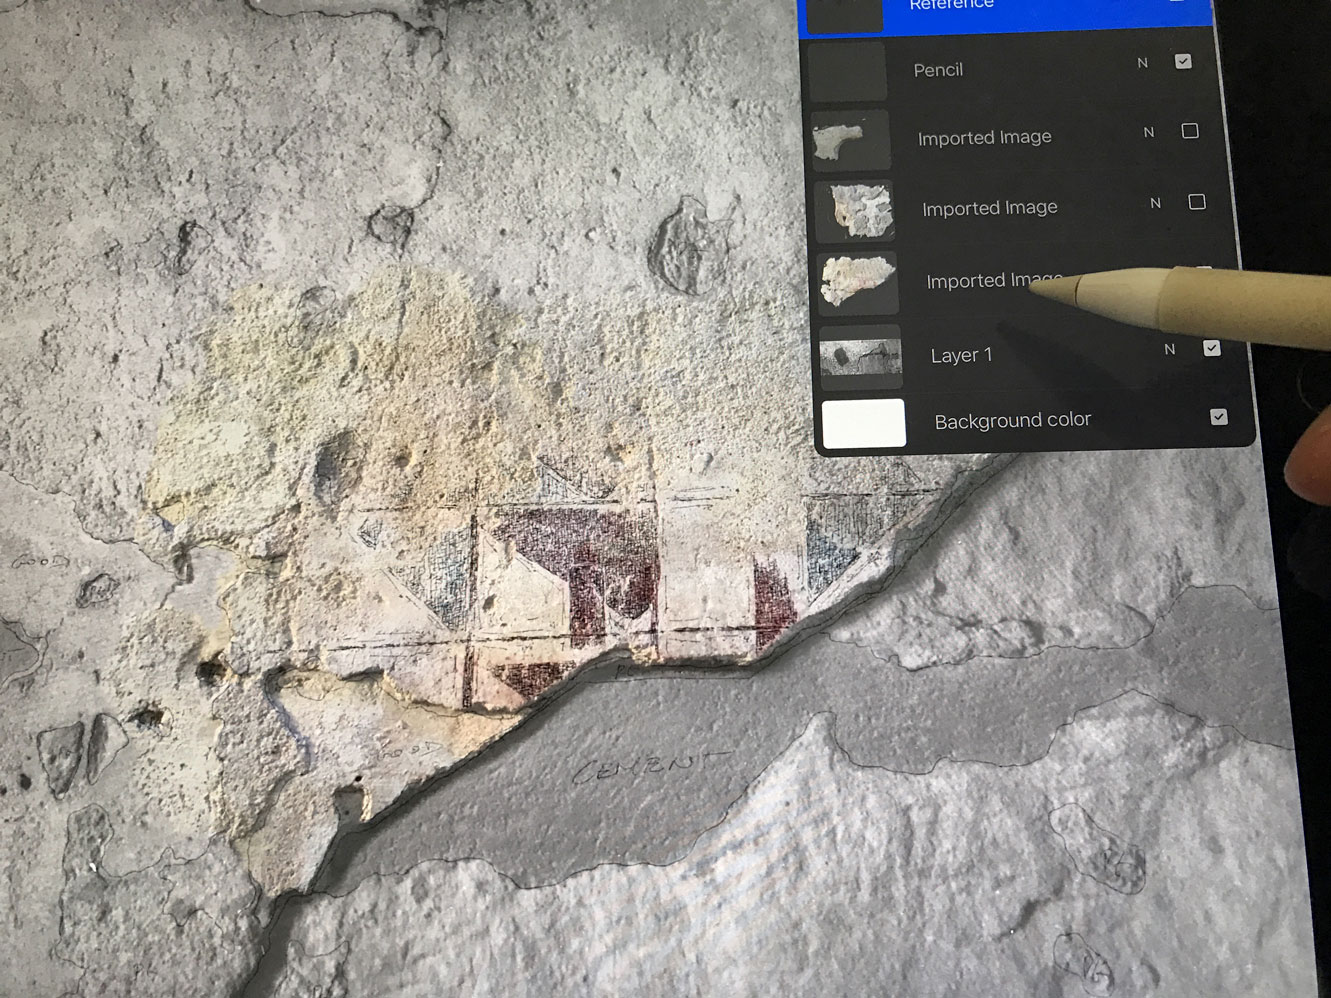
Setting up the iPad camera photos as addititonal layers
Screen recording is an automatic feature that records a time-lapse video feed of the entire drawing process from start to finish, no matter how many times the artwork file was closed and reopened again. It is enabled as a default, but it can be disabled, and its recording quality can also be modified through the iPad’s regular Settings under Procreate (not the settings within Procreate). An artwork-specific time-lapse video can be imported any time by going to Settings/Share/Export video in Procreate. This creates a regular mp4 video in the Photos App that can be modified or edited as desired. In the latest update, more video features were added to the software, and now they have their own settings panel as well. With the latest additions, the artist is able to start a Screen Capture with voice included, which makes it possible to create a quick tutorial dealing with certain problematic areas or to have a record of how a particularly problematic area has been handled. One can even start a live broadcast of the drawing process if needed, assuming there is access to a reliable internet connection on the iPad.
Exporting the field drawing and getting ready for digital inking
When exporting the finished, multi-layered digital pencil drawing from the iPad, Procreate offers us the same wide arsenal of options as presented with during importing. Upon finishing a particular drawing, hitting the Share button in Settings takes us to the panel where we have to choose the export format. Picking the right format is easy at this point, because the only format that preserves the layer information and is compatible with Photoshop, where inking is going to happen, is a psd file. As a first step, Procreate transforms our file into the appropriate format, than presents us with the regular iOS Share Sheet, where we have to decide if we want to use our psd file on the iPad in another App, transfer it to the Cloud, or open in another nearby device. If the iPad is connected to the computer by cable and iTunes is open, the safest and fastest way to transfer the file would be to use this option. Another fast transfer could be effected by using AirDrop, which is a direct wireless sharing from iPad to computer. The only interaction that this requires from the user is to choose the appropriate device from the list, and the file appears in the device’s Download folder. There is always the possibility that the artist doesn’t have the computer nearby when wanting to offload finished drawings from the iPad. In these cases, one can use a cloud service, where the files would then be available to download any time on any computer that has access to the same service.
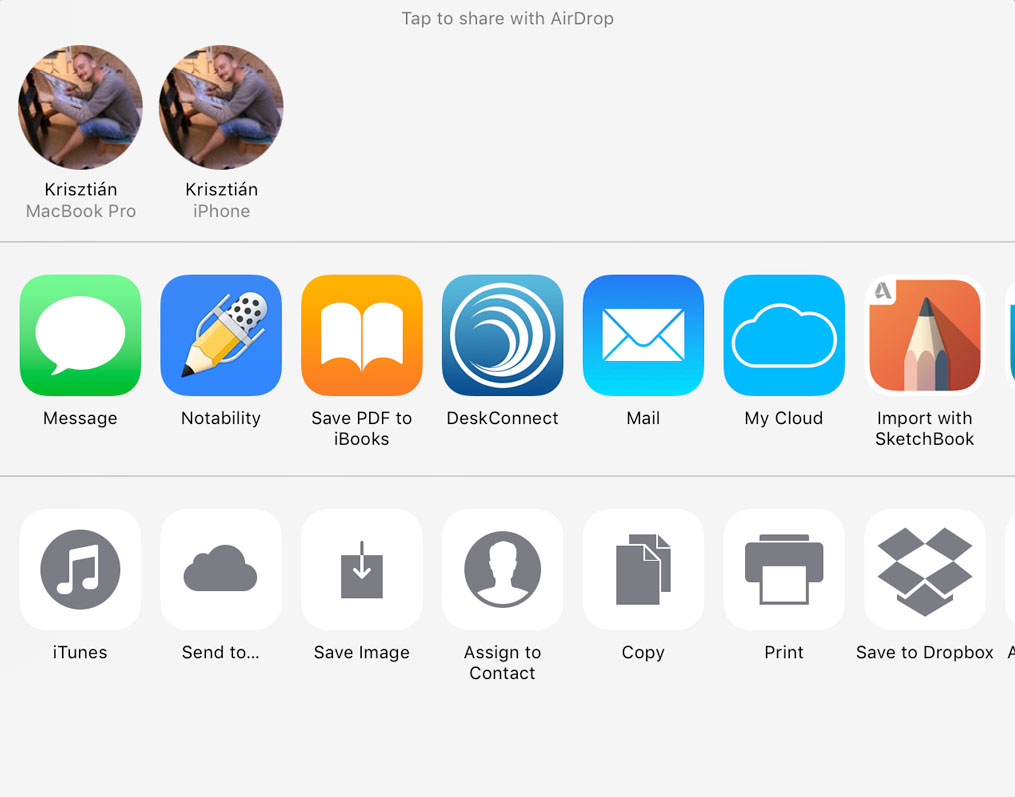
The iOS Share Sheet showing the available options during file export from Procreate
As a final preparatory step to ready the digitally penciled drawing for studio work, the artist needs to readjust the scale of the drawing to match its original dimensions. Since downscaling was a temporary necessity, required only to match the iPad’s and Procreate’s current limitations, we need to upscale our layered psd file to the same pixel resolution as it first appeared on our Template. This is a very straightforward process and starts with opening both the psd file and the source tiff in Photoshop.
The artist should remember what kind of downscaling method was used to provide the background for Procreate and reverse the steps in the same way as it was described earlier in the Chapter. If the artist decided about cropping the scene to smaller sections for digital penciling, it will be necessary to repeat the above steps with each section in order to be able to ink the entire scene as a unit.
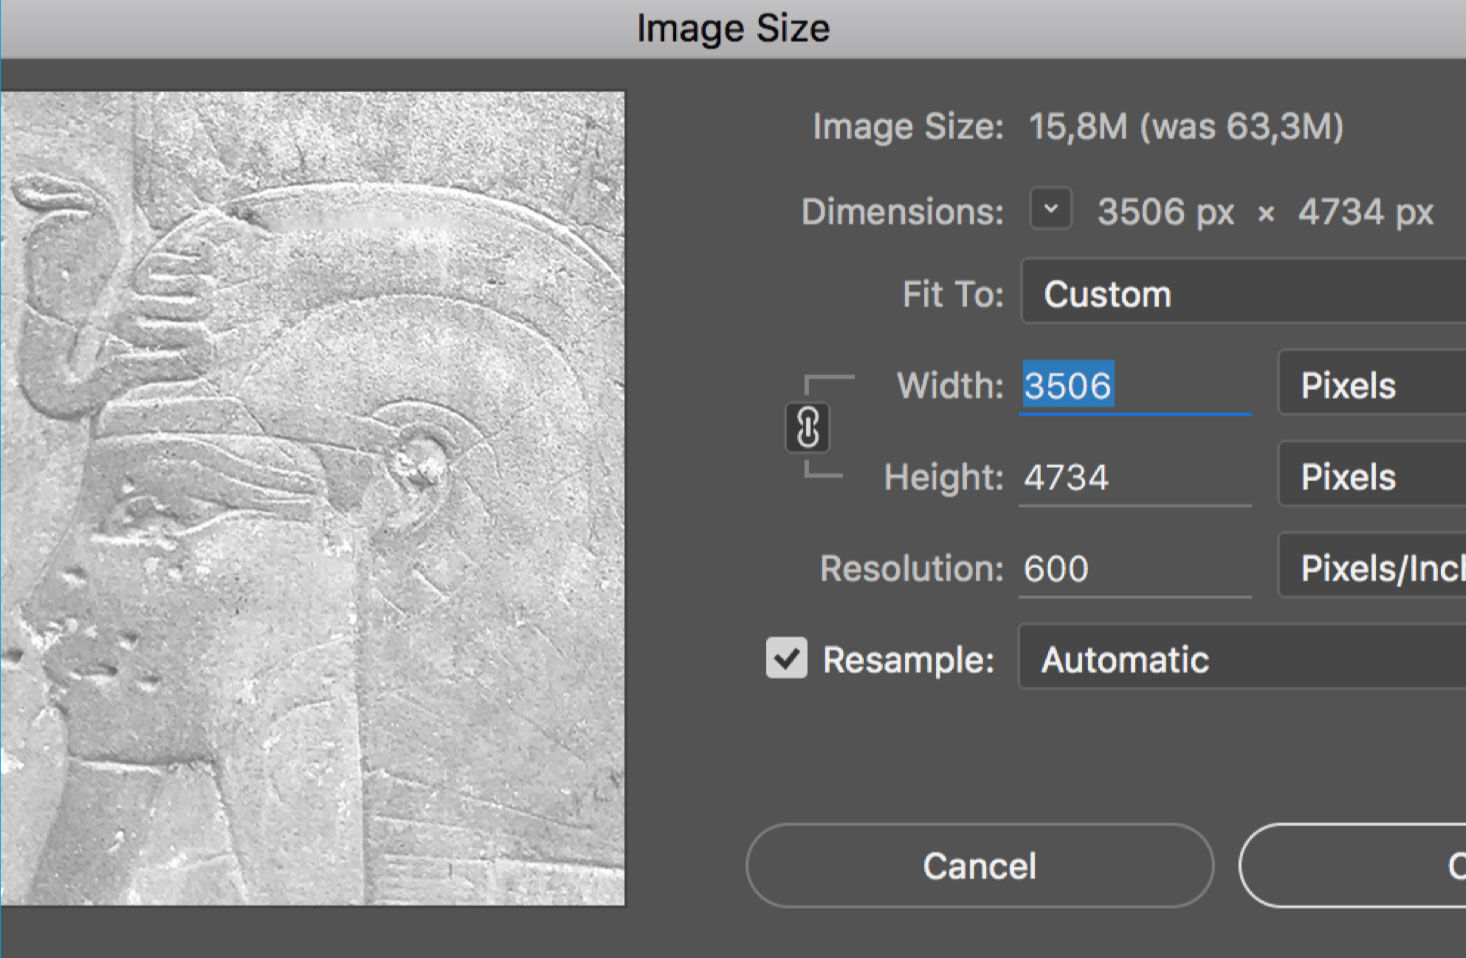
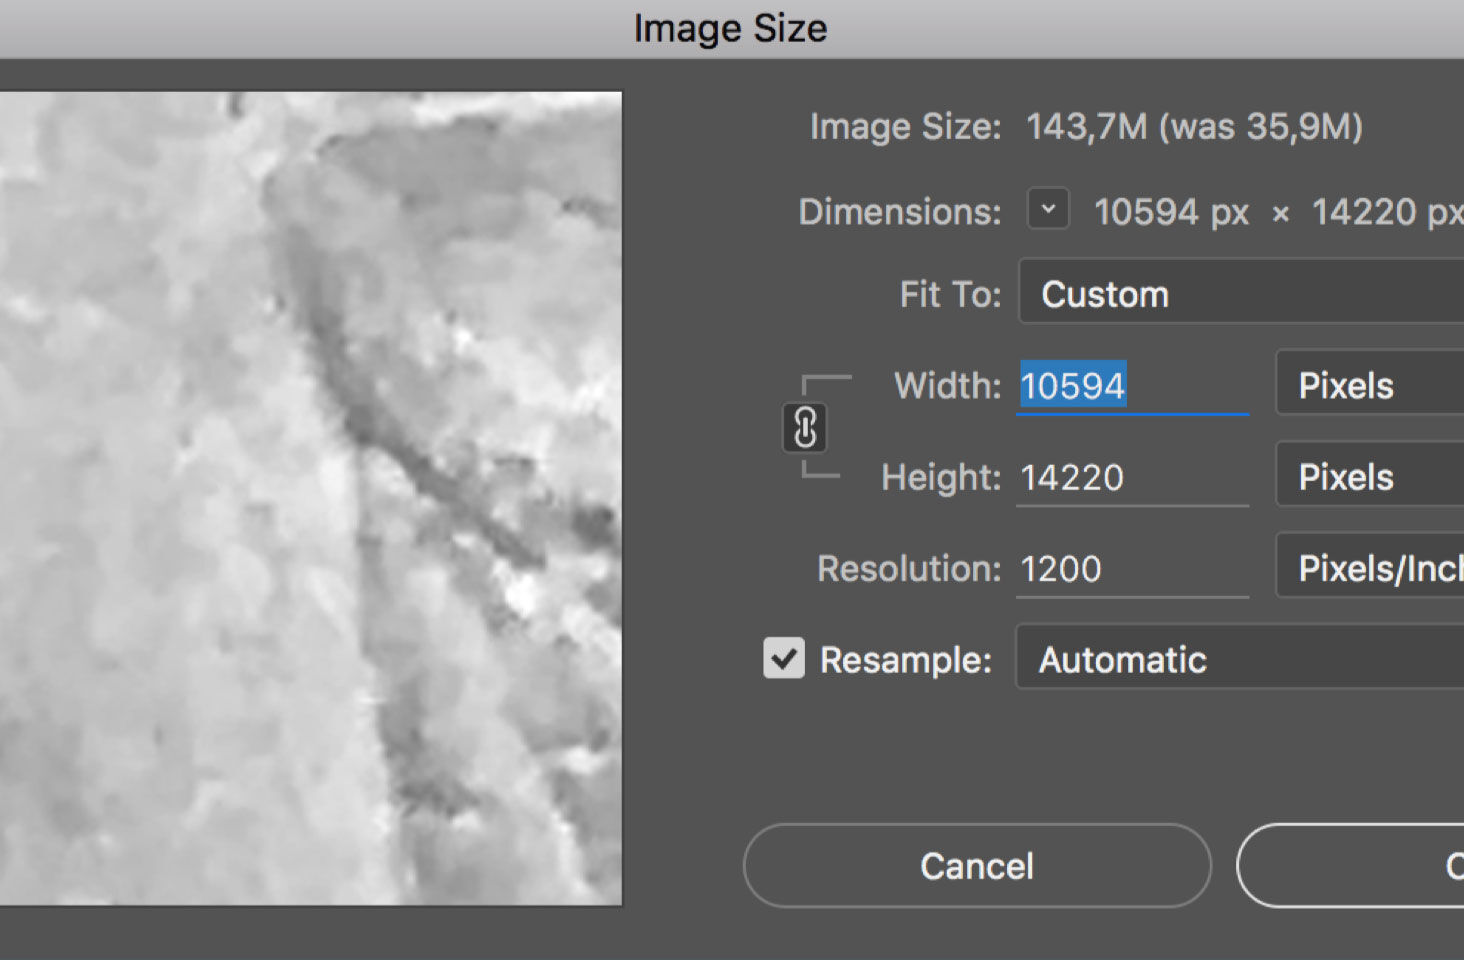
Upscaling the psd file
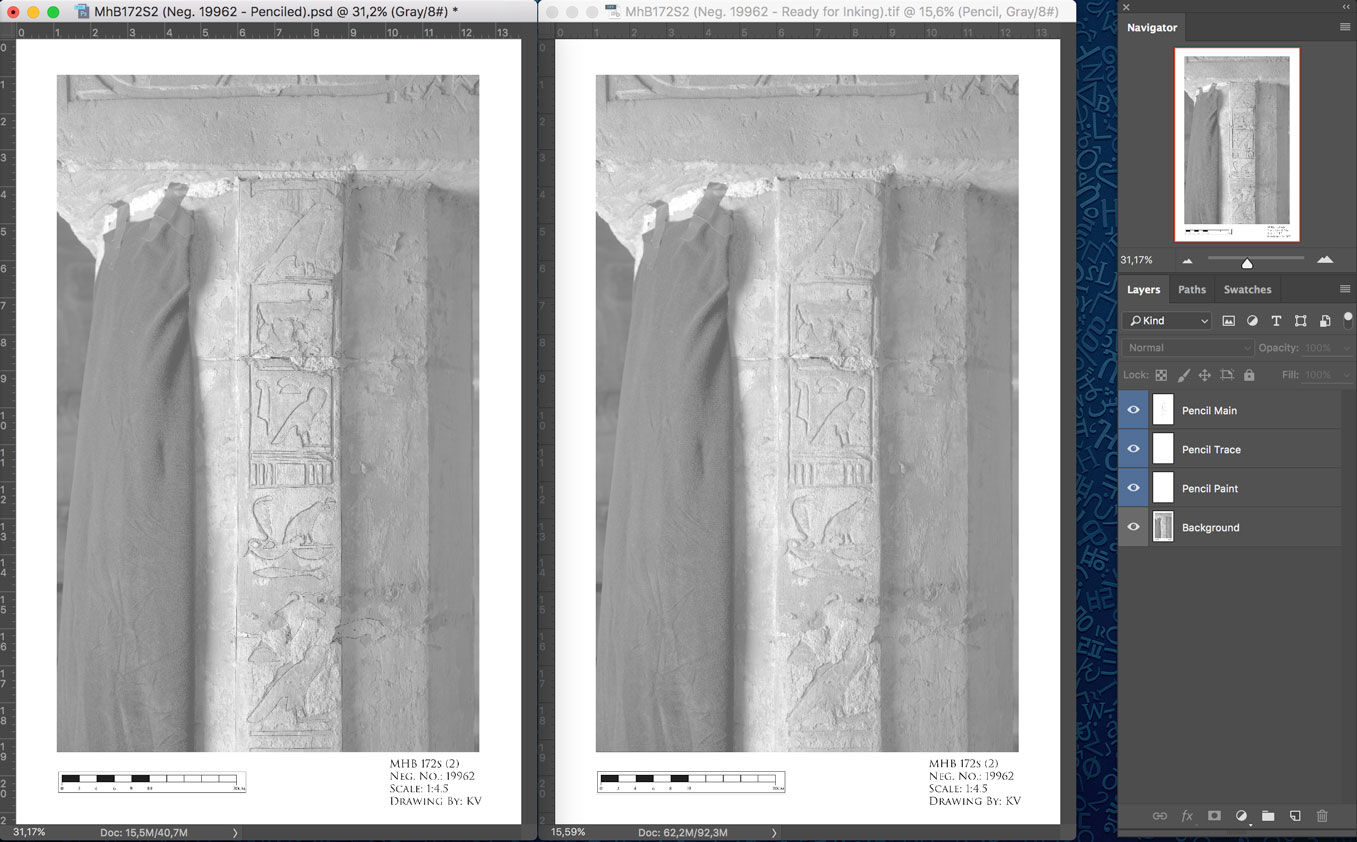
(1) Open both files in Photoshop and make sure the psd file has all the pencil layers intact. It is useful to use a layer color code for reference.

(2) Go to Image/Image Size and upscale the image to 1200 dpi. Make sure the pixel dimensions match with those of the source file.
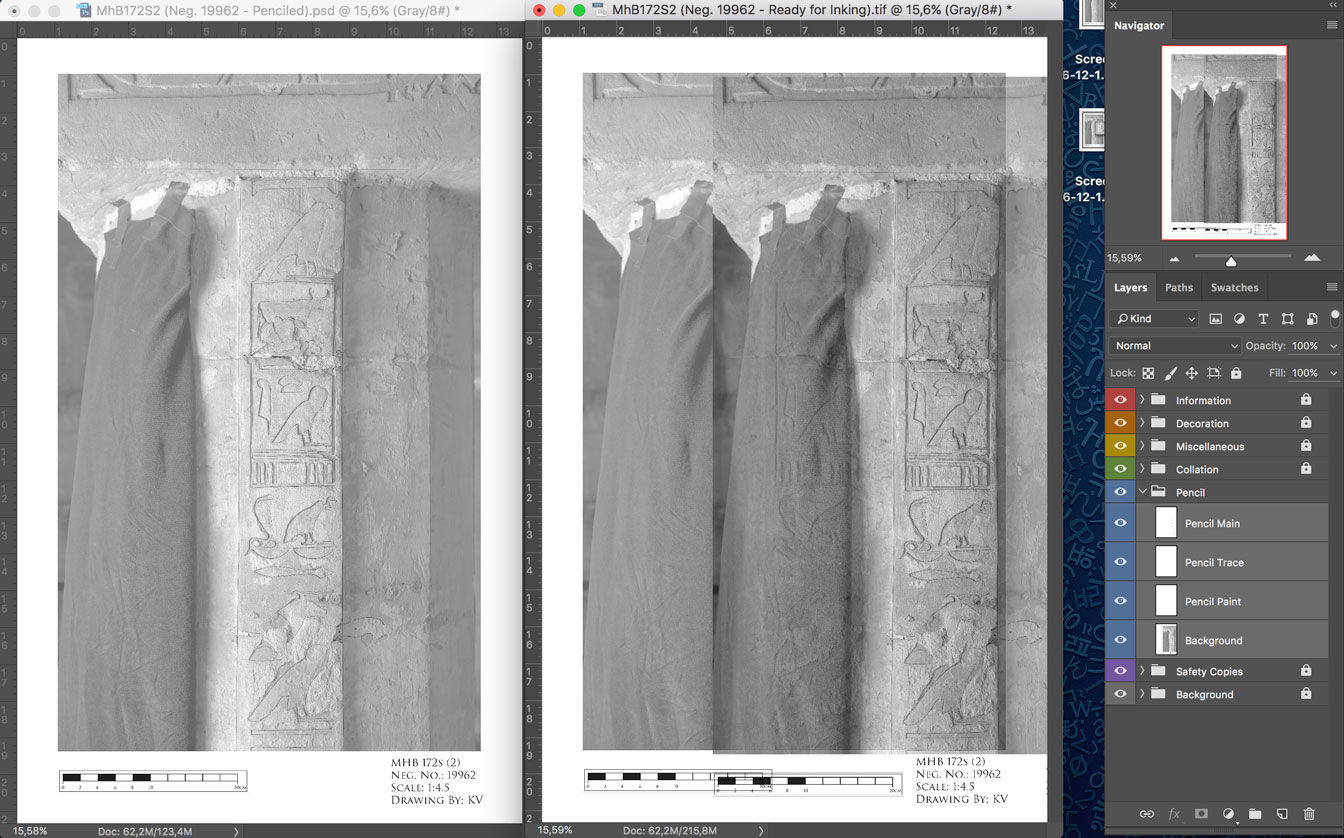
(3) Drag and move ALL the layers of the psd file to the Pencil layer folder in the source file. Make sure to select them all when adjusting.

(4) Change all the new layers to transparent (Multiply) and use the Move tool to hover ALL the layers to match exactly the source background.
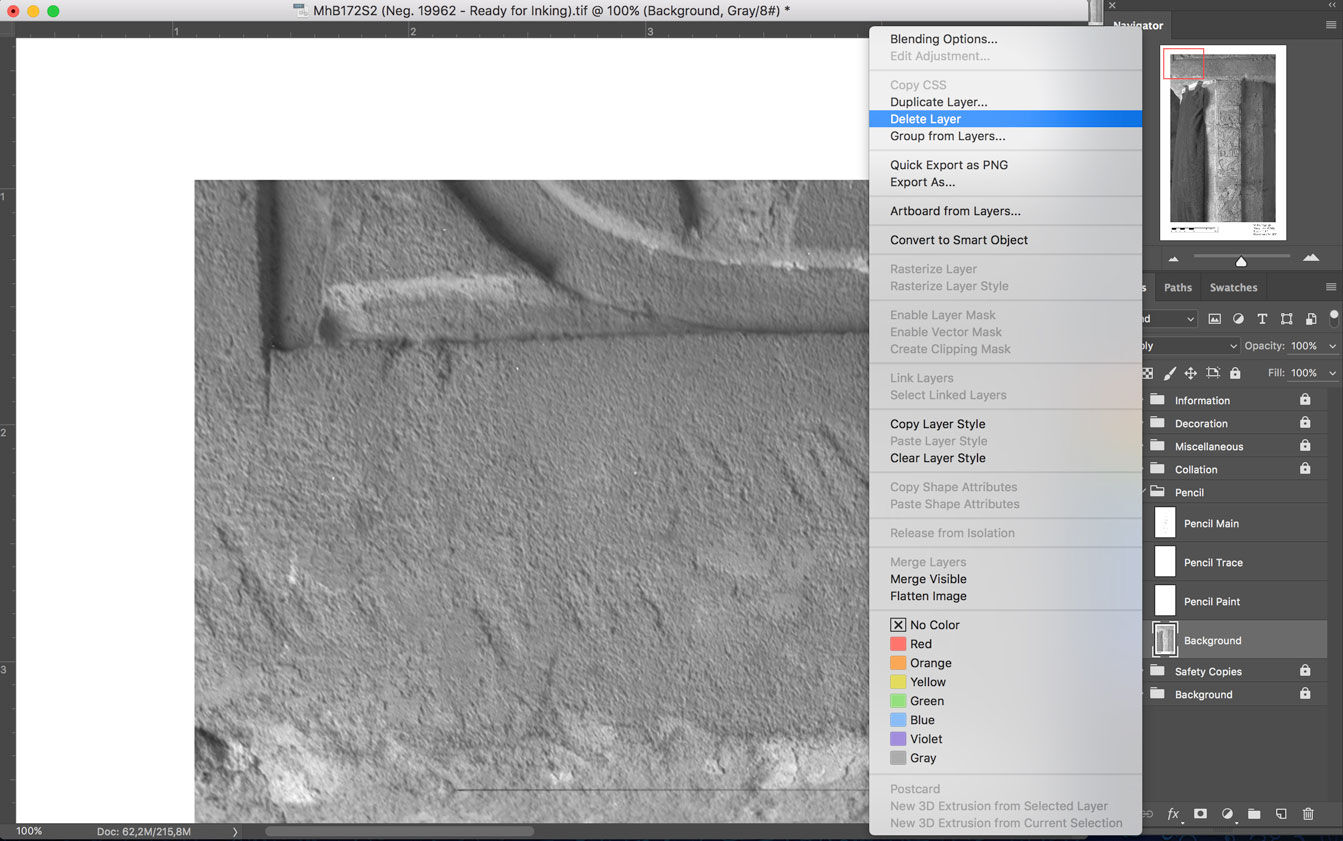
(5) When the new layers are all set, the psd file’s upscaled background is no longer needed and can be deleted.
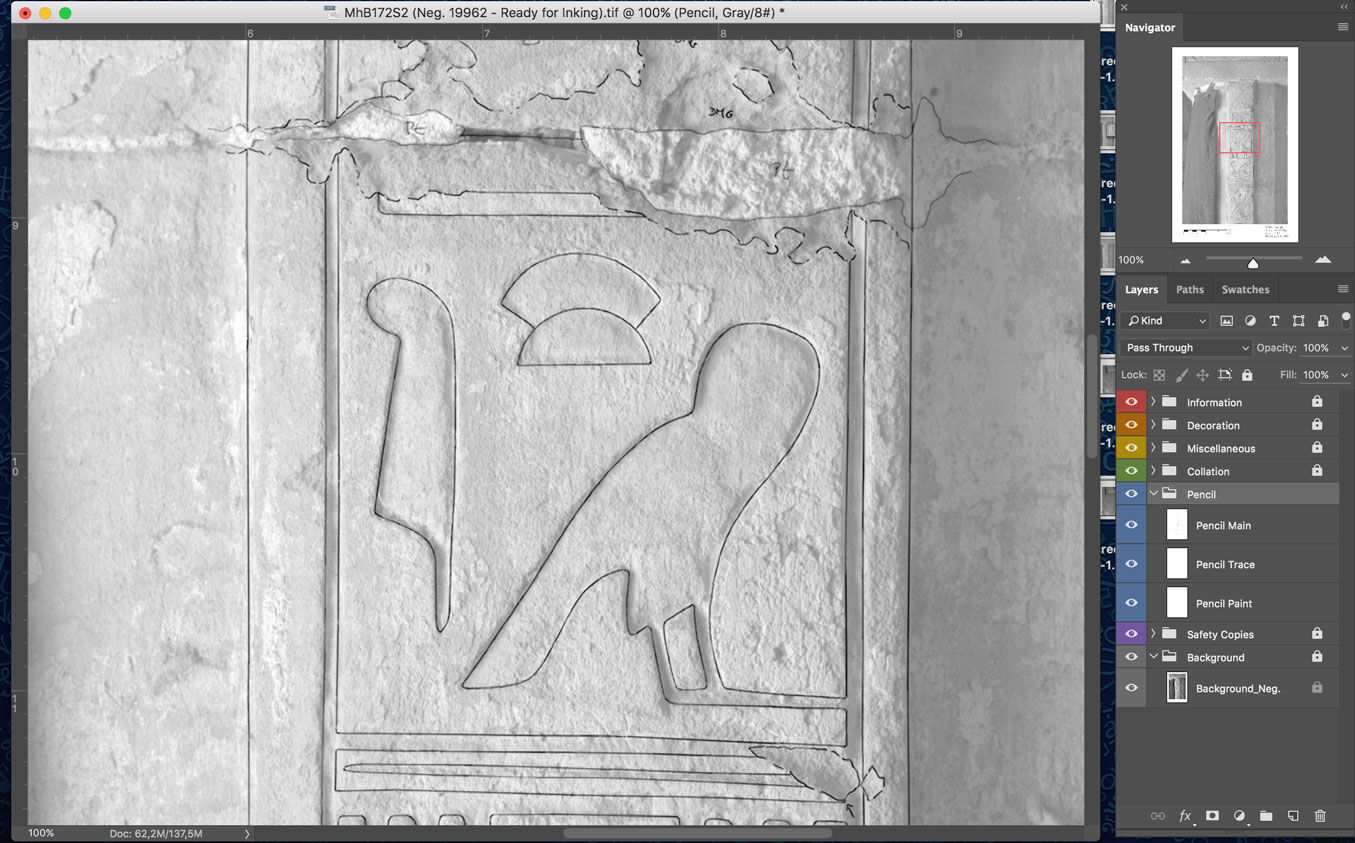
(6) Once the pencil layers are all in the Pencil folder and in the right position, the folder can be locked, and the drawing is ready for inking.
One has to keep in mind that bypassing these limitations with the above workarounds is only relevant for the current state of the hardware and software; this difficulty should eventually disappear as the iPad Pro gains more processing power.
0 comment(s)
Leave a comment(We'll keep your email address private)