
Digital Epigraphy (Second Edition)
Chapter 5 – Digital Inking Method
Chapter 5, Section 2 - Merging Scanned Images
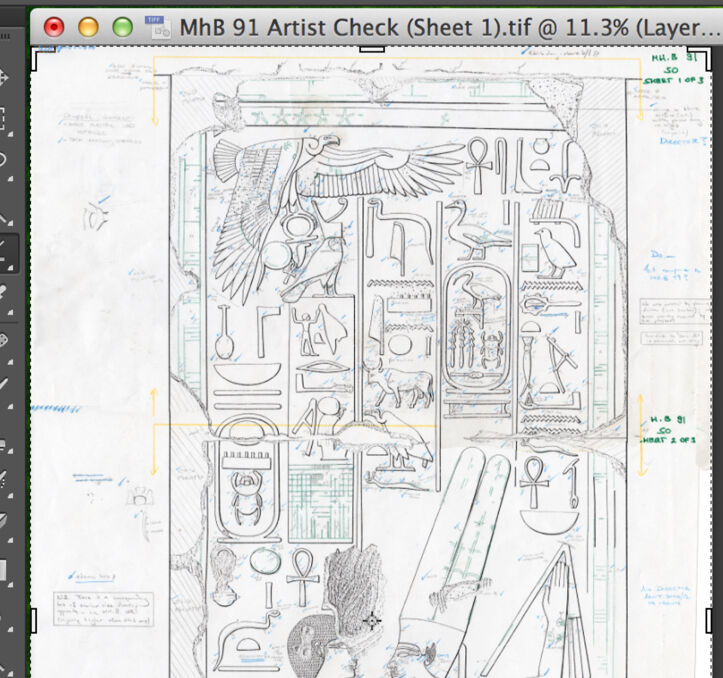
Once the image is scanned, it should be ready to work with. Ideally the photo enlargement is small enough to be scanned as one piece, and our pencil lines are strong enough to be visible while inking. Unfortunately, this is rarely the case: most of the time the artist has to merge scanned sections of a primary source larger than A3 and to make the modifications necessary to enhance certain elements, such as pencil lines, darkened or burnt out areas, etc.
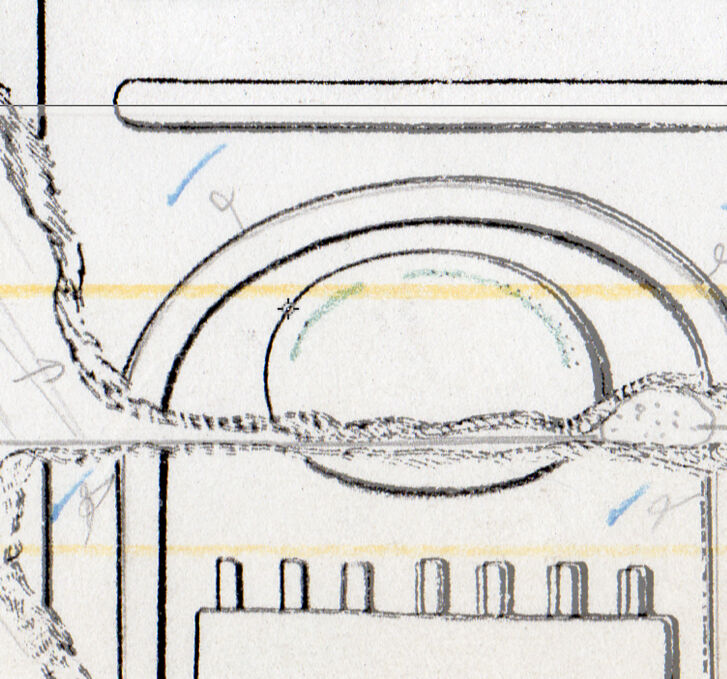
---1-1-tracing-(drawn-on-acetate-by-marker)-merged-with-1-4-B_W-photo-(drawn-on-paper-by-pencil).jpg)
MHB 4o (detail) - 1:1 tracing (drawn on acetate by marker) merged with 1:4 black-and-white photo (drawn on paper by pencil)
Merging Images Manually
The classic and more time-consuming way of merging scans of oversized images involves a lot of manual manipulation by the artist, but it gives a lot more control over the entire process. It should be used on images with very fine details. During scanning, the artist should find the least busy areas of his/her overlapping drawing sections to be merged so as to avoid overcomplicating the stitching process:
Merging Three Sections Manually into One Drawing
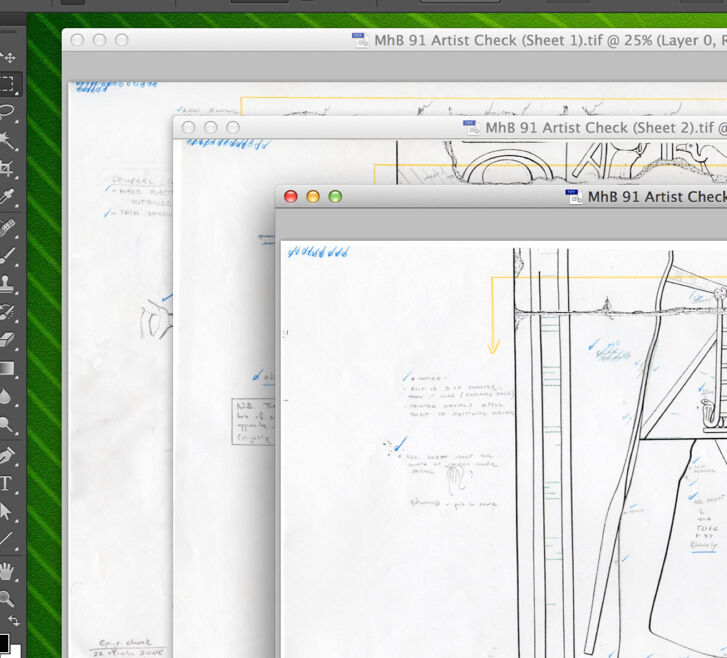
(1) Open all images at once in Photoshop.
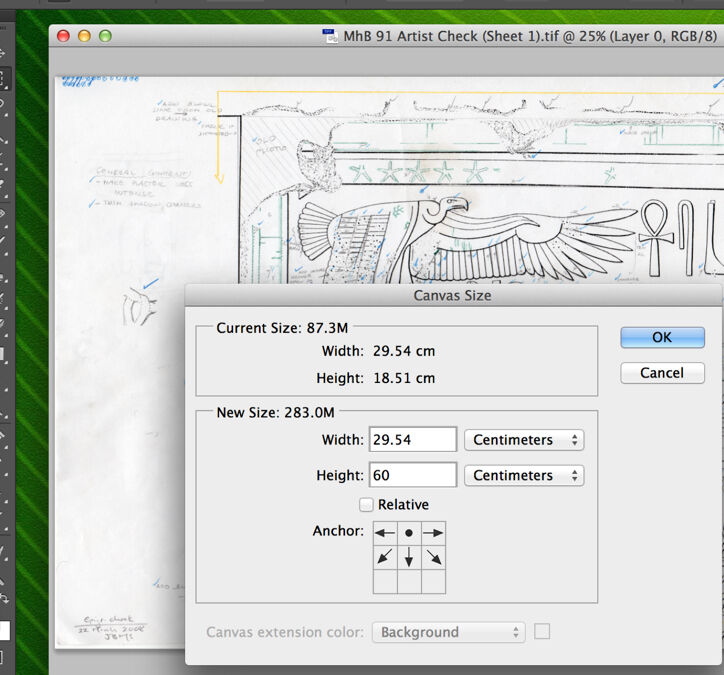
(2) Choose one of them as the base image; this will be the one with which you will merge the rest. Enlarge its canvas to its assumed final size and shape (Anchor - height in the sample case).
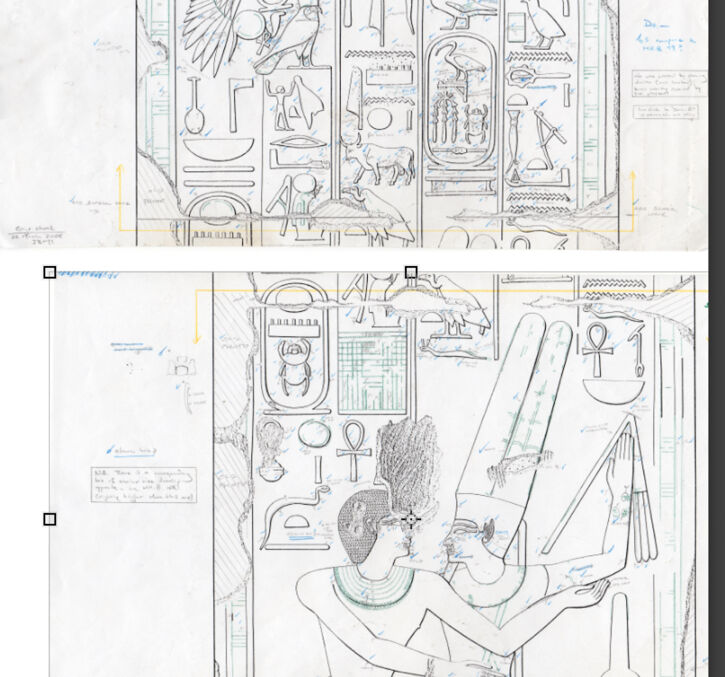
(3) Move the next section over the base image and navigate it to its approximate place. (Make sure all the sections are in the same file format, otherwise you can’t merge them.)
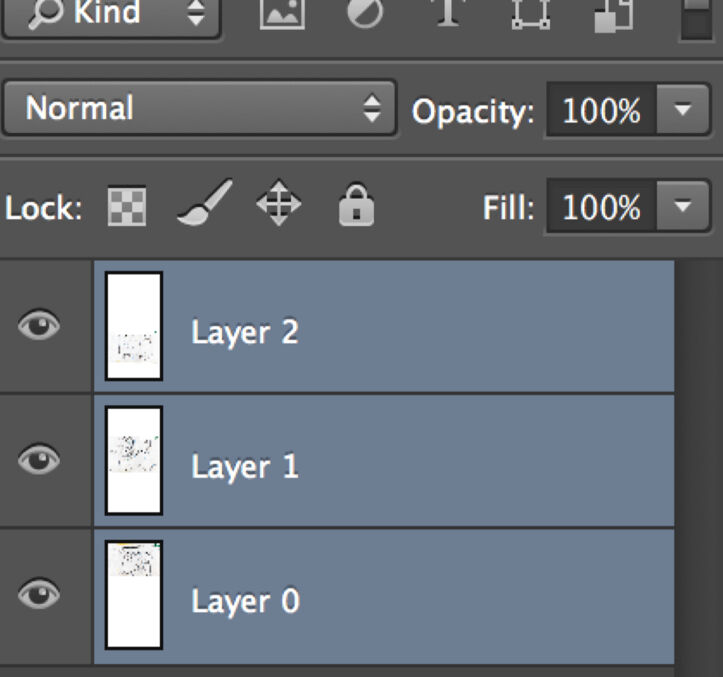
(4) Change the opacity of your to-be-merged sections to 50% to be able to refine the two sections’ alignments. (Note that every new section ends up on a new layer.)
(5) Find an area where the base image and the new section align accurately, and move the new section’s center point over this area.
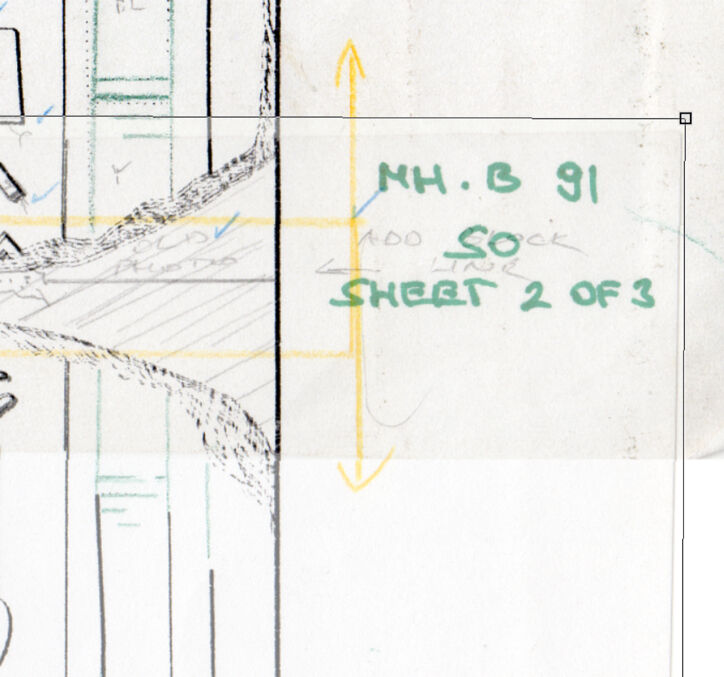
(6) Rotate (distort, etc. if necessary) the new section around this point to align the two layers as much as possible (Edit/Transform/Rotate).
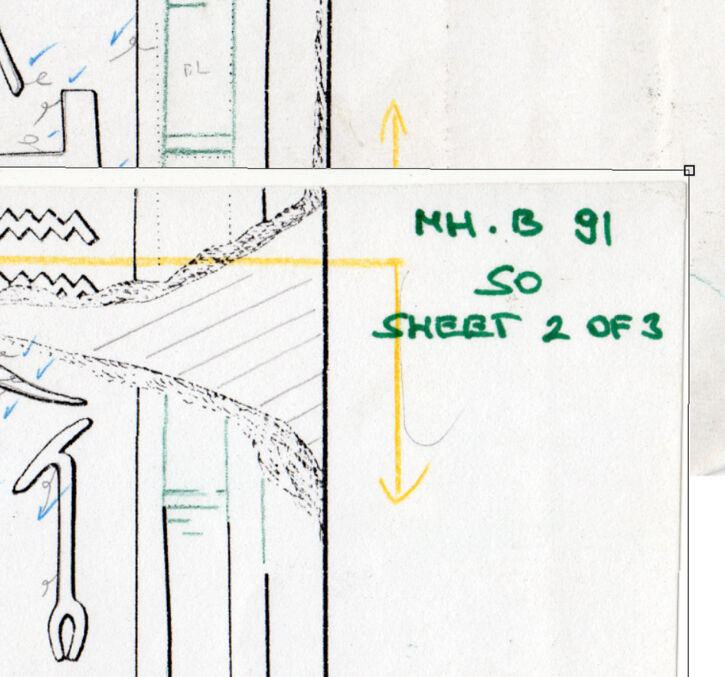
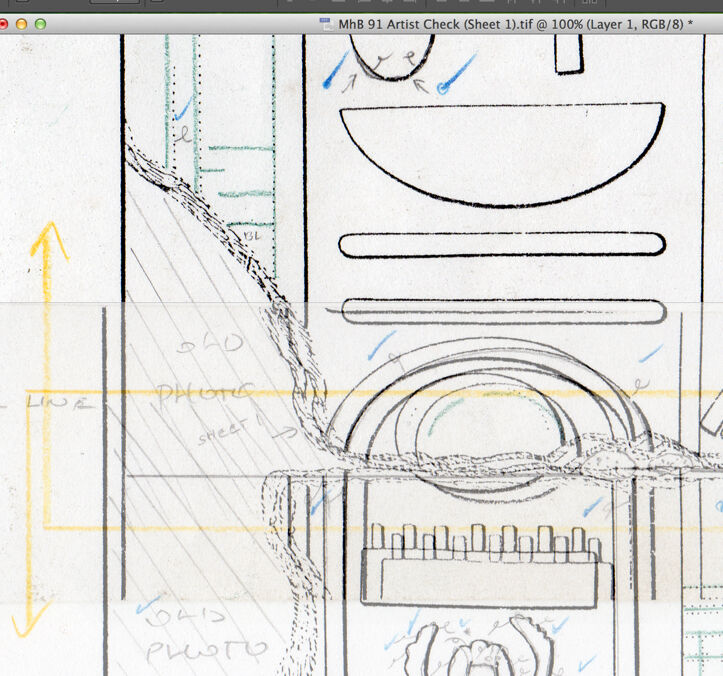
(7) Once the two layers are aligned, change the new section’s opacity back to 100%. This action results in a white stripe covering some parts along the overlapping areas.

(8) Erase the white areas of the to-be-merged new section and reveal the base image underneath. (Use a soft-edge eraser to achieve a more natural blending of the two layers, if necessary.)
(9) Repeat the previous steps with all the sections you want to merge. Once all the sections are aligned, merge the layers into the base image. (Make sure opacities are 100% everywhere.)
(10) Crop, rotate, etc. the final image (if necessary) and save the image as a non-compressed TIFF file. (Make sure to give it a different name and not to overwrite the base image file.)
You can download the short tutorial to learn this skill.
Auto-Align Layers
In Photoshop CS6 there is also a way to auto-align layers:
- Create a new document with the same dimensions as your original source image (keep the same resolution and color mode as well.)
- Open all the scanned section images. (Make sure you overlap each section by at least 40% during scanning, otherwise auto align won’t work!). With the Move tool, drag and drop each image into the new document. Each image should now appear on a separate layer.
- If you desire, you can choose a layer to use as a reference. Lock the reference layer. If you don’t set a reference layer, Photoshop analyzes the layers and then selects the layer in the center of the nal composite as the reference.
- In the Layers panel, select all the layers you want to align and go to Edit/Auto Align Layers. Choose one of the projection methods:
-
Auto: Photoshop analyzes the layers, decides which method would create the best composite, and then applies the alignment.
-
Perspective: Photoshop designates one of the layers as the reference layer. The remaining layers are transformed so that content is aligned.
-
Collage: This option enables us to move, rotate, and scale our layers to get the desired layout.
-
Cylindrical: Places the reference layer in the center and then places the remaining layers on an unfolded cylinder to minimize distortion.
-
Spherical: This option also places the reference layer in the center and places the remaining layers on a sphere to correct distortion.
-
Reposition: The best option when we need to stitch together oversized scanned images.

Auto-align layers
If necessary, the artist can check options to correct for scanning problems, such as Vignette Removal and Geometric Distortion. (Vignetting is caused when light at the edges of the images is reduced and the edges become darkened. Geometric Distortion refers to such problems as barrel (bulging out) and pincushion (pinching in) distortions).
Once we hit OK, Photoshop finds and aligns the common areas of the layers. If we’re stitching together images, we’re done. If the composite has visible seams or inconsistencies, the Auto-Blend Layers command can be applied as well.
Photomerge
In Photoshop CS6 there is a Photomerge command that combines several photographs into one continuous image. The main difference between using Auto-Align Layers and Photomerge is that in the latter the artist has even less to do during the merging process. The Photomerge command can assemble scanned sections that are tiled horizontally as well as vertically, just like the previously described method. To try Photomerge, do one of the following:
-
Choose File/Automate/Photomerge.
-
Under Source Files in the Photomerge dialog box, choose one of the following from the Use menu: Files generates the Photomerge composition using individual files. Folders uses all the images stored in a folder to create the Photomerge composition.
-
Specify which images to use by doing one of the following: To select image files or a folder of images, click the Browse button and navigate to the files or folder. To use the images currently open in Photoshop, click Add Open Files. To remove images from the Source File list, select the file and click the Remove button.
-
Select a Layout option: Auto, Perspective, Collage, Cylindrical, Spherical, or Reposition. These layout options behave the same way as described under Auto-Align Layers.
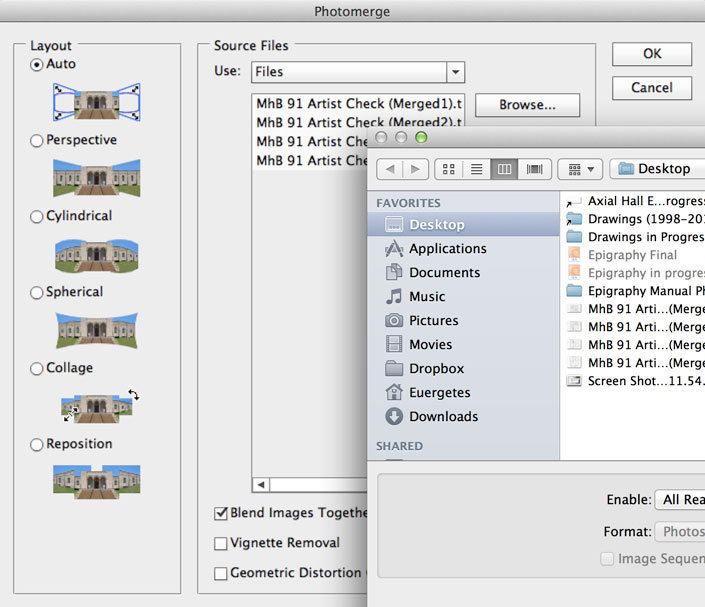
Selecting files in Photomerge
The digital artist must know about all three methods and must decide how much automation is necessary in the merging process. There will be cases when the simplest/fastest method provides enough accuracy, while in other cases more deliberate actions must be taken. Needless to say, no matter what method is chosen, our scanned sections must be as accurate as possible with - preferably - at least 40% overlapping from section to section.
Additional Reading:
Transforming Objects and Selected Areas in Photoshop CS6
Get More Creative with Photomerge
0 comment(s)
Leave a comment(We'll keep your email address private)