Digital Epigraphy (Second Edition)
Chapter 5 – Digital Inking Method
Chapter 5, Section 1 - Capturing Data
%20-%20Initial%20pencil%20drawing%20on%20B%3AW%20photo%20enlargement.jpg)
MHB 4n (detail) - Initial pencil drawing on black-and-white photo enlargement
As we discussed earlier, the initial version of our digital documentation is prepared at the archaeological site, in front of the actual wall. This version contains all the important data of the original artwork. The artist prepares these facsimile drawings by applying the guidelines of the Chicago House Method regarding in situ copying. This means that we draw in pencil on a specific scaled-down photo enlargement of a given wall section. This drawing contains all the visual (carved and/or painted details, traces of earlier decoration, damages of the wall surface, etc.) and verbal (artist’s remarks on the relationship of surface elements, color preservation, etc.) data on which we’ll rely heavily while inking in the studio. There is an important advantage of inking digitally which we can take advantage of right from the beginning: our pencil drawing made at the site will not be inked, but rather it serves as a scanned background, providing guidelines for the digital drawing. Therefore, the artist has a lot more freedom preparing this first sketch, adding more notes as well as trying out different solutions for certain problematic areas. Generally speaking, our photo enlargement can be treated a lot less circumspectly when we ink using a digital method.
The photo enlargement, or whatever physical media (film, transparent or acetate paper, etc.) is used to capture the initial artwork, has to be digitized so that it can be worked on in Photoshop. The most effective (i.e., the most accurate and most detailed) digitizing process is scanning.
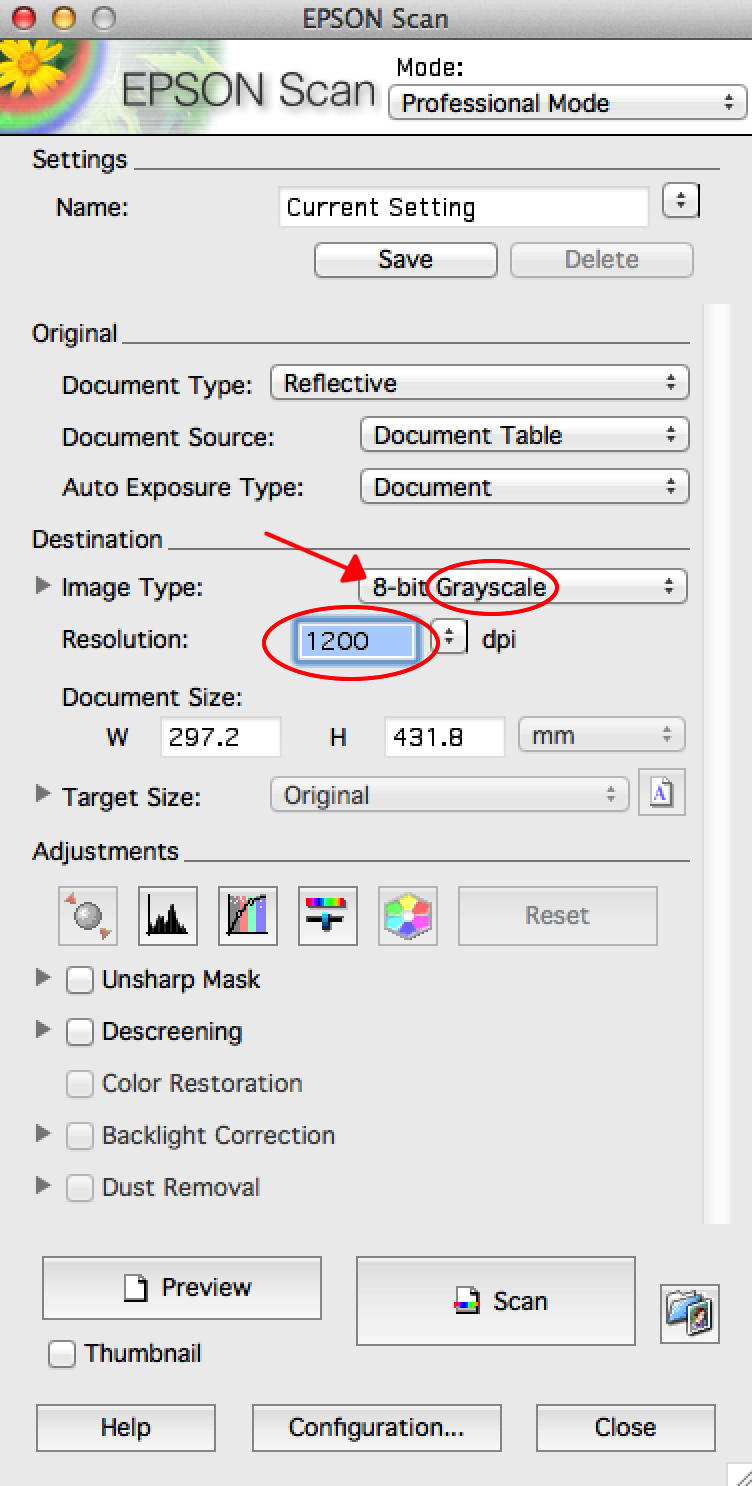
During digitization our main goal is to capture the original photo’s resolution (dpi) and detail to the greatest extent possible. Because the Oriental Institute traditionally publishes drawings in black and white, we get the most detailed image of a photo enlargement by scanning it in grayscale. Scanning in binary (black-and-white or line art) mode would provide us with the fastest processing. However, on most documents, grayscale leads to more accurate results, especially on degraded or shaded background photos. Color scanning is used only if one wants to retain color information and/or color graphics in the source material. The destination image resolution has to be set at 1200 dpi, which means that there will be 1200 dots in one square inch (dpi - dots per inch) of canvas. This option yields rather large file sizes but results in a sufficiently high level of detail and quality during printing. We have to make one more important choice during scanning that will affect the quality of our final product, and that is the bit mode of our scanned image. Some scanners offer 8-bit, 16-bit, 24-bit, and even 32-bit modes, indicating how many colors exist in an image. For example, scanning in 8-bit RGB (Red, Green, and Blue) means we have 256 shades of Red, 256 of Green, and 256 of Blue, which gives us 256x256x256, exactly 16.8 million possible colors. On the other hand, scanning in 8-bit grayscale results only 256 shades of gray representing our entire image. Although scanning in 16-bit grayscale would mean much better image quality (256x256, meaning 65,536 shades), it would result in much larger file sizes. Since our final inked documentation is represented by black outlines only, it is recommended to scan the background in 8-bit grayscale to keep the file sizes at a manageable level.

Epson Workforce WF-7515 Scanner Interface
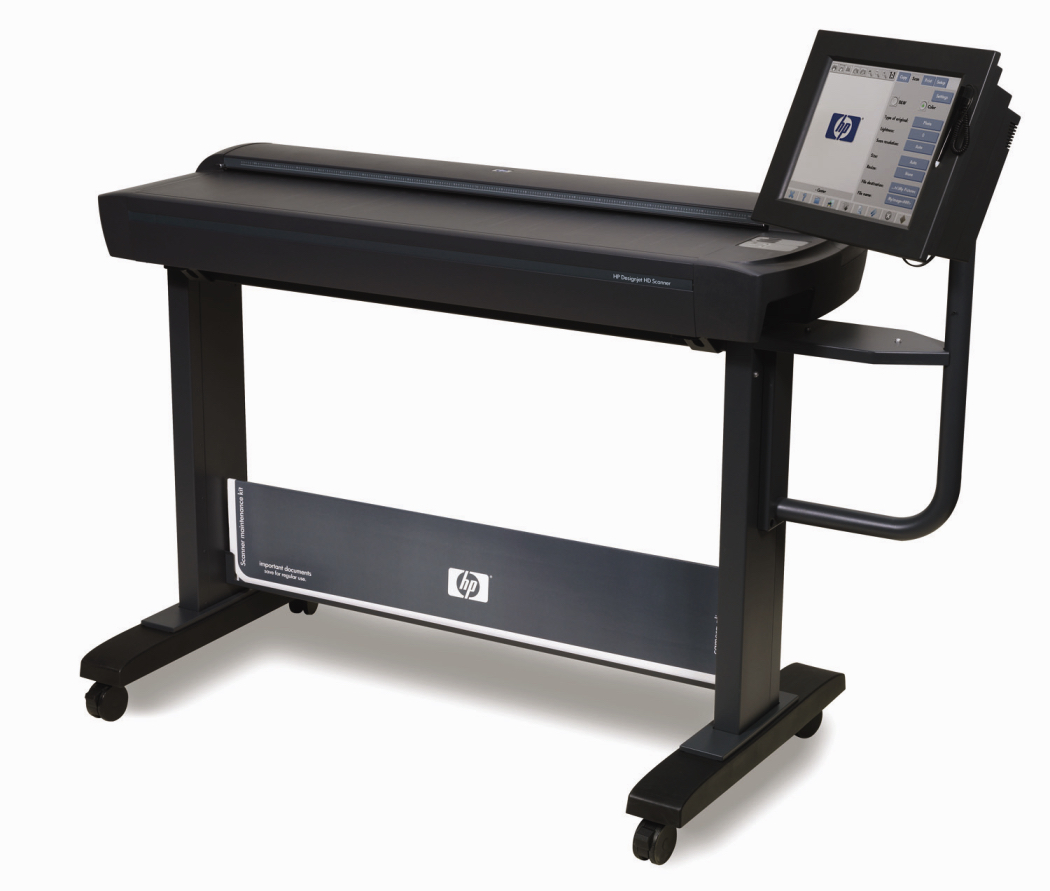
Once the scanning is done, the result has to be saved. We will talk a lot more about saving our files in Chapter 5, Section 1, but for now all we have to know is that we don’t want our image data to be compressed during saving. Therefore we have to save our background image as uncompressed TIFF (Tagged Image File). The regular flatbed scanner size is A4 (8.3x11.7 inches), but some scanners are able to capture A3+ images as well. If our source photo enlargement is larger than A3+ (13x19 inches) we have two options: we can use a drum scanner (such as the HP Designjet HD Scanner), which is able to scan up to 42-inch wide images in infinite length but only provides 600 dpi optical resolution.

HP Designjet HD Pro Scanner
An additional problem with this type of scanner is that the nature of this process (the image is “rolled” through between two drums) has a higher margin of inconsistency and distortion, and can damage the original drawing, especially if it is in a fragile state.
A better solution is scanning our large image in sections with some overlapping and then stitching the parts together in Photoshop. In the next Section we will have a look at the tools used for merging the various sections of scanned images and for modifying the results for our drawing needs.
Additional Reading:
Get Your Scanner to Work with Photoshop CS6
Image Resolution, Pixel Dimensions and Document Size Explained in Photoshop
Difference Between Image Resizing and Resampling in Photoshop


0 comment(s)
Leave a comment(We'll keep your email address private)