
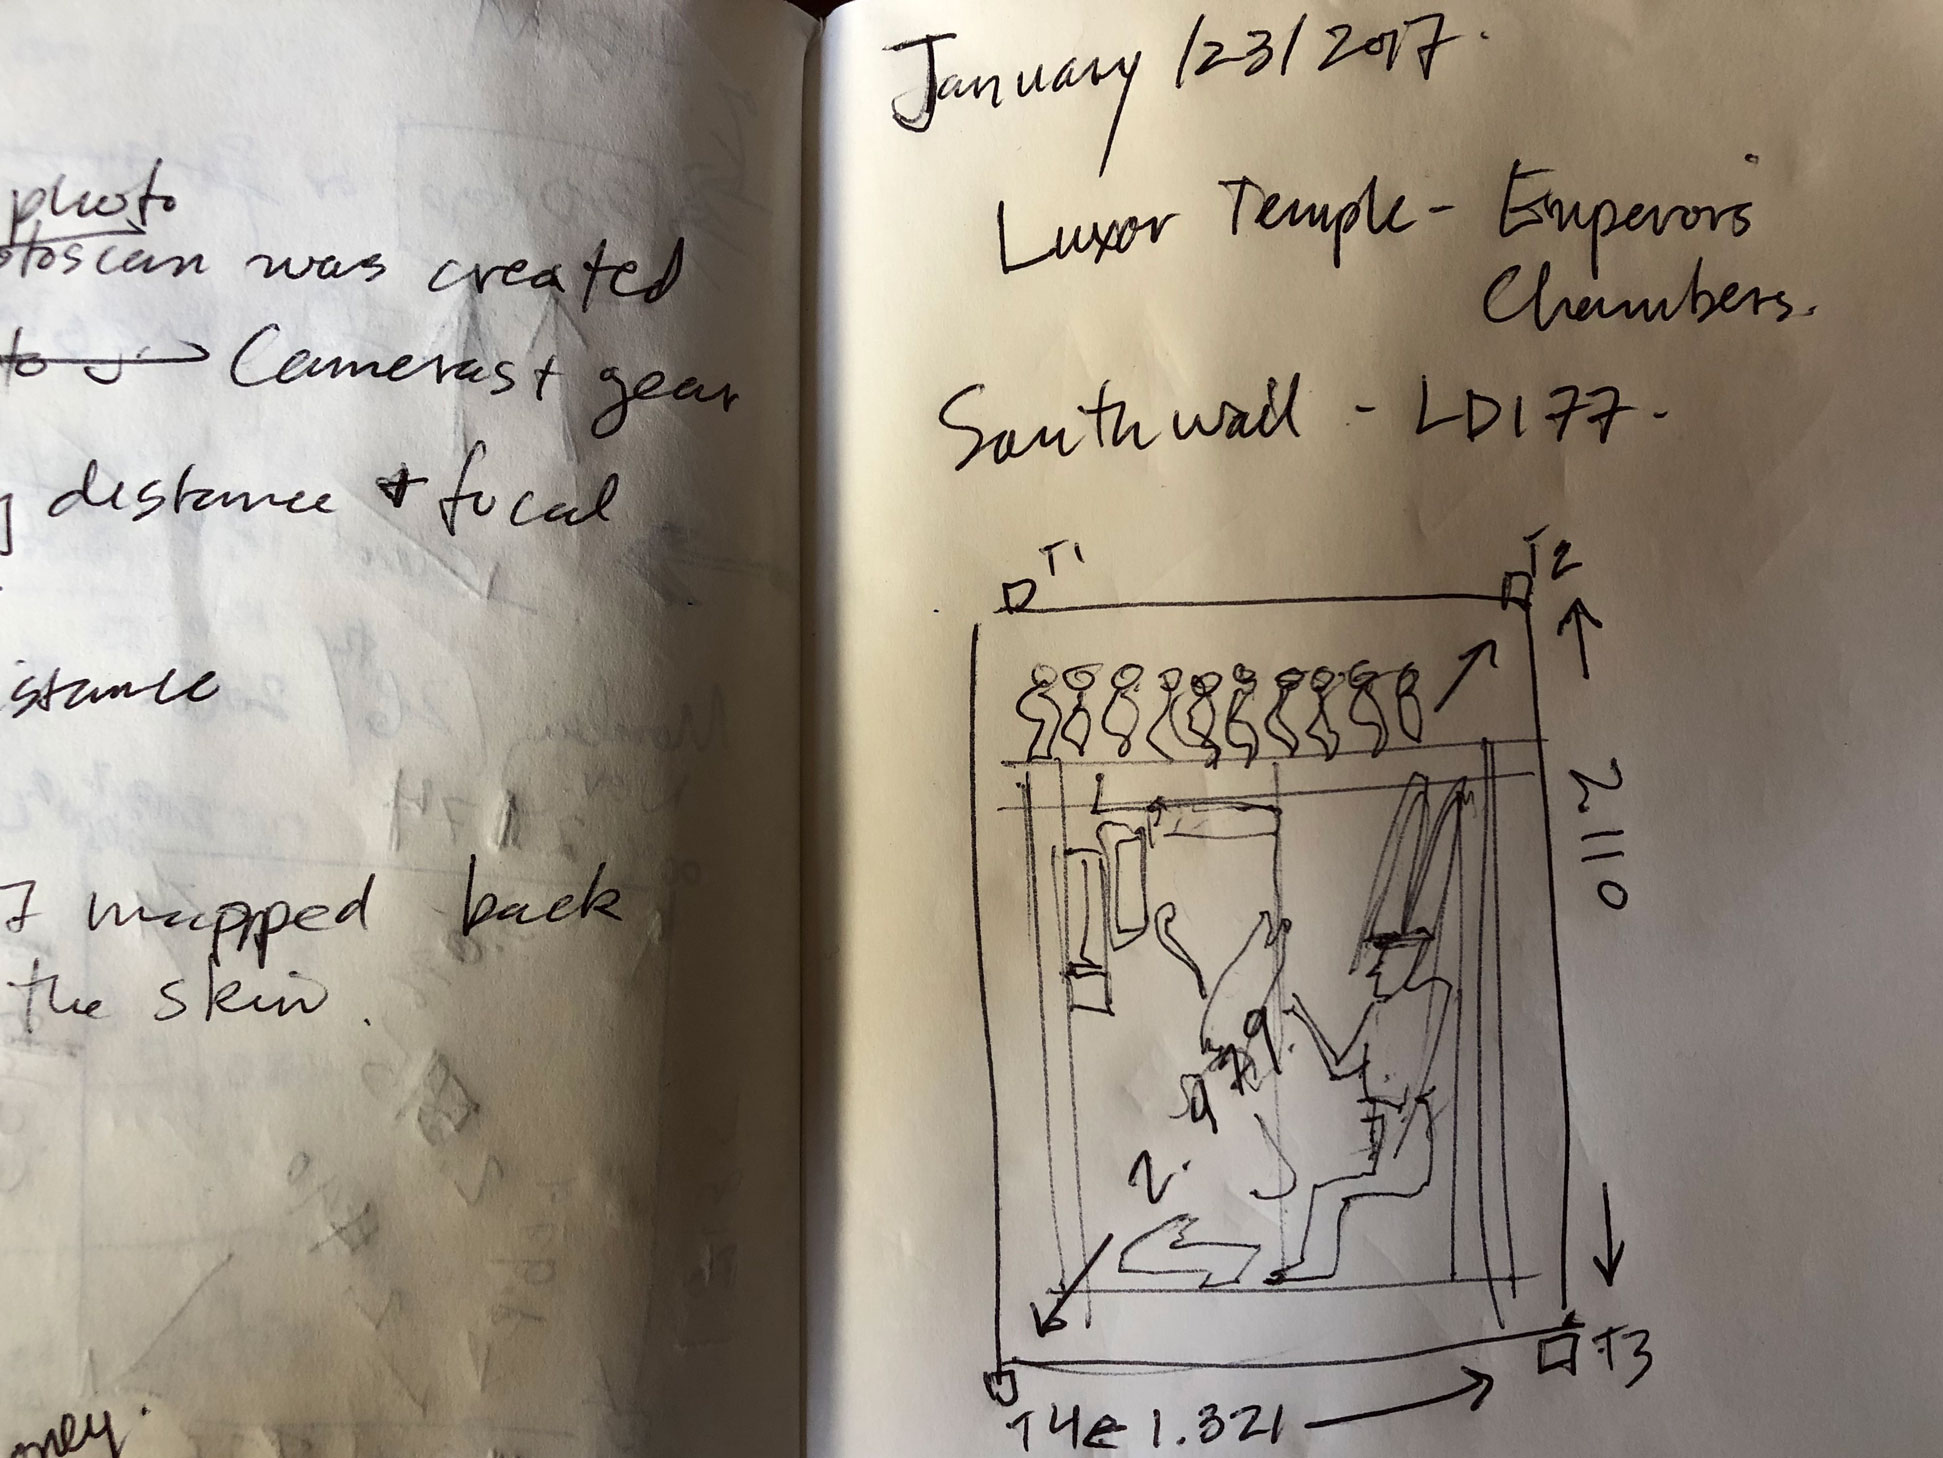
A practical use case - the photogrammetric digital background created for a sample scene at Luxor temple
Written by Owen Murray, photographer at the Epigraphic Survey of the Oriental Institute, University of Chicago
The background photo for LD 177 was created using the photogrammetric software Agisoft PhotoScan and a Mamiya RZ67 Pro IID and 50mm Mamiya-Sekor Z f/4.5 lens, mounted with a Hasselblad CFV-50c digital back. The scene was lit using a Profoto studio strobe.
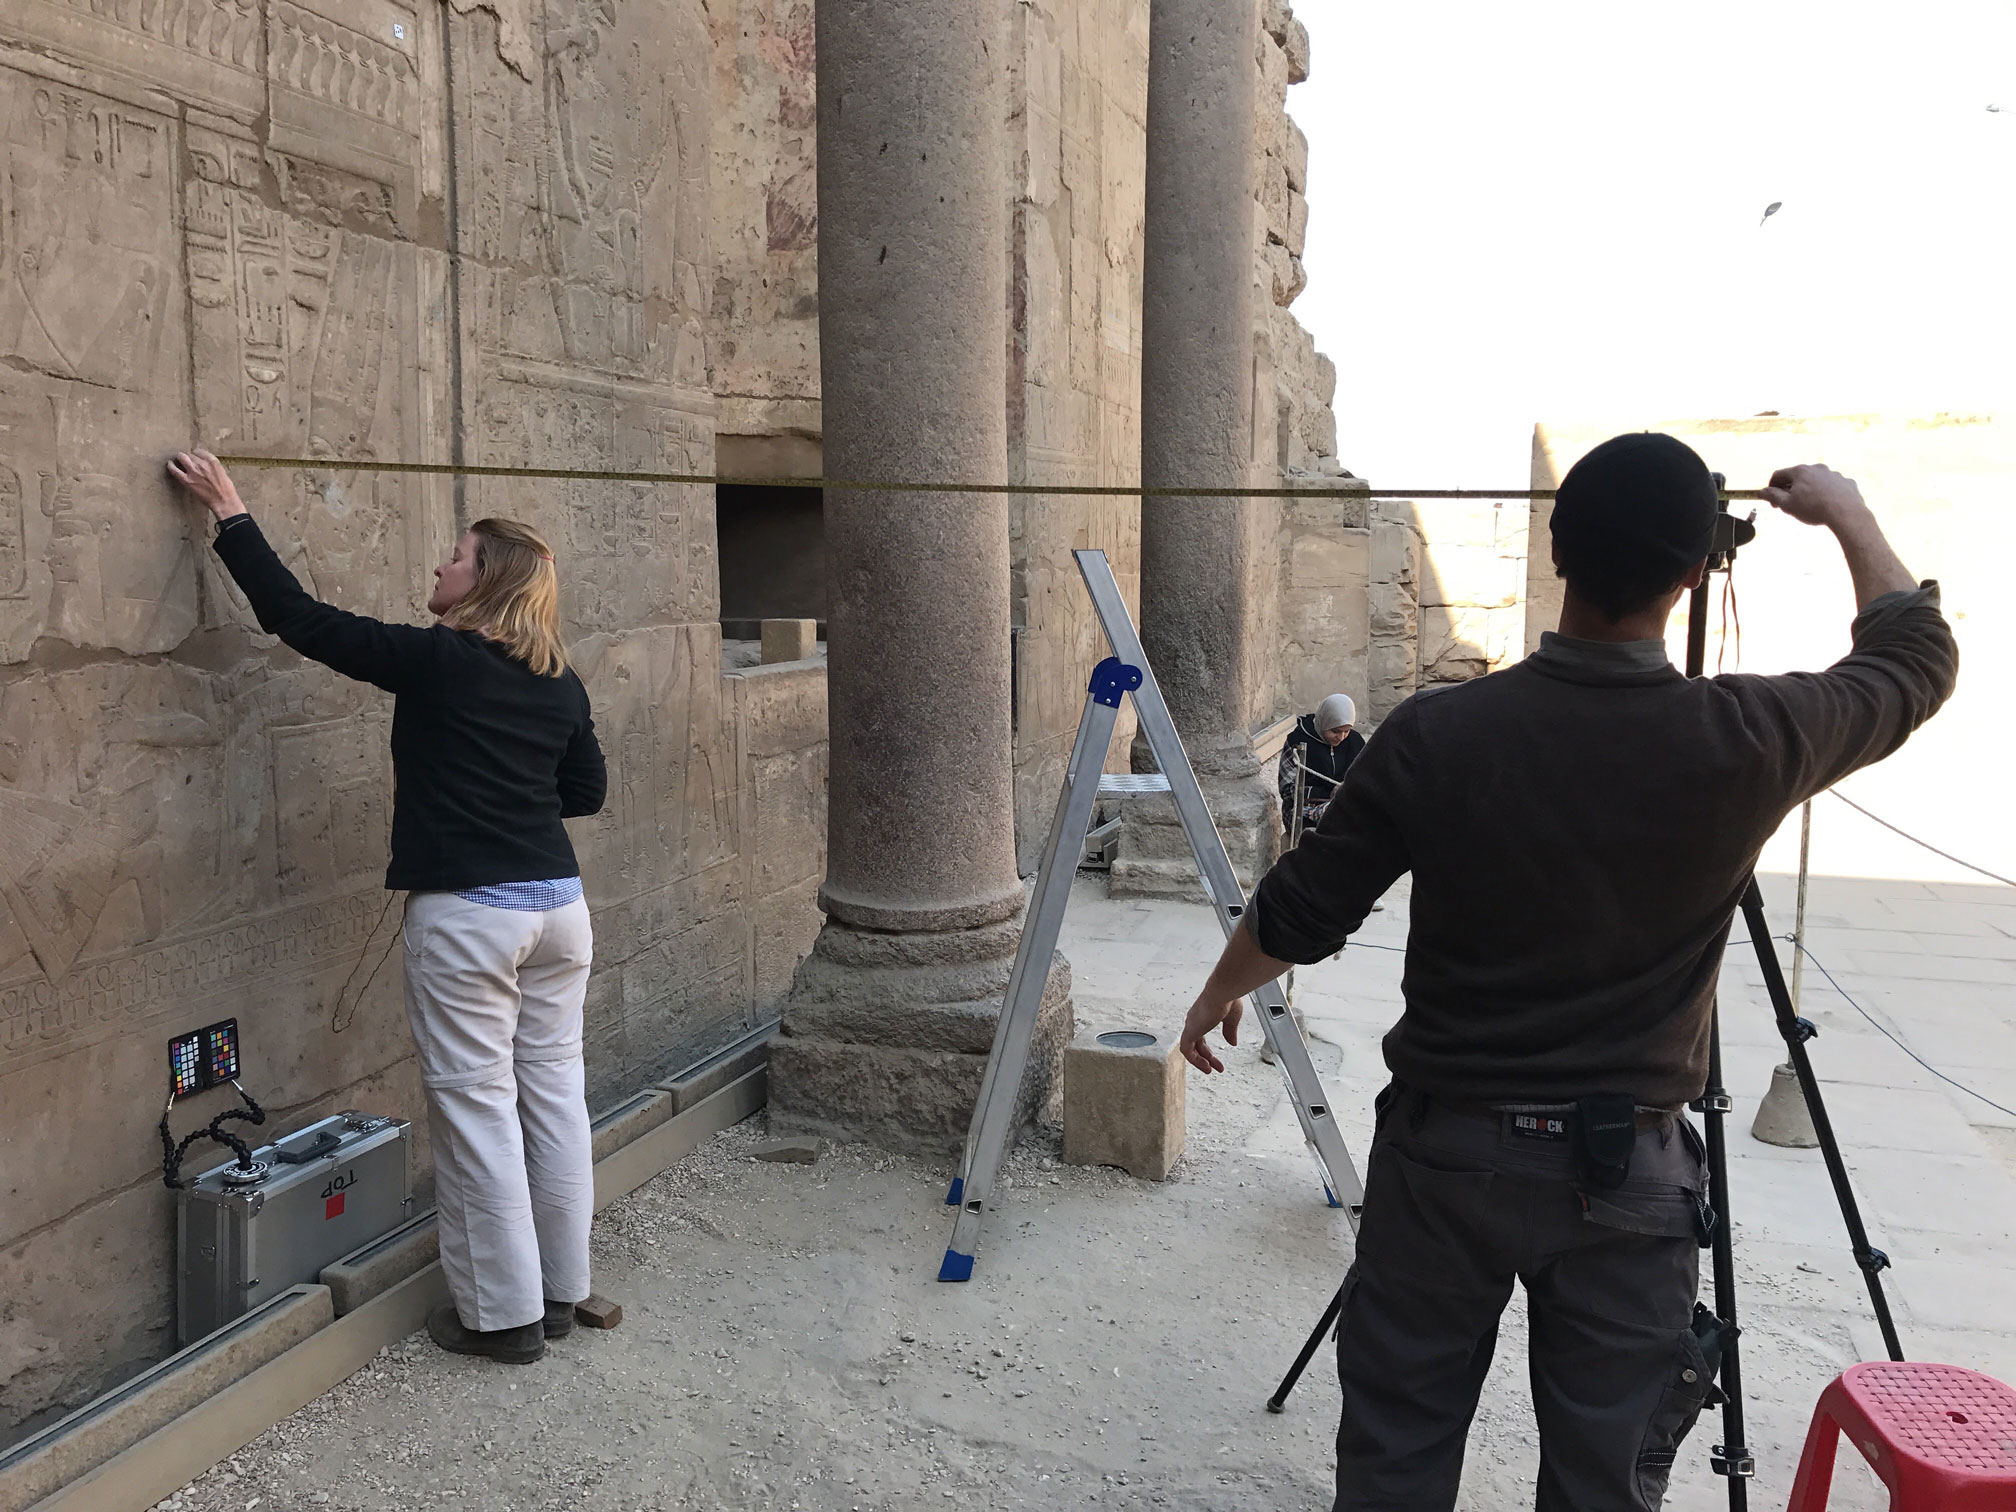
Hilary McDonald and Owen Murray preparing LD177 for photographic documentation
As LD 177 was a test subject, the scene was also shot using an iPhone 7 and Nikon D800, and under different lighting conditions, for PhotoScan model experimentation and comparison.
LD 177 Process/Methodology
LD 177 was selected as a test scene suitable for digital epigraphic workflow; photography was done in the early morning so as to avoid tourist thoroughfare and create the most uninterrupted work environment as possible.
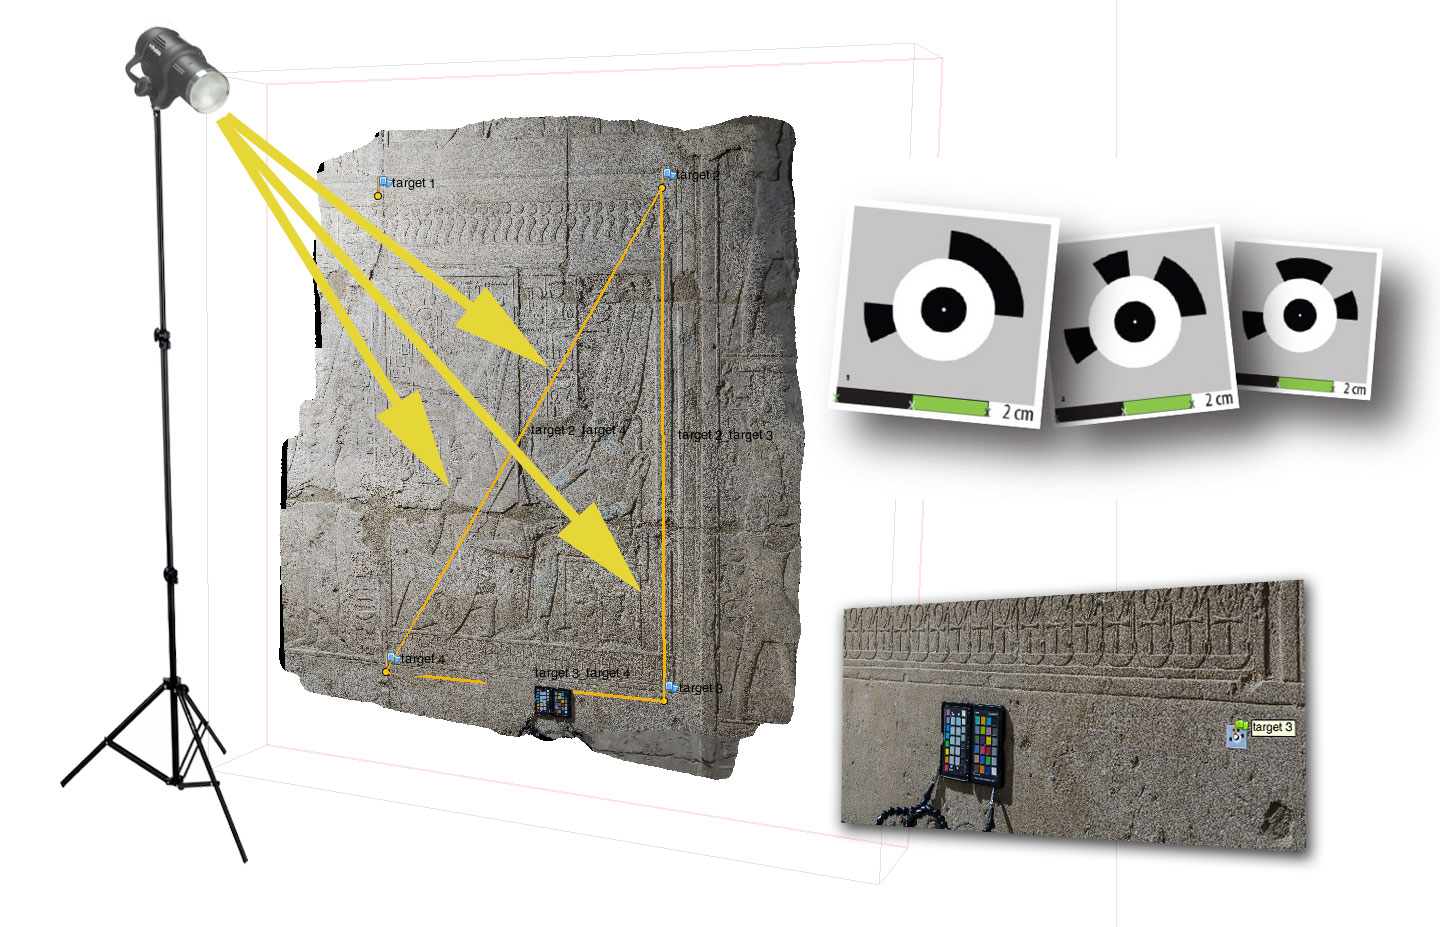
For documentation purposes, the background photo was lit from the top left corner.Coded targets (also referred to as ‘Markers’) were placed in four corners surrounding the scene and affixed using double sided tape with a minimal adhesive to cause the least amount of damage to the wall. The targets were measured and recorded.
The level of detail required was specified from current Epigraphic Survey Standards: 1:4 ratio @ 1200dpi. This equals an orthomosaic output of 0.0865mm/px in PhotoScan. Using the RZ 67 Pro II D with Hasselblad back, the optimal distance was determined as 1.5m from the wall. Optimal distance can be calculated using the formula below (courtesy of Dr. Geert J. Verhoeven at the Ludwig Boltzmann Institute for Archaeological Prospection and Virtual Archaeology):
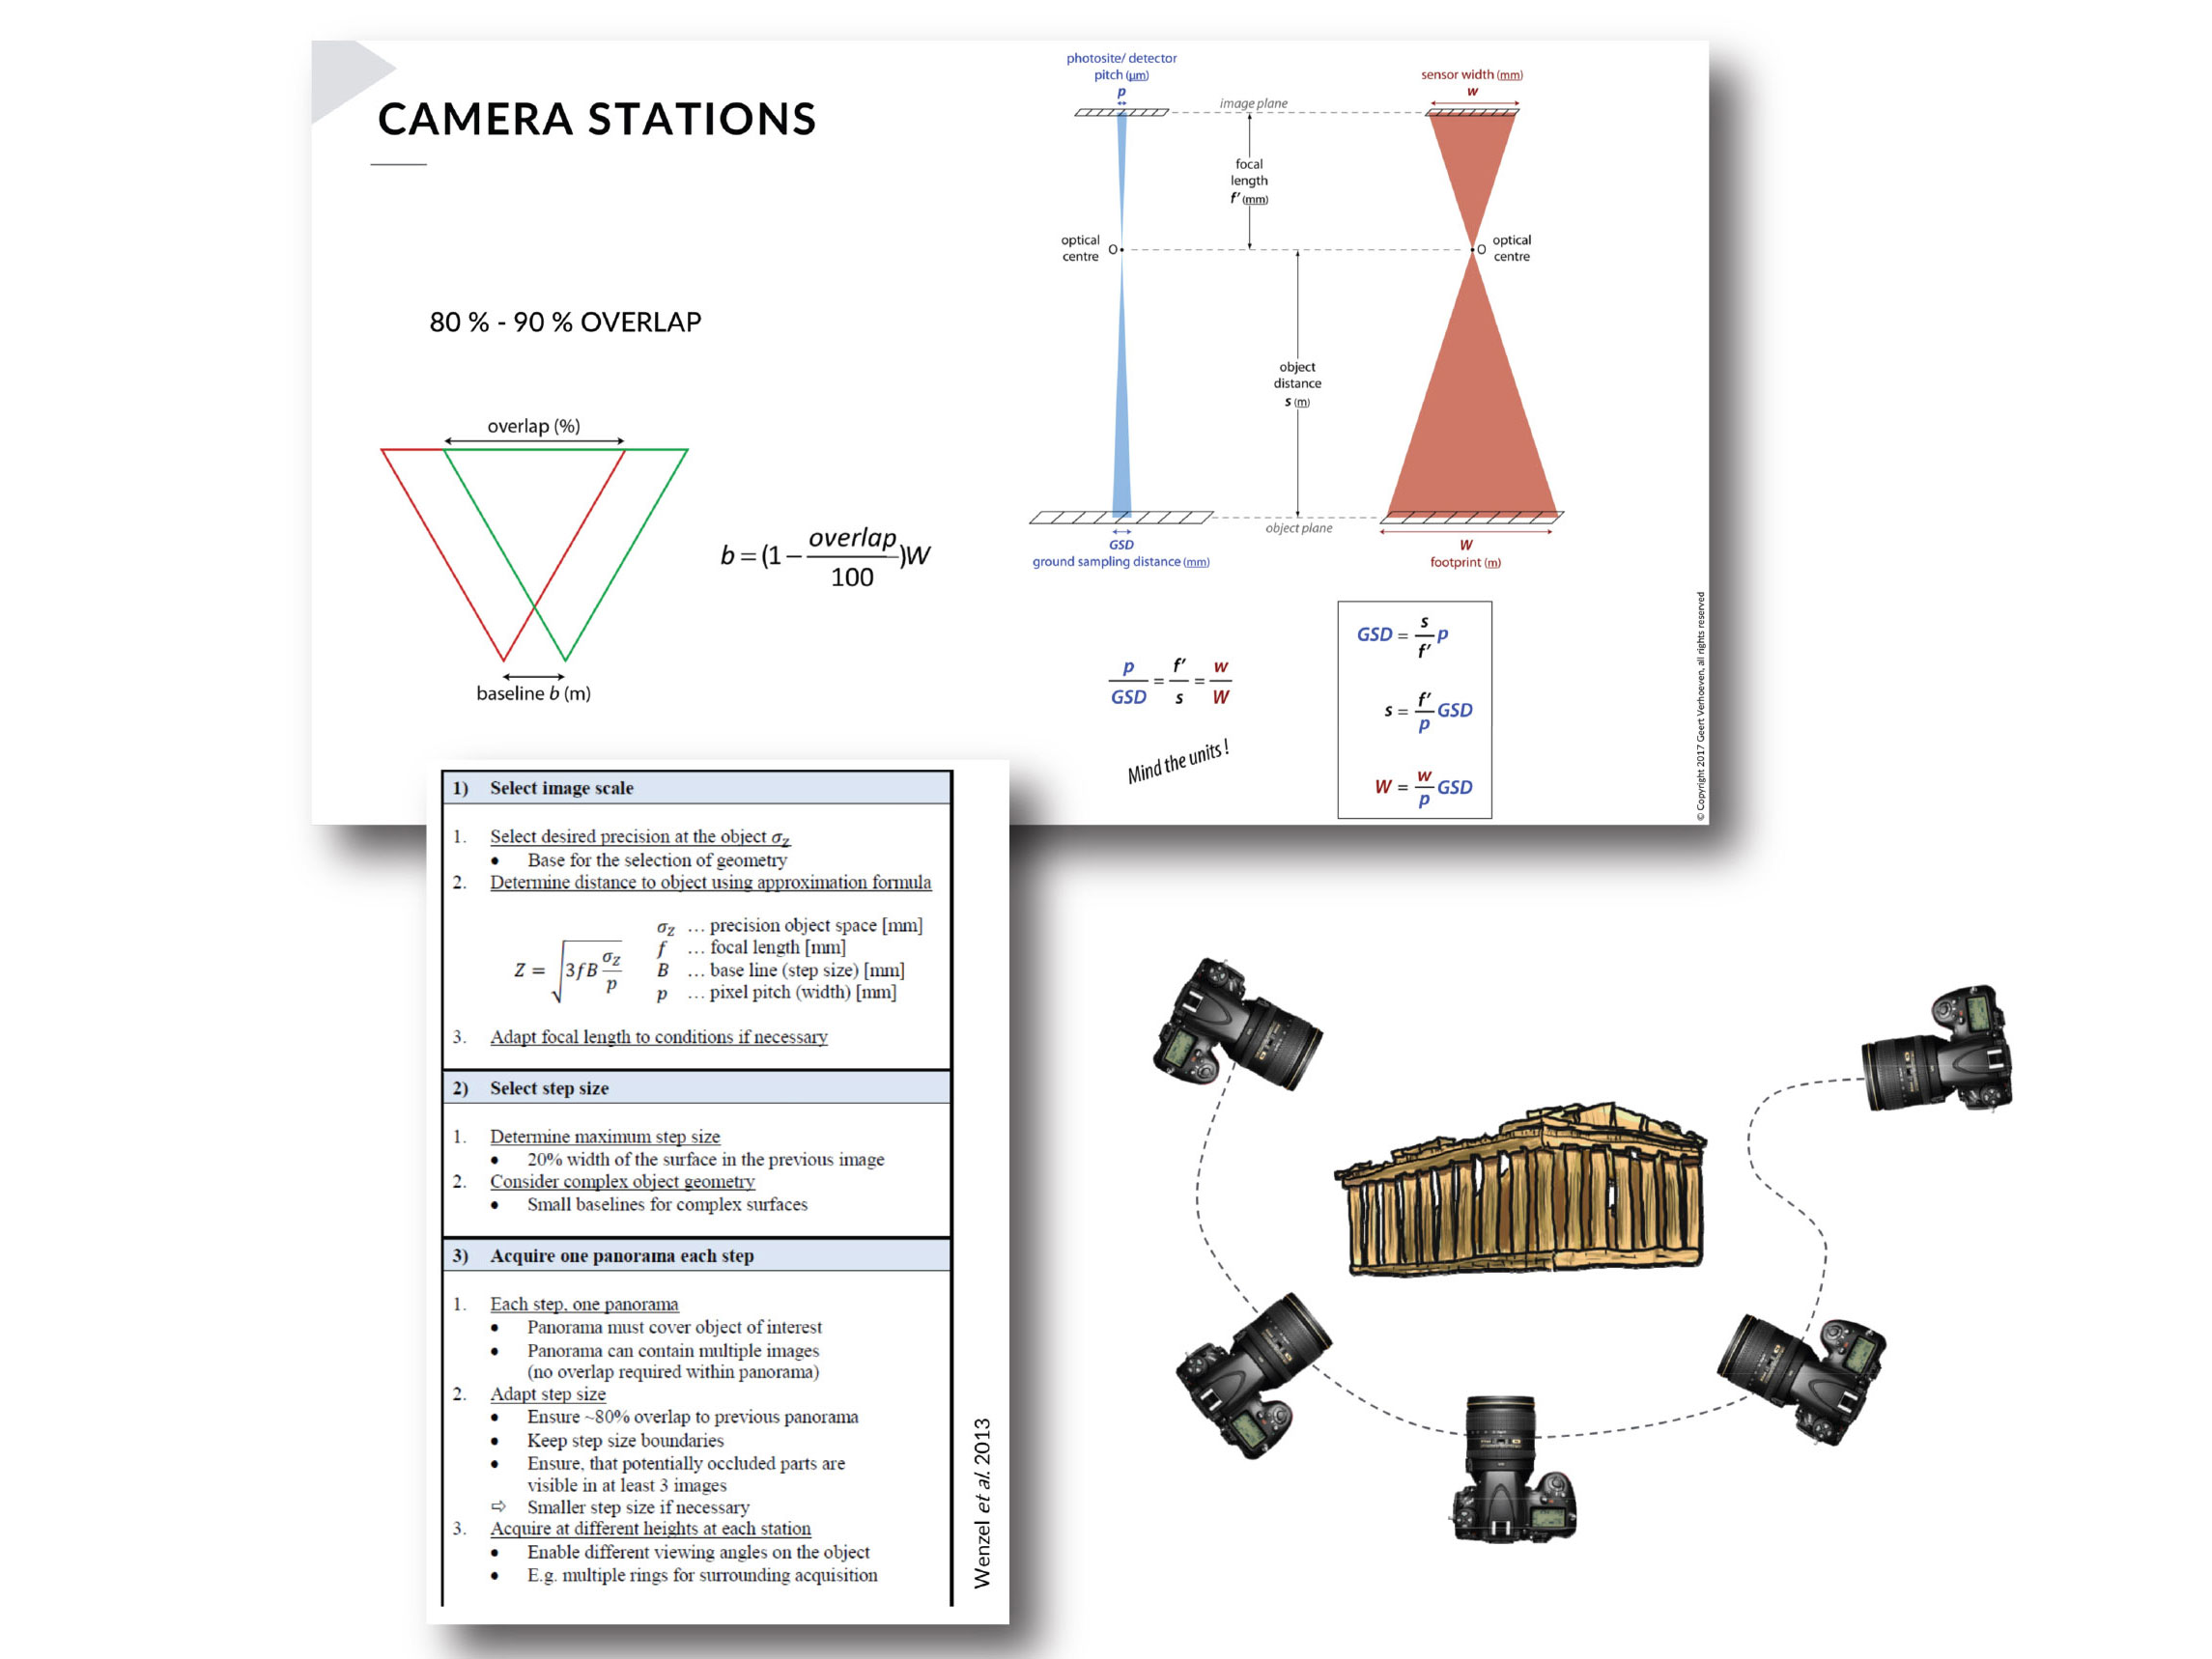
Image courtesy of Dr. Geert J. Verhoeven (Ludwig Boltzmann Institute for Archaeological Prospection and Virtual Archaeology, Wien)
A more hands-on manner of determining it is as follows:
Create a PhotoShop (PS) document of the overall distance of the area to be documented in metres using the final output dpi required.
- Divide the number of pixels (width) of this document by the number of pixels of your sensor. Use Image > Image Size to determine both of these attributes.
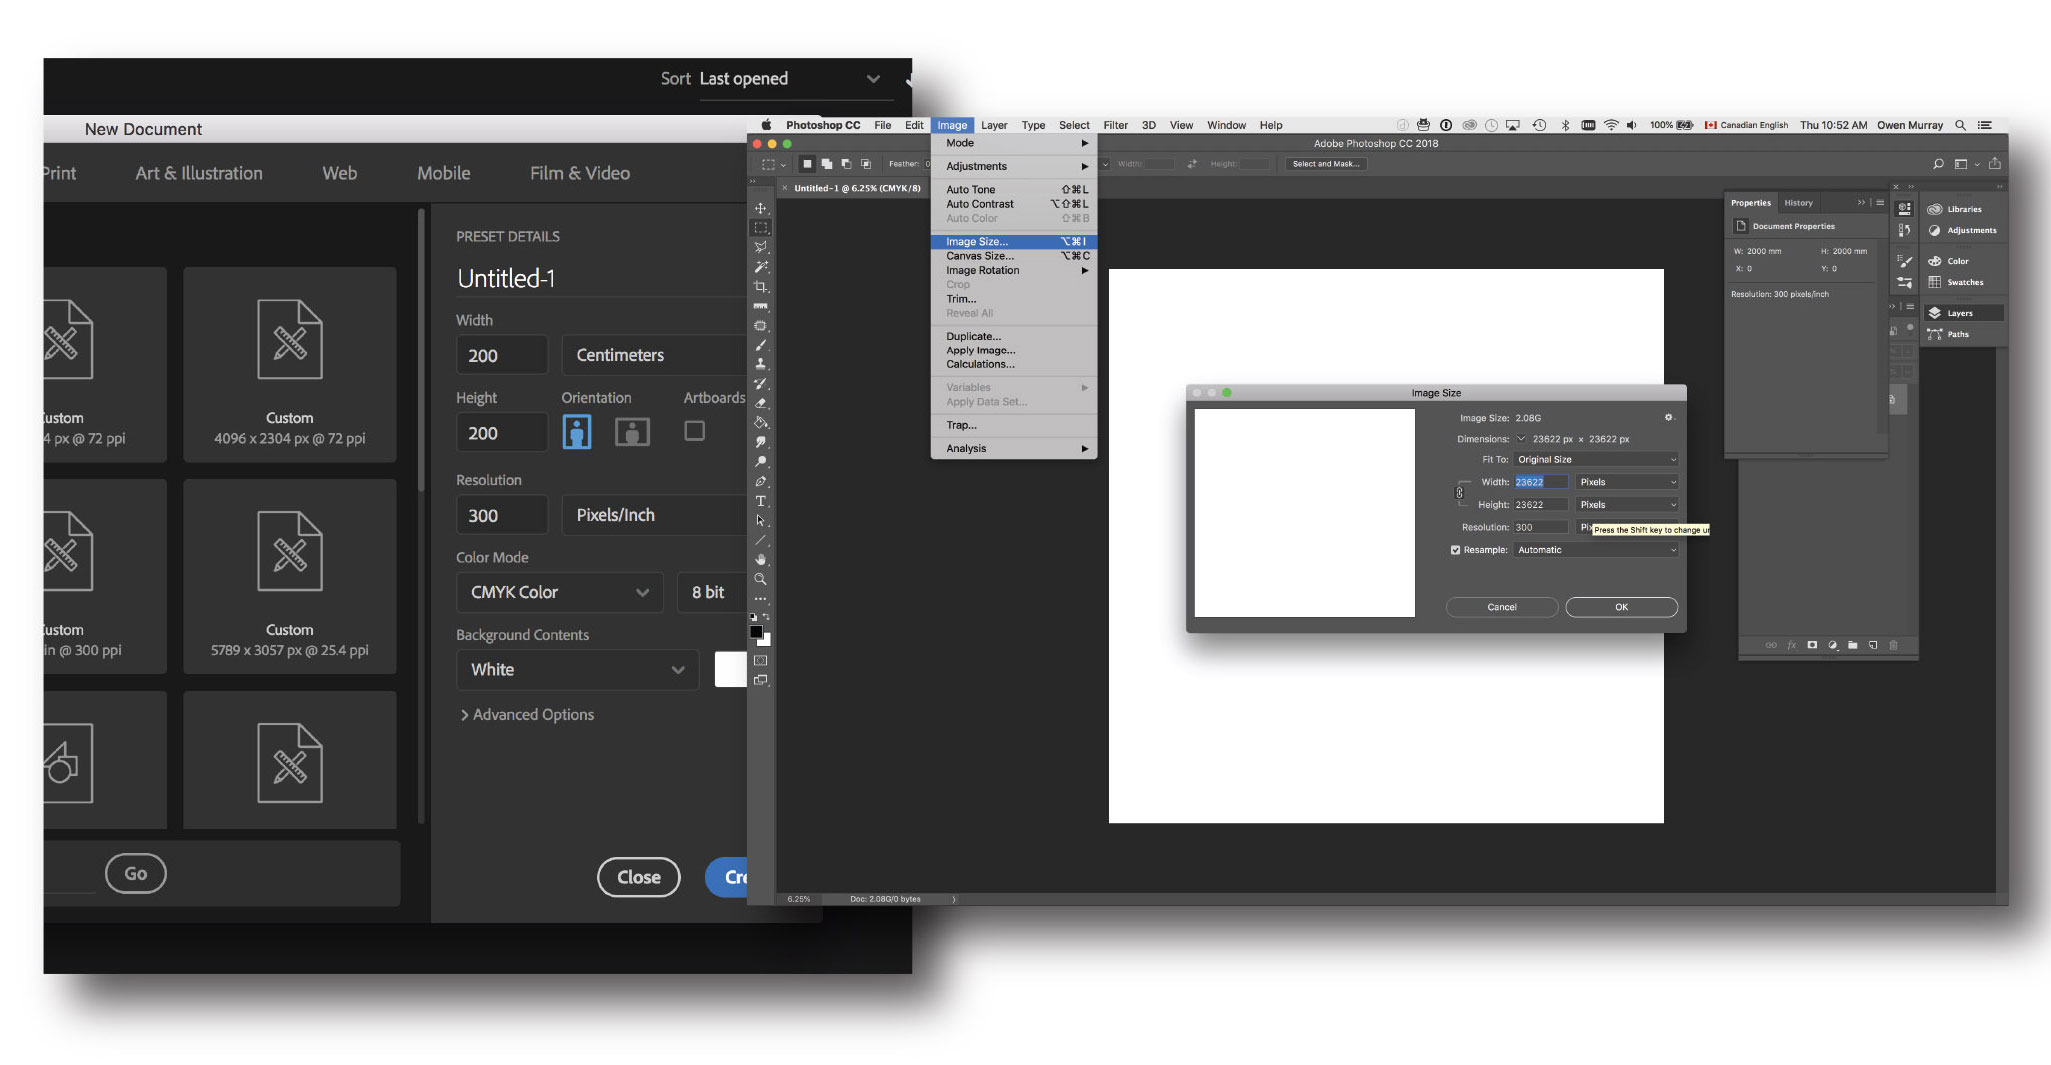
- Multiply the result by 3. This will give an approximation of the number of individual photos (camera positions) needed for the area to be documented.
- e.g. 2m @ 300dpi = 23622px. iPhone 6 Sensor = 4326px. 23622/4326 = 5.5. 5.5 x 3 ≈17.
- With this number in mind, stand in front of the area to be conserved and look through the viewfinder or screen of your camera. Visualize the number of times you will have to move in order to take this number of photos over the area to be conserved. Remember you need at least 66% (2/3rd) overlap between photos!
- Experiment; walkthrough the sequence multiple times until you’ve got a good sense of the optimal distance, then measure and record it, placing a piece of tape on the floor to indicate it.
The Profoto studio strobe was set up outside of the scene providing a raking light from the upper left and the scene was shot handheld from a distance of 1.5m.
An x-rite colour checker was placed on the wall for colour calibration in post-process as well as to provide a measurable scale. Note: The coded targets used also contained a measurable 2cm scale.
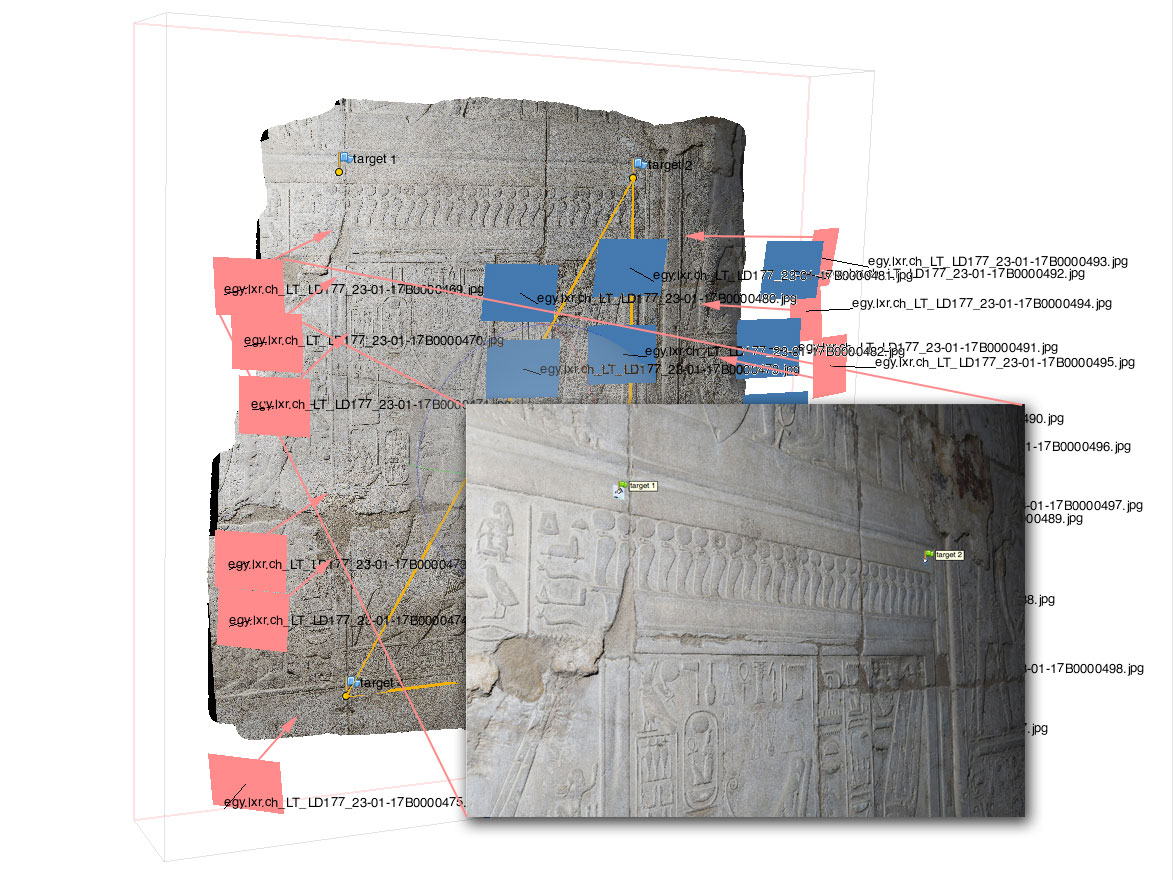
Photogrammetric models and the process of producing an orthomosaic image suitable for epigraphy can be thought of in terms of a body analogy. Two sets of photos are required: the first set, a series of overviews taken from up to double the optimal distance, provide the skeleton and musculature onto which the second set — a series of facing textural photos, the skin — are draped. Overview photos can be shot on oblique angles to the surface of the wall, while facing or textural (skin) photos should be shot at a right angle, parallel to the wall. Typically overview photos should contain a majority of the targets/markers used in the scene, though the ability to do so is context dependent.
For LD 177, structural photos taken at oblique angles to the scene were taken from roughly the same distance as the textural, facing photos used to produce the final orthomosaic.
Raw photos from the Hasselblad CFV-50c were catalogued and processed in Lightroom and then exported as high-resolution jpegs with a lens profile calibration specific to the 50 mm Mamiya-Sekor Z f/4.5 applied to each image. There were a total of 29 photos.
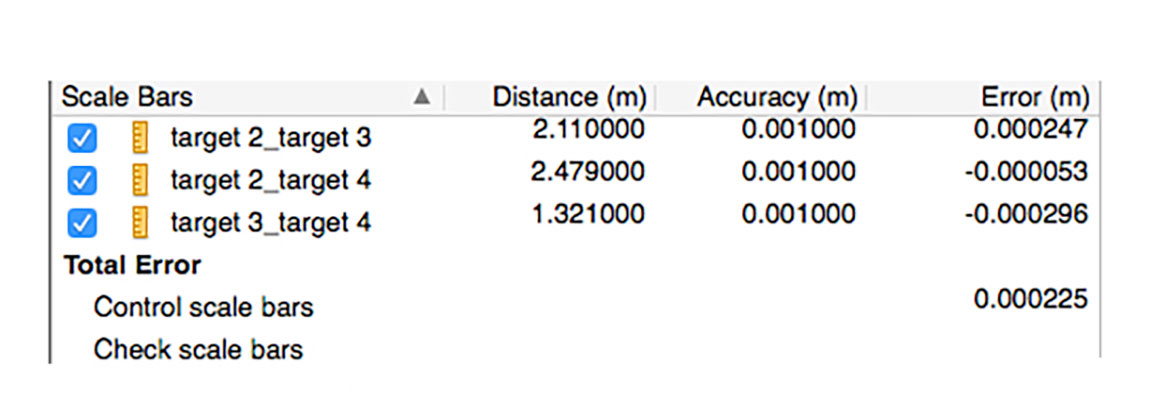
The photos were then imported into Agisoft PhotoScan and coded targets were automatically identified; their positions refined in each photo as required. Scale bars were created from these target measurements and camera stations were optimized resulting in very low error margins.
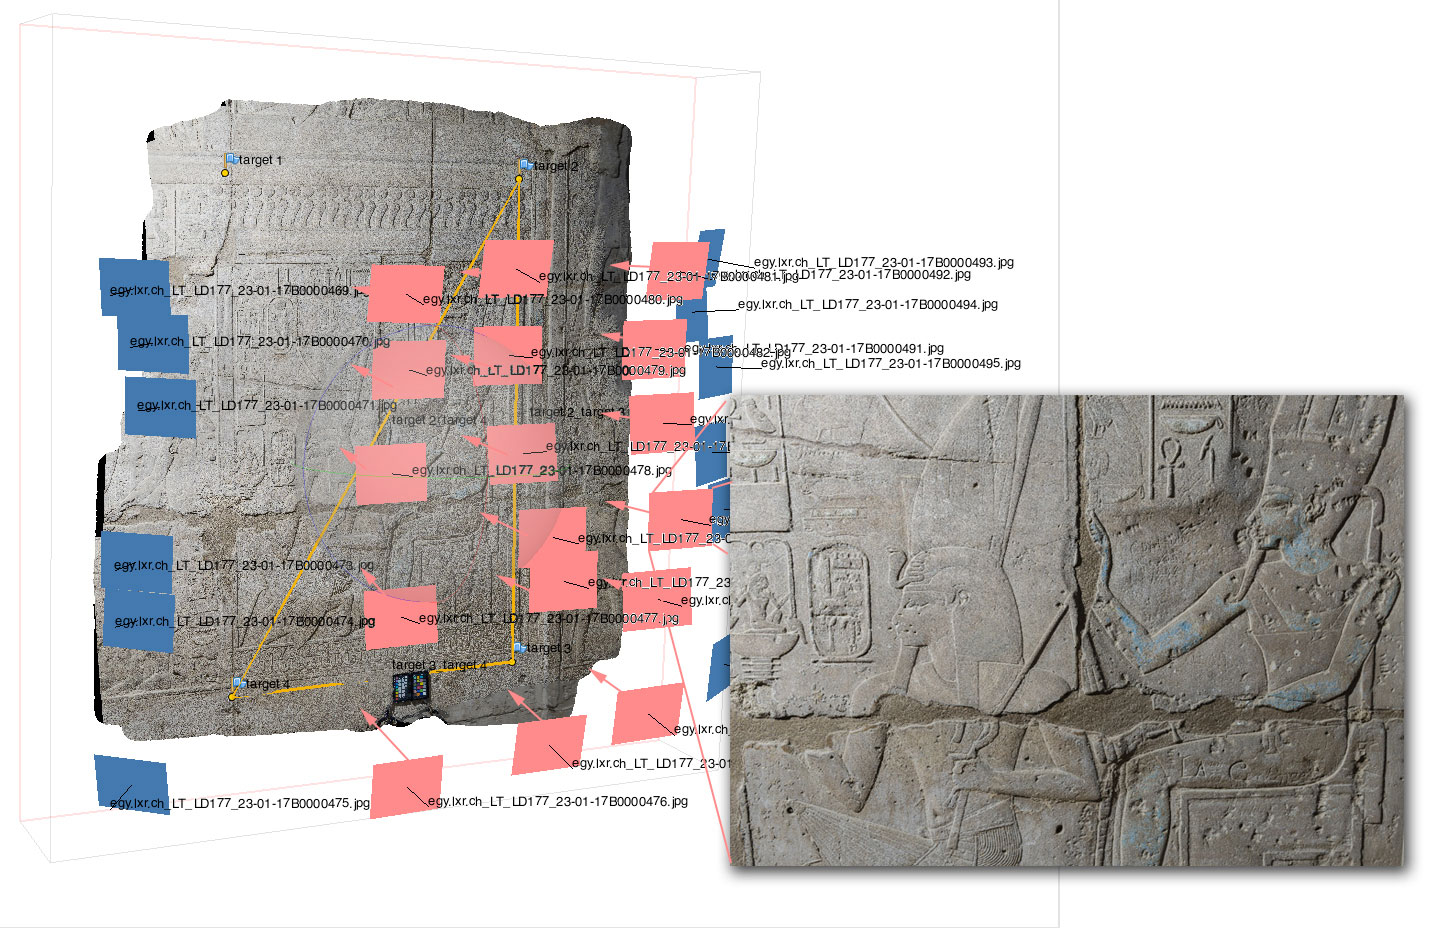
The photos were aligned on low to produce a sparse cloud with 32,400 tie points, from which a low-quality dense cloud of 4,000,000 points was produced. A low poly mesh was then built with 91,350 faces. Using the coded targets to define the projection plane, an orthomosaic was created of the scene and exported as a high-resolution tiff @ 0.0865mm/px (= 1:4 drawing ratio @1200 dpi).
LD177 - Photogrammetry sample - detail (Click photo to discover in higher resolution)
LD 177 orthomosaic approved for digital field documentation (click to enlarge)
Best practices:Though multiple cameras were experimented with, in order to mitigate alignment issues in PhotoScan, only one camera with a fixed focal length was used in any given build. i.e. Hasselblad, Nikon D800 and iPhone photosets were notmixed together.
Best practices:PhotoScan automatically recognizes and assigns camera/lens profiles for various camera and lens combinations, helping further refine model fidelity by improving camera alignment. As the Hasselblad CFV-50c is a sensor with no way of determining the focal length of the lens used with it, PhotoScan couldn’t calibrate/refine the images, however even without creating a profile — results with a minimal error margin were achieved by maintaining consistent optimal distance, lighting, shutter speed and aperture. Shot at ISO 100, 1/180th and f/11 with Profoto Strobe @ output intensity of 9 +/- 1.
0 comment(s)
Leave a comment(We'll keep your email address private)