
The most useful new features of Photoshop CC – Using brush-stroke smoothing for digital inking
Upon upgrading from Photoshop CC 2017 to CC 2018 there are a few differences to be noted regarding to the using of the standard brush tool. There are changes to the brush presets panel, allowing users to manage brush presets more quickly and easily, and there is also a change to the way brush presets are saved - all the options-bar settings are now included in the brush preset. One of the many new features brought to the Photoshop CC 2018 update was the introduction of a new brush smoothing algorithm. These new tools grant a more polished look with cleaner lines when using a brush and are a welcome addition for digital studio work. In this tutorial digitalEPIGRAPHY would like to introduce this new feature that quickly became one of the most essential tools used for inking our field drawings.
Using the smoothing effect in Pulled String mode in Photoshop CC
Adding pen stabilization when drawing on a PC has been possible for a long time now by the help of little programs, such as Lazynezumi. Using a smoothing effect on the Photoshop brush tool finally became a reality even for Mac users when Hej Stylus was released a couple of years ago. The latter evolved into a very sophisticated solution in the past few years and its most recent iteration offers a lot more than just smoothing your lines. We’ll give you a detailed review of Hej Stylus and its cases of use in digital inking in a separate article in the future.
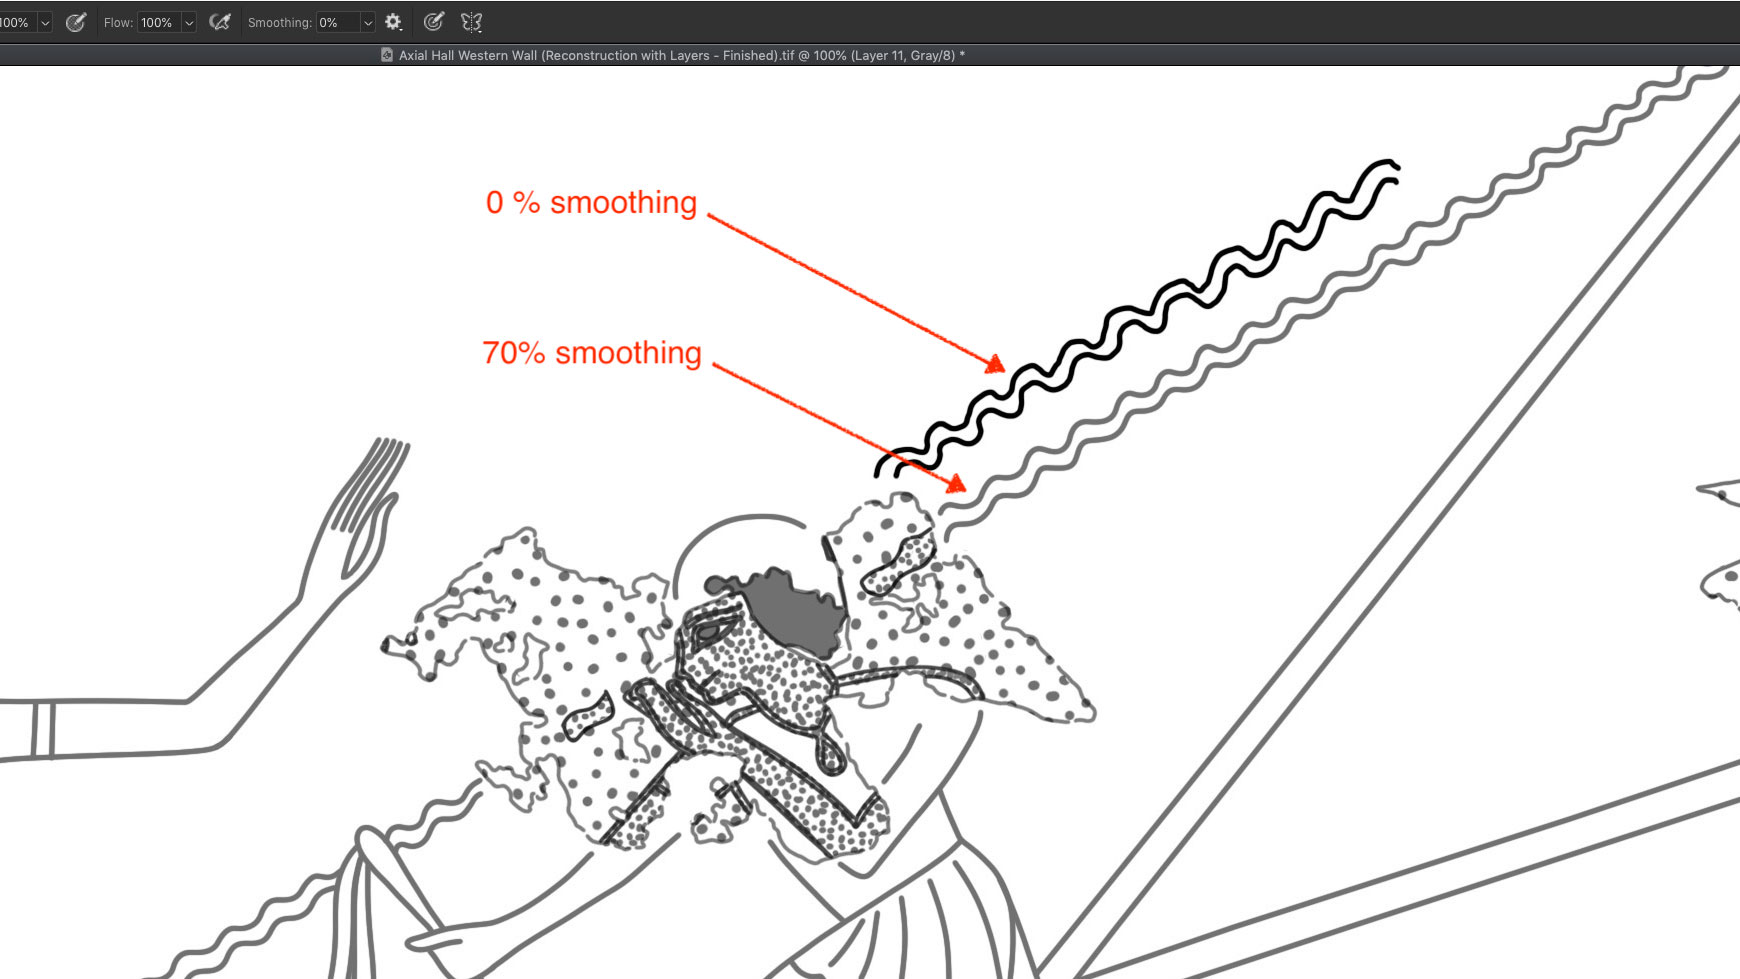
However, now that the brush smoothing effect is built into Photoshop, we shall take a quick look at when and how it could be used to help us with digital inking. The new tool can be found in a new spot where a percentage for the new effect can be chosen in the brush toolbar, next to the well-known panels opacity and flow. Smoothing is set to 10% automatically, and what it does is that it algorithmically reduces hand-shake in one’s brush strokes for a smoother appearance. Furthermore, the effect can be applied on both brush and eraser independently.
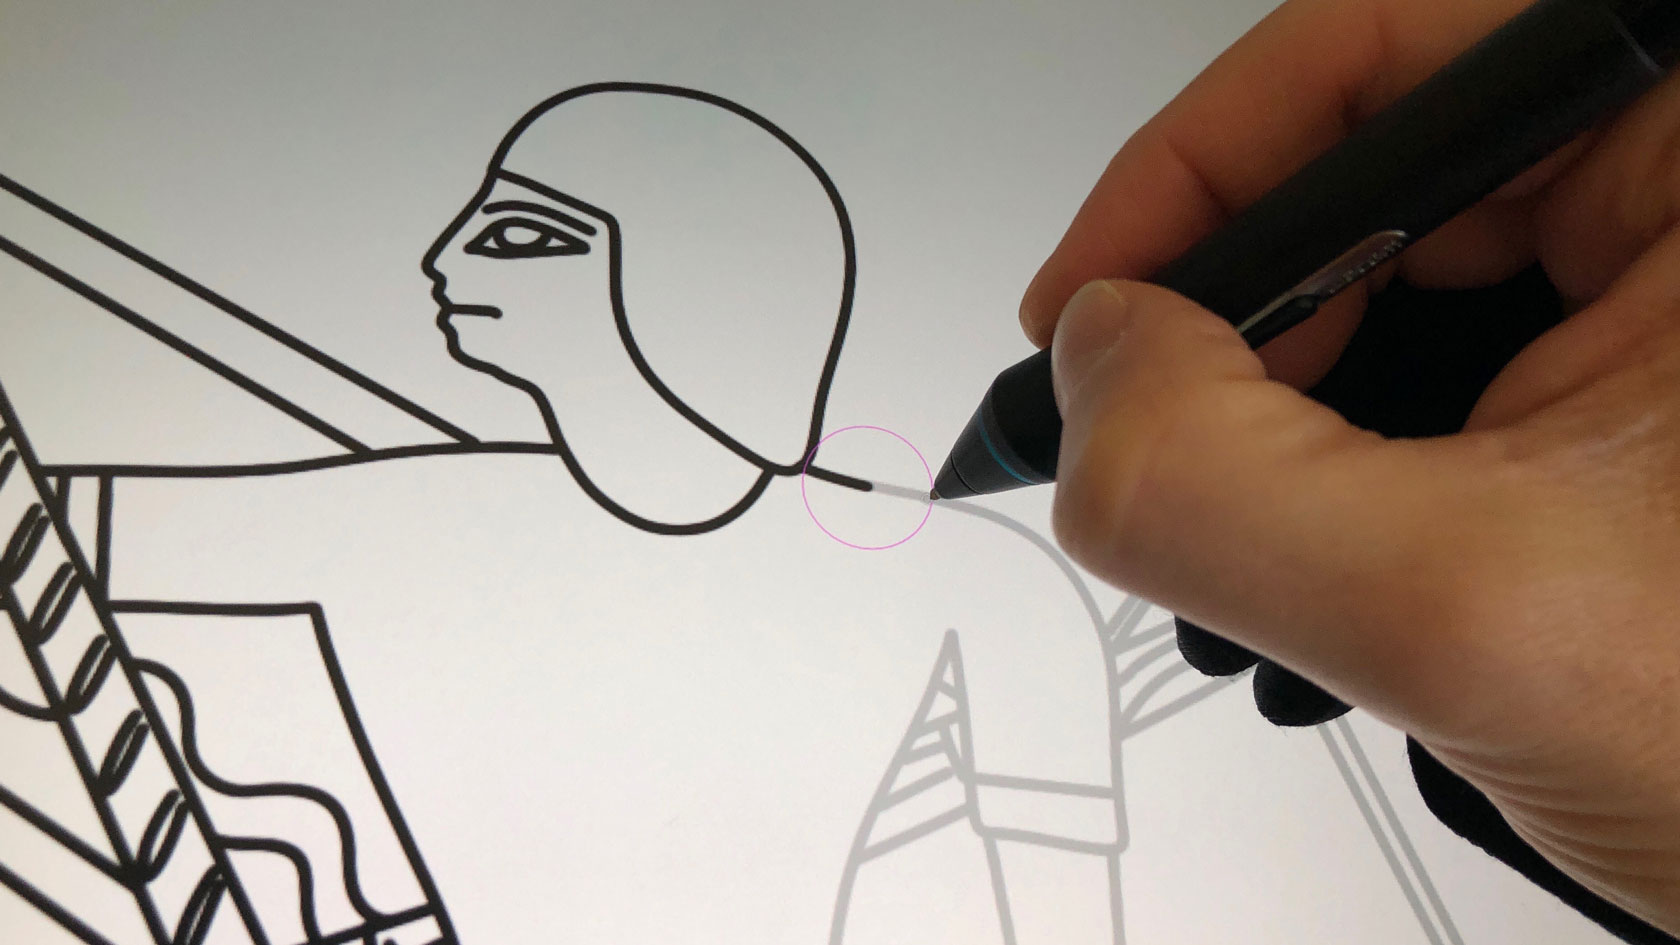
With smoothing turned on and set to a higher percentage, there is a noticeable delay from the pen tip to the brushstroke. Additionally, a magenta line appears between the cursor and the pen tip that behaves like a string pulling the line along the trail. If the amount of smoothing is lowered, the distance between the pen tip and brush becomes drastically shortened. As we start digging deeper in the smoothing tool’s settings panel (the little cog right next to the percentage slider), we’ll find a few specific customization options.
Using the smoothing effect in Photoshop CC

(1) The magenta line called Brush Leash is a byproduct of the new brush feature called smoothing.
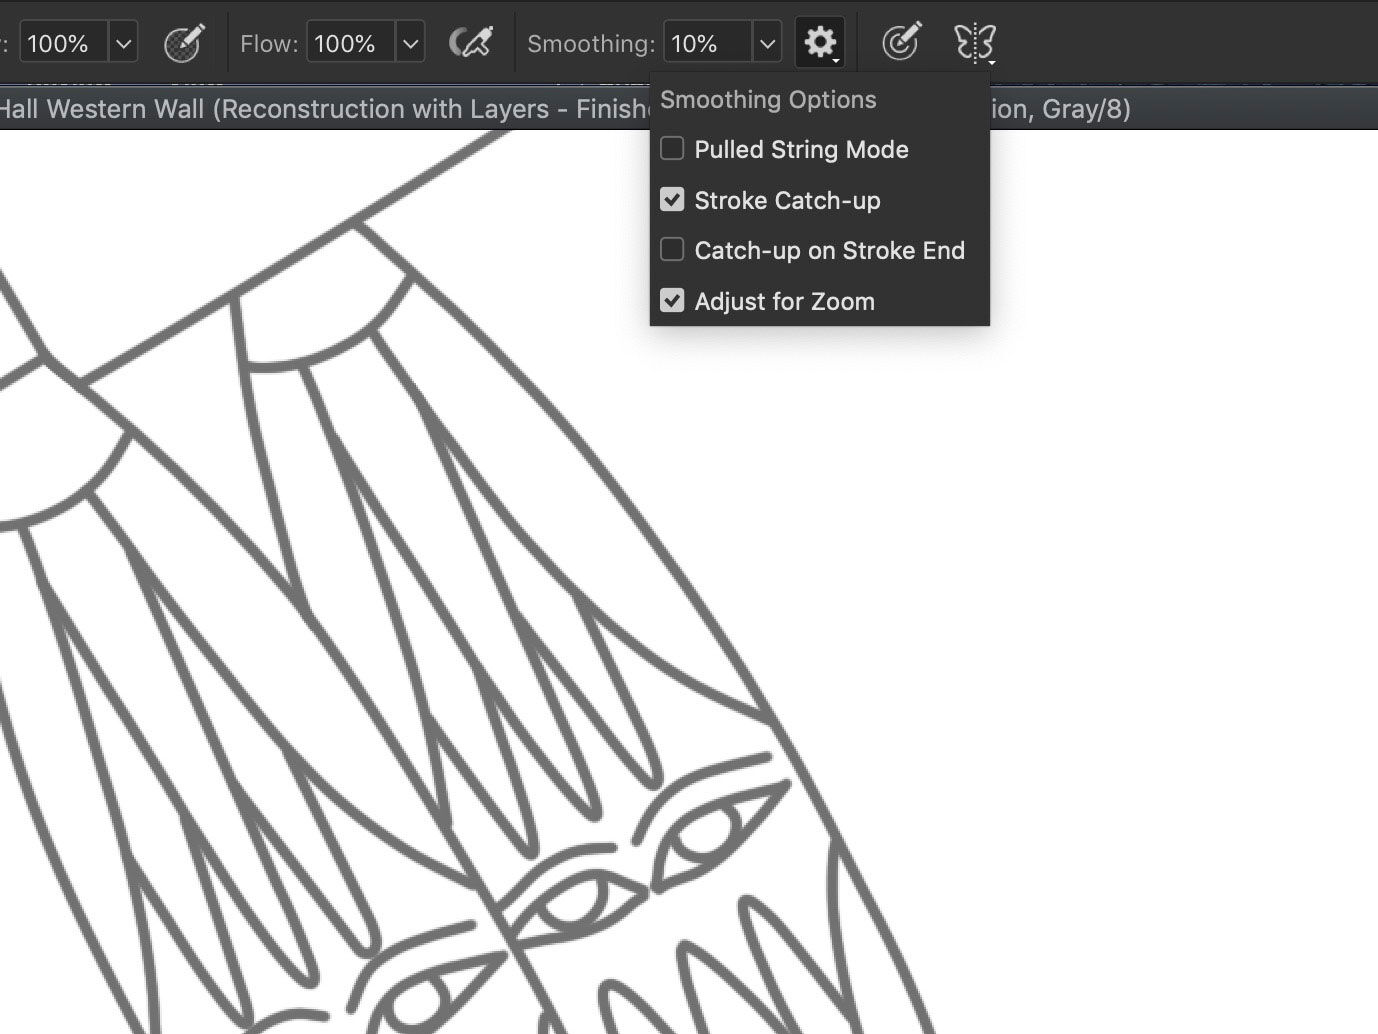
(2) Digging deeper in the smoothing tool’s settings panel, we’ll find a few specific customization options.
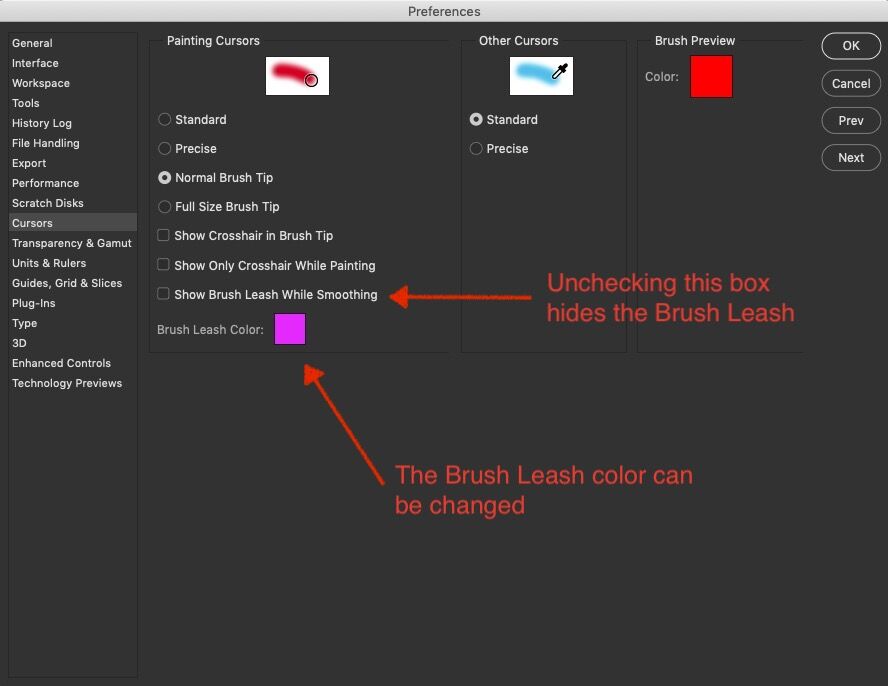
(1) If you want to disable the magenta string altogether, go to Edit/Preferences/Cursors and uncheck "Show Brush Leash While Smoothing”.
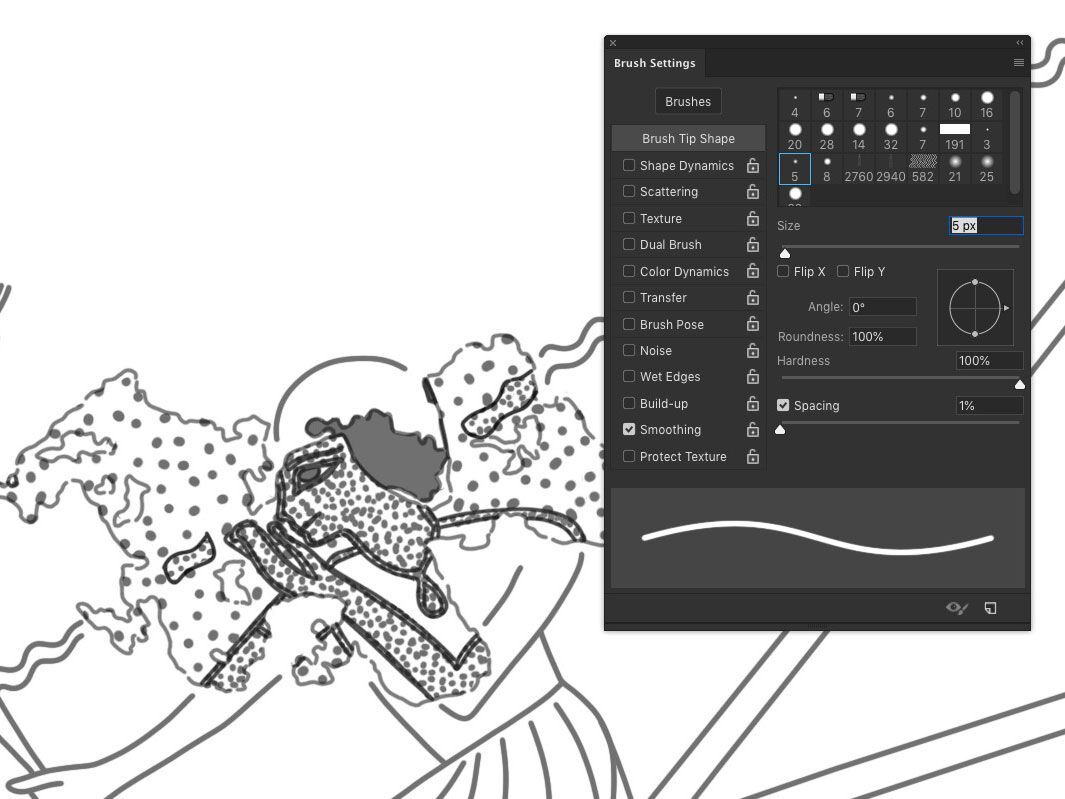
(1) To disable smoothing completely for all brushes, uncheck the box next to the Smoothing option in the Brush Settings panel.
Pulled String mode: when you tap and hold and start drawing, a magenta line appears with a magenta circle. In this mode the magenta line represents the lag with the line you’re going to draw, while the magenta circle indicates the threshold where you start painting. You won’t start drawing the line before you reach the edge of the circle. What it means is that one can take a break and stay within the circle anywhere without accidentally drawing anything. So, if you want to change direction, this setting becomes very convenient. And just to be clear, the amount of percentage you applied on the slider will dictate the intensity of these different modes, therefore, the higher the percentage is the larger your circle becomes.
Stroke Catch-up: in this mode the line comes closer to the cursor the slower you draw, until it reaches the cursor when at your stopping point. It has the illusion of giving you more guidance, while it directs the brush stroke into place with a little more precision. The speed of your brush becomes somewhat slower and the motion is much smoother. Its best-case usage is when inking drawings with lots of sharp corners.
Catch-up on Stroke End: this mode helps the brush catch-up at the end of your stroke. It is a little hard to predict how it’s going to end when you lift your pen off the tablet, because as soon as your pen is off, the line jumps from the end of the stroke to the point where your pen was lifted. Thankfully, you can turn these modes on in different combinations and experiment with what works for you, however, pulled-string mode will automatically gray-out the other options.
Finally, there is Adjust for Zoom: one good use-case scenario can be demonstrated with smoothing set to 20% and the canvas shown at 100%. When you draw on the canvas now, you are going to get only a little smoothing. However, if you start zooming out while the smoothing percentage remains the same, the smoothing effect becomes a lot stronger (as the magenta string gets much longer). At the end, the algorithm knows that when you zoomed out you’ll need quite a bit more smoothing and it automatically adjusts the length of the string to the zoom level you’re on.
When I’m inking hieroglyphs that are relatively small with lots of sharp corners and shorter curves, I prefer using the smoothing effect in Stroke Catch-up mode at about 70%. This extra boost adds a lot to the line quality. However, I like toggling this effect on and off, which, unfortunately, didn’t get a shortcut command from Adobe. Luckily, there is a workaround that can be applied to solve this problem. One can tap Option (Alt on the PC) and a numeric key between 1-9 to set the percentage of smoothing in 10% increments. Therefore, to toggle between no smoothing is possible by setting up two shortcuts on your relevant remote device (we, at digitalEPIGRAPHY use either the Delux Designer Keypad or the Wacom Express Key remote), one with Opt+1 (Alt+1) for almost no smoothing and another one with Opt+7 (Alt+7) for optimal smoothing. This is the closest you can get to fully control line quality during digital inking.
1 comment(s)
Hopefully Helpful
Jul 29, 2019In Photoshop, if you press two number keys in quick succession, for example alt+2 then (still holding alt) 7, it will put those numbers together to change the smoothing to 27% instead of 20 and then 70. If you press alt+00 (tap 0 twice quickly) then it will change the percentage to 0. Press alt+0 and it will change the percentage to 100. This also works for brush opacity (press the number keys (no alt) when the Brush tool is active), or layer opacity (when no tool is active that has its own opacity setting).

Aug 1, 2019Thank you very much for providing these useful shortcuts, We hope you enjoy reading digitalEPIGRAPHY!
Leave a comment(We'll keep your email address private)