
Tidbits of the digital Chicago method Part 1 - Creating and applying a damage template for digital inking
There is a lot of debate, hesitance and argument pro and contra when it comes to studying, documenting and/or indicating damaged areas of ancient Egyptian wall surfaces. In our opinion, there could be a very convincing case to be made for the visual representation of this type of information. The various ways in which damaged areas are treated by the many epigraphic projects in Egypt deserves its separate article. In this tutorial we’d rather like to focus on the thought process behind designing the Epigraphic Survey’s own digital damage solution and dissipate some of the myths concerning its application.
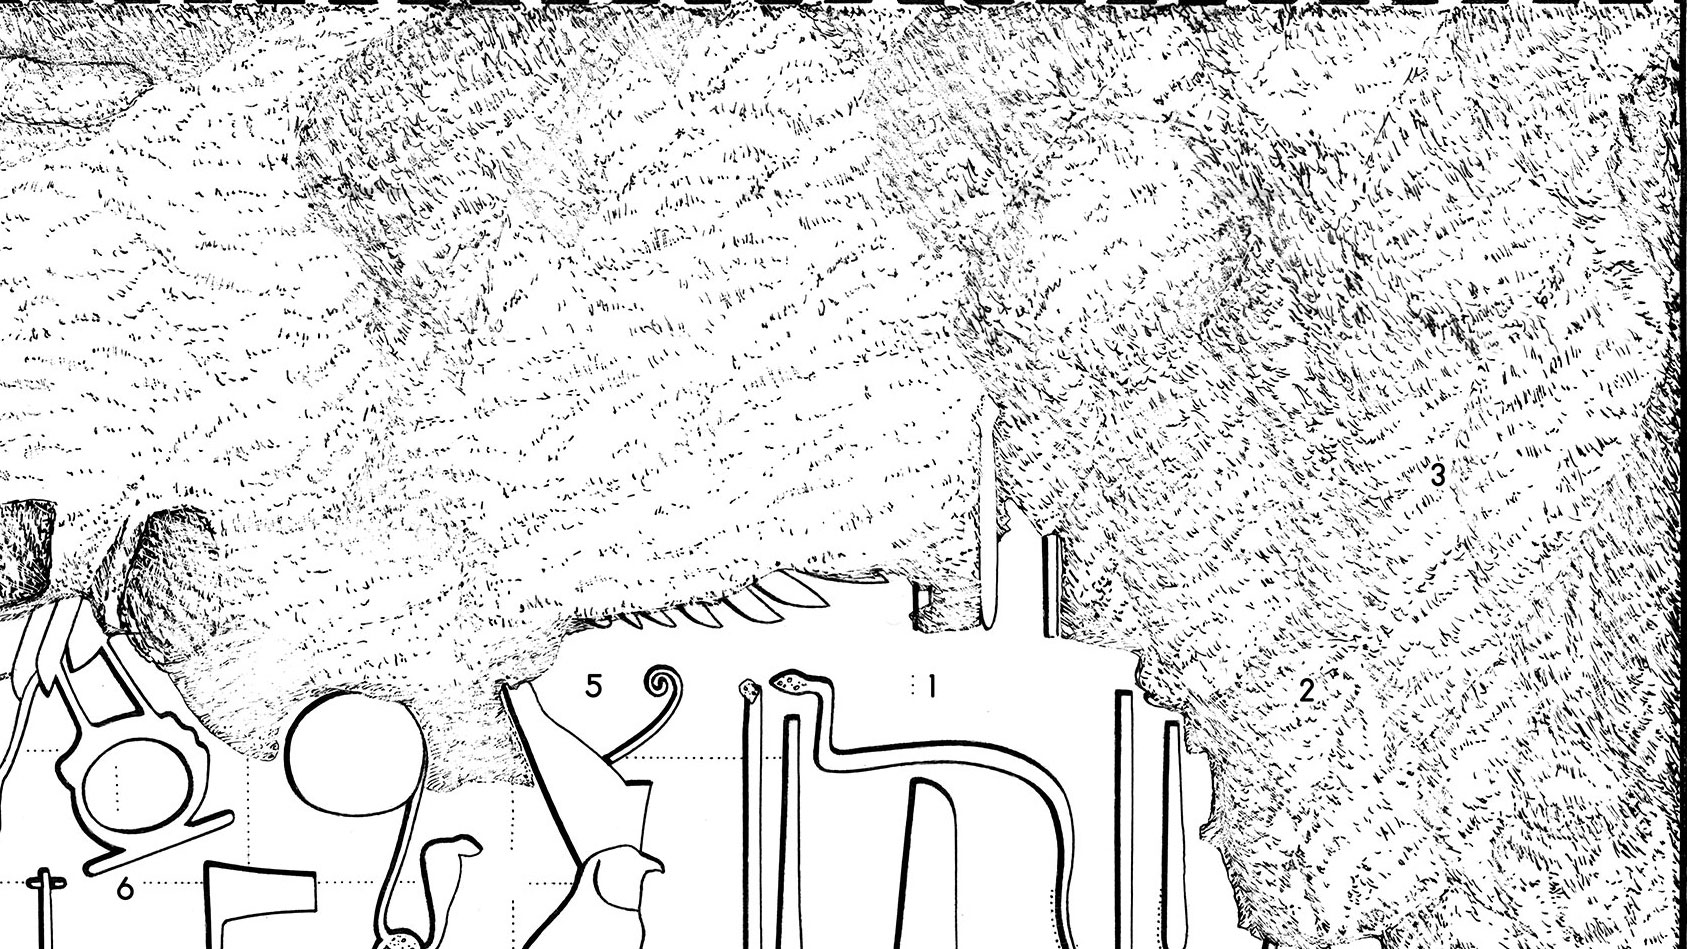
Damaged area indicated by Rapidograph pen on photo enlargement in accordance with the Chicago method (Medinet Habu, Small Amun temple detail, drawing by S. Osgood).
In their drawing conventions, the Epigraphic Survey dedicates an entire section to the leading principles behind damage representation, elaborating on some of the use cases for its specific occurrences. You can find this description, supported by numerous visual examples, in our Manual under Architectural Obstructions. As one might imagine, adding damage pattern to drawing enlargements manually by using the Rapidograph pen one stroke at a time was (and still is!) a very time-consuming affair. Obviously, a good damage pattern depends largely on the background image that is used for capturing those features with information value, while simplifying their visual appearance. When creating the digital equivalent of the Survey’s traditional damage pattern, we had to make some close observations on the nature of the brush strokes used in the Chicago method. As we take a closer look at a traditional inked drawing, we realize that one of the main attributes of working with the Rapidograph is its non-uniform ink distribution, which manifests in both the intensity and the thickness of the line.
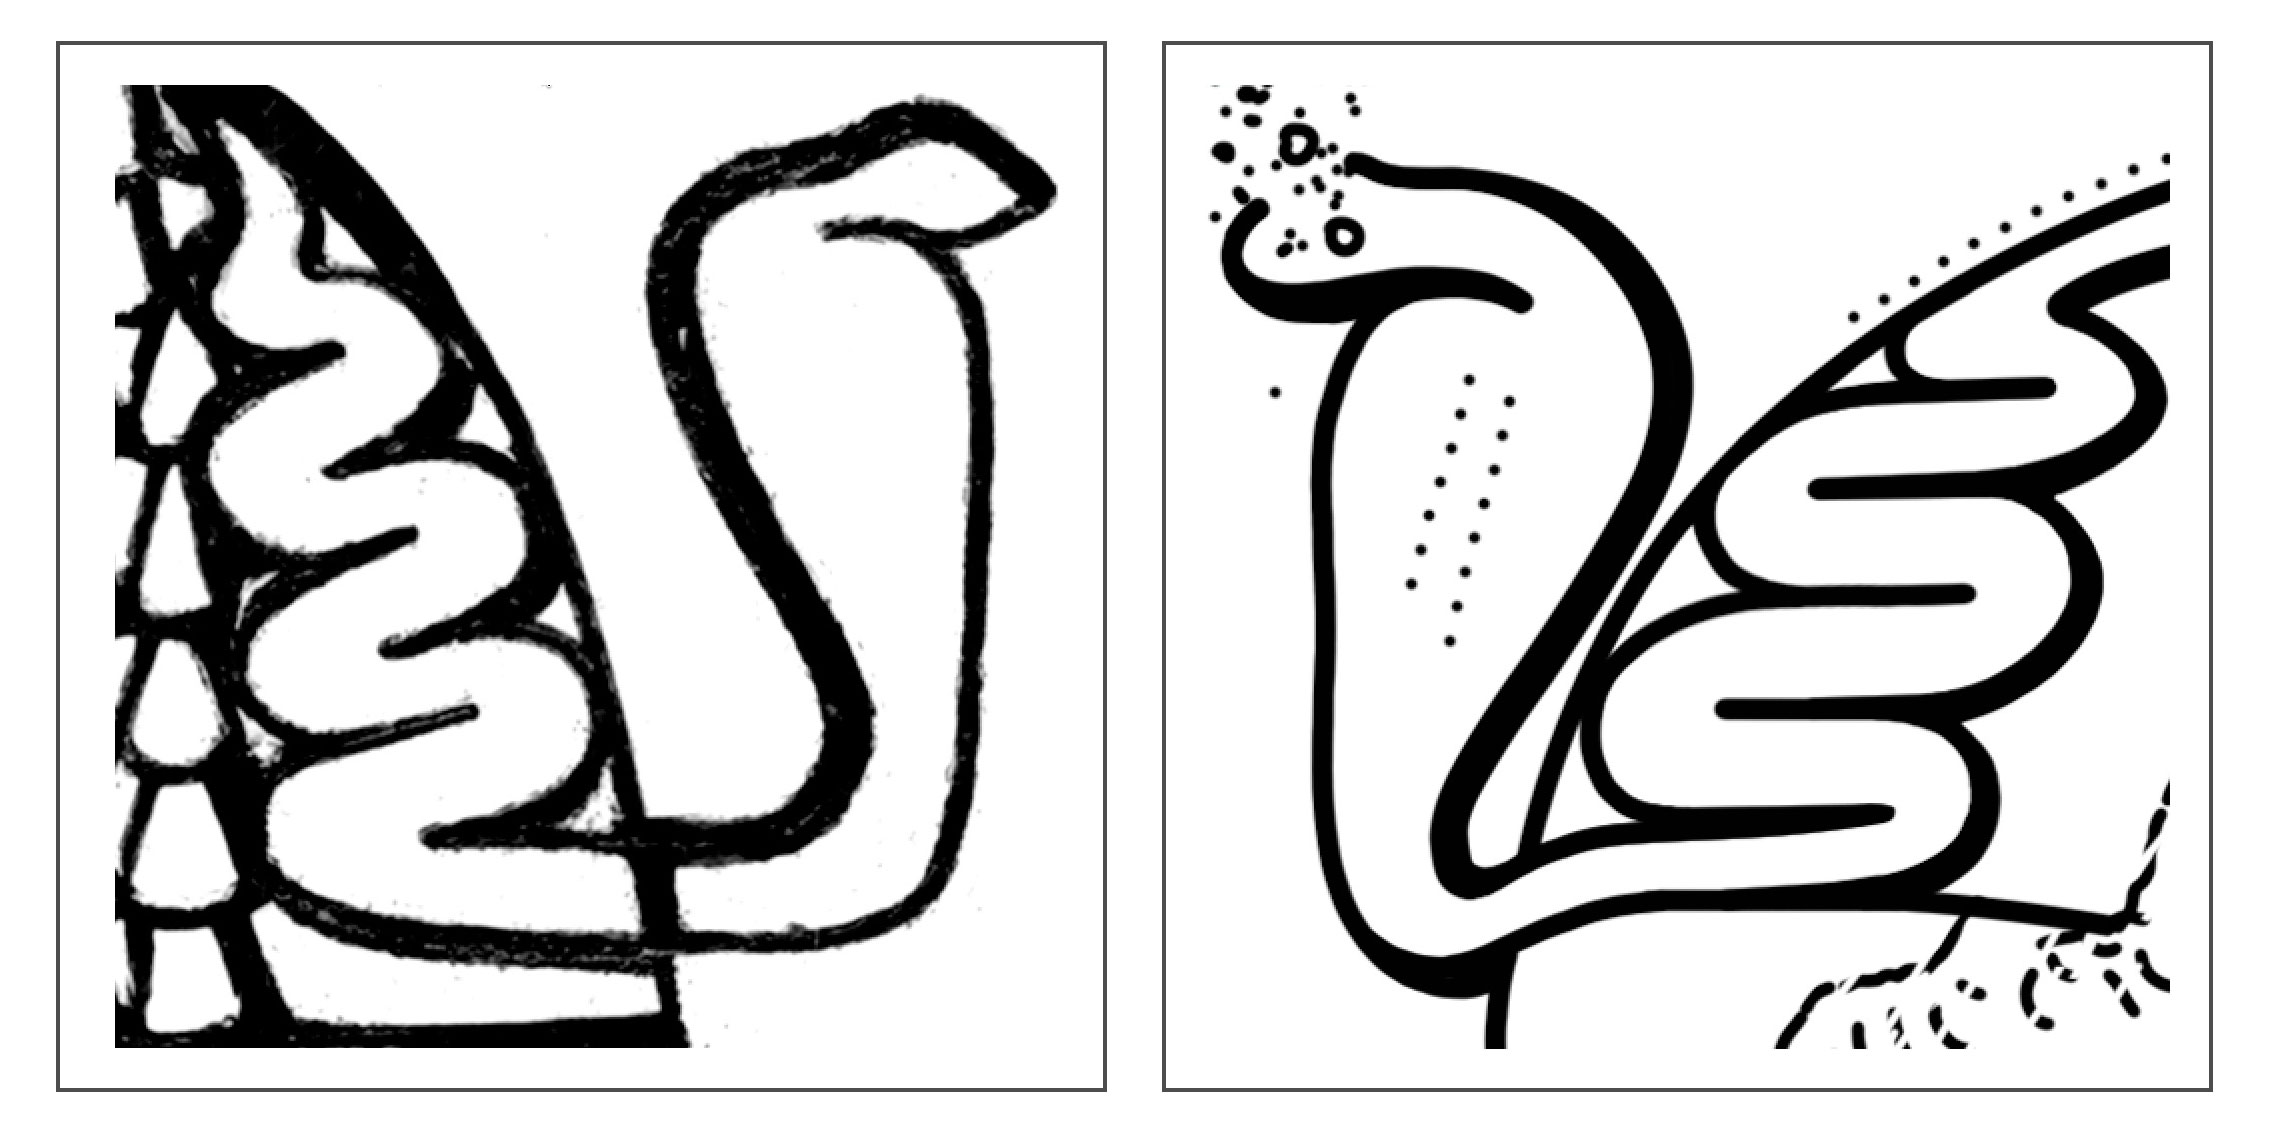
Differences appearing in line quality between traditionally (left) and digitally (right) inked line drawings.
This attribution used to be a burden for the artist, who needed to craft their inked lines very slowly and carefully. Naturally, replacing the Rapidograph with Photoshop brushes had an immensely positive effect in this process. However, the application of the same digital brush strokes for indicating architectural obstructions, such as damage and plaster patterns, was less convincing. As we investigated the nature of these textures, we realized that a specific digital brush had to be designed for a faithful damage replication that has the same non-uniform appearance as our traditional ink-pen.
Inking damage with regular paint brush versus bristle paint brush
(1) - Close-up detail of a traditional inked drawing made by Rapidograph on photo enlargement scanned at 1200dpi (detail, drawing by S. Osgood).

(2) – Differences shown between bristle brush versus regular brush when indicating damage on a digital background.
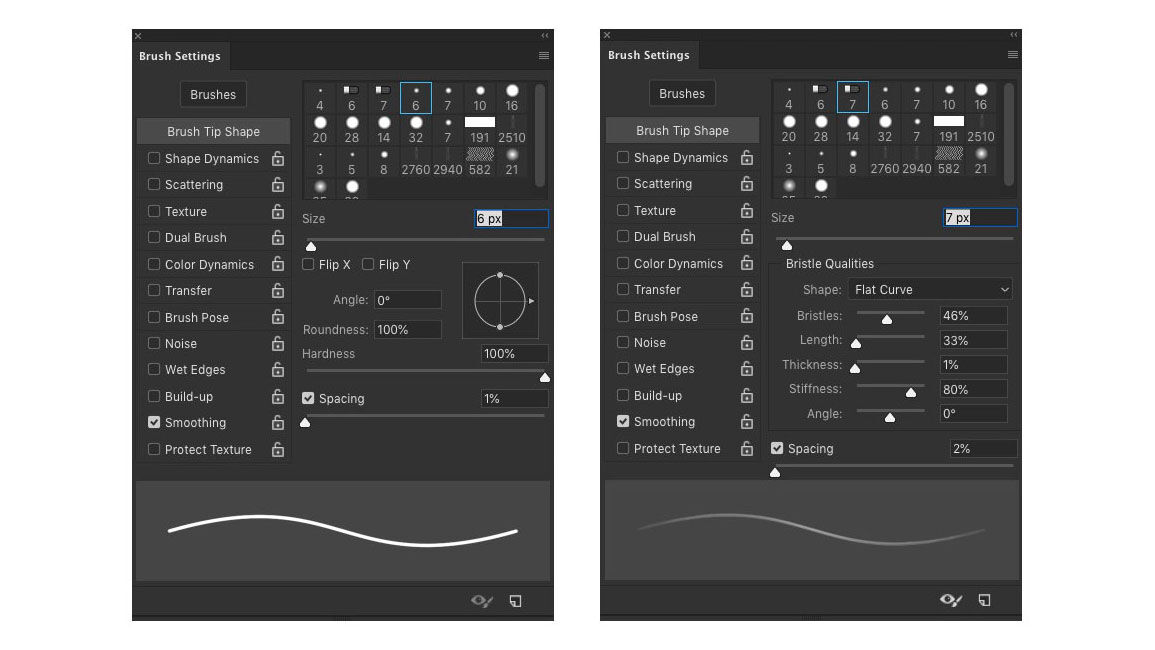
(3) – Brush attributes specified in their settings panel for regular paint brush (left) and the specific bristle brush created for damage texturing (right).
(4) – Large damage area created by using a regular 6px paint brush. Applying a regular paint brush results overly detailed, dark and almost photorealistic texture.
(5) – Large damage area created by using a custom-made bristle brush. Applying the special damage-brush results lighter, less intrusive texture with just enough surface details implied.
The Epigraphic Survey’s digital damage brush is available to download from here, but one must keep in mind that it was designed to be used in a 1200dpi environment, therefore it needs to be resized accordingly when applied in a different context. Now that we have a digital brush to faithfully replicate damage, we shall investigate the possibilities to speed up the process. We must realize that due to the very nature of damage, there is no digital pattern that can be used exclusively to imitate these surface elements. Any pattern that is created to cover large damaged areas needs to be completed by the addition of individual brush strokes wherever it's necessary. A lightweight digital damage pattern can be created as shown in the following steps:
Creating a digital damage pattern
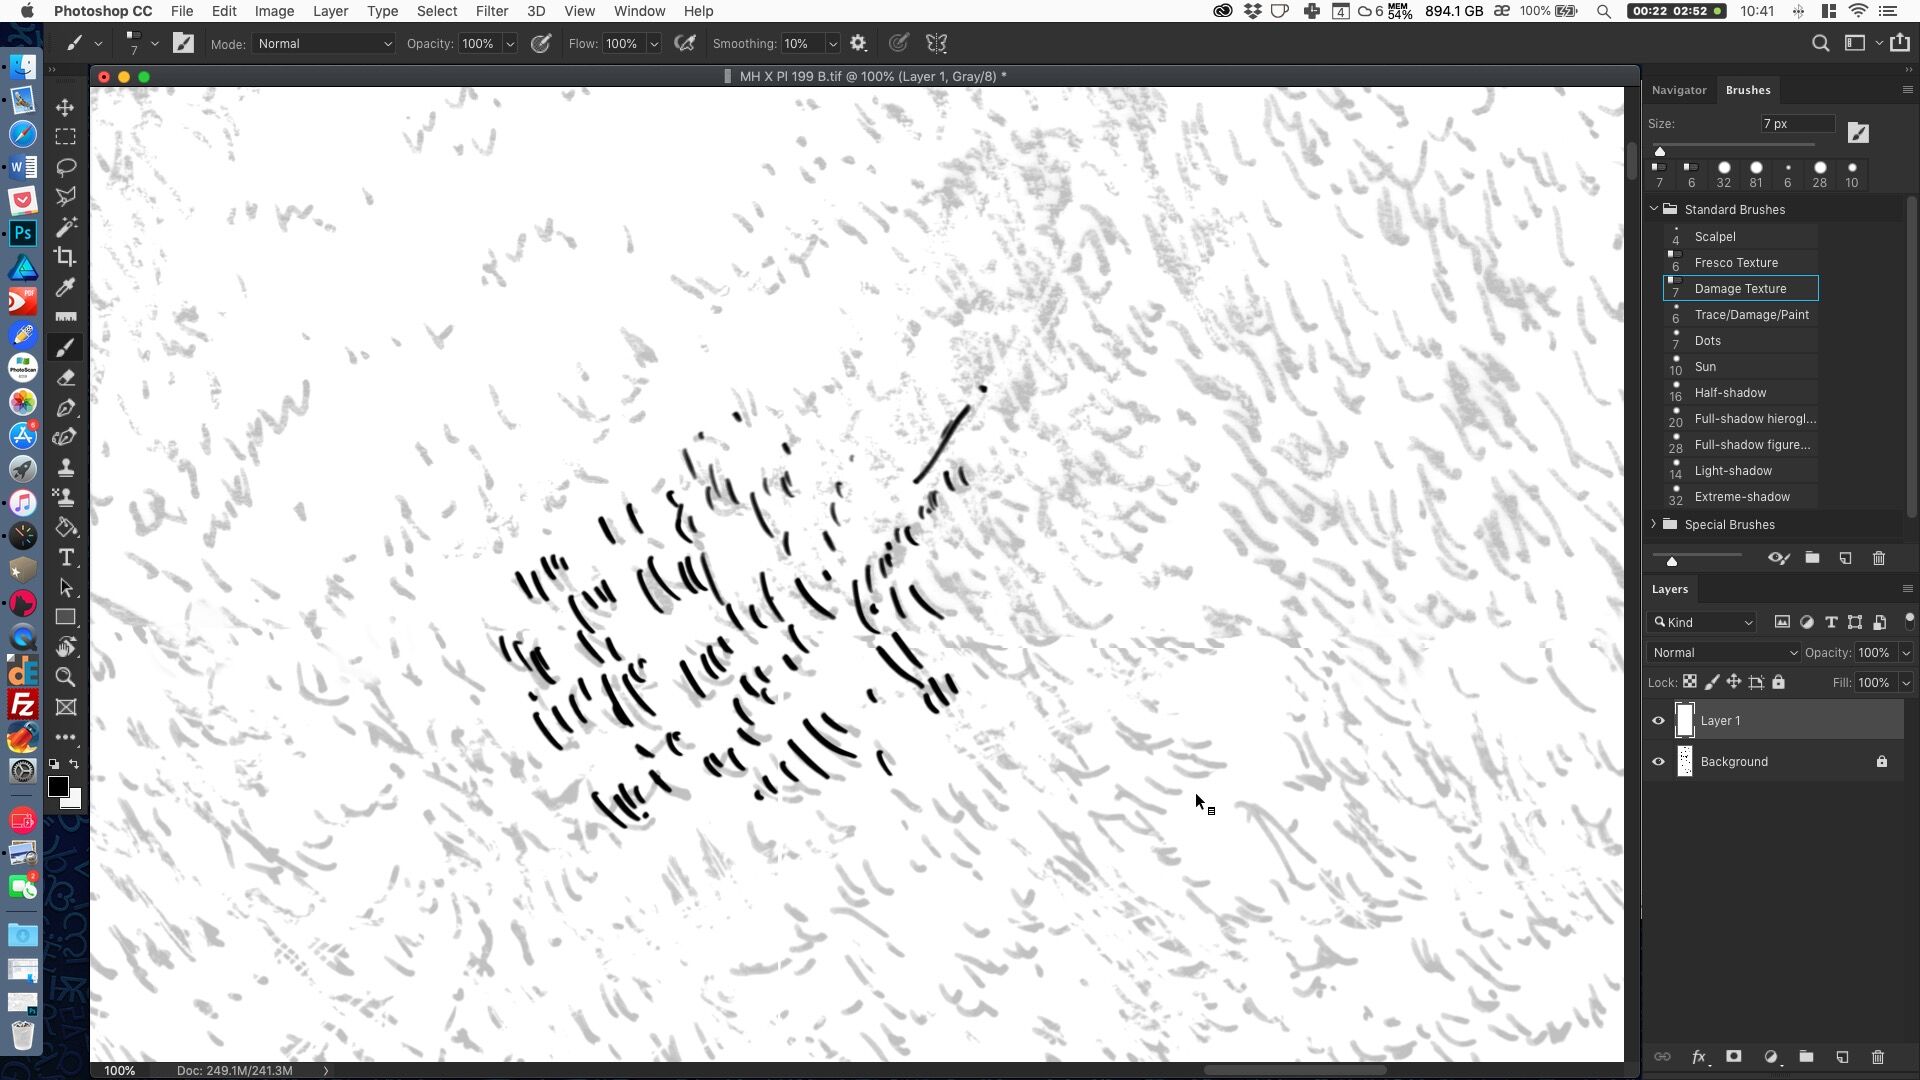
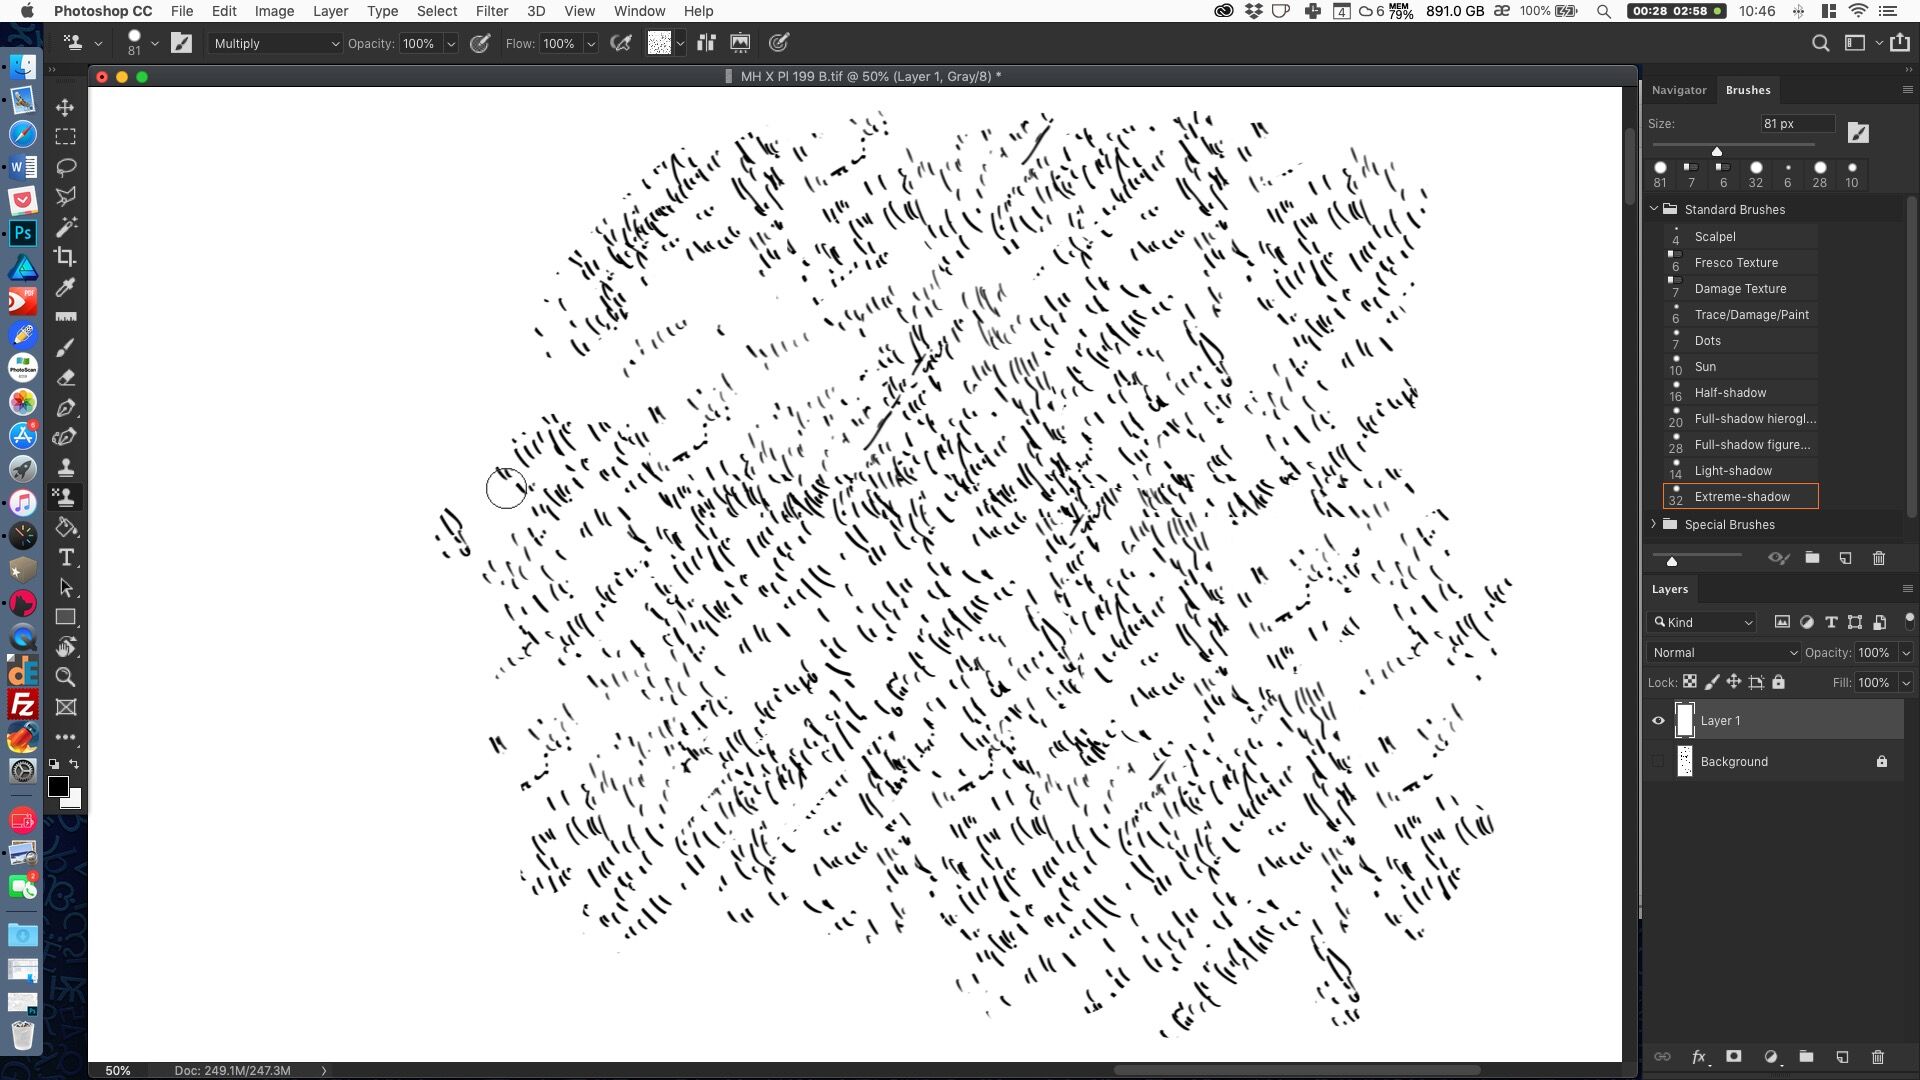
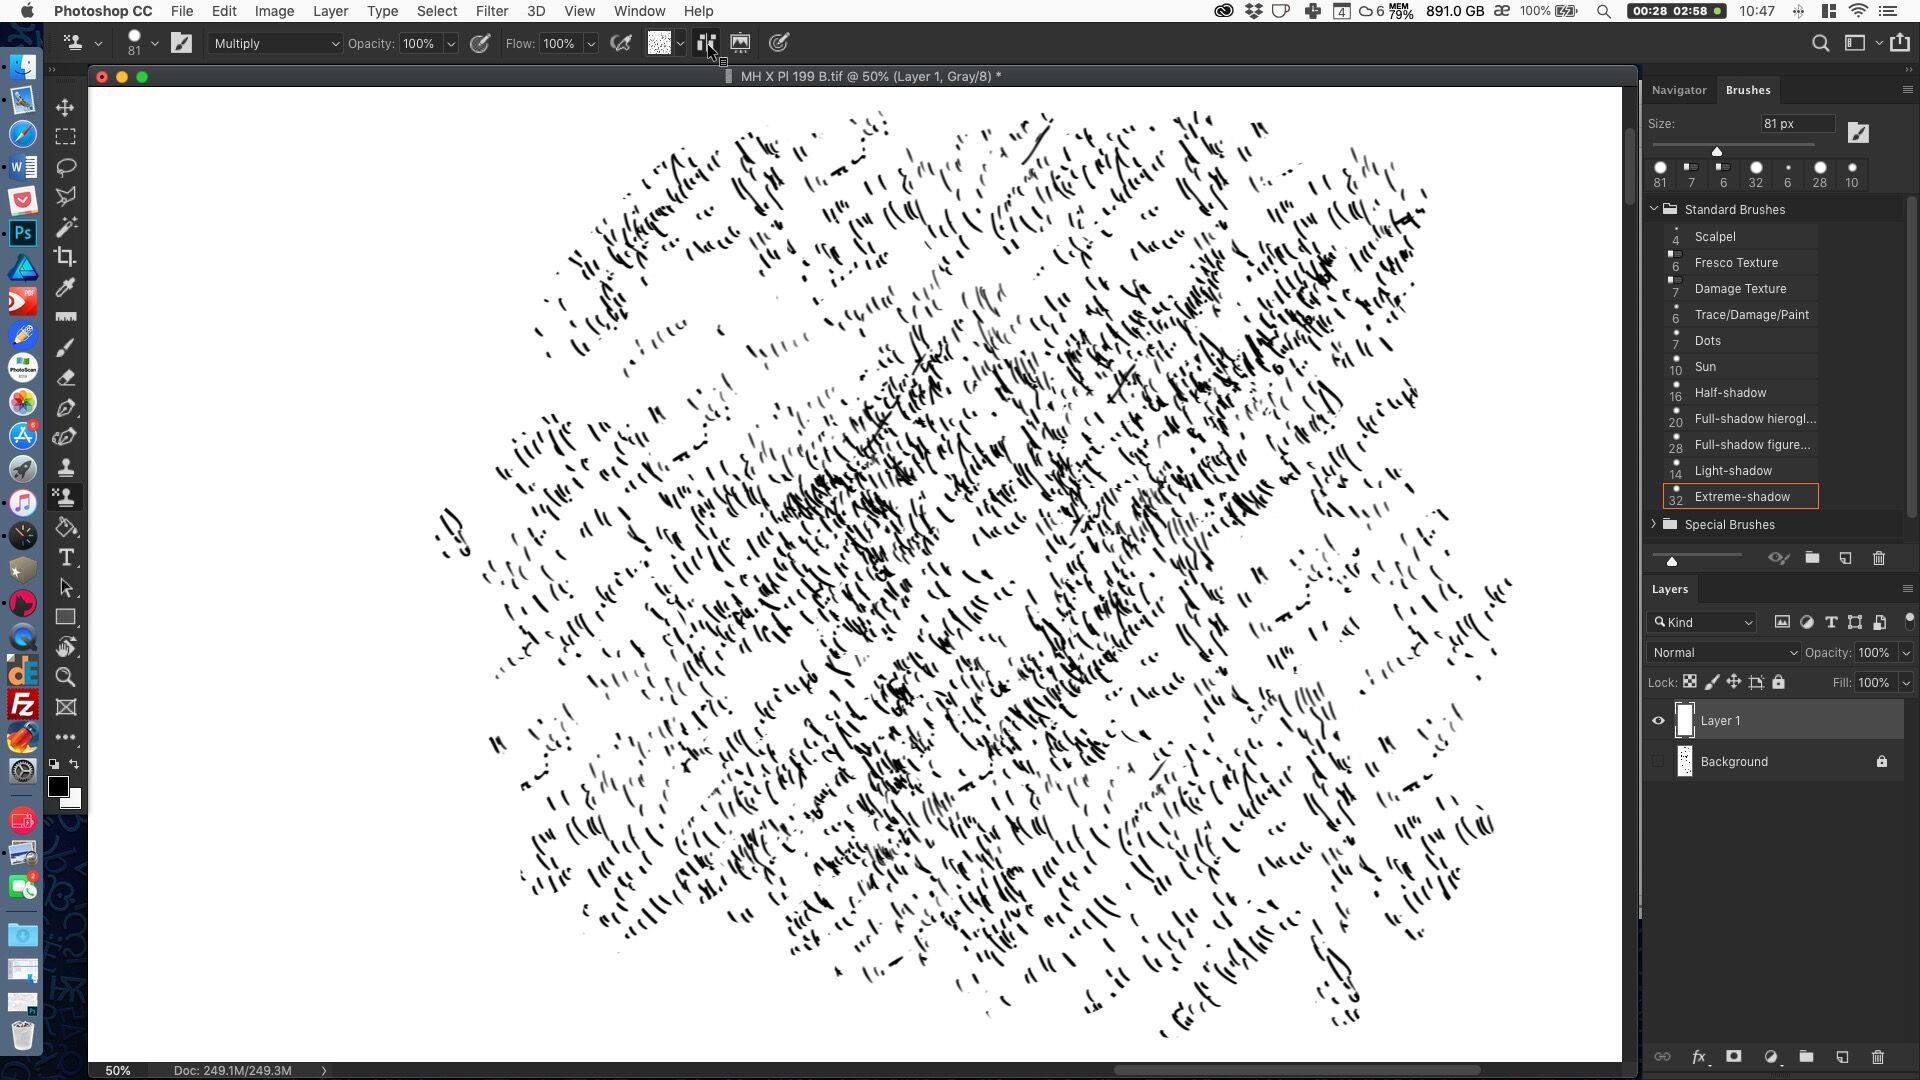
(1) – A section of a relatively low density, traditionally inked damage area needs to be replicated on a separate layer, using the newly developed digital damage brush.
(2) – The pattern needs to be designed in a way that reflects the Rapidograph pattern as closely as possible indicating a certain level of variety in its placement.

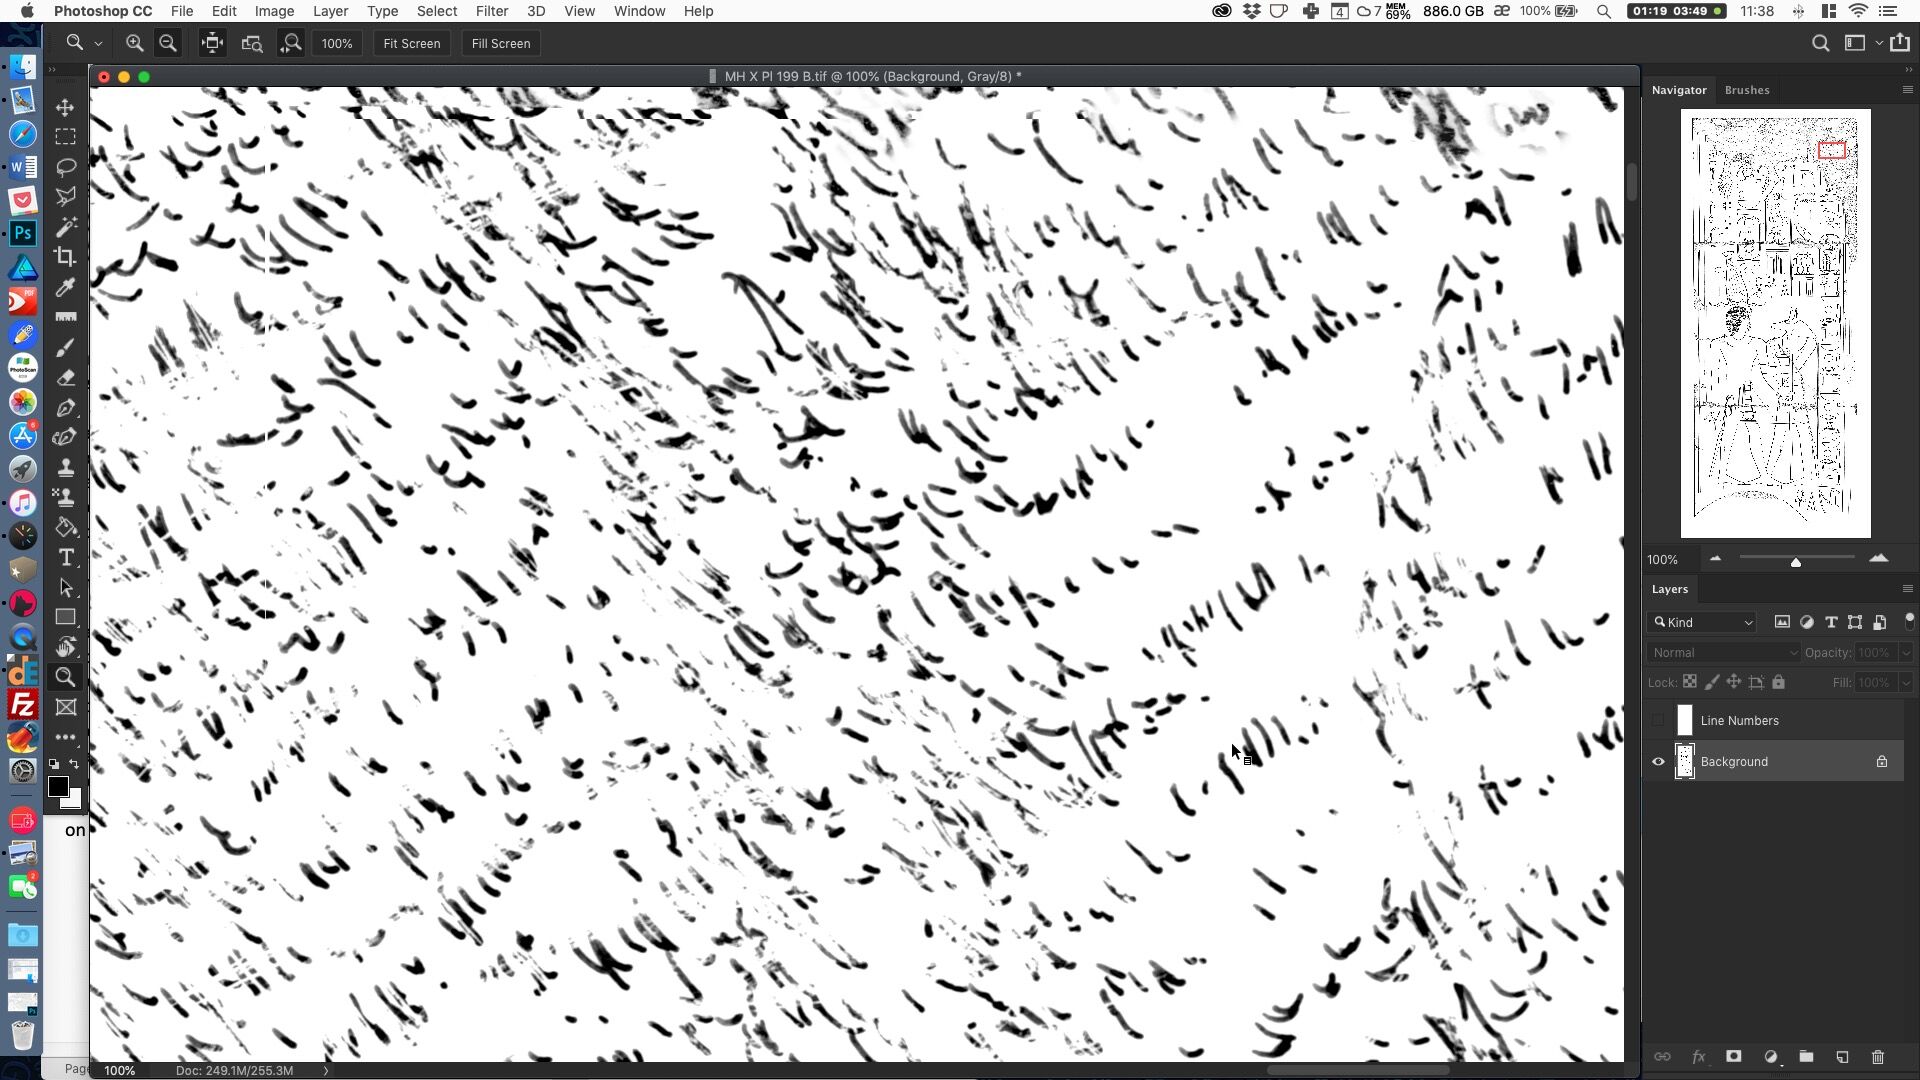
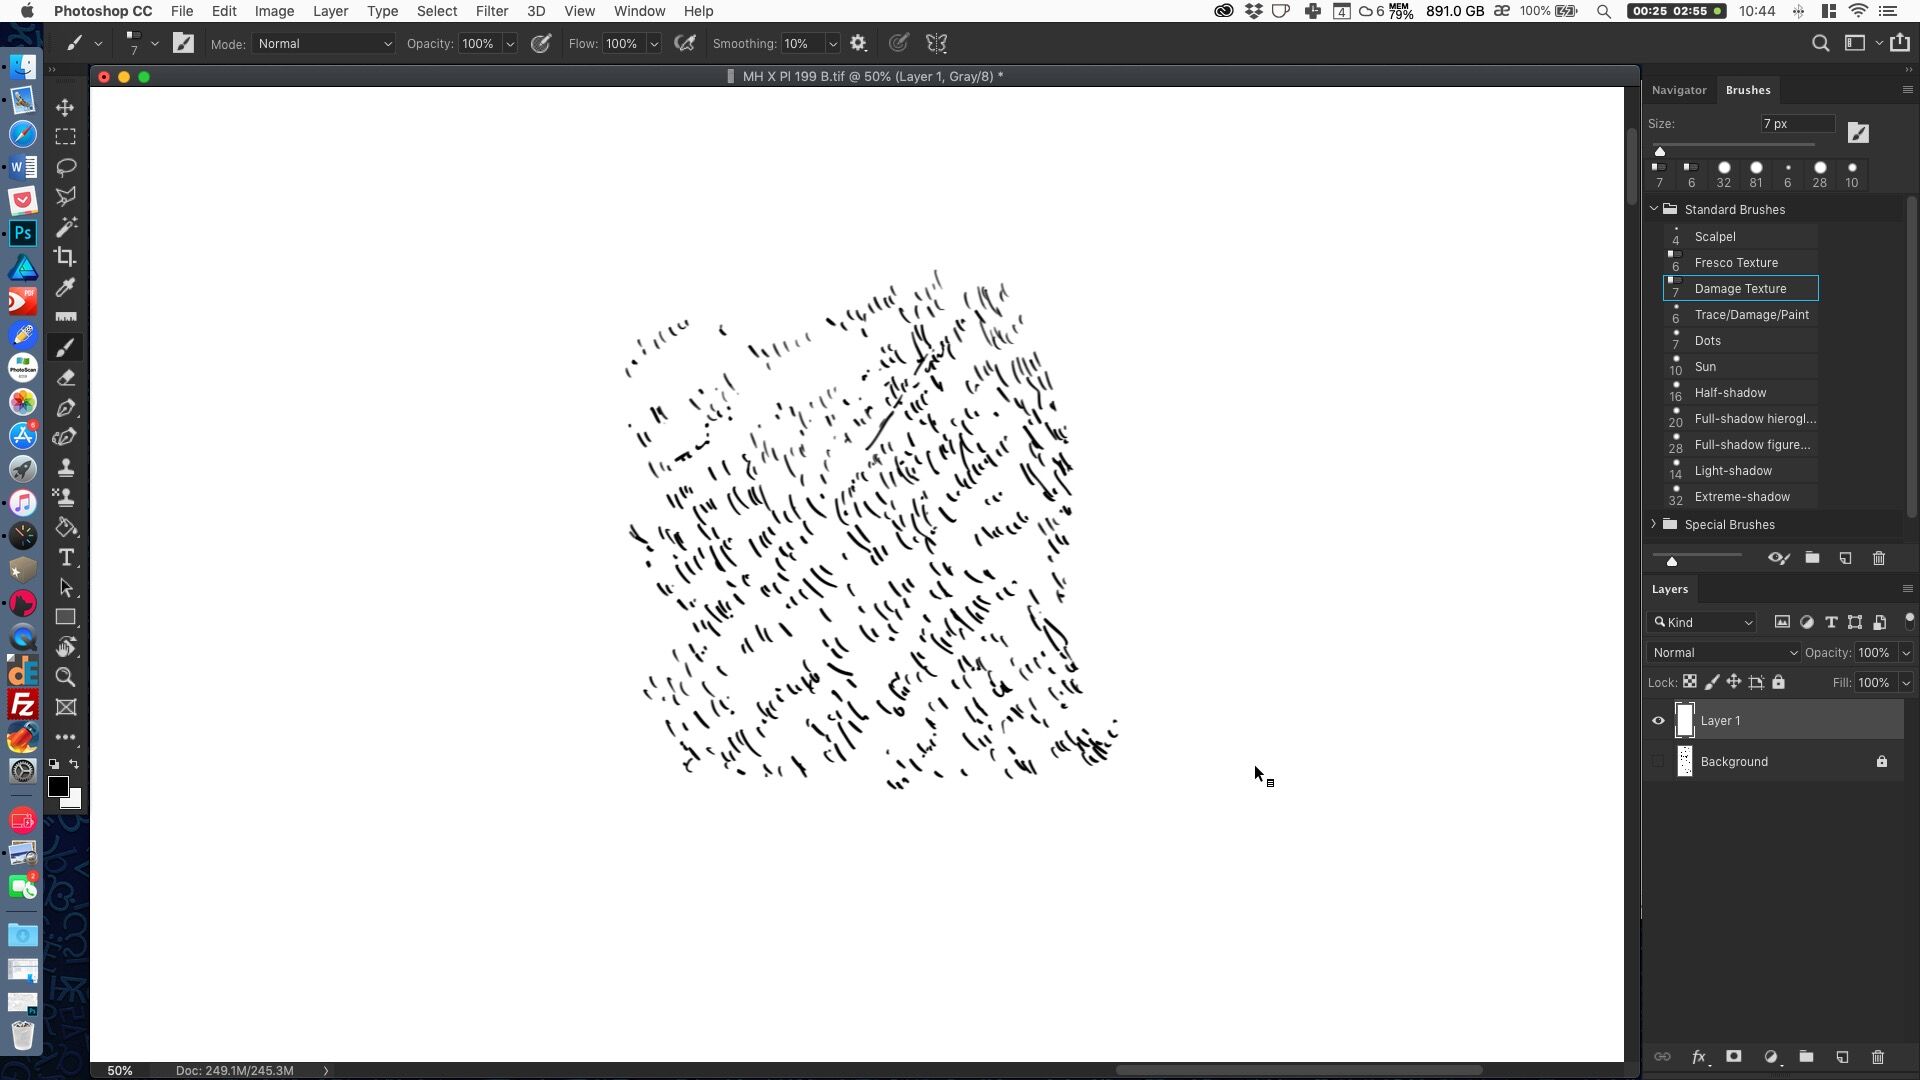
(3) – Once the pattern is applied on a large enough area, the background layer needs to be turned off and a rectangular area of the newly designed pattern needs to be selected.
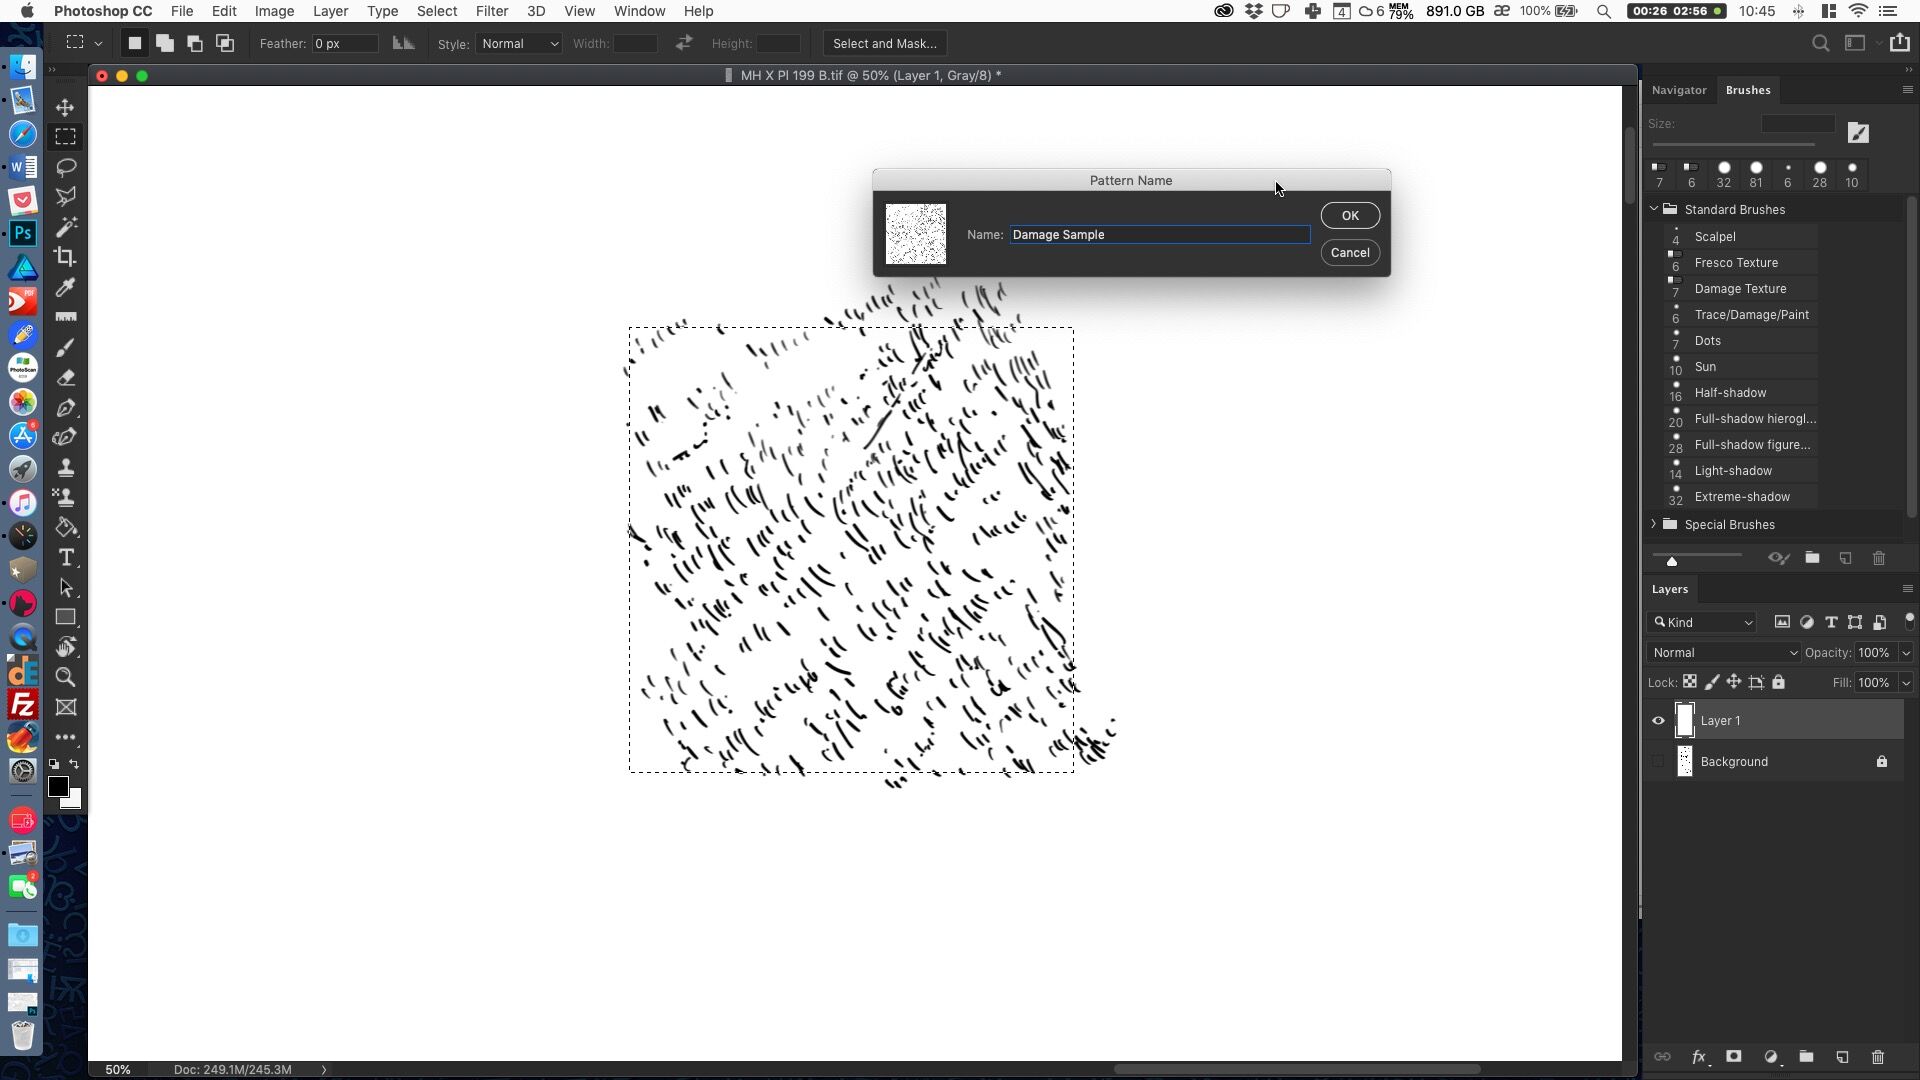
(4) – Now the selected area can be saved as a pattern (Edit/Define Pattern). One must make sure that both brush and layer opacity is at 100% when executing this process.

(5) – The newly designed pattern (Damage sample) can be found at the bottom of our Pattern list and is ready to be used.
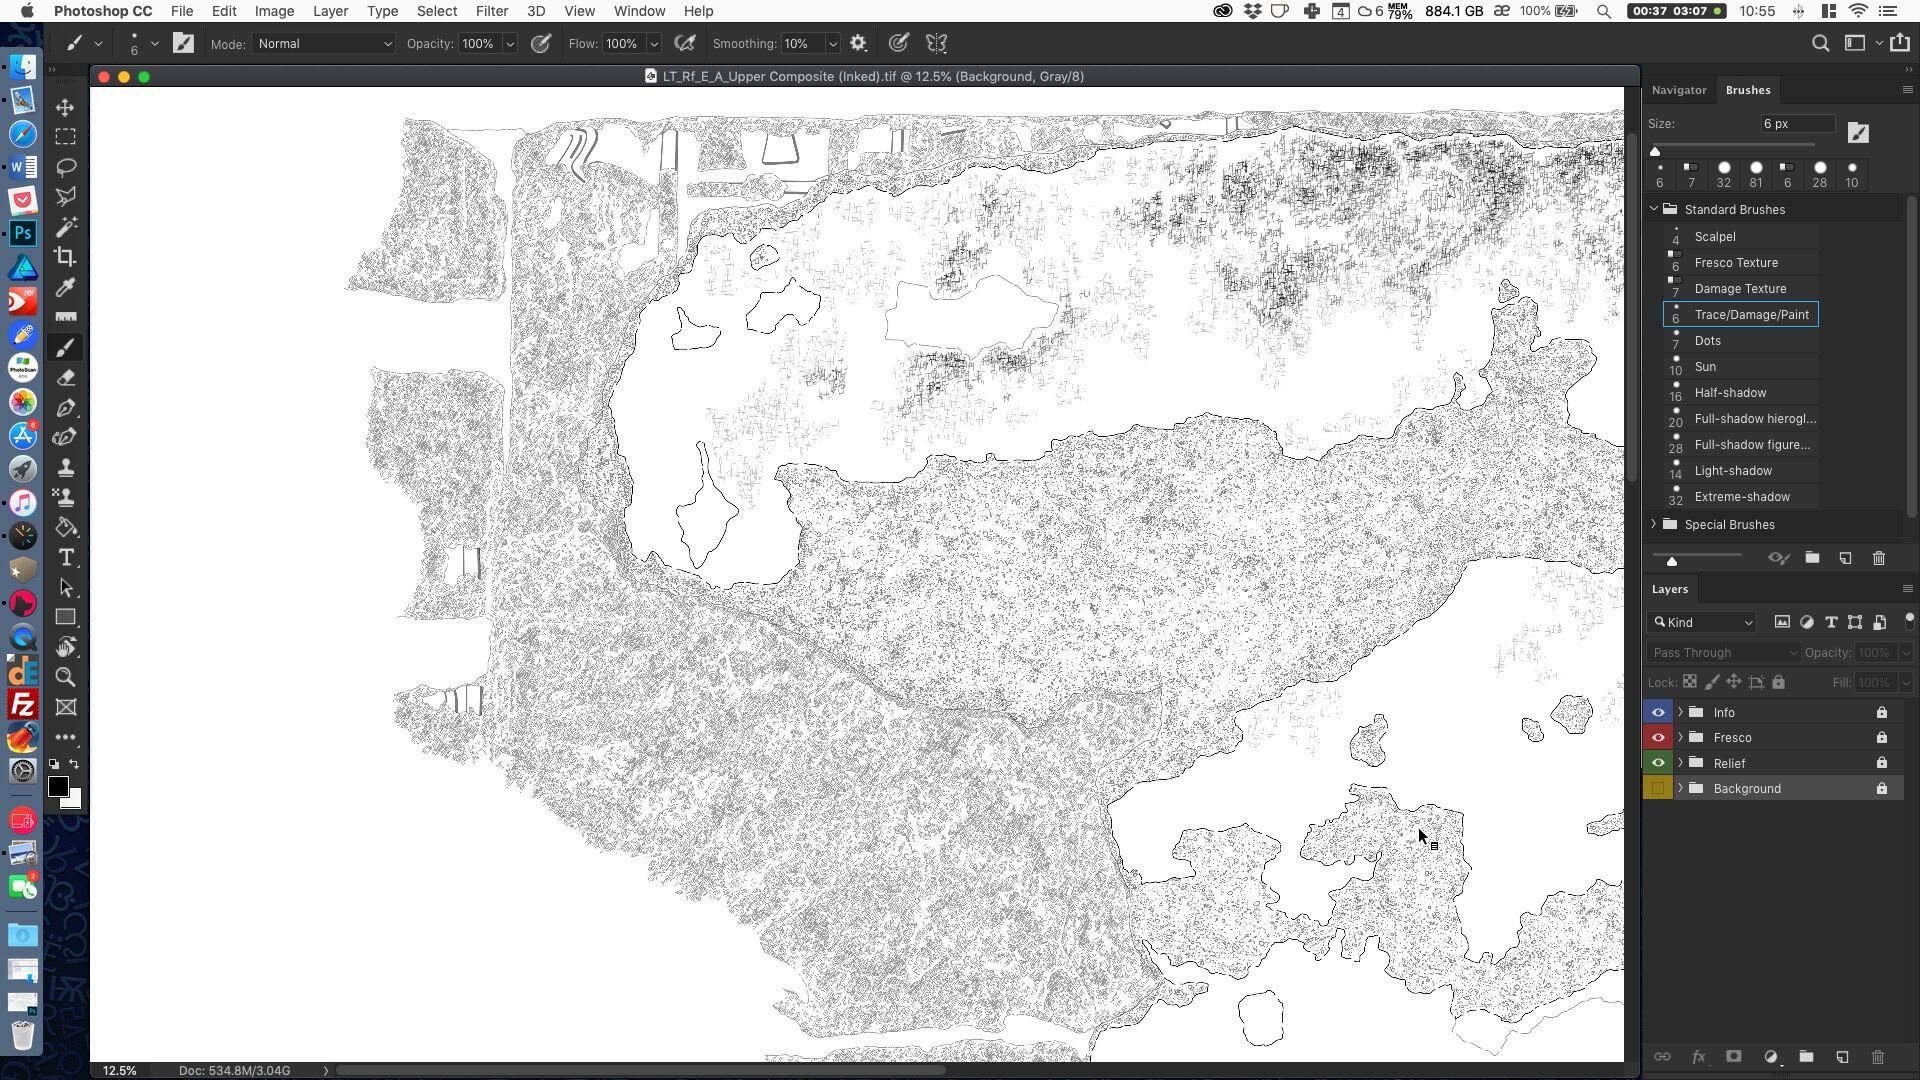
(6) – When the damage pattern is extended beyond the core area, it creates a general light damage pattern uncharacteristic of any specific damaged surface.
(7) – One can create a more characteristic resemblance of the surface by painting over darker areas multiple times.
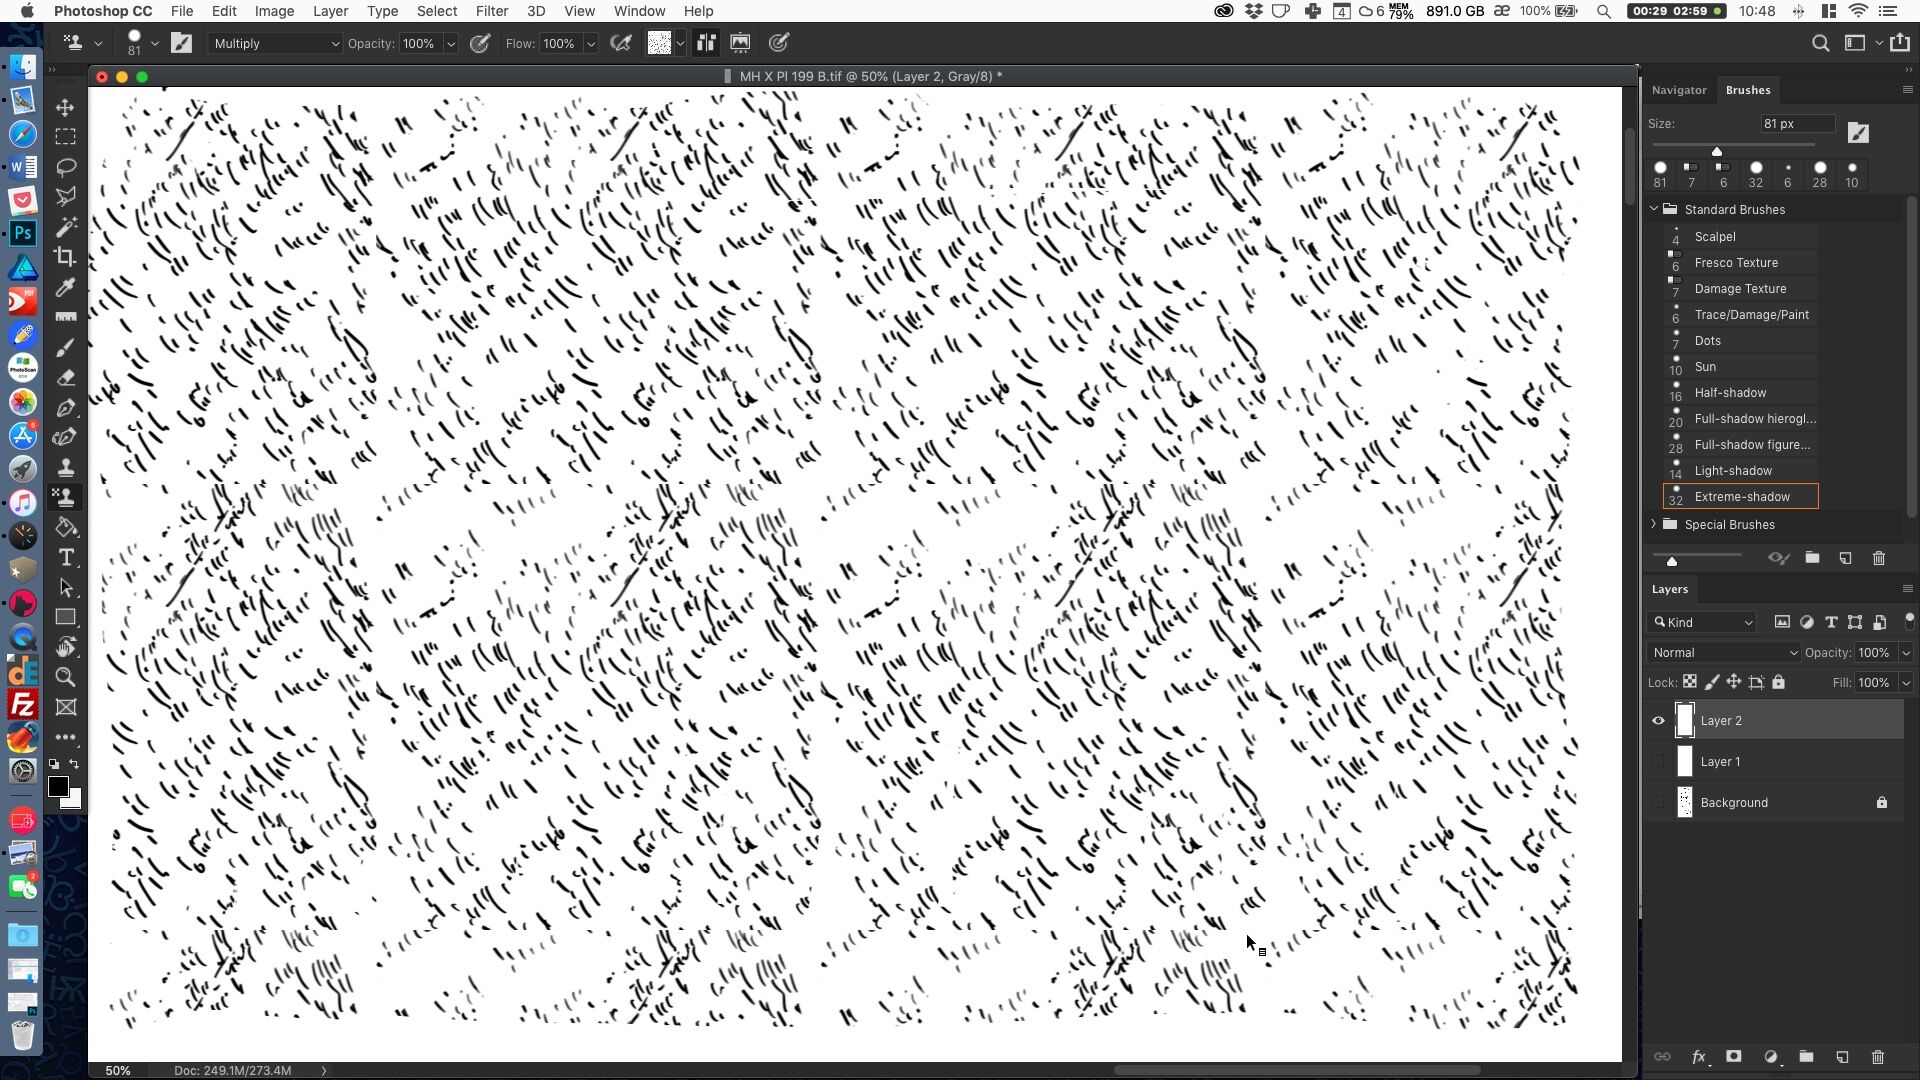
(8) – To avoid any artificial rendering of our damage pattern, one must disable the icon that is responsible for aligned pattern distribution.
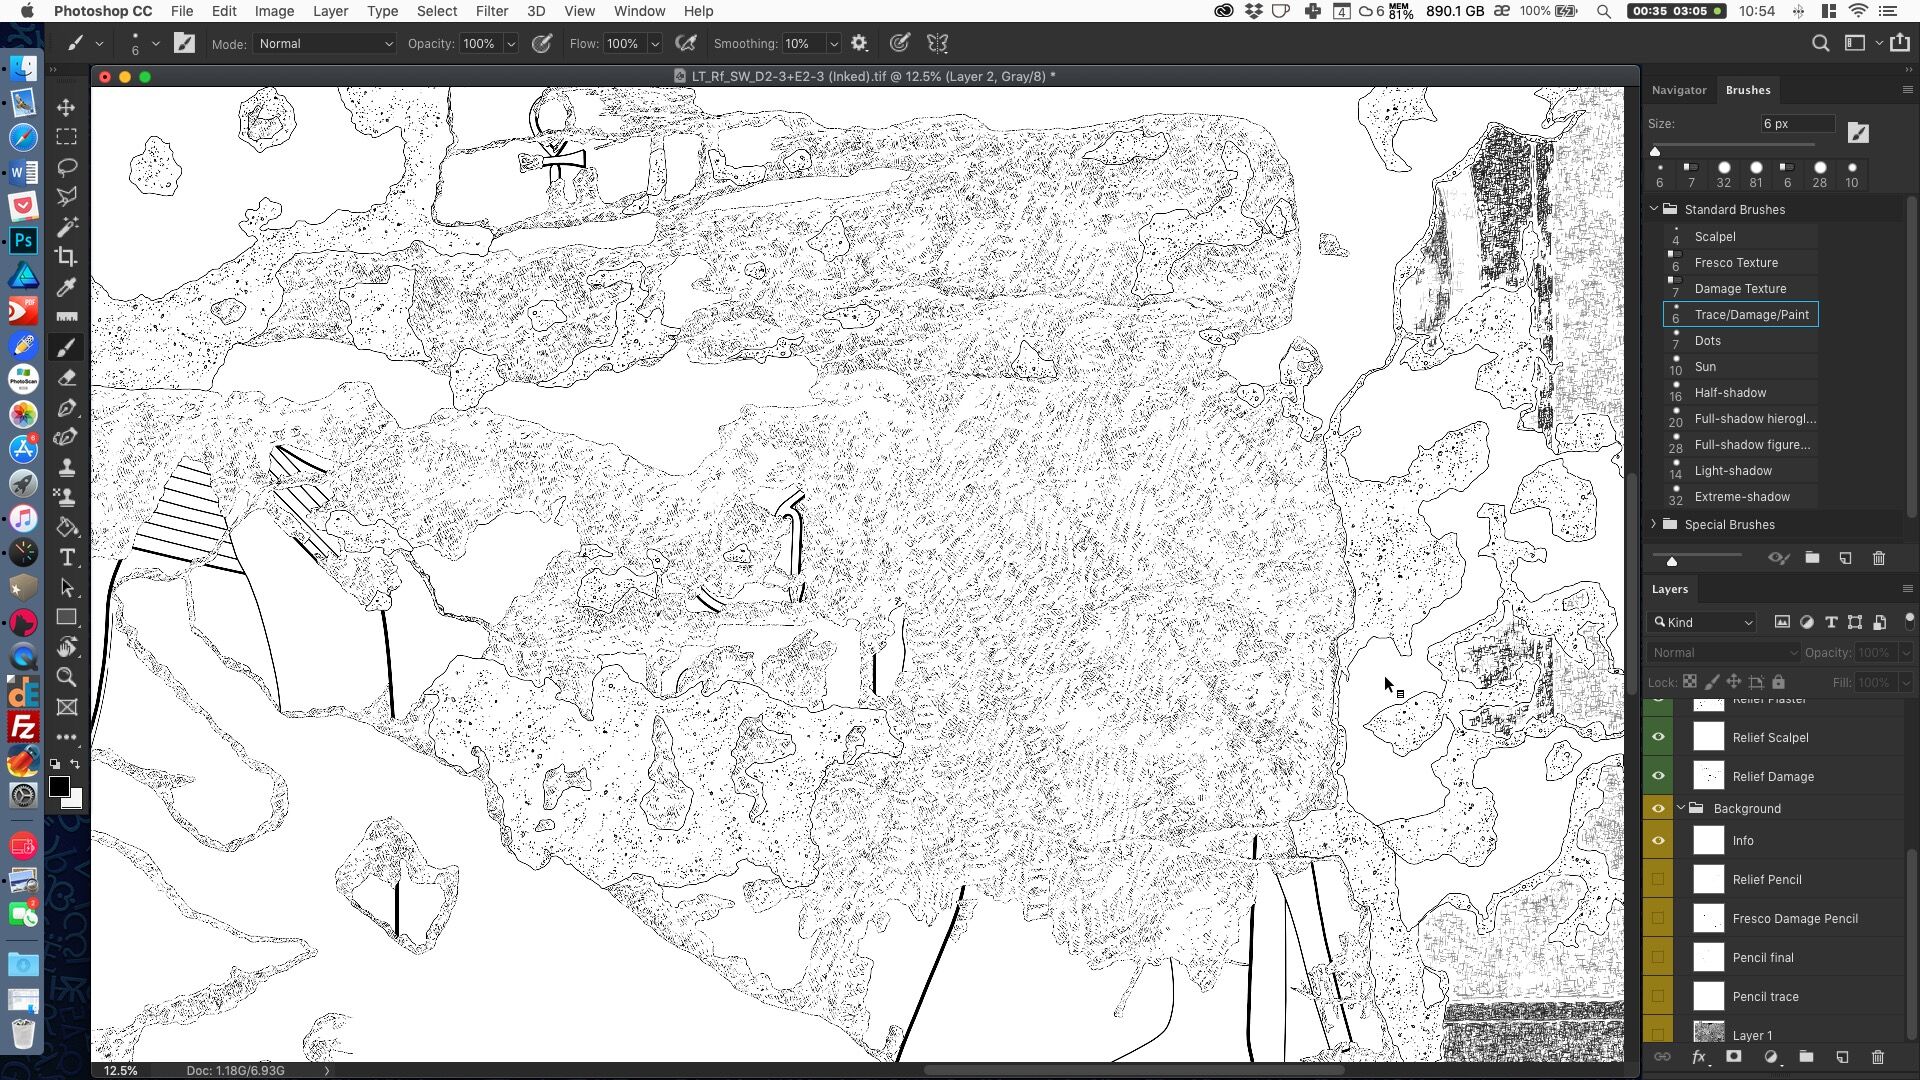
The Epigraphic Survey’s digital damage pattern was created in multiple iterations depending on pattern intensity (light, dark, varied) and stroke orientation (left, right). The various patterns can be downloaded from here. Once we import the necessary ingredients - the digital damage brush and the digital damage pattern - into Photoshop, we can start with the actual inking process. Damage can be best captured (and best prevented from appearing too dark) when the background photo opacity is lowered to 50%. Painting the damage starts by adding large strokes of damage pattern (pattern size set to 80px) over dark areas and gradually reducing the size to 40 pixels while painting multiple times over the darkest corners. Light areas should be left blank when working with the pattern only to be taken over by the damage brush at the final stage. Once damage is captured on a satisfactory level, we need to switch to the scalpel layer and break the damage pattern by using the pre-designed digital scalpel to achieve the final state of our digital damage. The Epigraphic Survey’s digital scalpel pattern can be downloaded according to the relevant damage orientation (left and right) from here.
1 comment(s)
Marina Murillo
Dec 4, 2018Thank you very much for sharing this technique! I have a question: how do I use the brush and texture samples in Photoshop. I downloaded them but I don't know what to do. Thanks for the YouTube video, it is very helpful!

Dec 7, 2018Dear Marina, thank you very much for your interest! Once you downloaded our damage brush on your computer, you just need to double-click on the file and it becomes part of your brush set automatically. The same is true for the damage texture which you will find in your pattern library at the very bottom. Please, let us know if you have any trouble opening the files or using the tools and good luck with drawing!
Leave a comment(We'll keep your email address private)