
Creating Digital Paint Sheets
As part of the collation package, paint sheets are regular (i.e., black-and-white) printed copies of the inked drawing. They can thus be made fairly easily by flattening the digital drawing and hitting print. As an advantage of working with layers, however, one can emphasize certain features while making other features less obvious. Highlighting the (sometimes barely visible) dotted lines by using a different color directs the focus on the paint during collation. There is a further advantage of this color differentiation: we are able to distinguish between painted and carved lines when they overlap each other. This feature opens up a whole new set of opportunities for collecting color data, especially when dealing with very fine small-scale painted details. Any layer can be emphasized or made less apparent by changing its color scheme.
Creating Digital Paint Sheets
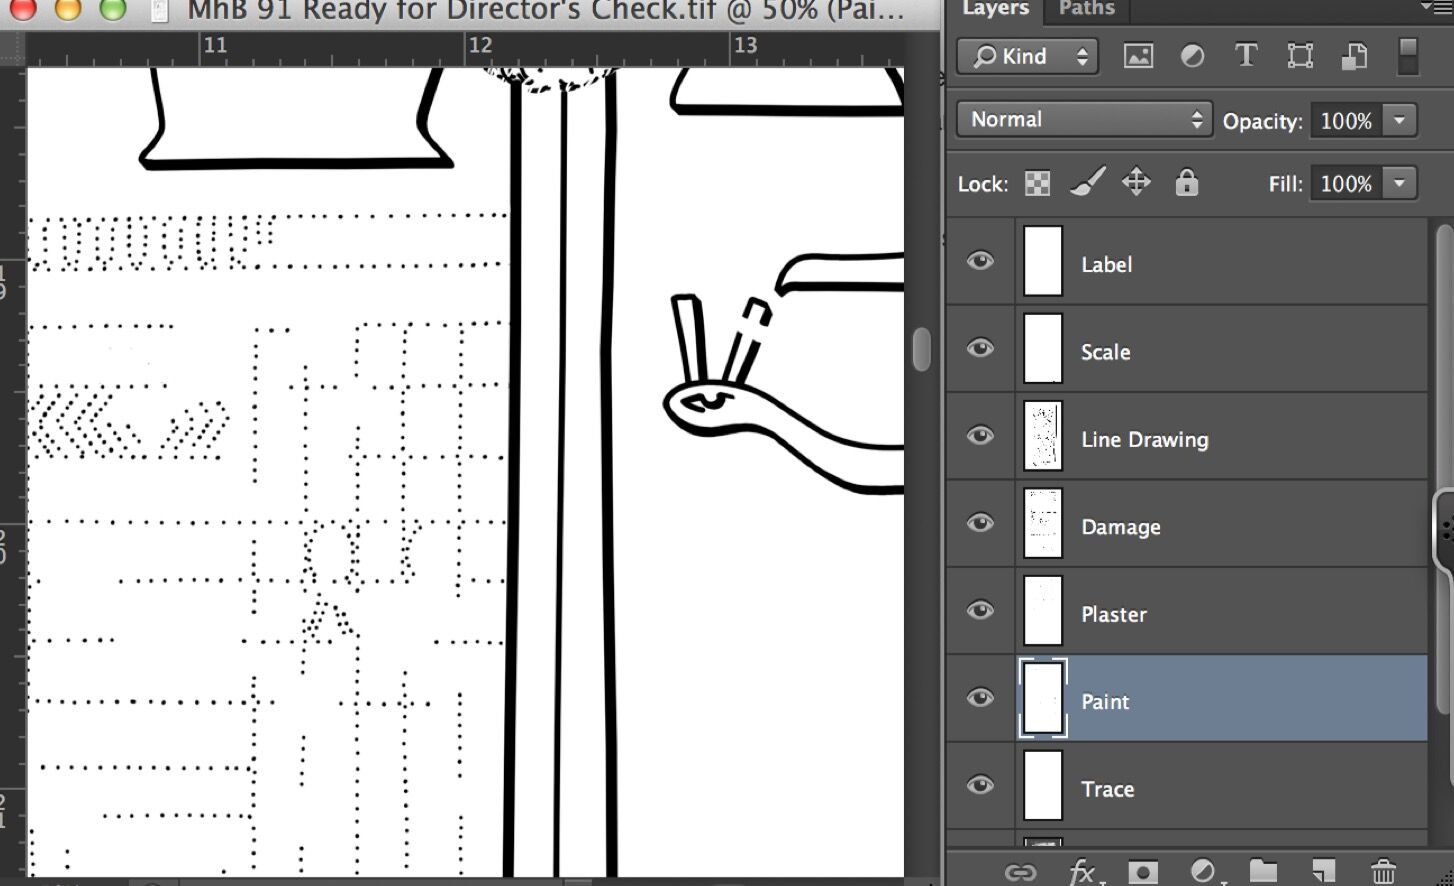
(1) Open your drawing and make all the layers that shouldn’t be part of your Paint Sheet invisible. Make sure that the Opacity is 100% on all the layers. Don’t flatten your image.

(2) Change the color mode of your drawing to RGB (Image/Mode/RGB Color). Note that RGB mode adds quite a bit to your file size. The image quality shouldn’t be changed (8 Bits/Channel).
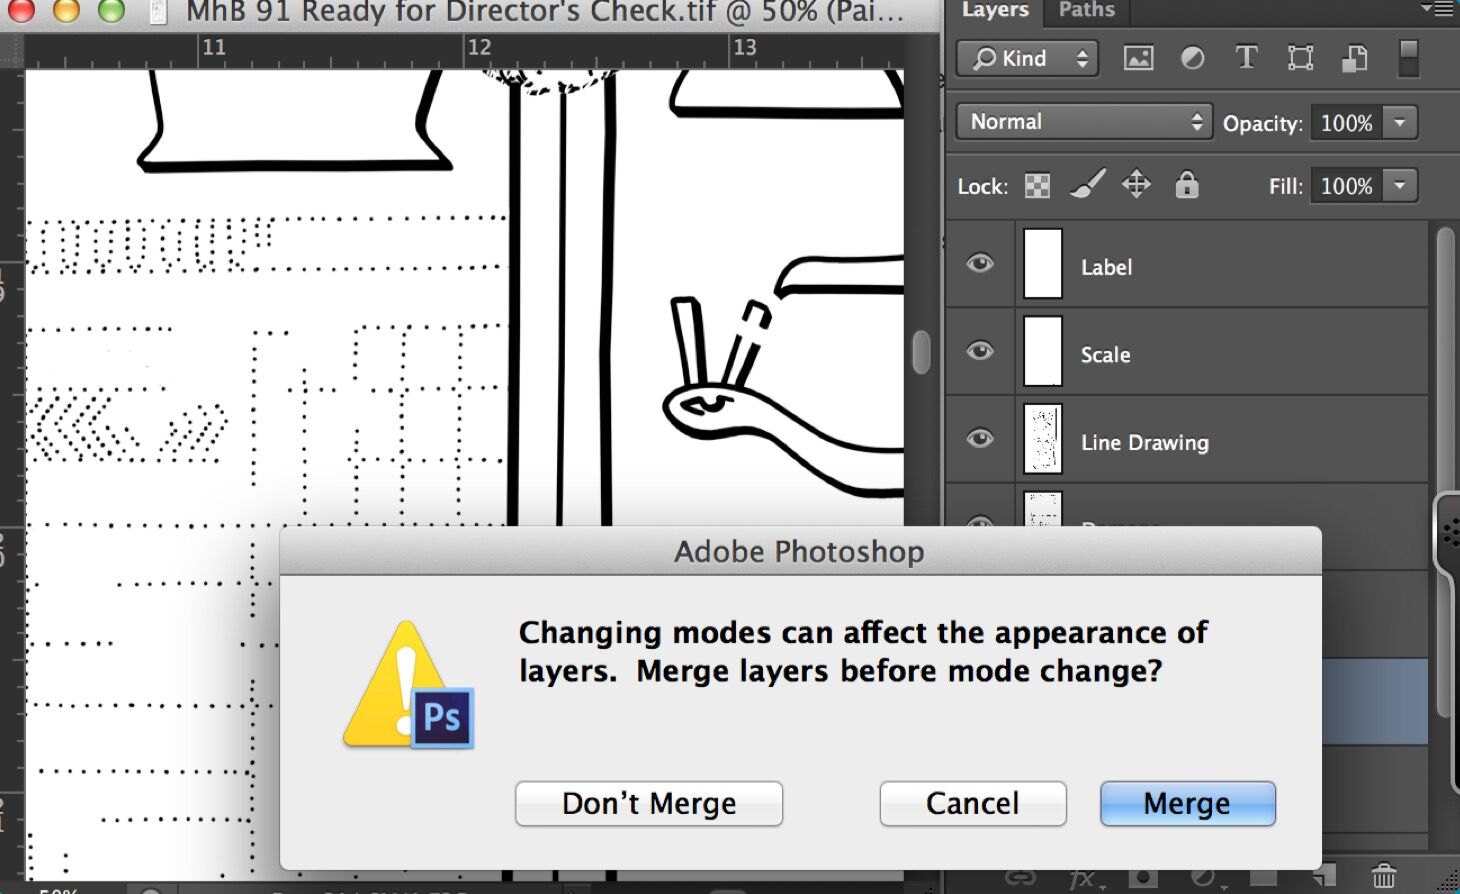
(3) When asked if you’d like to merge the layers before the mode change, choose Don’t Merge. Merging the layers would prevent you from being able to modify the Paint Layer separately.
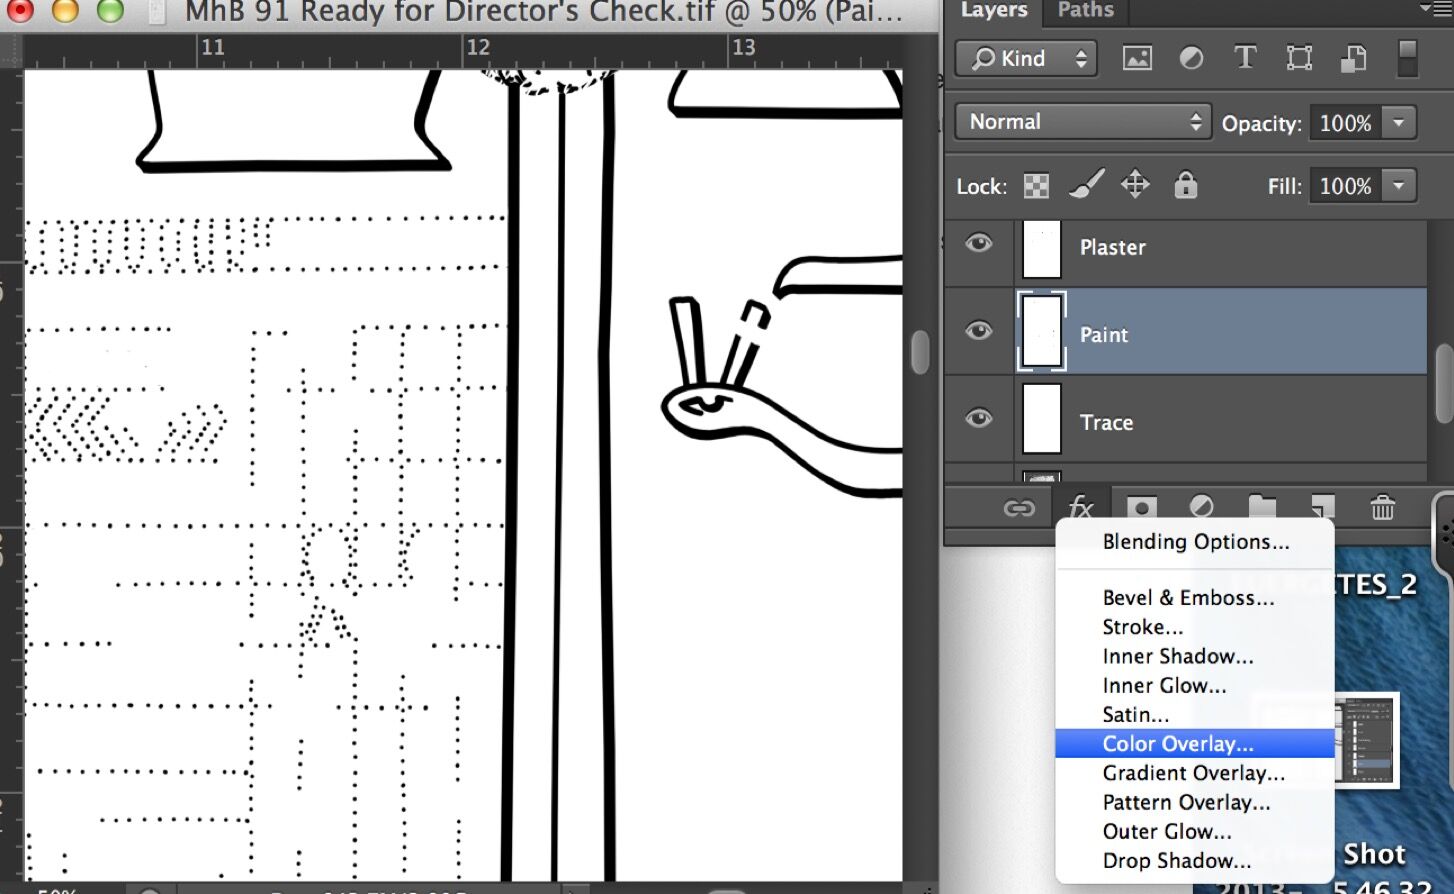
(4) Make sure you are on the Paint Layer. Hit “fx” and add a Layer Style to your drawing. Pick Color Overlay from the drop-down menu.
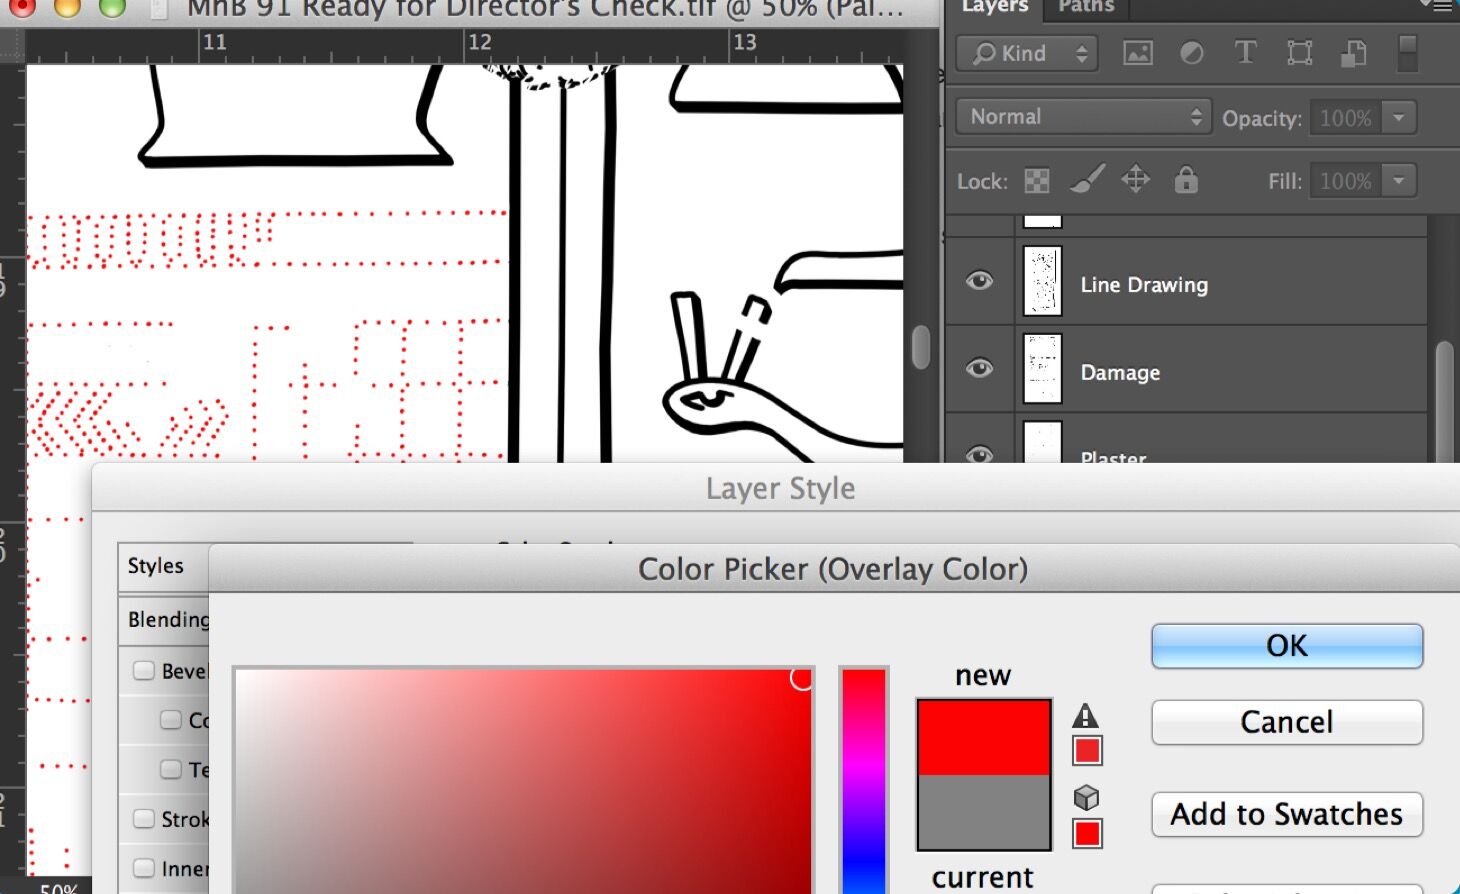
(5) Hit the color panel next to the Blend Mode drop-down menu and choose a color to apply on the drawing. The full red in the upper right corner on the Color Picker panel is recommended.
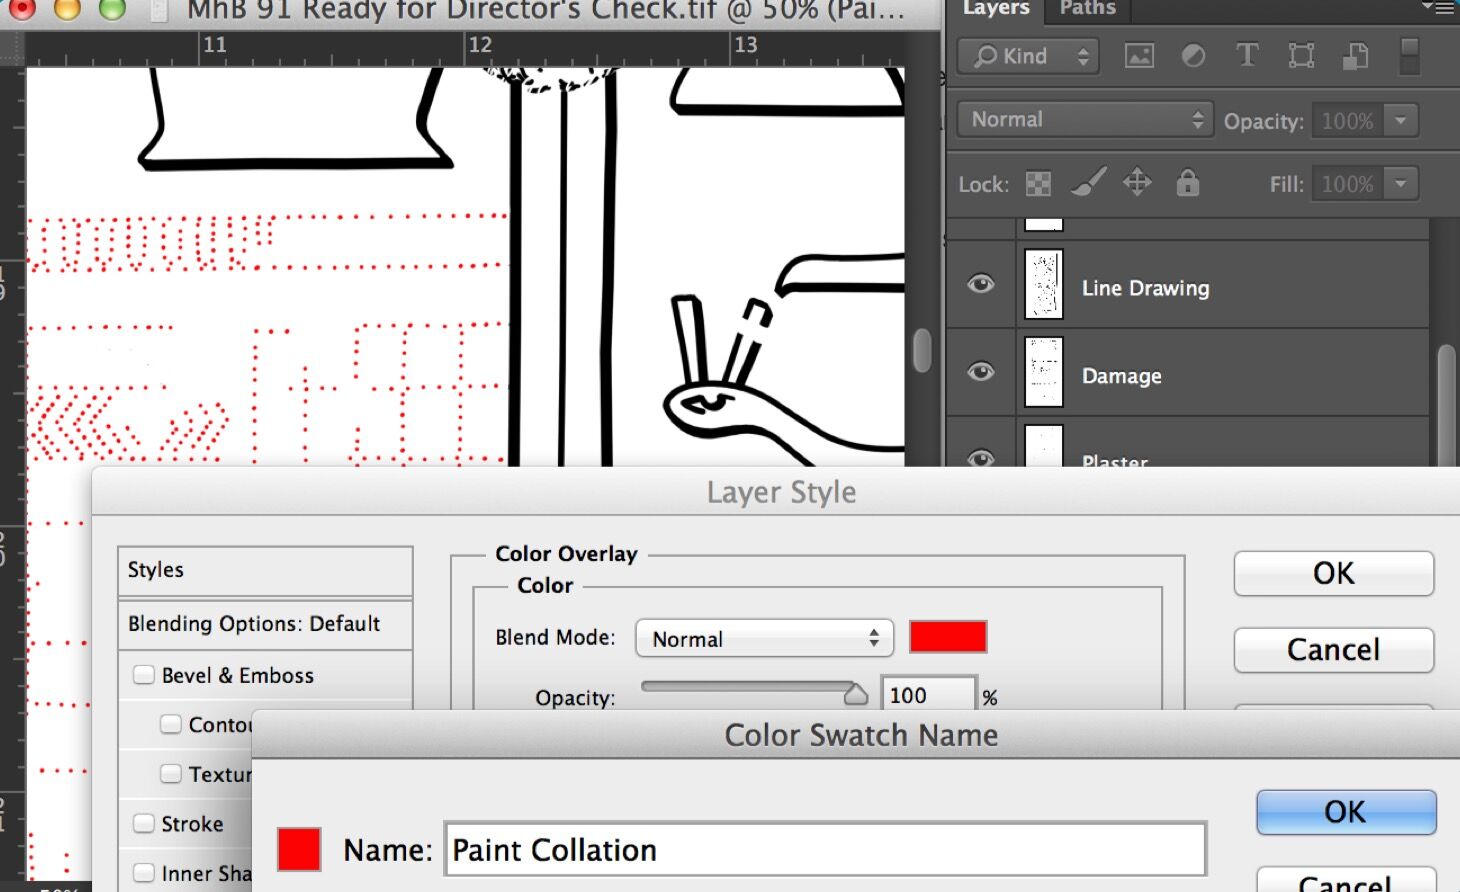
(6) Save your color pick by adding it to your Swatches collection. Remember that swatches can be customized so that a particular collection would refer to a particular working environment.
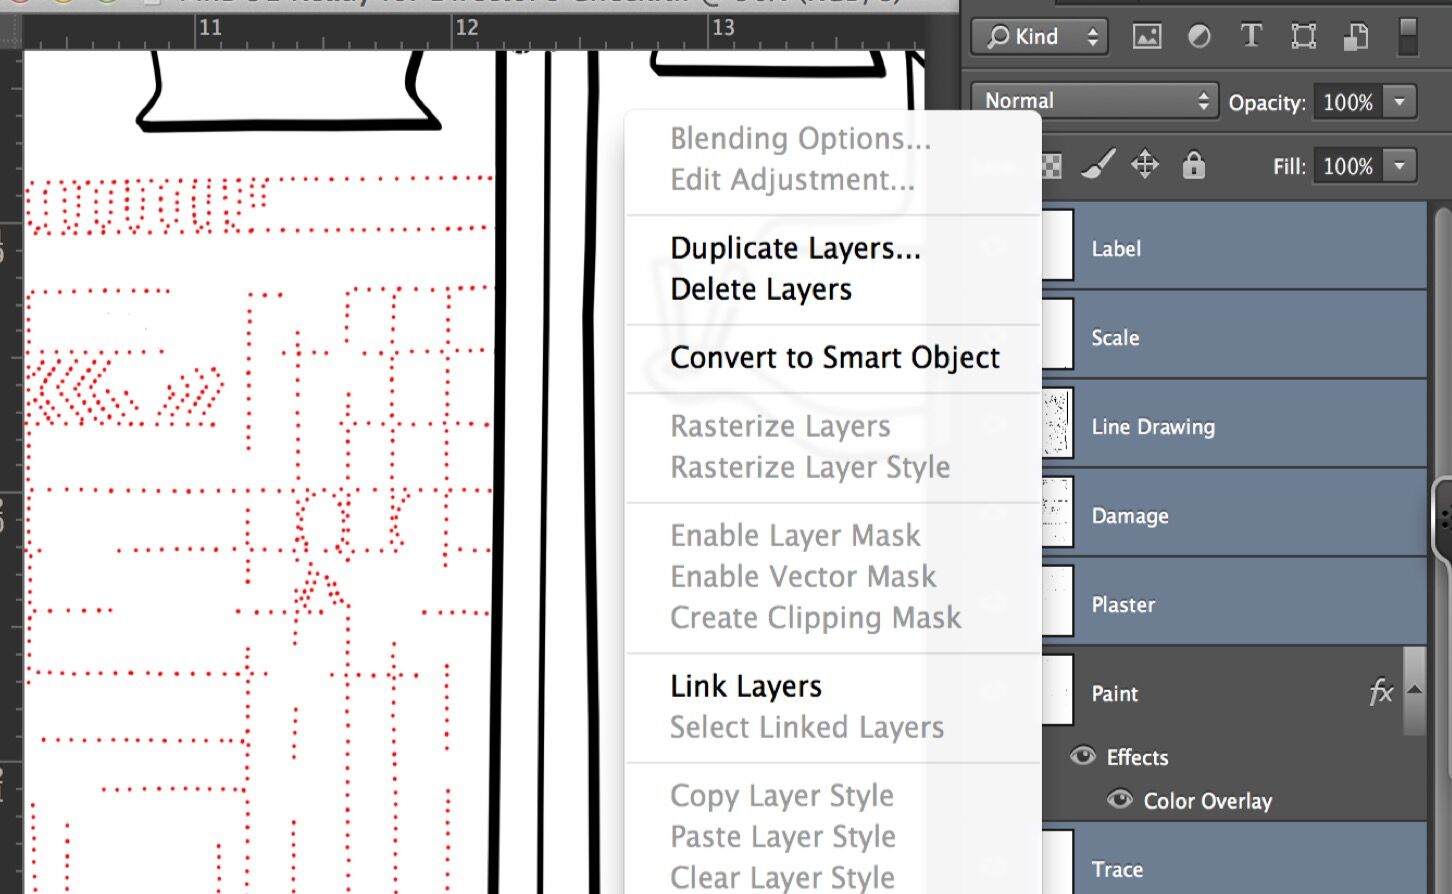
(7) Now select all the other layers except your Paint Layer. Hit right click (secondary click) and pick Merge Layers from the drop-down menu.

(8) All your layers except the Paint Layer should collapse into the top layer. Change the opacity of the layer to 30%. This makes the inked lines stay in the background while the paint lines glow.
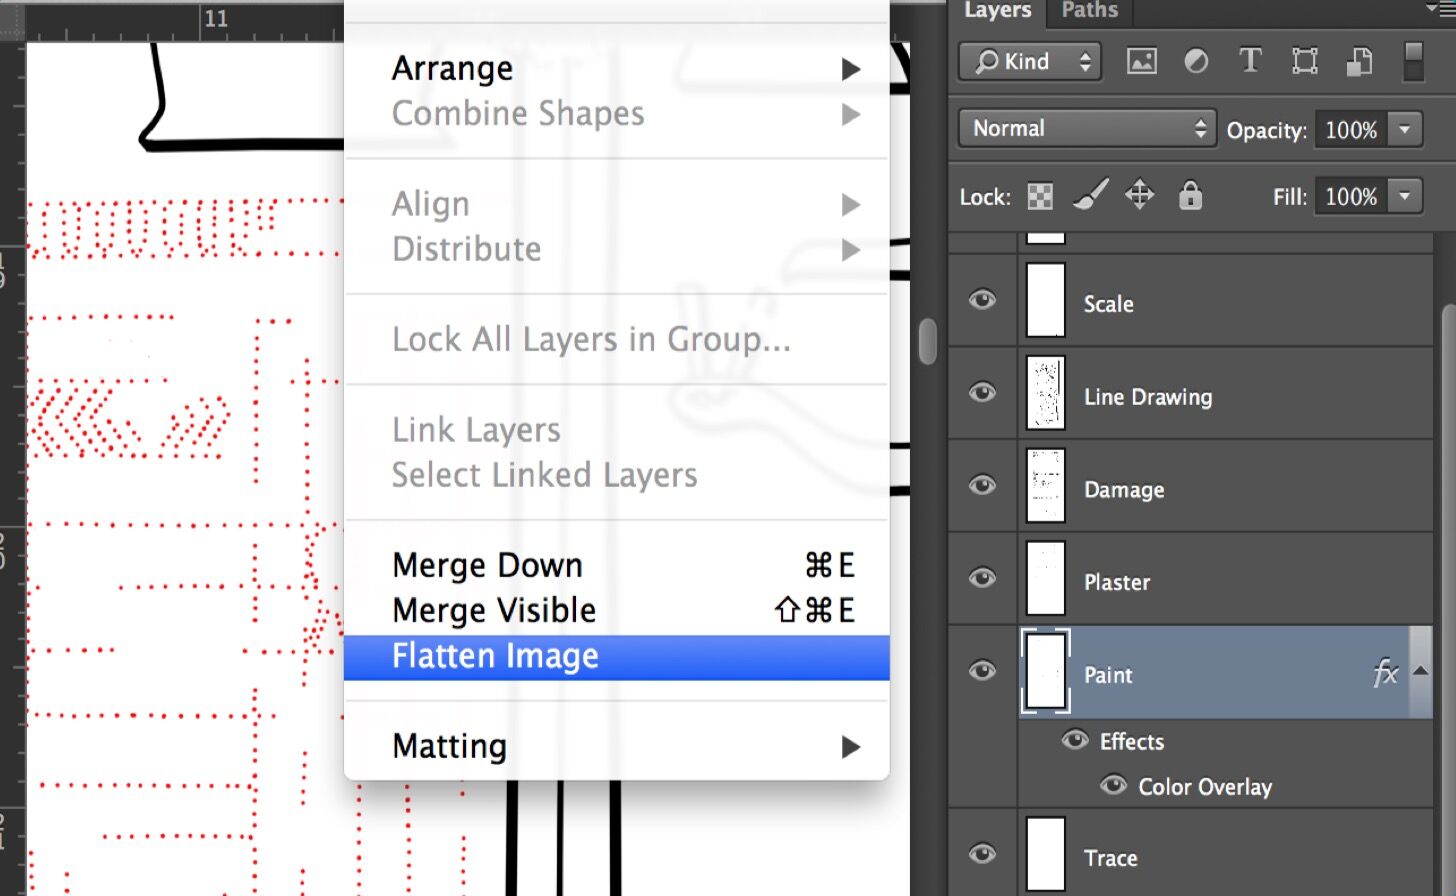
(9) Now go to Layer and choose Flatten Image. This command collapses all your layers into the top one. Always save your image as a new file, don’t overwrite your source file (Save As).
You can download the short tutorial to learn this skill.
0 comment(s)
Leave a comment(We'll keep your email address private)